作者选择了 Internet Archive作为 Write for Donations计划的一部分接受捐赠。
介绍
像许多流行的 _Static Site Generators 一样,Gatsby(https://www.gatsbyjs.com/)采用动态 Web 框架,在前端使用 React(https://www.digitalocean.com/community/tutorial_series/how-to-code-in-react-js)和后端使用 Node.js(https://andsky.com/tech/tutorials/what-is-node-js)。
本教程涵盖了你可能想要使用静态文件与你的Gatsby网站的情况,它将向你展示如何在全球范围内添加图像,风格表以及模块,JavaScript文件和任意文件,如PDF,让你的用户下载。
前提条件
在开始之前,这里有一些你需要的东西:
- 当地安装Node.js,用于运行Gatsby并建设你的站点。 安装程序因操作系统而异,但DigitalOcean有Ubuntu 20.04和macOS的指南,您总是可以在官方节点.js下载页上找到最新的发布. *一个新的Gatsby项目,由`gatsby-starter-default'提供脚手架。 为了满足这一要求,并从零开始建设新的Gatsby项目,可以参考[如何设置您的第一个Gatsby网站] (https://andsky.com/tech/tutorials/how-to-set-up-your-first-gatsby-website)的步骤1.
- 如果您想要自定义超出本教程所覆盖的帖子的用户界面(UI),则对反应和JSX以及HTML元素有些熟悉.
- 解开zip 归档文件的程序 。 在大多数操作系统中,["unzip" (https://linux.die.net/man/1/unzip)是选择的命令,你可以使用本地的[包装管理 (https://andsky.com/tech/tutorials/package-management-basics-apt-yum-dnf-pkg)在Linux上下载.
- 访问用于为此教程提供样本文件的演示文件仓库 。 您可以在 [ DigitalOcean Community GitHub source] (https://github.com/do-community/gatsby-static-files-tutorial-assets) 访问它, [Step 1] (# step-1-- preparing-files- for-this-tutorial) 将指示您如何下载它. (英语)
本教程已在 Node.js v14.16.1, npm v6.14.12, Gatsby v3.13.1 和 'flexboxgrid' v6.3.1 上测试。
步骤 1 - 准备示例文件
对于本教程的目的,你将与一个预先安排的集合的静态资产,这将被用在以下步骤中。 文件的集合是可用的作为一个 GitHub 存储库,而本教程的第一步是下载它们并将它们放置在你的Gatsby项目。
首先,你会将样本文件提取到src/sample-assets,你可以通过下载zip文件(https://github.com/do-community/gatsby-static-files-tutorial-assets/archive/refs/heads/main.zip)并使用你所选择的解码工具手动执行,或者在你的Gatsby项目的根端运行下列命令:
1wget -O ../sample-assets.zip https://github.com/do-community/gatsby-static-files-tutorial-assets/archive/refs/heads/main.zip
2unzip ../sample-assets.zip -d ./src
上面的命令将下载整个 Repo 的档案作为一个单一的 zip 档案文件,使用 wget,然后将内容解码到源目录中。
一旦文件被解除,下一步是创建一个空的Gatsby页面组件,它将作为本教程的演示页面。在src/pages/static-files-demo.js创建一个空的文件,然后在您选择的编辑器中打开该文件并添加以下代码:
 1[label src/pages/static-files-demo.js]
 2import * as React from "react"
 3
 4import Layout from "../components/layout"
 5import Seo from "../components/seo"
 6
 7const StaticFilesDemo = () => (
 8  <Layout>
 9    <Seo title="Static Files Demo" />
10    <h1>Static Files Demo</h1>
11  </Layout>
12)
13
14export default StaticFilesDemo
此代码作为一个Gatsby页面组件文件,你将使用它来生成一个公共页面在https://localhost/static-files-demo/. 该 StaticFilesDemo函数是一个 [React 组件](https://andsky.com/tech/tutorials/how-to-create-custom-components-in-react)返回 [JSX](https://andsky.com/tech/tutorials/how-to-create-react-elements-with-jsx),它成为页面内容。 您将使用export default StaticFilesDemo` 作为最后一行,因为Gatsby 的构建系统预计页面组件的默认出口将是负责页面渲染的 React 组件。
添加页面代码后,保存文件,但保持它打开,因为下列步骤将添加到它。
在这个第一步下载了静态资产文件,将在整个教程中使用,并设置了一个演示页面,以构建内部。
步骤 2 - 添加图片
在此步骤中,您将了解如何使用Gatsby这样做,使用gatsby插件图像,以及一些HTML来嵌入图像到您的Gatsby页面,同时也优化加载时间和带宽使用。
由于 gatsby-plugin-image包含在 the gatsby-starter-default prerequisite中,它已经作为依赖性安装并准备好使用。
打开您在上一步创建的演示页面组件文件,并添加以下突出代码:
1[label src/pages/static-files-demo.js]
2import * as React from "react"
3import { StaticImage } from "gatsby-plugin-image"
4
5import Layout from "../components/layout"
6import Seo from "../components/seo"
7
8const StaticFilesDemo = () => (
9 <Layout>
10 <Seo title="Static Files Demo" />
11 <h1>Static Files Demo</h1>
12
13 <section className="demo">
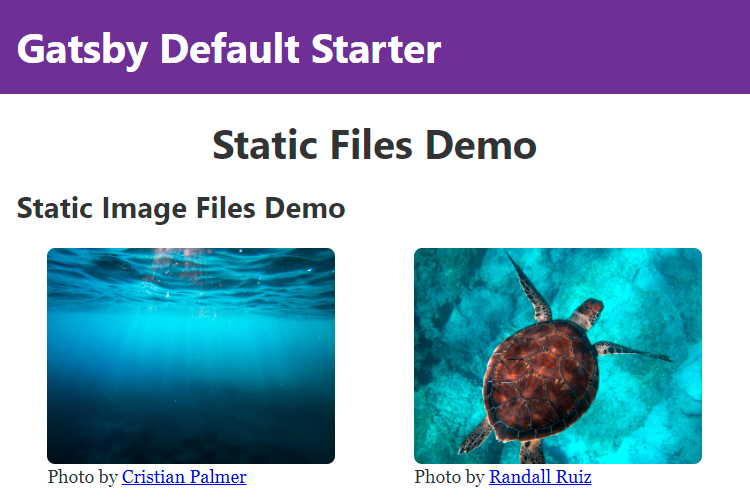
14 <h2>Static Image Files Demo</h2>
15
16 <figure className="image-demo">
17 <StaticImage
18 src="../gatsby-static-files-tutorial-assets-main/images/water.jpg"
19 width={1000}
20 quality={90}
21 alt="Underwater view of clear, blue body of water"
22 />
23 <figcaption>
24 Photo by{" "}
25 <a target="_blank" rel="noreferrer noopener" href="https://unsplash.com/@cristianpalmer">
26 Cristian Palmer
27 </a>
28 </figcaption>
29 </figure>
30
31 <figure className="image-demo">
32 <StaticImage
33 src="../gatsby-static-files-tutorial-assets-main/images/turtle.jpg"
34 width={1000}
35 quality={90}
36 alt="Overhead view of a turtle floating over blue water"
37 />
38 <figcaption>
39 Photo by{" "}
40 <a target="_blank" rel="noreferrer noopener" href="https://unsplash.com/@ruizra">
41 Randall Ruiz
42 </a>
43 </figcaption>
44 </figure>
45 </section>
46 </Layout>
47)
48
49export default StaticFilesDemo
而不是直接使用标准的HTMLimg标签,并将其指向公共图像URL,在这个代码中,你正在使用gatsby-plugin-image中的StaticImage组件(https://www.gatsbyjs.com/docs/reference/built-in-components/gatsby-plugin-image/#staticimage)并将路径转移到你的本地静态图像。
对于转移到StaticImage的图像,您使用了90的质量来取代50的默认值,这表明gatsby-plugin-image如何仍然可以提供文件大小的改进,同时保持质量。您还指定了1000的宽度,这作为最大宽度的限制,因为两个源图像的原始宽度远远超过了它。 对于演示和许多网页,1000个像素的宽度是足够多的。 这两种选项对性能产生了重大影响,但对于gatsby-plugin-image有许多其他选项值得探索,您可以在 Gatsby docs中找到。
在本页面上,这两张图像的原始版本总共占用大约4 MB,无论它们在哪个屏幕上被观看,但是在StaticImage和小型手机上,它们将被压缩到仅100kB,或大约2.5%的原始大小。 加载时间从近2分钟在 3G 互联网连接上下降到几秒。 该gatsby-plugin-image插件还利用现代图像格式,这些格式更适合压缩的网络交付,如webp和avif。
继续前保存文件。
<$>[注]
注: 如果您需要绕过gatsby-plugin-image并将图像完全按原始状态下加载,Gatsby提供了通过 静态文件夹的方式来做到这一点,但通常建议不要这样做,因为这不包括前面提到的图像优化。
您现在已经在您的网站上添加了几张新图像,使用Gatsby内部的最佳实践,为您的网页的访问者提供最佳的用户体验。
步骤 3 – 添加 CSS 风格表
与嵌入图像一样,在Gatsby网站中可以添加基于CSS的风格多种方式。虽然内线风格和CSS-in-JS(https://css-tricks.com/a-thorough-analysis-of-css-in-js/)始终是Gatsby的选择,但对于整个网站或组件的风格设计,使用专用的静态风格表往往是更好的做法。
您开始在同一个文件夹中创建一个 CSS 文件,如您的演示页面,在 src/pages/static-files-demo.module.css. 您正在使用 .module.css 附加字符来标记该文件的目的是作为一个 CSS 模块,这确保风格将最终扩展到它被导入的组件,而不是用户界面(UI)的其他区域。
打开新创建的文件后,添加以下代码:
1[label src/pages/static-files-demo.module.css]
2.headerText {
3  width: 100%;
4  text-align: center;
5}
6.container img {
7  border-radius: 8px;
8}
在这个CSS中,你正在将任何元素中的文本与.headerText类进行中心对齐,使其具有完整的宽度,以及在一个元素中具有.container类的任何img元素的圆形边缘。
保存 CSS 文件并关闭它. 现在打开备份演示页面组件并添加以下突出代码:
 1[label src/pages/static-files-demo.js]
 2import * as React from "react"
 3import { StaticImage } from "gatsby-plugin-image"
 4
 5import Layout from "../components/layout"
 6import Seo from "../components/seo"
 7import * as DemoStyles from "./static-files-demo.module.css"
 8
 9const StaticFilesDemo = () => (
10  <Layout>
11    <Seo title="Static Files Demo" />
12    <h1 className={DemoStyles.headerText}>Static Files Demo</h1>
13
14    <section className={'demo ' + DemoStyles.container}>
15      <h2>Static Image Files Demo</h2>
16
17      <figure className="image-demo">
18        ...
19      </figure>
20      <figure className="image-demo">
21        ...
22      </figure>
23    </section>
24  </Layout>
25)
26
27export default StaticFilesDemo
您在此文件中做的第一个更改是添加一个导入陈述来导入您刚刚创建的 CSS 文件,而不是使用一个 CSS @import 陈述,您正在使用标准 ES 模块导入陈述,将此导入的值分配给DemoStyles变量。
您还更新了组件中的 JSX,以使用 CSS 模块文件中的类;您通过在战略位置更新className属性,以从DemoStyles导入中使用精确的范围类名。
保存你的檔案
下一步涉及相反的场景:添加静态CSS代码,以影响整个网站. 您可能希望以这种方式加载的CSS类型的一个例子是帮助设计基于flexbox的布局的小组实用类别: flexboxgrid。
通过在您的Gatsby项目的根中运行此命令来安装此第三方CSS作为依赖:
1npm install flexboxgrid
接下来,而不是将本库提供的 CSS 导入到之前的同一演示页面中,您会将其导入到项目的最高级别,以便在全球范围内应用。
<$>[注] **注:**全球CSS导入的另一个选项是在gatsby-browser.js文件中,但Gatsby不建议这在大多数情况下作为主要方法,正如Gatsby关于全球风格的文件中所提到的(https://www.gatsbyjs.com/docs/how-to/styling/global-css/)。
打开src/components/layout.js,然后执行以下更改:
 1[label src/components/layout.js]
 2/**
 3 * Layout component that queries for data
 4 * with Gatsby's useStaticQuery component
 5 *
 6 * See: https://www.gatsbyjs.com/docs/use-static-query/
 7 */
 8
 9import * as React from "react"
10import PropTypes from "prop-types"
11import { useStaticQuery, graphql } from "gatsby"
12
13import Header from "./header"
14import "./layout.css"
15import "../../node_modules/flexboxgrid/dist/flexboxgrid.min.css"
16
17const Layout = ({ children }) => {
18  const data = useStaticQuery(graphql`
19    query SiteTitleQuery {
20      site {
21        siteMetadata {
22          title
23        }
24      }
25    }
26  `)
27
28  return (
29    <>
30      ...
31    </>
32  )
33}
34
35Layout.propTypes = {
36  children: PropTypes.node.isRequired,
37}
38
39export default Layout
您刚刚添加了一个导入陈述,直接从flexboxgrid库导入 CSS 文件,因为 CSS 文件的目的在于将其应用到整个网站,所以您不会将其分配给一个变量,并且因为您不想将其作为一个模块使用,所以文件名不会以.module.css结束。
保存并关闭layout.js,以完成在您的Gatsby网站上全球导入CSS的过程。
随着CSS的全球导入,您现在将使用从flexboxgrid的类在您的演示页面中,而无需再次导入CSS文件。
 1[label src/pages/static-files-demo.js]
 2import * as React from "react"
 3import { StaticImage } from "gatsby-plugin-image"
 4
 5import Layout from "../components/layout"
 6import Seo from "../components/seo"
 7import * as DemoStyles from "./static-files-demo.module.css"
 8
 9const StaticFilesDemo = () => (
10  <Layout>
11    <Seo title="Static Files Demo" />
12    <h1 className={DemoStyles.headerText}>Static Files Demo</h1>
13
14    <section className={'demo row around-xs ' + DemoStyles.container}>
15      <h2 className="col-xs-12">Static Image Files Demo</h2>
16
17      <figure className="image-demo col-xs-10 col-sm-5">
18        ...
19      </figure>
20
21      <figure className="image-demo col-xs-10 col-sm-5">
22        ...
23      </figure>
24    </section>
25  </Layout>
26)
27
28export default StaticFilesDemo
您刚刚将一些类添加到您的演示页面中,这些类使用来自flexboxgrid CSS 文件的规则集。在部分元素上的row和around-xs类将其转化为包装的 flex 元素,而justify-content设置为space-around,而col-*类用于控制每个元素占有多少行。
请确保在关闭之前将您的更改保存到演示文件中,随着此更改,页面变得更加响应,图像将在足够大的显示屏上旁边出现。
要预览到目前为止的更改,请运行此命令:
1npm run develop
这将启动一个本地开发服务器为您的Gatsby网站在http://localhost:8000/static-files-demo`. 导航到这个URL,你会发现你的网站与你的新风格:
<$>[注] 注: 由于 Gatsby 将 React 带出盒子,除了这里描述的静态 CSS 选项外,您还可以选择使用基于 React 和 React 的框架(https://andsky.com/tech/tutorials/how-to-style-react-components)。
在此步骤中,您使用静态CSS文件为您的网站添加额外的风格,在下一步,您将使用类似的方法添加静态JavaScript文件以增加功能。
步骤 4 – 添加 JavaScript 文件
Gatsby 已经在后端和前端都使用 JavaScript,但它被用作仅在构建过程中运行的 Node.js 代码或 React 组件来生成静态 HTML 输出。
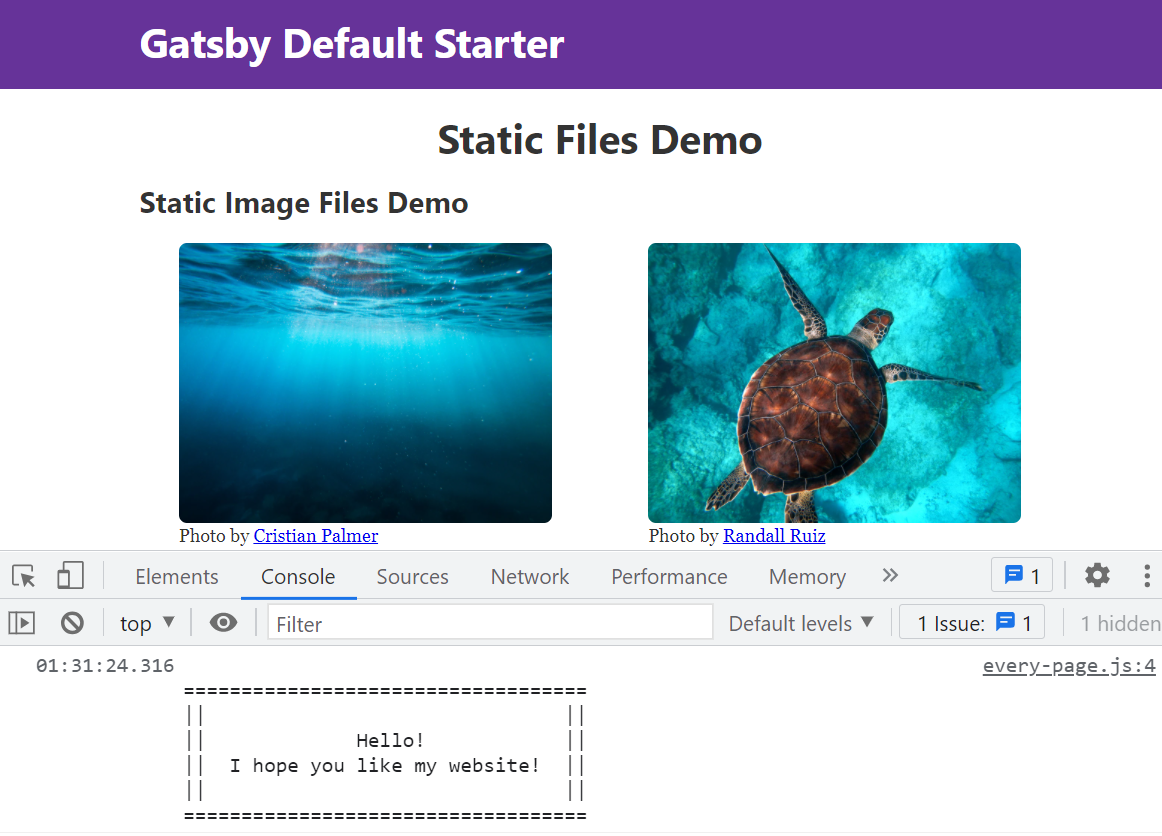
对于本教程,你正在添加一个文件,打印一个消息给任何访问者到你的网站,打开他们的开发者控制台. 你可以检查JavaScript,它将运行通过打开文件在src/gatsby-static-files-tutorial-assets-main/js/every-page.js。
而不是通过ES模块导入直接导入这个文件到Gatsby文件中(就像你在CSS文件中一样),你会通过Gatsby服务器端渲染(SSR)API将其添加到页面上。
但是,在使用Gatsby SSR API之前,您需要让静态JavaScript文件向公众开放。 要做到这一点,请使用Gatsby支持的特殊静态文件夹(https://www.gatsbyjs.com/docs/how-to/images-and-media/static-folder/),在Gatsby项目的根部创建一个名为静态的文件夹。 然后,将静态JavaScript文件复制到此文件夹。 您可以在文件浏览器中手动执行这两项操作,或者使用以下命令从项目的根部运行:
1mkdir static
2cp src/gatsby-static-files-tutorial-assets-main/js/every-page.js static/every-page.js
通过此操作,JavaScript 文件现在可公开访问到 https://localhost:8000/every-page.js. 此步骤的下一个部分是通过HTML启动其加载。
在你的Gatsby项目的根部打开gatsby-ssr.js,因为在那里Gatsby将允许你连接到服务器渲染API。
 1[label gatsby-ssr.js]
 2/**
 3 * Implement Gatsby's SSR (Server Side Rendering) APIs in this file.
 4 *
 5 * See: https://www.gatsbyjs.com/docs/ssr-apis/
 6 */
 7
 8import * as React from "react"
 9
10export const onRenderBody = ({ setPostBodyComponents }) => {
11  setPostBodyComponents([
12    <script type="text/javascript" src="/every-page.js" key="every-page-js" defer></script>,
13  ])
14}
您添加的第一行代码是导入 React 的声明,这需要允许在文件中使用 JSX。接下来,您导出一个名为onRenderBody的函数,该函数将一个对象作为一个参数,其中嵌入了setPostBodyComponents的函数,您从自己的函数中调用。
SetPostBodyComponents将以其第一个参数(在这种情况下是一个单一的脚本标签)通过的 array内部的任何 React 组件,并将其作为身体的一部分,从而触发您的脚本文件在浏览器中加载。
现在导航到您的 https://localhost:8000/static-files-demo URL 并打开一个 JavaScript 控制台. 您将找到由 JavaScript 文件创建的消息,如下图像所示:
<$>[注]
注: 如果您正在使用Gatsby的实时开发功能,您可能需要停止并重新启动npm run develop才能对此文件的更改生效。
您现在使用Gatsby SSR API添加了本地静态JavaScript文件,但也可以使用相同的策略来从其他域上加载外部JavaScript,也称为第三方脚本。 为了使演示中的图像易于缩放,您将添加第三方的 lightbox库,名为 Fancybox。
 1[label gatsby-ssr.js]
 2/**
 3 * Implement Gatsby's SSR (Server Side Rendering) APIs in this file.
 4 *
 5 * See: https://www.gatsbyjs.com/docs/ssr-apis/
 6 */
 7
 8import * as React from "react"
 9
10export const onRenderBody = ({ setPostBodyComponents }) => {
11  setPostBodyComponents([
12    <script type="text/javascript" src="/every-page.js" key="every-page-js" defer></script>,
13    <script
14      src="https://cdn.jsdelivr.net/npm/@fancyapps/[email protected]/dist/fancybox.umd.js"
15      integrity="sha256-B34QrPZs5i0CQ3eqywkXHKIWw8msfAVH30RWj/i+dMo="
16      crossOrigin="anonymous"
17      key="fancybox-js"
18      defer
19    ></script>,
20    <link
21      rel="stylesheet"
22      href="https://cdn.jsdelivr.net/npm/@fancyapps/[email protected]/dist/fancybox.css"
23      integrity="sha256-WIieo0WFPkV7kcA2lQ4ZCO5gTg1Bs/SBX5YzEB4JkyM="
24      crossOrigin="anonymous"
25      key="fancybox-css"
26    ></link>,
27  ])
28}
在此代码中,您已通过与本地every-page.js文件相同的onRenderBodyGatsby SSR API添加了第三方库Fancybox的JavaScript和CSS两种附加属性,这两种属性都对安全有帮助。crossOrigin="anonymous``明确告诉浏览器不要与不匹配您的域共享凭证,而完整性属性被用来执行子资源完整性(SRI)`(https://developer.mozilla.org/en-US/docs/Web/Security/Subresource_Integrity),保护文件被添加后不会突然更改。
<$>[警告] 警告: 一般来说,请将第三方脚本和风格视为不受信任。 除了在使用前检查它们外,始终使用 SRI。
这完成了将第三方代码加载的任务,但对于这个特定的库,还有另一个步骤来触发新的UI功能。
保存并关闭gatsby-ssr.js,然后打开src/pages/static-files-demo.js备份并执行以下编辑:
 1[label src/pages/static-files-demo.js]
 2import * as React from "react"
 3import { StaticImage } from "gatsby-plugin-image"
 4
 5import Layout from "../components/layout"
 6import Seo from "../components/seo"
 7import * as DemoStyles from "./static-files-demo.module.css"
 8
 9const StaticFilesDemo = () => (
10  <Layout>
11    <Seo title="Static Files Demo" />
12    <h1 className={DemoStyles.headerText}>Static Files Demo</h1>
13
14    <section className={"demo row around-xs " + DemoStyles.container}>
15      <h2 className="col-xs-12">Static Image Files Demo</h2>
16
17      <figure className="image-demo col-xs-10 col-sm-5">
18        <StaticImage
19          data-fancybox
20          src="../gatsby-static-files-tutorial-assets-main/images/water.jpg"
21          ...
22        />
23        <figcaption>
24          ...
25      </figure>
26
27      <figure className="image-demo col-xs-10 col-sm-5">
28        <StaticImage
29          data-fancybox
30          src="../gatsby-static-files-tutorial-assets-main/images/turtle.jpg"
31          ...
32
33        />
34        <figcaption>
35          ...
36        </figcaption>
37      </figure>
38    </section>
39  </Layout>
40)
41
42export default StaticFilesDemo
添加data-fancybox告诉 fancybox 库在哪里找到图像来触发光箱效应,随后,用户可以通过点击演示图像开始使用光箱浏览器,如下 GIF 所示:
<$>[注]
注: 在页面中的<head>中加载脚本或风格,无论是您自己还是第三方,建议的方法是使用gatsby-plugin-react-helmet插件(https://www.gatsbyjs.com/plugins/gatsby-plugin-react-helmet/)。
您刚刚使用了两种不同的方法将本地和远程JavaScript拖入您的Gatsby网站,每个都有自己的使用案例和折扣。 对于不受此步骤或之前的文件类型,本教程的下一节将讨论如何在您的Gatsby网站中包含任意文件。
步骤 5 – 添加任意静态文件
您现在已经在Web开发中实施了三种常见的静态资产类型:图像,CSS和JavaScript,但这仍然留下了许多其他文件类型,可能是网站的一部分。
添加任意静态文件的第一种方法是将其导入JavaScript文件中,并使用Webpack为您生成公共链接,该策略是由官方Gatsby文件导入资产(https://www.gatsbyjs.com/docs/how-to/images-and-media/importing-assets-into-files/#importing-assets-with-webpack)推荐的,因为Webpack将有助于防止键入路径,避免不必要的磁盘空间用于从未导入的文件,在某些情况下,甚至将文件的内容列为数据URI。
打开 demo 页面组件文件并添加以下编辑:
 1[label src/pages/static-files-demo.js]
 2import * as React from "react"
 3import { StaticImage } from "gatsby-plugin-image"
 4
 5import Layout from "../components/layout"
 6import Seo from "../components/seo"
 7import * as DemoStyles from "./static-files-demo.module.css"
 8import helloWorldPdf from "../gatsby-static-files-tutorial-assets-main/hello-world.pdf"
 9
10const StaticFilesDemo = () => (
11  <Layout>
12    <Seo title="Static Files Demo" />
13    <h1 className={DemoStyles.headerText}>Static Files Demo</h1>
14
15    <section>
16      <h2>Arbitrary Static Files</h2>
17      <a href={helloWorldPdf} title="Download the Hello World file">
18        Access the Hello World file by clicking here.
19      </a>
20    </section>
21
22    <section className={"demo row around-xs " + DemoStyles.container}>
23      <h2 className="col-xs-12">Static Image Files Demo</h2>
24      ...
25    </section>
26  </Layout>
27)
28
29export default StaticFilesDemo
在此代码中,您正在直接在 JavaScript 中导入静态文件(一个 PDF 文件,该文件将被 webpack 解析并生成一个独特的链接。
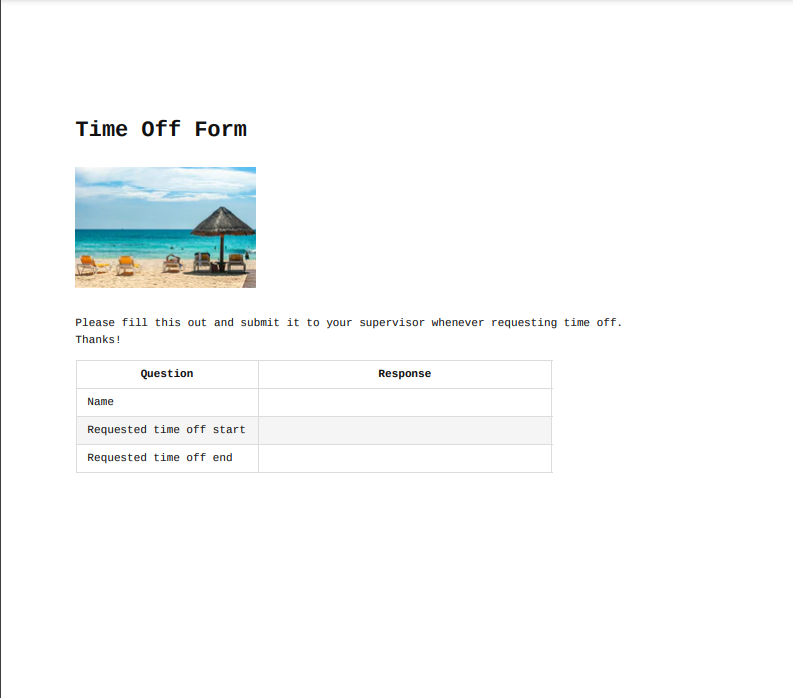
由于这种方法处理资产的方式,最终的链接将看起来相当随机,例如 /static/hello-world-2f669160afa9b953cbe496f2d6ccb046.pdf. 这对于大多数情况来说是有效的,但如果您需要一个永久可读的链接,Gatsby 提供另一种选项,以特殊的 static 文件夹的形式。假装您是一个雇主,希望您的员工能够标记 your_domain.com/time-off-form.pdf 的链接,您将使用这种静态文件夹添加一个新文件。
首先,从演示文件目录中将静态文件 time-off-form.pdf 复制到 root static 文件夹. 您可以手动或使用以下命令做到这一点:
1cp src/gatsby-static-files-tutorial-assets-main/time-off-form.pdf static/time-off-form.pdf
接下来,在页面文件中添加一个链接:
 1[label src/pages/static-files-demo.js]
 2import * as React from "react"
 3
 4...
 5
 6import helloWorldPdf from "../gatsby-static-files-tutorial-assets-main/hello-world.pdf"
 7
 8const StaticFilesDemo = () => (
 9  <Layout>
10    <Seo title="Static Files Demo" />
11    <h1 className={DemoStyles.headerText}>Static Files Demo</h1>
12
13    <section>
14      <h2>Arbitrary Static Files</h2>
15      <a href={helloWorldPdf} title="Download the Hello World file">
16        Access the Hello World file by clicking here.
17      </a>
18      <br />
19      <a href="/time-off-form.pdf" title="Time Off Form">
20        Request Time Off - Form to fill out and submit.
21      </a>
22    </section>
23
24    <section className={"demo row around-xs " + DemoStyles.container}>
25      ...
26    </section>
27  </Layout>
28)
29
30export default StaticFilesDemo
将更改保存到此文件并关闭它。
使用静态文件夹的方法,您可以为用户提供一个永久的/time-off-form.pdf路径,但您会失去缓存缓冲对文件更改的优势,并在文件路径中捕捉 webpack 的编译步骤。
点击https://localhost:8000/time-off-form.pdf查看以下PDF:
由于您在这一步中所做的努力,您网站的访问者现在可以访问新的代码启用的额外静态文件类型,这对您网站的访问者来说是方便的,因为他们不必离开您的域名才能访问这些文件,而且对您来说是有益的,因为这使得他们不太可能完全离开网站。
<$>[注]
注: 如果您在Gatsby中使用Markdown作为源,并希望自动将链接到您的网站的公共部分的
链接中链接的文件复制,以便用户可以下载它们,请查看gatsby-remark-copy-linked-files插件。
结论
通过遵循本教程中的步骤,您已将新的静态文件和资产类型添加到您的网站中,将其集成到Gatsby系统和现有内容中。
静态文件涉及到Web开发的许多部分,影响或受到相关设计决策的影响。
如果您想了解更多关于 Gatsby 的信息,请参阅 如何使用 Gatsby.js 系列创建静态网站的其余部分。