介绍
风格指南允许我们编写一致的、可重复使用的和清洁的代码. 这些规则可以自动化并通过引用程序执行。
您的工作流可能受益于执行频繁的环节检查,以解决小问题,而不是解决许多可能延迟部署代码的大问题。
在本教程中,您将安装ESLint,构建规则,并在Visual Studio Code中启用codeActionsOnSave。
前提条件
如果您想跟随这篇文章,您将需要:
- 下载并安装最新版本的 Visual Studio Code。
- Node.js 已本地安装,您可以按照 如何安装 Node.js 并创建本地开发环境执行。
本教程已通过 Node v16.6.2、npm v7.21.0、eslint v7.32.0 和 Visual Studio Code v1.59.1 进行验证。
步骤1 - 设置项目
对于不同语言和类型的项目,有不同的灯具。 对于本教程的需求,您需要安装和配置 ESLint。
首先,创建一个新的项目目录:
1mkdir eslint-save-example
然后,导航到项目目录:
1cd eslint-save-example
启动新项目:
1npm init -y
然后安装Slint:
1npm install [email protected]
然后,开始slint:
1npx eslint --init
用以下选项响应快速:
1? How would you like to use ESLint? To check syntax and find problems
2? What type of modules does your project use? JavaScript modules (import/export)
3? Which framework does your project use? None of these
4? Does your project use TypeScript? No
5? Where does your code run? Browser, Node
6? What format do you want your config file to be in? JavaScript
在此时,您将有一个新的项目,包含package.json和.eslintrc.js文件。
要在 Visual Studio 代码中使用 ESLint,您需要安装 ESLint 扩展程序可在 Visual Studio 代码市场上使用。
步骤 2 – 创建一个错误的例子
接下来,创建一个故意违反常见规则的JavaScript文件,例如不一致的间隔和入口,引用标记和半色:
1[label index.js]
2const helloYou    = (name)=> {
3  name = 'you' || name   ;
4  console.log("hello" + name + "!" )
5}
在 Visual Studio 代码中打开文件,并观察 ESLint 规则违规的迹象:
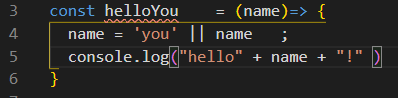
helloYou 被强调.在 Visual Studio 代码中,在这个行上浮动时会显示以下工具提示信息: helloYou 被分配一个值,但从未使用过。
我们可以通过使用变量来解决这个问题:
1[label index.js]
2const helloYou    = (name)=> {
3  name = 'you' || name   ;
4  console.log("hello" + name + "!" )
5}
6
7console.log(helloYou)
为了解决其他问题,我们将不得不添加规则。
步骤三:添加规则
eslint --init 创建了一个名为 eslintrc.js 的文件(如果这是您选择的选项,则可以创建一个名为 .yml 或 .json 的文件):
 1[label .eslintrc.js]
 2module.exports = {
 3  'env': {
 4    'browser': true,
 5    'es2021': true,
 6    'node': true
 7  },
 8  'extends': 'eslint:recommended',
 9  'parserOptions': {
10    'ecmaVersion': 12,
11    'sourceType': 'module'
12  },
13  'rules': {
14  }
15};
让我们添加规则,以便保持一致的间隔和标注,并强制执行优先的单个报价,而不是双重报价。
 1[label .eslintrc.js]
 2module.exports = {
 3  // ...
 4  'rules': {
 5    'quotes': ['error', 'single'],
 6    // we want to force semicolons
 7    'semi': ['error', 'always'],
 8    // we use 2 spaces to indent our code
 9    'indent': ['error', 2],
10    // we want to avoid extraneous spaces
11    'no-multi-spaces': ['error']
12  }
13};
将更改保存到您的文件中。
在您的代码编辑器中,打开您之前创建的JavaScript文件. 将显示所有破坏的规则。
如果您安装了 ESLint 扩展,您可以使用CTRL+SHIFT+P打开命令盘,然后搜索 ESLint:修复所有可自动修复的问题,然后按ENTER(或RETURN)。
自动修复的问题将被纠正:
1[label index.js]
2const helloYou = (name)=> {
3  name = 'you' || name ;
4  console.log('hello' + name + '!' );
5};
6
7console.log(helloYou());
您可以自由地计算入口并检查报价标记和半色彩!
步骤 4 – 在 Save 上添加代码操作
试图手动运行 ESLint:定期修复所有可自动修复的问题并不太可靠,但是每次保存工作时,运行带规则会更可靠,您可以将ESLint设置为每次按下CTRL+S(或COMMAND+S)执行自动修复。
要使 ESLint 能够在相同的文件上正确工作,您必须更改 Visual Studio 代码偏好,然后转到 ** 文件 > 偏好 > 设置**(或 ** 代码 > 偏好 > 设置**)。
对于本教程,我们将更改 工作区设置 - 也可以将这些设置应用于所有项目。
1Editor: Code Actions On Save
2Code action kinds to be run on save.
3
4Edit in settings.json
然后点击Settings.json。
1[label .vscode/settings.json]
2{
3  "editor.codeActionsOnSave": null
4}
在 settings.json 中插入以下代码:
1[label .vscode/settings.json]
2{
3  "editor.codeActionsOnSave": {
4    "source.fixAll.eslint": true
5  },
6  "eslint.validate": ["javascript"]
7 }
现在,取消你以前创建的JavaScript文件所做的修复,然后保存该文件。
结论
在本教程中,您安装了ESLint,构建了规则,并在Visual Studio Code中启用了codeActionsOnSave。