数据库是大多数企业应用程序的组成部分,所以当它涉及到Java EE框架时,与JDBC(/community/tutorials/jdbc-example-mysql-oracle JDBC Example Tutorial – Drivers, Connection, Statement and ResultSet)有良好的整合非常重要。
JDBC 春天
 Spring Framework provides excellent integration with JDBC API and provides
 JdbcTemplate utility class that we can use to avoid bolier-plate code from our database operations logic such as Opening/Closing Connection, ResultSet, PreparedStatement etc. Let's first look at a simple Spring JDBC example application and then we will see how JdbcTemplate class can help us in writing modular code with ease, without worrying whether resources are closed properly or not. Spring Tool Suite to develop Spring based applications is very helpful, so we will use STS to create our Spring JDBC application. Our final project structure will look like below image. 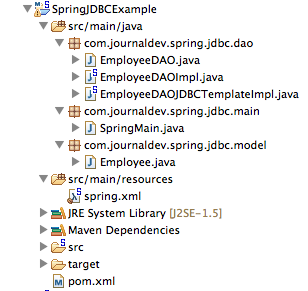 Create a simple Spring Maven Project from the STS Menu, you can choose whatever name you like or stick with my project name as SpringJDBCExample.
春季JDBC依赖
首先,我们需要将 Spring JDBC 和 Database 驱动程序包含在 maven 项目 pom.xml 文件中。
 1<project xmlns="https://maven.apache.org/POM/4.0.0" xmlns:xsi="https://www.w3.org/2001/XMLSchema-instance"
 2    xsi:schemaLocation="https://maven.apache.org/POM/4.0.0 https://maven.apache.org/xsd/maven-4.0.0.xsd">
 3    <modelVersion>4.0.0</modelVersion>
 4    <groupId>org.springframework.samples</groupId>
 5    <artifactId>SpringJDBCExample</artifactId>
 6    <version>0.0.1-SNAPSHOT</version>
 7
 8    <properties>
 9
10    	<!-- Generic properties -->
11    	<java.version>1.6</java.version>
12    	<project.build.sourceEncoding>UTF-8</project.build.sourceEncoding>
13    	<project.reporting.outputEncoding>UTF-8</project.reporting.outputEncoding>
14
15    	<!-- Spring -->
16    	<spring-framework.version>4.0.2.RELEASE</spring-framework.version>
17
18    	<!-- Logging -->
19    	<logback.version>1.0.13</logback.version>
20    	<slf4j.version>1.7.5</slf4j.version>
21
22    </properties>
23
24    <dependencies>
25    	<!-- Spring and Transactions -->
26    	<dependency>
27    		<groupId>org.springframework</groupId>
28    		<artifactId>spring-context</artifactId>
29    		<version>${spring-framework.version}</version>
30    	</dependency>
31    	<dependency>
32    		<groupId>org.springframework</groupId>
33    		<artifactId>spring-tx</artifactId>
34    		<version>${spring-framework.version}</version>
35    	</dependency>
36
37    	<!-- Spring JDBC Support -->
38    	<dependency>
39    		<groupId>org.springframework</groupId>
40    		<artifactId>spring-jdbc</artifactId>
41    		<version>${spring-framework.version}</version>
42    	</dependency>
43
44    	<!-- MySQL Driver -->
45    	<dependency>
46    		<groupId>mysql</groupId>
47    		<artifactId>mysql-connector-java</artifactId>
48    		<version>5.0.5</version>
49    	</dependency>
50
51    	<!-- Logging with SLF4J & LogBack -->
52    	<dependency>
53    		<groupId>org.slf4j</groupId>
54    		<artifactId>slf4j-api</artifactId>
55    		<version>${slf4j.version}</version>
56    		<scope>compile</scope>
57    	</dependency>
58    	<dependency>
59    		<groupId>ch.qos.logback</groupId>
60    		<artifactId>logback-classic</artifactId>
61    		<version>${logback.version}</version>
62    		<scope>runtime</scope>
63    	</dependency>
64
65    </dependencies>
66</project>
大多数部分是由STS自动生成的,但是我更新了春季框架版本以使用最新版本为 4.0.2.RELEASE。我们还添加了所需的文物 spring-jdbc和 mysql-connector-java。第一个包含春季JDBC支持类,第二个是数据库驱动程序。我正在使用MySQL数据库为我们的测试目的,所以我已经添加了MySQL JConnector罐依赖性。
春季 JDBC 示例 - 数据库设置
让我们创建一个简单的表,我们将在我们的应用程序中使用CRUD操作示例。
1CREATE TABLE `Employee` (
2  `id` int(11) unsigned NOT NULL,
3  `name` varchar(20) DEFAULT NULL,
4  `role` varchar(20) DEFAULT NULL,
5  PRIMARY KEY (`id`)
6) ENGINE=InnoDB DEFAULT CHARSET=utf8;
春季JDBC示例 - 模型类
对于 JDBC 操作,我们将使用 DAO 模式,所以让我们创建一个 java 豆,以模拟我们的员工表。
 1package com.journaldev.spring.jdbc.model;
 2
 3public class Employee {
 4
 5    private int id;
 6    private String name;
 7    private String role;
 8
 9    public int getId() {
10    	return id;
11    }
12    public void setId(int id) {
13    	this.id = id;
14    }
15    public String getName() {
16    	return name;
17    }
18    public void setName(String name) {
19    	this.name = name;
20    }
21    public String getRole() {
22    	return role;
23    }
24    public void setRole(String role) {
25    	this.role = role;
26    }
27
28    @Override
29    public String toString(){
30    	return "{ID="+id+",Name="+name+",Role="+role+"}";
31    }
32}
春季 JDBC 示例 - DAO 接口和实现
对于DAO模式,我们首先会有一个界面,声明我们想要实现的所有操作。
 1package com.journaldev.spring.jdbc.dao;
 2
 3import java.util.List;
 4
 5import com.journaldev.spring.jdbc.model.Employee;
 6
 7//CRUD operations
 8public interface EmployeeDAO {
 9
10    //Create
11    public void save(Employee employee);
12    //Read
13    public Employee getById(int id);
14    //Update
15    public void update(Employee employee);
16    //Delete
17    public void deleteById(int id);
18    //Get All
19    public List<Employee> getAll();
20}
  1package com.journaldev.spring.jdbc.dao;
  2
  3import java.sql.Connection;
  4import java.sql.PreparedStatement;
  5import java.sql.ResultSet;
  6import java.sql.SQLException;
  7import java.util.ArrayList;
  8import java.util.List;
  9
 10import javax.sql.DataSource;
 11
 12import com.journaldev.spring.jdbc.model.Employee;
 13
 14public class EmployeeDAOImpl implements EmployeeDAO {
 15
 16    private DataSource dataSource;
 17
 18    public void setDataSource(DataSource dataSource) {
 19    	this.dataSource = dataSource;
 20    }
 21
 22    @Override
 23    public void save(Employee employee) {
 24    	String query = "insert into Employee (id, name, role) values (?,?,?)";
 25    	Connection con = null;
 26    	PreparedStatement ps = null;
 27    	try{
 28    		con = dataSource.getConnection();
 29    		ps = con.prepareStatement(query);
 30    		ps.setInt(1, employee.getId());
 31    		ps.setString(2, employee.getName());
 32    		ps.setString(3, employee.getRole());
 33    		int out = ps.executeUpdate();
 34    		if(out !=0){
 35    			System.out.println("Employee saved with id="+employee.getId());
 36    		}else System.out.println("Employee save failed with id="+employee.getId());
 37    	}catch(SQLException e){
 38    		e.printStackTrace();
 39    	}finally{
 40    		try {
 41    			ps.close();
 42    			con.close();
 43    		} catch (SQLException e) {
 44    			e.printStackTrace();
 45    		}
 46    	}
 47    }
 48
 49    @Override
 50    public Employee getById(int id) {
 51    	String query = "select name, role from Employee where id = ?";
 52    	Employee emp = null;
 53    	Connection con = null;
 54    	PreparedStatement ps = null;
 55    	ResultSet rs = null;
 56    	try{
 57    		con = dataSource.getConnection();
 58    		ps = con.prepareStatement(query);
 59    		ps.setInt(1, id);
 60    		rs = ps.executeQuery();
 61    		if(rs.next()){
 62    			emp = new Employee();
 63    			emp.setId(id);
 64    			emp.setName(rs.getString("name"));
 65    			emp.setRole(rs.getString("role"));
 66    			System.out.println("Employee Found::"+emp);
 67    		}else{
 68    			System.out.println("No Employee found with id="+id);
 69    		}
 70    	}catch(SQLException e){
 71    		e.printStackTrace();
 72    	}finally{
 73    		try {
 74    			rs.close();
 75    			ps.close();
 76    			con.close();
 77    		} catch (SQLException e) {
 78    			e.printStackTrace();
 79    		}
 80    	}
 81    	return emp;
 82    }
 83
 84    @Override
 85    public void update(Employee employee) {
 86    	String query = "update Employee set name=?, role=? where id=?";
 87    	Connection con = null;
 88    	PreparedStatement ps = null;
 89    	try{
 90    		con = dataSource.getConnection();
 91    		ps = con.prepareStatement(query);
 92    		ps.setString(1, employee.getName());
 93    		ps.setString(2, employee.getRole());
 94    		ps.setInt(3, employee.getId());
 95    		int out = ps.executeUpdate();
 96    		if(out !=0){
 97    			System.out.println("Employee updated with id="+employee.getId());
 98    		}else System.out.println("No Employee found with id="+employee.getId());
 99    	}catch(SQLException e){
100    		e.printStackTrace();
101    	}finally{
102    		try {
103    			ps.close();
104    			con.close();
105    		} catch (SQLException e) {
106    			e.printStackTrace();
107    		}
108    	}
109    }
110
111    @Override
112    public void deleteById(int id) {
113    	String query = "delete from Employee where id=?";
114    	Connection con = null;
115    	PreparedStatement ps = null;
116    	try{
117    		con = dataSource.getConnection();
118    		ps = con.prepareStatement(query);
119    		ps.setInt(1, id);
120    		int out = ps.executeUpdate();
121    		if(out !=0){
122    			System.out.println("Employee deleted with id="+id);
123    		}else System.out.println("No Employee found with id="+id);
124    	}catch(SQLException e){
125    		e.printStackTrace();
126    	}finally{
127    		try {
128    			ps.close();
129    			con.close();
130    		} catch (SQLException e) {
131    			e.printStackTrace();
132    		}
133    	}
134    }
135
136    @Override
137    public List<Employee> getAll() {
138    	String query = "select id, name, role from Employee";
139    	List<Employee> empList = new ArrayList<Employee>();
140    	Connection con = null;
141    	PreparedStatement ps = null;
142    	ResultSet rs = null;
143    	try{
144    		con = dataSource.getConnection();
145    		ps = con.prepareStatement(query);
146    		rs = ps.executeQuery();
147    		while(rs.next()){
148    			Employee emp = new Employee();
149    			emp.setId(rs.getInt("id"));
150    			emp.setName(rs.getString("name"));
151    			emp.setRole(rs.getString("role"));
152    			empList.add(emp);
153    		}
154    	}catch(SQLException e){
155    		e.printStackTrace();
156    	}finally{
157    		try {
158    			rs.close();
159    			ps.close();
160    			con.close();
161    		} catch (SQLException e) {
162    			e.printStackTrace();
163    		}
164    	}
165    	return empList;
166    }
167
168}
如果您想了解更多关于 DataSource 的信息,请阅读 JDBC DataSource 示例。
春季 JDBC 示例 - Bean 配置
如果你看上面的所有类,他们都使用标准的JDBC API,没有提到春季JDBC框架。春季JDBC框架类在我们创建春季豆配置文件并定义豆类时出现。
 1<?xml version="1.0" encoding="UTF-8"?>
 2<beans xmlns="https://www.springframework.org/schema/beans"
 3    xmlns:xsi="https://www.w3.org/2001/XMLSchema-instance"
 4    xsi:schemaLocation="https://www.springframework.org/schema/beans https://www.springframework.org/schema/beans/spring-beans.xsd">
 5
 6    <bean id="employeeDAO" class="com.journaldev.spring.jdbc.dao.EmployeeDAOImpl">
 7    	<property name="dataSource" ref="dataSource" />
 8    </bean>
 9
10    <bean id="dataSource" class="org.springframework.jdbc.datasource.DriverManagerDataSource">
11
12    	<property name="driverClassName" value="com.mysql.jdbc.Driver" />
13    	<property name="url" value="jdbc:mysql://localhost:3306/TestDB" />
14    	<property name="username" value="pankaj" />
15    	<property name="password" value="pankaj123" />
16    </bean>
17
18</beans>
首先,我们正在创建一个DataSource对象的类 DriverManagerDataSource. 这个类提供了我们可以使用的DataSource的基本实现。 我们正在将MySQL数据库URL、用户名和密码作为属性传递给DataSource棒。 再次,DataSource棒被设置为EmployeeDAOImpl棒,我们已经准备好了我们的春季JDBC实现。 实现是松散的,如果我们想要切换到另一个实现或移动到另一个数据库服务器,我们只需要对豆子配置做出相应的更改。
春季JDBC测试班
让我们写一个简单的测试课,以确保一切正常工作。
 1package com.journaldev.spring.jdbc.main;
 2
 3import java.util.List;
 4import java.util.Random;
 5
 6import org.springframework.context.support.ClassPathXmlApplicationContext;
 7
 8import com.journaldev.spring.jdbc.dao.EmployeeDAO;
 9import com.journaldev.spring.jdbc.model.Employee;
10
11public class SpringMain {
12
13    public static void main(String[] args) {
14    	//Get the Spring Context
15    	ClassPathXmlApplicationContext ctx = new ClassPathXmlApplicationContext("spring.xml");
16
17    	//Get the EmployeeDAO Bean
18    	EmployeeDAO employeeDAO = ctx.getBean("employeeDAO", EmployeeDAO.class);
19
20    	//Run some tests for JDBC CRUD operations
21    	Employee emp = new Employee();
22    	int rand = new Random().nextInt(1000);
23    	emp.setId(rand);
24    	emp.setName("Pankaj");
25    	emp.setRole("Java Developer");
26
27    	//Create
28    	employeeDAO.save(emp);
29
30    	//Read
31    	Employee emp1 = employeeDAO.getById(rand);
32    	System.out.println("Employee Retrieved::"+emp1);
33
34    	//Update
35    	emp.setRole("CEO");
36    	employeeDAO.update(emp);
37
38    	//Get All
39    	List<Employee> empList = employeeDAO.getAll();
40    	System.out.println(empList);
41
42    	//Delete
43    	employeeDAO.deleteById(rand);
44
45    	//Close Spring Context
46    	ctx.close();
47
48    	System.out.println("DONE");
49    }
50
51}
我正在使用 random class(/community/tutorials/random-number-generator-java)来生成员工id 的随机号码,当我们运行程序时,我们会得到以下输出。
 1Mar 25, 2014 12:54:18 PM org.springframework.context.support.ClassPathXmlApplicationContext prepareRefresh
 2INFO: Refreshing org.springframework.context.support.ClassPathXmlApplicationContext@4b9af9a9: startup date [Tue Mar 25 12:54:18 PDT 2014]; root of context hierarchy
 3Mar 25, 2014 12:54:18 PM org.springframework.beans.factory.xml.XmlBeanDefinitionReader loadBeanDefinitions
 4INFO: Loading XML bean definitions from class path resource [spring.xml]
 5Mar 25, 2014 12:54:19 PM org.springframework.jdbc.datasource.DriverManagerDataSource setDriverClassName
 6INFO: Loaded JDBC driver: com.mysql.jdbc.Driver
 7Employee saved with id=726
 8Employee Found::{ID=726,Name=Pankaj,Role=Java Developer}
 9Employee Retrieved::{ID=726,Name=Pankaj,Role=Java Developer}
10Employee updated with id=726
11[{ID=726,Name=Pankaj,Role=CEO}]
12Employee deleted with id=726
13Mar 25, 2014 12:54:19 PM org.springframework.context.support.ClassPathXmlApplicationContext doClose
14INFO: Closing org.springframework.context.support.ClassPathXmlApplicationContext@4b9af9a9: startup date [Tue Mar 25 12:54:18 PDT 2014]; root of context hierarchy
15DONE
Jdbc 春季 示例
如果你看看DAO实施类别,我们会发现很多锅炉板代码,在那里我们打开和关闭连接、 PreparedStatements 和 ResultSet。如果有人忘记正确关闭资源,这可能会导致资源泄漏。我们可以使用org.springframework.jdbc.core.JdbcTemplate类来避免这些错误。春季 JdbcTemplate 是春季 JDBC 核心包的中心类别,并且提供了许多方法来执行查询并自动解析 ResultSet 以获取对象或对象列表。我们所需要的只是提供对象作为对象数组,并实施呼叫接口,如PreparedStatementSetter和RowMapper来绘制对象或将 ResultSet 数据转换为对象。让我们看看我们雇员
  1package com.journaldev.spring.jdbc.dao;
  2
  3import java.sql.ResultSet;
  4import java.sql.SQLException;
  5import java.util.ArrayList;
  6import java.util.List;
  7import java.util.Map;
  8
  9import javax.sql.DataSource;
 10
 11import org.springframework.jdbc.core.JdbcTemplate;
 12import org.springframework.jdbc.core.RowMapper;
 13
 14import com.journaldev.spring.jdbc.model.Employee;
 15
 16public class EmployeeDAOJDBCTemplateImpl implements EmployeeDAO {
 17
 18    private DataSource dataSource;
 19
 20    public void setDataSource(DataSource dataSource) {
 21    	this.dataSource = dataSource;
 22    }
 23
 24    @Override
 25    public void save(Employee employee) {
 26    	String query = "insert into Employee (id, name, role) values (?,?,?)";
 27
 28    	JdbcTemplate jdbcTemplate = new JdbcTemplate(dataSource);
 29
 30    	Object[] args = new Object[] {employee.getId(), employee.getName(), employee.getRole()};
 31
 32    	int out = jdbcTemplate.update(query, args);
 33
 34    	if(out !=0){
 35    		System.out.println("Employee saved with id="+employee.getId());
 36    	}else System.out.println("Employee save failed with id="+employee.getId());
 37    }
 38
 39    @Override
 40    public Employee getById(int id) {
 41    	String query = "select id, name, role from Employee where id = ?";
 42    	JdbcTemplate jdbcTemplate = new JdbcTemplate(dataSource);
 43
 44    	//using RowMapper anonymous class, we can create a separate RowMapper for reuse
 45    	Employee emp = jdbcTemplate.queryForObject(query, new Object[]{id}, new RowMapper<Employee>(){
 46
 47    		@Override
 48    		public Employee mapRow(ResultSet rs, int rowNum)
 49    				throws SQLException {
 50    			Employee emp = new Employee();
 51    			emp.setId(rs.getInt("id"));
 52    			emp.setName(rs.getString("name"));
 53    			emp.setRole(rs.getString("role"));
 54    			return emp;
 55    		}});
 56
 57    	return emp;
 58    }
 59
 60    @Override
 61    public void update(Employee employee) {
 62    	String query = "update Employee set name=?, role=? where id=?";
 63    	JdbcTemplate jdbcTemplate = new JdbcTemplate(dataSource);
 64    	Object[] args = new Object[] {employee.getName(), employee.getRole(), employee.getId()};
 65
 66    	int out = jdbcTemplate.update(query, args);
 67    	if(out !=0){
 68    		System.out.println("Employee updated with id="+employee.getId());
 69    	}else System.out.println("No Employee found with id="+employee.getId());
 70    }
 71
 72    @Override
 73    public void deleteById(int id) {
 74
 75    	String query = "delete from Employee where id=?";
 76    	JdbcTemplate jdbcTemplate = new JdbcTemplate(dataSource);
 77
 78    	int out = jdbcTemplate.update(query, id);
 79    	if(out !=0){
 80    		System.out.println("Employee deleted with id="+id);
 81    	}else System.out.println("No Employee found with id="+id);
 82    }
 83
 84    @Override
 85    public List<Employee> getAll() {
 86    	String query = "select id, name, role from Employee";
 87    	JdbcTemplate jdbcTemplate = new JdbcTemplate(dataSource);
 88    	List<Employee> empList = new ArrayList<Employee>();
 89
 90    	List<Map<String,Object>> empRows = jdbcTemplate.queryForList(query);
 91
 92    	for(Map<String,Object> empRow : empRows){
 93    		Employee emp = new Employee();
 94    		emp.setId(Integer.parseInt(String.valueOf(empRow.get("id"))));
 95    		emp.setName(String.valueOf(empRow.get("name")));
 96    		emp.setRole(String.valueOf(empRow.get("role")));
 97    		empList.add(emp);
 98    	}
 99    	return empList;
100    }
101
102}
要查看上面的 Spring JdbcTemplate 代码的重要点是:
- 使用 Object 数组通过 PreparedStatement 参数,我们也可以使用 PreparedStatementSetter 实现,但通过 Object 数组看起来很容易使用
- 没有与打开和关闭连接、陈述或结果集相关的代码。 所有由 Spring JdbcTemplate 类内部处理的内容
- RowMapper 匿名类实现以将 ResultSet 数据绘制到 queryForObject() 方法中的 Employee bean 对象
- _queryForList() 方法返回了包含 Mapas Mapas 数据列的列表,以键作为名称列和基准符串数据库的值
要使用 Spring JdbcTemplate 实现,我们只需要更改 Spring Bean 配置文件中的 employeeDAO 类,如下所示。
1<bean id="employeeDAO" class="com.journaldev.spring.jdbc.dao.EmployeeDAOJDBCTemplateImpl">
2    <property name="dataSource" ref="dataSource" />
3</bean>
当你要运行主类时,春季JdbcTemplate实现的输出将类似于上面看到的与正常的JDBC实现。