Spring Controller 注释是 @Component注释的专业化。 Spring Controller 注释通常与基于 RequestMapping 注释的注释处理方法相结合使用。
春天控制器
Spring Controller 注释只能应用于类,用于标记类作为 Web 请求处理器,主要用于 Spring MVC应用程序。
春节控制器
Spring @RestController 是一个方便的注释,它本身被注释为 @Controller 和 @ResponseBody. 此注释用于标记一个类为 [RESTful]( / 社区 / 教程 / 春节 - 休息 - 例子 - 教程 - 春节 - 休息 - 网络服务) Web 服务的请求处理器。
春天控制器示例
Let's create a simple spring application where we will implement standard MVC controller as well as REST controller. Create a "Dynamic Web Project" in Eclipse and then convert it to Maven project. This will provide us with maven based web application structure and we can build our application on top of it. Below image shows the final project structure of our Spring MVC Controller application. 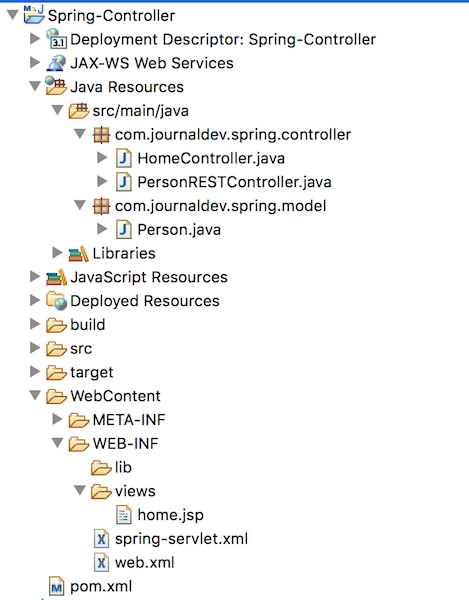 We would need following dependencies for our application.
 1<dependency>
 2    <groupId>org.springframework</groupId>
 3    <artifactId>spring-webmvc</artifactId>
 4    <version>5.0.7.RELEASE</version>
 5</dependency>
 6<dependency>
 7    <groupId>org.springframework</groupId>
 8    <artifactId>spring-web</artifactId>
 9    <version>5.0.7.RELEASE</version>
10</dependency>
11
12<!-- Jackson for REST -->
13<dependency>
14    <groupId>com.fasterxml.jackson.core</groupId>
15    <artifactId>jackson-databind</artifactId>
16    <version>2.9.6</version>
17</dependency>
让我们看看部署描述器(web.xml),在那里我们将配置DispatcherServlet作为前置控制器。
 1<?xml version="1.0" encoding="UTF-8"?>
 2<web-app xmlns:xsi="https://www.w3.org/2001/XMLSchema-instance" xmlns="https://xmlns.jcp.org/xml/ns/javaee"
 3 xsi:schemaLocation="https://xmlns.jcp.org/xml/ns/javaee https://xmlns.jcp.org/xml/ns/javaee/web-app_3_1.xsd" id="WebApp_ID" version="3.1">
 4  <display-name>Spring-Controller</display-name>
 5  <!-- Add Spring MVC DispatcherServlet as front controller -->
 6    <servlet>
 7        <servlet-name>spring</servlet-name>
 8        <servlet-class>
 9                org.springframework.web.servlet.DispatcherServlet
10        </servlet-class>
11        <init-param>
12       		<param-name>contextConfigLocation</param-name>
13       		<param-value>/WEB-INF/spring-servlet.xml</param-value>
14    		</init-param>
15        <load-on-startup>1</load-on-startup>
16    </servlet>
17
18    <servlet-mapping>
19        <servlet-name>spring</servlet-name>
20        <url-pattern>/</url-pattern>
21    </servlet-mapping>
22</web-app>
最后,我们有以下的春季背景文件. 在这里,我们正在配置我们的应用程序以注释为基础,并提供扫描春季组件的根包。
 1<?xml version="1.0" encoding="UTF-8"?>
 2<beans:beans xmlns="https://www.springframework.org/schema/mvc"
 3    xmlns:xsi="https://www.w3.org/2001/XMLSchema-instance" xmlns:beans="https://www.springframework.org/schema/beans"
 4    xmlns:context="https://www.springframework.org/schema/context"
 5    xsi:schemaLocation="https://www.springframework.org/schema/mvc https://www.springframework.org/schema/mvc/spring-mvc.xsd
 6    	https://www.springframework.org/schema/beans https://www.springframework.org/schema/beans/spring-beans.xsd
 7    	https://www.springframework.org/schema/context https://www.springframework.org/schema/context/spring-context.xsd">
 8
 9    <!-- Enables the Spring MVC @Controller programming model -->
10    <annotation-driven />
11
12    <context:component-scan base-package="com.journaldev.spring" />
13
14    <!-- Resolves views selected for rendering by @Controllers to JSP resources
15    	in the /WEB-INF/views directory -->
16    <beans:bean
17    	class="org.springframework.web.servlet.view.InternalResourceViewResolver">
18    	<beans:property name="prefix" value="/WEB-INF/views/" />
19    	<beans:property name="suffix" value=".jsp" />
20    </beans:bean>
21
22</beans:beans>
我们的配置 XML 文件已经准备好了,现在让我们转到控制器类。
 1package com.journaldev.spring.controller;
 2
 3import java.text.DateFormat;
 4import java.util.Date;
 5import java.util.Locale;
 6
 7import org.springframework.stereotype.Controller;
 8import org.springframework.ui.Model;
 9import org.springframework.web.bind.annotation.GetMapping;
10
11@Controller
12public class HomeController {
13
14    @GetMapping("/hello")
15    public String home(Locale locale, Model model) {
16    	Date date = new Date();
17    	DateFormat dateFormat = DateFormat.getDateTimeInstance(DateFormat.LONG, DateFormat.LONG, locale);
18    	String formattedDate = dateFormat.format(date);
19    	model.addAttribute("serverTime", formattedDate);
20    	return "home";
21    }
22
23}
我们已经定义了一个单个请求处理方法,它是通过URI/hello接受GET请求,并作为响应返回home.jsp页面,请注意,我们正在为模型设置一个属性,这将在home.jsp页面中使用。
 1<%@ page language="java" contentType="text/html; charset=UTF-8"
 2    pageEncoding="UTF-8"%>
 3<html>
 4<head>
 5<title>Home</title>
 6</head>
 7<body>
 8    <h1>Hello world!</h1>
 9
10    <p>The time on the server is ${serverTime}.</p>
11
12</body>
13</html>
春季MVC控制器测试
Our conventional servlet based Spring MVC application with a simple controller is ready, just export it as the WAR file and deploy on Tomcat or any other servlet container. Then go to URL https://localhost:8080/Spring-Controller/hello and you should see the following screen as output. 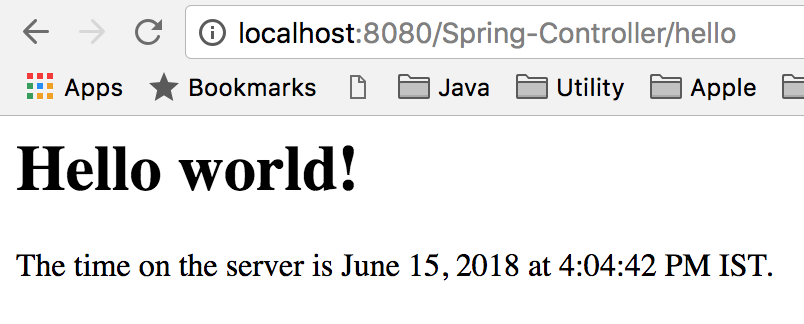
春天控制器例子
现在,让我们将我们的应用程序扩展到暴露REST API。创建一个模型类,将作为JSON响应发送。
 1package com.journaldev.spring.model;
 2
 3public class Person {
 4
 5    private String name;
 6
 7    public String getName() {
 8    	return name;
 9    }
10
11    public void setName(String name) {
12    	this.name = name;
13    }
14
15}
这里是我们简单的 REST 控制器类。
 1package com.journaldev.spring.controller;
 2
 3import org.springframework.web.bind.annotation.RequestMapping;
 4import org.springframework.web.bind.annotation.RequestParam;
 5import org.springframework.web.bind.annotation.RestController;
 6
 7import com.journaldev.spring.model.Person;
 8
 9@RestController
10public class PersonRESTController {
11
12    @RequestMapping("/rest")
13    public String healthCheck() {
14    	return "OK";
15    }
16
17    @RequestMapping("/rest/person/get")
18    public Person getPerson(@RequestParam(name = "name", required = false, defaultValue = "Unknown") String name) {
19    	Person person = new Person();
20    	person.setName(name);
21    	return person;
22    }
23
24}
重新部署应用程序,以测试我们的 REST API。
春季控制器测试
Go to URL https://localhost:8080/Spring-Controller/rest and you should get following output. 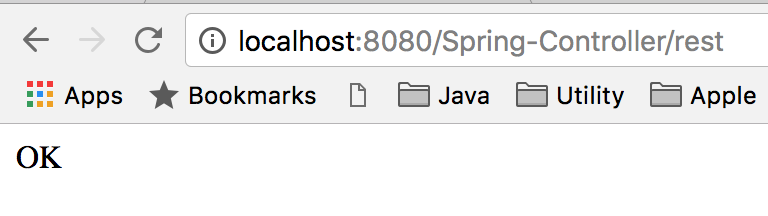 Go to URL
 https://localhost:8080/Spring-Controller/rest/person/get and you will get following JSON response: 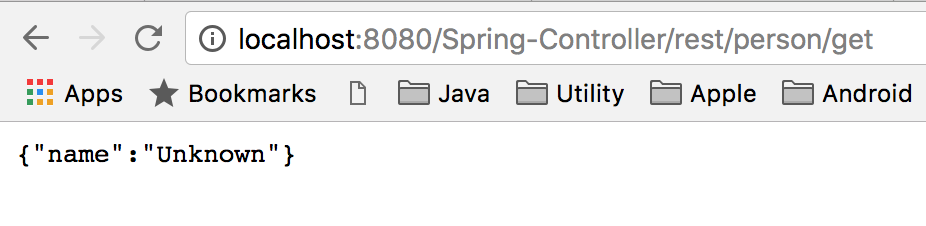 Now let's provide the name parameter value in the URL, go to
 https://localhost:8080/Spring-Controller/rest/person/get?name=Pankaj and you will get following JSON response. 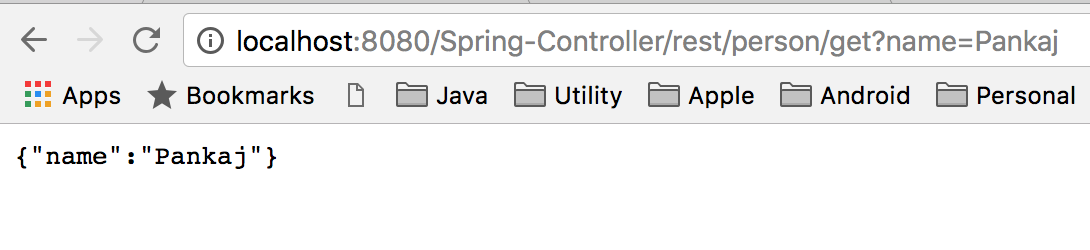
摘要
Spring Controller 是 Spring MVC 应用的支柱,这就是我们的商业逻辑的起点,RestController 还能帮助我们轻松地创建基于休息的 Web 服务。
您可以从我们的 GitHub 存储库下载示例项目代码。