春天
 In this post, we will setup up a sample Spring boot application and integrate it with Redis Cache. While Redis is an Open source in-memory data structure store, used as a database, cache and message broker, this lesson will demonstrate only the caching integration. We will make use of Spring Initializr tool for quickly setting up the project.
Spring Boot Redis 项目设置
We will make use of Spring Initializr tool for quickly setting up the project. We will use 3 dependencies as shown below: 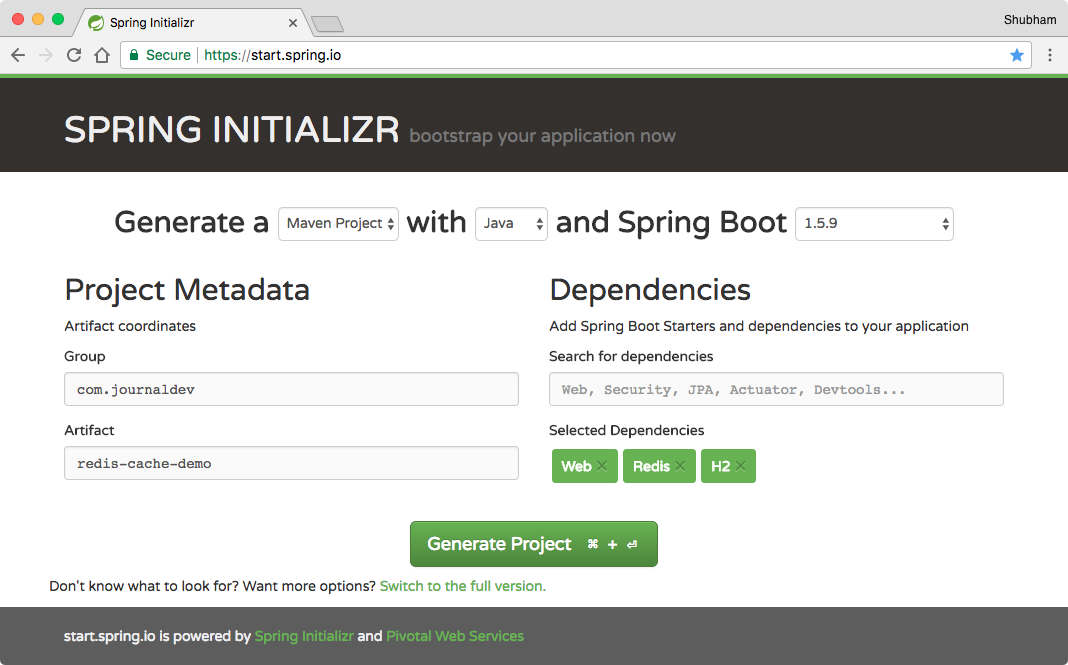 Download the project and unzip it. We have used H2 database dependency as we will be using an embedded database which loses all data once the application has been stopped.
春天启动 Redis 缓存 Maven 依赖
虽然我们已经完成了与该工具的安装,如果你想手动设置它,我们使用Maven构建系统这个项目,这里是我们使用的依赖:
 1<parent>
 2  <groupId>org.springframework.boot</groupId>
 3  <artifactId>spring-boot-starter-parent</artifactId>
 4  <version>1.5.9.RELEASE</version>
 5  <relativePath/> <!-- lookup parent from repository -->
 6</parent>
 7<properties>
 8  <project.build.sourceEncoding>UTF-8</project.build.sourceEncoding>
 9  <project.reporting.outputEncoding>UTF-8</project.reporting.outputEncoding>
10  <java.version>1.8</java.version>
11</properties>
12<dependencies>
13  <dependency>
14     <groupId>org.springframework.boot</groupId>
15     <artifactId>spring-boot-starter-data-redis</artifactId>
16  </dependency>
17
18  <dependency>
19     <groupId>org.springframework.boot</groupId>
20     <artifactId>spring-boot-starter-web</artifactId>
21  </dependency>
22
23  <dependency>
24     <groupId>org.springframework.boot</groupId>
25     <artifactId>spring-boot-starter-test</artifactId>
26     <scope>test</scope>
27  </dependency>
28
29  <!-- for JPA support -->
30  <dependency>
31    <groupId>org.springframework.boot</groupId>
32    <artifactId>spring-boot-starter-data-jpa</artifactId>
33  </dependency>
34
35  <!-- for embedded database support -->
36  <dependency>
37    <groupId>com.h2database</groupId>
38    <artifactId>h2</artifactId>
39    <scope>runtime</scope>
40  </dependency>
41
42</dependencies>
43
44<build>
45  <plugins>
46     <plugin>
47        <groupId>org.springframework.boot</groupId>
48        <artifactId>spring-boot-maven-plugin</artifactId>
49     </plugin>
50  </plugins>
51</build>
请确保从 maven central中使用 Spring Boot 的稳定版本。
定义模型
要将对象保存到 Redis 数据库中,我们用基本字段定义一个 Person 模型对象:
 1package com.journaldev.rediscachedemo;
 2
 3import javax.persistence.*;
 4import java.io.Serializable;
 5
 6@Entity
 7public class User implements Serializable {
 8
 9    private static final long serialVersionUID = 7156526077883281623L;
10
11    @Id
12    @SequenceGenerator(name = "SEQ_GEN", sequenceName = "SEQ_USER", allocationSize = 1)
13    @GeneratedValue(strategy = GenerationType.SEQUENCE, generator = "SEQ_GEN")
14    private Long id;
15    private String name;
16    private long followers;
17
18    public User() {
19    }
20
21    public User(String name, long followers) {
22        this.name = name;
23        this.followers = followers;
24    }
25
26    //standard getters and setters
27
28    @Override
29    public String toString() {
30        return String.format("User{id=%d, name='%s', followers=%d}", id, name, followers);
31    }
32}
这是一个标准的POJO与和。
配置 Redis Cache
有了 Spring Boot 和已在 Maven 工作中所需的依赖性,我们可以在我们的 application.properties 文件中配置本地 Redis 实例,只有三个行:
1# Redis Config
2spring.cache.type=redis
3spring.redis.host=localhost
4spring.redis.port=6379
此外,在 Spring Boot 主类上使用@EnableCaching注释:
 1package com.journaldev.rediscachedemo;
 2
 3import org.slf4j.Logger;
 4import org.slf4j.LoggerFactory;
 5import org.springframework.beans.factory.annotation.Autowired;
 6import org.springframework.boot.CommandLineRunner;
 7import org.springframework.boot.SpringApplication;
 8import org.springframework.boot.autoconfigure.SpringBootApplication;
 9import org.springframework.cache.annotation.EnableCaching;
10
11@SpringBootApplication
12@EnableCaching
13public class Application implements CommandLineRunner {
14
15  private final Logger LOG = LoggerFactory.getLogger(getClass());
16  private final UserRepository userRepository;
17
18  @Autowired
19  public Application(UserRepository userRepository) {
20    this.userRepository = userRepository;
21  }
22
23  public static void main(String[] args) {
24    SpringApplication.run(Application.class, args);
25  }
26
27  @Override
28  public void run(String... strings) {
29    //Populating embedded database here
30    LOG.info("Saving users. Current user count is {}.", userRepository.count());
31    User shubham = new User("Shubham", 2000);
32    User pankaj = new User("Pankaj", 29000);
33    User lewis = new User("Lewis", 550);
34
35    userRepository.save(shubham);
36    userRepository.save(pankaj);
37    userRepository.save(lewis);
38    LOG.info("Done saving users. Data: {}.", userRepository.findAll());
39  }
40}
我们已经添加了CommandLineRunner,因为我们希望在嵌入式H2数据库中填充一些样本数据。
定义仓库
在我们展示 Redis 是如何工作的之前,我们将简单地定义 JPA 相关功能的 Repository:
1package com.journaldev.rediscachedemo;
2
3import org.springframework.data.jpa.repository.JpaRepository;
4import org.springframework.stereotype.Repository;
5
6@Repository
7public interface UserRepository extends JpaRepository { }
它目前没有方法呼叫,因为我们不需要任何。
定义控制者
控制器是 Redis 缓存呼叫行动的地方,实际上,这是最好的地方,因为作为缓存直接与它相关联,请求甚至不必输入服务代码等待缓存结果。
 1package com.journaldev.rediscachedemo;
 2
 3import org.slf4j.Logger;
 4import org.slf4j.LoggerFactory;
 5import org.springframework.beans.factory.annotation.Autowired;
 6import org.springframework.cache.annotation.CacheEvict;
 7import org.springframework.cache.annotation.CachePut;
 8import org.springframework.cache.annotation.Cacheable;
 9import org.springframework.web.bind.annotation.*;
10
11@RestController
12public class UserController {
13
14  private final Logger LOG = LoggerFactory.getLogger(getClass());
15
16  private final UserRepository userRepository;
17
18  @Autowired
19  public UserController(UserRepository userRepository) {
20    this.userRepository = userRepository;
21  }
22   ...
23}
现在,为了将某些东西放入缓存中,我们使用@Cacheable注释:
1@Cacheable(value = "users", key = "#userId", unless = "#result.followers < 12000")
2@RequestMapping(value = "/{userId}", method = RequestMethod.GET)
3public User getUser(@PathVariable String userId) {
4  LOG.info("Getting user with ID {}.", userId);
5  return userRepository.findOne(Long.valueOf(userId));
6}
在上述绘制中,getUser方法会将一个人放入一个名为用户的缓存中,将该人按键识别为userId,并且只会存储一个拥有超过12000名追随者的用户。
1localhost:8090/1
2localhost:8090/1
3localhost:8090/2
4localhost:8090/2
如果我们注意到日志,这些将是:
1... : Getting user with ID 1.
2... : Getting user with ID 1.
3... : Getting user with ID 2.
注意点?我们进行了四次API呼叫,但只有三次日志声明。这是因为ID 2的用户有29000个追随者,所以数据被缓存,这意味着当对其进行API呼叫时,数据从缓存中返回,而没有进行DB呼叫!
缓存更新
缓存值也应该在其实际对象值更新时更新,可以使用 @CachePut 注释:
1@CachePut(value = "users", key = "#user.id")
2@PutMapping("/update")
3public User updatePersonByID(@RequestBody User user) {
4  userRepository.save(user);
5  return user;
6}
这样一来,一个人再一次被他的ID识别,并与结果更新。
清理隐藏
如果某些数据要从实际数据库中删除,将不再有必要将其保存在缓存中,我们可以使用@CacheEvict注释来清除缓存数据:
1@CacheEvict(value = "users", allEntries=true)
2@DeleteMapping("/{id}")
3public void deleteUserByID(@PathVariable Long id) {
4  LOG.info("deleting person with id {}", id);
5  userRepository.delete(id);
6}
在最后的映射中,我们只排除了缓存条目,没有做任何其他事情。
运行 Spring Boot Redis 缓存应用程序
我们可以简单地使用一个命令来运行这个应用程序:
1mvn spring-boot:run
Redis 缓存限制
虽然Redis非常快,但它仍然没有限制在64位系统上存储任何数据量。它只能在32位系统上存储3GB的数据。可用的存储量可能导致更高的打击率,但一旦Redis占用了太多的存储量,它就会停止使用。
摘要
在本课中,我们研究了Redis Cache为我们提供快速数据交互的功率,以及我们如何将其与Spring Boot以最小而强大的配置集成。
[下载Spring Boot Redis Cache Project]