Spring Bean Scopes 允许我们对 bean 实例的创建进行更细微的控制,有时我们希望创建 bean 实例作为 singleton,但在其他情况下,我们可能希望它在每个请求或一个会话中创建一次。
春季豆类的目的
有五种类型的 [春豆]( / 社区 / 教程 / 春豆 - 草莓 - 例子 - 教程)范围:
使用此范围时,请确保 bean 没有共享实例变量,否则可能会导致数据不一致问题 2. 原型 – 每当从 Spring 容器中请求 Bean 时,都会创建一个新实例 3. 请求 – 这是与原型范围相同的,但它应该用于 Web 应用程序。将为每个 HTTP 请求创建一个新的 Bean 实例 4. 会话 – 一个新的 Bean 将由容器为每个 HTTP 会话创建 5. global-session – 用于创建 Port_MBR_let 应用程序的全球会话。
Spring Bean Singleton 和原型范围
Spring bean singleton 和原型范围可用于独立的 Spring 应用程序. 让我们看看我们如何使用 @Scope 注释轻松配置这些范围。
1package com.journaldev.spring;
2
3public class MyBean {
4
5    public MyBean() {
6    	System.out.println("MyBean instance created");
7    }
8
9}
让我们定义 [春季配置]( / 社区 / 教程 / 春季配置 - 注释)类,我们将定义从春季容器获取MyBean实例的方法。
 1package com.journaldev.spring;
 2
 3import org.springframework.context.annotation.Bean;
 4import org.springframework.context.annotation.Configuration;
 5import org.springframework.context.annotation.Scope;
 6
 7@Configuration
 8public class MyConfiguration {
 9
10    @Bean
11    @Scope(value="singleton")
12    public MyBean myBean() {
13    	return new MyBean();
14    }
15
16}
请注意,‘singleton’是默认范围,所以我们可以从上面的 Bean 定义中删除 `@Scope(value="singleton")。
 1package com.journaldev.spring;
 2
 3import org.springframework.context.annotation.AnnotationConfigApplicationContext;
 4
 5public class MySpringApp {
 6
 7    public static void main(String[] args) {
 8    	AnnotationConfigApplicationContext ctx = new AnnotationConfigApplicationContext();
 9    	ctx.register(MyConfiguration.class);
10    	ctx.refresh();
11
12    	 MyBean mb1 = ctx.getBean(MyBean.class);
13    	 System.out.println(mb1.hashCode());
14
15    	 MyBean mb2 = ctx.getBean(MyBean.class);
16    	 System.out.println(mb2.hashCode());
17
18    	ctx.close();
19    }
20
21}
当上面的程序运行时,我们会得到如下所示的输出。
1MyBean instance created
2867988177
3867988177
请注意,两个 MyBean 实例都具有相同的哈希代码,并且构建器被调用一次,这意味着春 container 总是返回相同的 MyBean 实例。
1@Bean
2@Scope(value="prototype")
3public MyBean myBean() {
4    return new MyBean();
5}
这一次,我们将在执行主方法时跟踪输出。
1MyBean instance created
2867988177
3MyBean instance created
4443934570
很明显,MyBean实例每当从春节容器中被请求时都会被创建,现在让我们将范围更改为请求。
1@Bean
2@Scope(value="request")
3public MyBean myBean() {
4    return new MyBean();
5}
在这种情况下,我们会得到以下例外。
1Exception in thread "main" java.lang.IllegalStateException: No Scope registered for scope name 'request'
2    at org.springframework.beans.factory.support.AbstractBeanFactory.doGetBean(AbstractBeanFactory.java:347)
3    at org.springframework.beans.factory.support.AbstractBeanFactory.getBean(AbstractBeanFactory.java:224)
4    at org.springframework.beans.factory.support.DefaultListableBeanFactory.resolveNamedBean(DefaultListableBeanFactory.java:1015)
5    at org.springframework.beans.factory.support.DefaultListableBeanFactory.getBean(DefaultListableBeanFactory.java:339)
6    at org.springframework.beans.factory.support.DefaultListableBeanFactory.getBean(DefaultListableBeanFactory.java:334)
7    at org.springframework.context.support.AbstractApplicationContext.getBean(AbstractApplicationContext.java:1107)
8    at com.journaldev.spring.MySpringApp.main(MySpringApp.java:12)
这是因为请求、会话和全球会话范围不适用于独立应用。
春豆请求和会议范围
For spring bean request and session scope example, we will create Spring Boot web application. Create a spring boot starter project and choose "web" so that we can run it as a web application. 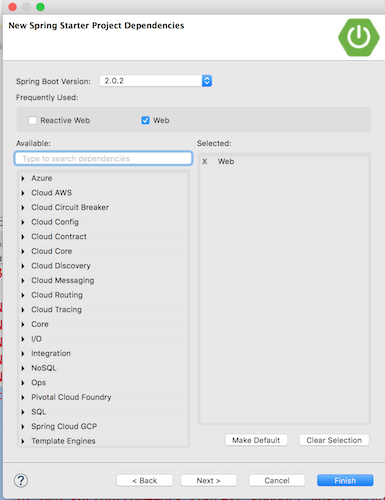 Our final project will look like below image.
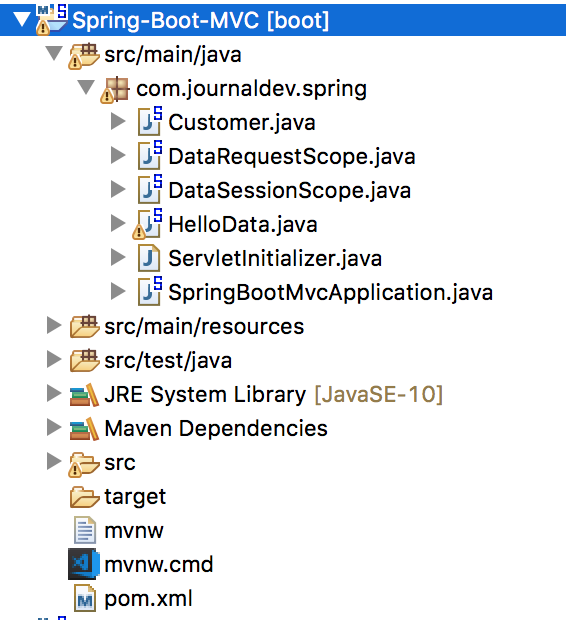
ServletInitializer and SpringBootMvcApplication are auto generated spring boot classes. We don't need to make any changes there. Here is my pom.xml file, have a look at the dependencies for our application. Your pom.xml file might be slightly different based on the Eclipse version you are using.
 1<?xml version="1.0" encoding="UTF-8"?>
 2<project xmlns="https://maven.apache.org/POM/4.0.0" xmlns:xsi="https://www.w3.org/2001/XMLSchema-instance"
 3    xsi:schemaLocation="https://maven.apache.org/POM/4.0.0 https://maven.apache.org/xsd/maven-4.0.0.xsd">
 4    <modelVersion>4.0.0</modelVersion>
 5
 6    <groupId>com.journaldev.spring</groupId>
 7    <artifactId>Spring-Boot-MVC</artifactId>
 8    <version>0.0.1-SNAPSHOT</version>
 9    <packaging>war</packaging>
10
11    <name>Spring-Boot-MVC</name>
12    <description>Spring Beans Scope MVC</description>
13
14    <parent>
15    	<groupId>org.springframework.boot</groupId>
16    	<artifactId>spring-boot-starter-parent</artifactId>
17    	<version>2.0.2.RELEASE</version>
18    	<relativePath/> <!-- lookup parent from repository -->
19    </parent>
20
21    <properties>
22    	<project.build.sourceEncoding>UTF-8</project.build.sourceEncoding>
23    	<project.reporting.outputEncoding>UTF-8</project.reporting.outputEncoding>
24    	<java.version>10</java.version>
25    </properties>
26
27    <dependencies>
28    	<dependency>
29    		<groupId>org.springframework.boot</groupId>
30    		<artifactId>spring-boot-starter-web</artifactId>
31    	</dependency>
32
33    	<dependency>
34    		<groupId>org.springframework.boot</groupId>
35    		<artifactId>spring-boot-starter-tomcat</artifactId>
36    		<scope>provided</scope>
37    	</dependency>
38    	<dependency>
39    		<groupId>org.springframework.boot</groupId>
40    		<artifactId>spring-boot-starter-test</artifactId>
41    		<scope>test</scope>
42    	</dependency>
43    </dependencies>
44
45    <build>
46    	<plugins>
47    		<plugin>
48    			<groupId>org.springframework.boot</groupId>
49    			<artifactId>spring-boot-maven-plugin</artifactId>
50    		</plugin>
51    	</plugins>
52    </build>
53
54</project>
让我们创建一些春季组件,并将它们配置为春季豆类,以请求和会话为范围。
Spring Bean 请求范围
 1package com.journaldev.spring;
 2
 3import org.springframework.context.annotation.Scope;
 4import org.springframework.context.annotation.ScopedProxyMode;
 5import org.springframework.stereotype.Component;
 6
 7@Component
 8@Scope(value = "request", proxyMode = ScopedProxyMode.TARGET_CLASS)
 9public class DataRequestScope {
10
11    private String name = "Request Scope";
12
13    public DataRequestScope() {
14    	System.out.println("DataRequestScope Constructor Called");
15    }
16
17    public String getName() {
18    	return name;
19    }
20
21    public void setName(String name) {
22    	this.name = name;
23    }
24}
Spring Bean 會議範圍
 1package com.journaldev.spring;
 2
 3import org.springframework.context.annotation.Scope;
 4import java.time.LocalDateTime;
 5import org.springframework.context.annotation.ScopedProxyMode;
 6import org.springframework.stereotype.Component;
 7
 8@Component
 9@Scope(value = "session", proxyMode = ScopedProxyMode.TARGET_CLASS)
10public class DataSessionScope {
11
12    private String name = "Session Scope";
13
14    public DataSessionScope() {
15    	System.out.println("DataSessionScope Constructor Called at "+LocalDateTime.now());
16    }
17
18    public String getName() {
19    	return name;
20    }
21
22    public void setName(String name) {
23    	this.name = name;
24    }
25}
春季组件
现在,让我们创建一个春节组件,并使用春节自动配置豆子上方。
 1package com.journaldev.spring;
 2
 3import org.springframework.beans.factory.annotation.Autowired;
 4import org.springframework.stereotype.Component;
 5
 6@Component
 7public class Customer {
 8
 9    @Autowired
10    private DataRequestScope dataRequestScope;
11
12    @Autowired
13    private DataSessionScope dataSessionScope;
14
15    public DataRequestScope getDataRequestScope() {
16    	return dataRequestScope;
17    }
18
19    public void setDataRequestScope(DataRequestScope dataRequestScope) {
20    	this.dataRequestScope = dataRequestScope;
21    }
22
23    public DataSessionScope getDataSessionScope() {
24    	return dataSessionScope;
25    }
26
27    public void setDataSessionScope(DataSessionScope dataSessionScope) {
28    	this.dataSessionScope = dataSessionScope;
29    }
30
31}
春天休息控制器
最后,让我们创建一个 RestController 类,并为我们的测试目的配置一些 API 终点。
 1package com.journaldev.spring;
 2
 3import org.springframework.beans.factory.annotation.Autowired;
 4import org.springframework.web.bind.annotation.RequestMapping;
 5import org.springframework.web.bind.annotation.RestController;
 6
 7@RestController
 8public class HelloData {
 9
10    @Autowired
11    private Customer customer;
12
13    @RequestMapping("/nameRS")
14    public String helloRS() {
15    	return customer.getDataRequestScope().getName();
16    }
17
18    @RequestMapping("/nameSSUpdated")
19    public String helloSSUpdated() {
20    	customer.getDataSessionScope().setName("Session Scope Updated");
21    	return customer.getDataSessionScope().getName();
22    }
23
24    @RequestMapping("/nameSS")
25    public String helloSS() {
26    	return customer.getDataSessionScope().getName();
27    }
28}
春季启动会话时限配置
最后,我们必须配置春季启动会话时间变量,在src/main/resources/application.properties中添加以下属性。
1server.session.cookie.max-age= 1
2server.session.timeout= 1
现在我们的春豆与会话范围将在一分钟内无效。只需运行SpringBootMvcApplication类作为春天启动应用程序。
12018-05-23 17:02:25.830 INFO 6921 --- [main] s.w.s.m.m.a.RequestMappingHandlerMapping : Mapped "{[/nameRS]}" onto public java.lang.String com.journaldev.spring.HelloData.helloRS()
22018-05-23 17:02:25.831 INFO 6921 --- [main] s.w.s.m.m.a.RequestMappingHandlerMapping : Mapped "{[/nameSSUpdated]}" onto public java.lang.String com.journaldev.spring.HelloData.helloSSUpdated()
32018-05-23 17:02:25.832 INFO 6921 --- [main] s.w.s.m.m.a.RequestMappingHandlerMapping : Mapped "{[/nameSS]}" onto public java.lang.String com.journaldev.spring.HelloData.helloSS()
春豆请求范围测试
打开任何浏览器,转到 URL https://localhost:8080/nameRS 并检查控制台输出. 您应该看到 DataRequestScope Constructor Called 在每个请求上打印。
Spring Bean 会话范围测试
Go to https://localhost:8080/nameSS and you would get following output. 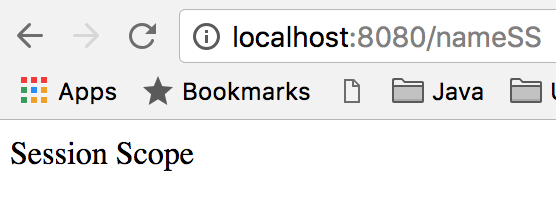 Now go to
 https://localhost:8080/nameSSUpdated so that DataSessionScope name value is updated to Session Scope Updated. 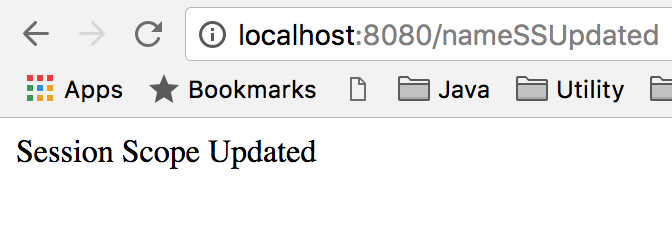 Now again go to
 https://localhost:8080/nameSS and you should see the updated value. 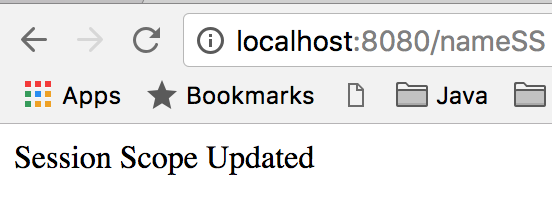 By this time, you should see
 DataSessionScope Constructor Called at XXX only once in the console output. Now wait for 1 minute so that our session scoped bean is invalidated. Then again go to https://localhost:8080/nameSS and you should see the original output. Also you should check console message for creation of DataSessionScope again by the container.  That's all for spring beans scope tutorial.
您可以从我们的 GitHub 存储库下载 Spring Beans Scope Spring Boot 项目。