介绍
学习 React 的常见方法是使用 create-react-app,这是启动任何 React 项目的轻量级方法,但为了达到特定目的,有时需要从头开始配置您的应用程序。
步骤1 - 设置项目
在您开始之前,请确保您的计算机上安装了编辑器和终端,此外,您还需要安装版本的 Node.js with npm。
在我们开始编写任何代码之前,让我们创建一个新的目录,我们的项目将留在那里. 在您的计算机上的任何位置,在您的终端中运行以下操作:
1mkdir webpack-babel-react-starter
2cd webpack-babel-react-starter
我们需要用package.json文件初始化我们的项目,因为我们将安装一些对安装至关重要的软件包。
1yarn init -y
<$>[注] **注:**对于本教程,我们将使用wire作为我们的包管理器。如果您正在使用npm,请确保运行相应的命令 <$>
步骤 2 – 设置 Webpack
Webpack 是网页开发中最受欢迎的包装程序之一,在处理您的应用程序时内部构建了 依赖图。 该图表描绘了您项目所需的每个模块,并生成了一个或多个包装。 自 4.0.0 版本以来,webpack 不需要配置文件来组合您的项目;然而,它可以配置以更好地满足您的需求。
让我们通过运行来安装它:
1yarn add webpack --dev
我们还需要安装 webpack CLI:
1yarn add webpack-cli --dev
安装这两个包后,你会注意到一个新的添加到我们的项目,我们的package.json文件中的node_modules和dev Dependencies部分。
接下来要做的是将您刚刚安装的webpack添加到package.json文件中。
1"scripts": {
2  "build": "webpack --mode production"
3}
在此时刻,你不需要一个配置文件来开始。
步骤三:建立巴比伦
现代 JavaScript 是用 ES6 或 ES7 编写的,但并非每个浏览器都能理解这一点. 在这里,我们需要 Babel 来为我们做重大的照明。 Babel 是一个工具链,主要用于将 ECMAScript 2015+ 代码转换为当前和较旧的浏览器或环境中对 JavaScript 的反向兼容版本。
React 组件大多是用 ES6 编写的,具有导入、类和其他 ES6+ 功能的概念,而旧的浏览器无法理解。Webpack 本身不知道如何将 ES6 代码转换或转换为 ES5 代码。
在我们开始使用 babel-loader 之前,我们需要安装一些包,并设置 babel 预设 `env',它将针对我们想要转载的特定 JavaScript 版本。
让我们安装所有依赖:
1yarn add @babel/core @babel/preset-env @babel/preset-react babel-loader --dev
我们还需要设置我们的 Babel config 文件,在根目录中创建一个名为 `.babelrc’的新文件,并写下以下配置:
1{
2  "presets": ["@babel/env", "@babel/react"]
3}
此配置将确保 Babel 将我们的 React 代码,即 JSX 和任何其他 ES6+ 代码转换到 ES5 代码。
在 root 目录中创建一个 webpack.config.js 文件,并为其写下列配置:
 1module.exports = {
 2  module: {
 3    rules: [
 4      {
 5        test: /.(js|jsx)$/,
 6        exclude: /node_modules/,
 7        use: {
 8          loader: "babel-loader"
 9        }
10      }
11    ]
12  }
13}
对于每个具有.js或.jsx扩展的文件,不包括node_modules文件夹及其内容,Webpack 使用 babel-loader 将 ES6 代码转移到 ES5。
有了这一点,让我们开始写我们的React组件。
步骤 4 – 设置 React
我们将创建一个 React 组件,该组件会渲染一个文本和一个按钮,但为了使用 React,我们需要安装一些依赖:‘react’和‘react-dom’。
1yarn add react react-dom
安装后,在根目录中创建一个新的文件夹,让我们把它叫做src,然后在里面创建一个index.js文件。
在 index.js 文件中,写下以下代码:
 1import React from "react";
 2import ReactDOM from "react-dom";
 3
 4const Index = () => {
 5  return (
 6    <div className="full-screen">
 7      <div>
 8        <h1>
 9          React Page {" "}
10        </h1>
11        <br />
12        <a
13          className="button-line"
14          href="https://github.com/deityhub"
15          target="_blank"
16        >
17          Know more
18        </a>
19      </div>
20    </div>
21  );
22};
23
24export default Index;
现在是时候测试一下了,再次打开终端并运行:
1yarn run build
你会看到一个由Webpack为我们创建的dist文件夹,里面将是一个index.js文件,其中我们有我们的ES5代码的缩小版本。在我们在package.json中的构建脚本中,我们在webpack命令后指定了一个--模式生产旗帜;这使得Webpack生成我们的ES5代码的缩小版本。
输出显示我们的代码工作,但我们希望我们的转录代码在我们的浏览器中可见。
步骤 5 – 将 React 组件连接到 DOM
我们需要设置一个HTML文件,以便我们的React组件可以在DOM上渲染。
1yarn add html-webpack-plugin --dev
调整您的webpack.config.js文件看起来像这样:
 1const path = require("path");
 2const HtmlWebpackPlugin = require("html-webpack-plugin");
 3
 4module.exports = {
 5  entry: path.join(__dirname, "src", "index.js"),
 6  output: {
 7    path: path.join(__dirname, "build"),
 8    filename: "bundle.js"
 9  },
10  module: {
11    rules: [
12      {
13        test: /.(js|jsx)$/,
14        exclude: /node_modules/,
15        use: {
16          loader: "babel-loader"
17        }
18      }
19    ]
20  },
21  plugins: [
22    new HtmlWebpackPlugin({
23      filename: "index.html",
24      template: path.join(__dirname, "src", "index.html")
25    })
26  ]
27};
我们正在调整输入和输出,以便我们对文件的命名和目标有更大的控制权。
下一步是创建一个 HTML 文件在src文件夹中;让我们称它为index.html,然后添加以下代码:
 1<!DOCTYPE html>
 2<html>
 3  <head>
 4    <meta charset="utf-8" />
 5    <meta http-equiv="X-UA-Compatible" content="IE=edge" />
 6    <title>React, Webpack, Babel Starter Pack</title>
 7    <meta name="viewport" content="width=device-width, initial-scale=1" />
 8  </head>
 9  <body>
10    <noscript> You need to enable JavaScript to run this app. </noscript>
11    <!-- your react app will render here -->
12    <div id="app"></div>
13  </body>
14</html>
由于我们位于src目录中,让我们对我们的 React 组件做一些调整。 首先,创建一个新的组件文件夹,然后在这个文件夹中添加两个文件app.js和app.scss。
在 ./src/index.js 中:
1import React from "react";
2import ReactDOM from "react-dom";
3import App from "./components/app";
4
5ReactDOM.render(<App />, document.getElementById("app"));
在 `./src/components/app.js 中
 1import React from "react";
 2import "./app.scss";
 3
 4const App = () => {
 5  return (
 6    <div className="full-screen">
 7      <div>
 8        <h1>
 9          React Page {" "}
10        </h1>
11        <br />
12        <a
13          className="button-line"
14          href="https://github.com/deityhub"
15          target="_blank"
16        >
17          Know more now
18        </a>
19      </div>
20    </div>
21  );
22};
23
24export default App;
在 ./src/components/app.scss 中:
  1body {
  2  background: linear-gradient(253deg, #0cc898, #1797d2, #864fe1);
  3  background-size: 300% 300%;
  4  -webkit-animation: Background 25s ease infinite;
  5  -moz-animation: Background 25s ease infinite;
  6  animation: Background 25s ease infinite;
  7}
  8
  9.full-screen {
 10  position: fixed;
 11  top: 0;
 12  right: 0;
 13  bottom: 0;
 14  left: 0;
 15//you need to setup file-loader in webpack before you can use images
 16  background: url("../../assests/image/background.png");
 17  background-size: cover;
 18  background-position: center;
 19  width: 100%;
 20  height: 100%;
 21  display: -webkit-flex;
 22  display: flex;
 23  -webkit-flex-direction: column;
 24  //_ works with row or column_
 25
 26  flex-direction: column;
 27  -webkit-align-items: center;
 28  align-items: center;
 29  -webkit-justify-content: center;
 30  justify-content: center;
 31  text-align: center;
 32}
 33
 34h1 {
 35  color: #fff;
 36  font-family: "Open Sans", sans-serif;
 37  font-weight: 800;
 38  font-size: 4em;
 39  letter-spacing: -2px;
 40  text-align: center;
 41  text-shadow: 1px 2px 1px rgba(0, 0, 0, 0.6);
 42
 43  &:after {
 44    display: block;
 45    color: #fff;
 46    letter-spacing: 1px;
 47    font-family: "Poiret One", sans-serif;
 48    content: "React project powered by webpack and babel with support for sass";
 49    font-size: 0.4em;
 50    text-align: center;
 51  }
 52}
 53
 54.button-line {
 55  font-family: "Open Sans", sans-serif;
 56  text-transform: uppercase;
 57  letter-spacing: 2px;
 58  background: transparent;
 59  border: 1px solid #fff;
 60  color: #fff;
 61  text-align: center;
 62  font-size: 1.4em;
 63  opacity: 0.8;
 64  padding: 20px 40px;
 65  text-decoration: none;
 66  transition: all 0.5s ease;
 67  margin: 0 auto;
 68  display: block;
 69
 70  &:hover {
 71    opacity: 1;
 72    background-color: #fff;
 73    color: grey;
 74  }
 75}
 76
 77@-webkit-keyframes Background {
 78  0% {
 79    background-position: 0% 50%;
 80  }
 81  50% {
 82    background-position: 100% 50%;
 83  }
 84  100% {
 85    background-position: 0% 50%;
 86  }
 87}
 88
 89@-moz-keyframes Background {
 90  0% {
 91    background-position: 0% 50%;
 92  }
 93  50% {
 94    background-position: 100% 50%;
 95  }
 96  100% {
 97    background-position: 0% 50%;
 98  }
 99}
100
101@keyframes Background {
102  0% {
103    background-position: 0% 50%;
104  }
105  50% {
106    background-position: 100% 50%;
107  }
108  100% {
109    background-position: 0% 50%;
110  }
111}
在我们运行我们的代码来测试它之前,我们需要配置我们的Webpack,以便它知道如何处理任何.css或.scss文件通过它。
1yarn add css-loader sass-loader mini-css-extract-plugin node-sass --dev
在这里安装的sass-loader被Webpack用来将我们的.scss转换为浏览器理解的.css文件,并在帽子下使用node-sass来实现这一点。然后mini-css-extract-plugin将我们所有的CSS文件抽象成一个CSS文件,而不是Webpack提供的正常行为,即将您的CSS文件与最终的.js输出文件结合起来,然后在运行代码时将CSS注入到您的渲染HTML输出中。
打开 Webpack 配置文件并调整您的代码看起来像这样:
 1const path = require("path");
 2const HtmlWebpackPlugin = require("html-webpack-plugin");
 3const MiniCssExtractPlugin = require("mini-css-extract-plugin");
 4
 5module.exports = {
 6  entry: path.join(__dirname, "src", "index.js"),
 7  output: {
 8    path: path.join(__dirname, "build"),
 9    filename: "bundle.js"
10  },
11  module: {
12    rules: [
13      {
14        test: /.(js|jsx)$/,
15        exclude: /node_modules/,
16        use: {
17          loader: "babel-loader"
18        }
19      },
20      {
21        test: /.(css|scss)$/,
22        use: [MiniCssExtractPlugin.loader, "css-loader", "sass-loader"]
23      }
24    ]
25  },
26  plugins: [
27    new HtmlWebpackPlugin({
28      filename: "index.html",
29      template: path.join(__dirname, "src", "index.html")
30    }),
31    new MiniCssExtractPlugin({
32      filename: "[name].css",
33      chunkFilename: "[id].css"
34    })
35  ]
36};
<$>[注] 注: Webpack 配置文件中的加载器的顺序很重要,因为 Webpack 会从右向左处理加载器。
现在让我们安装webpack dev服务器,这将为我们创建一个开发服务器,并监控我们的文件在开发过程中发生的任何变化。
1yarn add webpack-dev-server --dev
然后打开package.json文件,并在脚本标签中进行以下调整:
1"scripts": {
2    "start": "webpack --mode development",
3    "dev": "webpack-dev-server --mode development --open",
4    "build": "webpack --mode production"
5  }
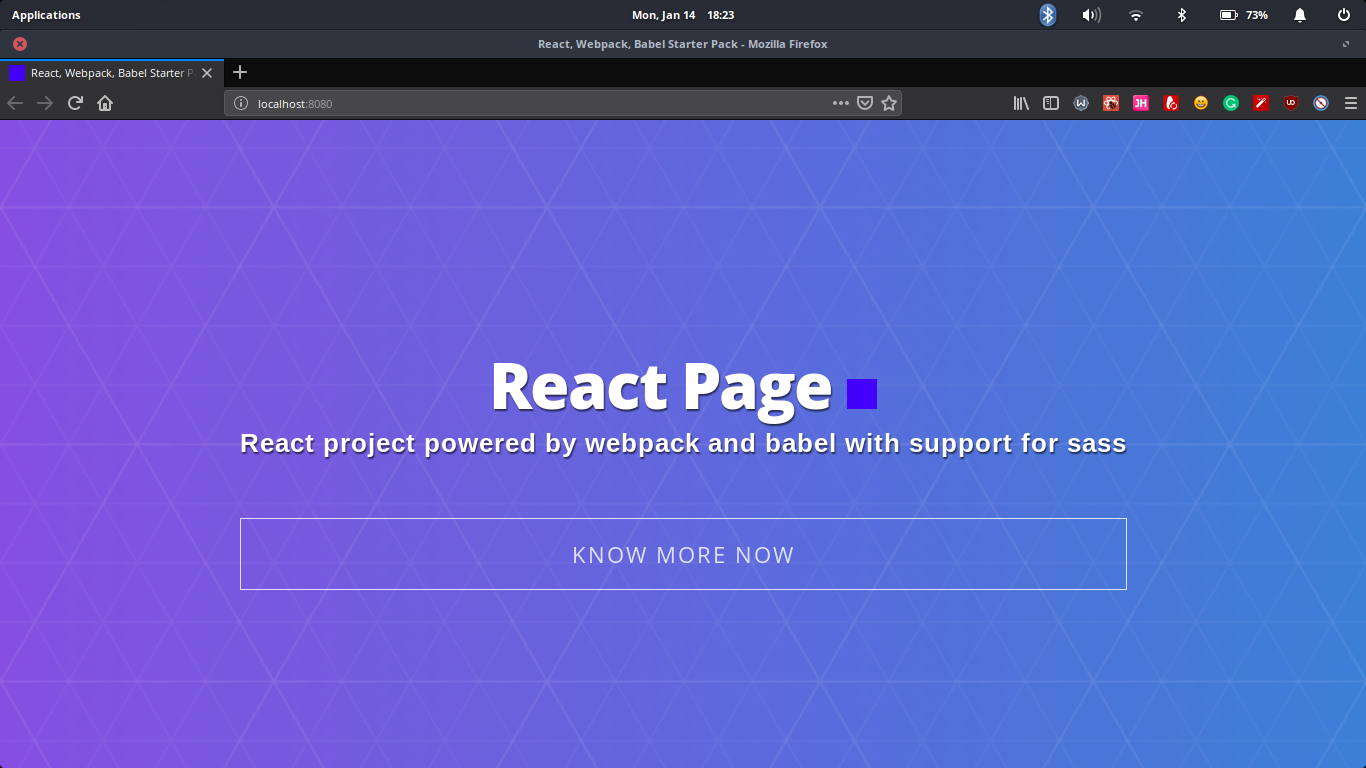
让我们通过运行yarn run dev来测试我们的代码。
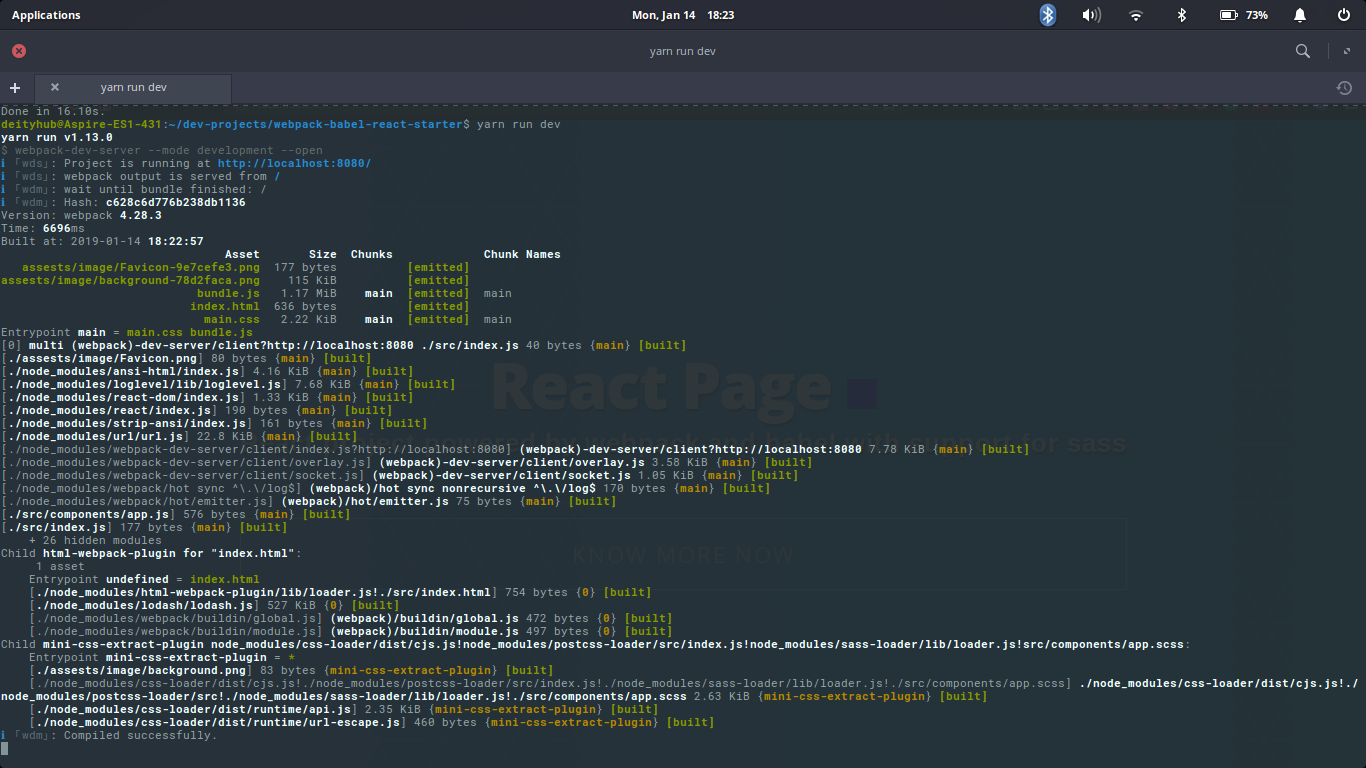
你会在你的浏览器中看到这样的东西:
步骤6 - 扩展功能
现在,让我们向该项目添加两项功能,以证明您可以在比这项更先进的 React 项目上工作时可以扩展或添加更多功能。
打开您的终端并安装这些包:
1yarn add file-loader @babel/plugin-proposal-class-properties --dev
‘file-loader’ 将处理我们想要导入图像或 SVG 的所有场景,而 @babel/plugin-proposal-class-properties 将处理 React 类组件和静态类属性。
在「webpack.config.js」中,將它調整為這樣:
 1const path = require("path");
 2const HtmlWebpackPlugin = require("html-webpack-plugin");
 3const MiniCssExtractPlugin = require("mini-css-extract-plugin");
 4
 5module.exports = {
 6  entry: path.join(__dirname, "src", "index.js"),
 7  output: {
 8    path: path.join(__dirname, "build"),
 9    filename: "bundle.js"
10  },
11  module: {
12    rules: [
13      {
14        test: /.(js|jsx)$/,
15        exclude: /node_modules/,
16        use: {
17          loader: "babel-loader"
18        }
19      },
20      {
21        test: /.(css|scss)$/,
22        use: [MiniCssExtractPlugin.loader, "css-loader", "sass-loader"]
23      },
24      {
25        test: /.(jpg|jpeg|png|gif|mp3|svg)$/,
26        use: [
27          {
28            loader: "file-loader",
29            options: {
30              name: "[path][name]-[hash:8].[ext]"
31            }
32          }
33        ]
34      }
35    ]
36  },
37  plugins: [
38    new HtmlWebpackPlugin({
39      filename: "index.html",
40      template: path.join(__dirname, "src", "index.html")
41    }),
42    new MiniCssExtractPlugin({
43      filename: "[name].css",
44      chunkFilename: "[id].css"
45    })
46  ]
47};
在 .babelrc 文件中,也调整它看起来像这样:
1{
2  "presets": ["@babel/env", "@babel/react"],
3  "plugins": ["@babel/plugin-proposal-class-properties"]
4}
最后,运行yarn run dev,确保一切都以风格工作。
结论
有了这个作为您的React应用程序的基础,您可以扩展配置并从中构建一些东西. 如果您陷入困境,请检查 GitHub 链接到完整的代码。