今天,我们将使用 @MultipartConfig 注释和 javax.servlet.http.Part 查看 Servlet 3 文件上传示例. 有一段时间我写了一篇关于 Servlet 文件上传的文章,我使用了 Apache FileUpload API,但在这里我们将使用 Servlet 3 文件上传功能。
3 檔案上傳
由于文件上传是Web应用中常见的任务,Servlet Specs 3.0为上传文件到服务器提供了额外的支持,我们不必依赖于任何第三方API。
多元化
我们需要注释 File Upload handler servlet 使用 MultipartConfig 注释来处理用于将文件上传到服务器的 multipart/form-data 请求。
- fileSizeThreshold:我们可以指定文件将被写入磁盘的尺寸门槛。 尺寸值为字节,所以1024102410是10 MB
- 位置:文件将被默认存储的目录,默认值是``。
- maxFileSize:允许上传文件的最大尺寸,其值为字节。 默认值是 -1L 意味着无限
- maxRequestSize:允许多部分/形式数据请求的最大尺寸。 默认值是 -1L 意味着无限
阅读有关注释的更多信息在 [Java 注释教程]( / 社区 / 教程 / Java 注释)。
部分接口
Part interface代表一部分或表单项目,它是在多部分/form-data POST 请求中接收的。
HttpServlet请求变更
New methods got added in HttpServletRequest to get all the parts in multipart/form-data request through getParts() method. We can get a specific part using getPart(String partName) method. Let's see a simple project where we will use above API methods to upload file using servlet. Our project structure will look like below image. 
HTML 格式
我们有一个简单的HTML页面,我们可以选择要上传的文件,并向服务器提交请求,以便上传。
 1<html>
 2<head></head>
 3<body>
 4<form action="FileUploadServlet" method="post" enctype="multipart/form-data">
 5Select File to Upload:<input type="file" name="fileName">
 6<br>
 7<input type="submit" value="Upload">
 8</form>
 9</body>
10</html>
文件上传服务器
这里是我们的 File Upload Servlet 实现。 FileUploadServlet.java
 1package com.journaldev.servlet;
 2
 3import java.io.File;
 4import java.io.IOException;
 5
 6import javax.servlet.ServletException;
 7import javax.servlet.annotation.MultipartConfig;
 8import javax.servlet.annotation.WebServlet;
 9import javax.servlet.http.HttpServlet;
10import javax.servlet.http.HttpServletRequest;
11import javax.servlet.http.HttpServletResponse;
12import javax.servlet.http.Part;
13
14@WebServlet("/FileUploadServlet")
15@MultipartConfig(fileSizeThreshold=1024*1024*10, 	// 10 MB
16                 maxFileSize=1024*1024*50,      	// 50 MB
17                 maxRequestSize=1024*1024*100)   	// 100 MB
18public class FileUploadServlet extends HttpServlet {
19
20    private static final long serialVersionUID = 205242440643911308L;
21
22    /**
23     * Directory where uploaded files will be saved, its relative to
24     * the web application directory.
25     */
26    private static final String UPLOAD_DIR = "uploads";
27
28    protected void doPost(HttpServletRequest request,
29            HttpServletResponse response) throws ServletException, IOException {
30        // gets absolute path of the web application
31        String applicationPath = request.getServletContext().getRealPath("");
32        // constructs path of the directory to save uploaded file
33        String uploadFilePath = applicationPath + File.separator + UPLOAD_DIR;
34
35        // creates the save directory if it does not exists
36        File fileSaveDir = new File(uploadFilePath);
37        if (!fileSaveDir.exists()) {
38            fileSaveDir.mkdirs();
39        }
40        System.out.println("Upload File Directory="+fileSaveDir.getAbsolutePath());
41
42        String fileName = null;
43        //Get all the parts from request and write it to the file on server
44        for (Part part : request.getParts()) {
45            fileName = getFileName(part);
46            part.write(uploadFilePath + File.separator + fileName);
47        }
48
49        request.setAttribute("message", fileName + " File uploaded successfully!");
50        getServletContext().getRequestDispatcher("/response.jsp").forward(
51                request, response);
52    }
53
54    /**
55     * Utility method to get file name from HTTP header content-disposition
56     */
57    private String getFileName(Part part) {
58        String contentDisp = part.getHeader("content-disposition");
59        System.out.println("content-disposition header= "+contentDisp);
60        String[] tokens = contentDisp.split(";");
61        for (String token : tokens) {
62            if (token.trim().startsWith("filename")) {
63                return token.substring(token.indexOf("=") + 2, token.length()-1);
64            }
65        }
66        return "";
67    }
68}
请注意使用 @MultipartConfig 注释来指定上传文件的不同大小参数. 我们需要使用请求标题内容分布属性来获得客户端发送的文件名,我们将以相同的名称保存文件。
JSP 回应
一个简单的 JSP 页面,一旦文件被成功上传到服务器后,将作为响应发送给客户端。
 1<%@ page language="java" contentType="text/html; charset=ISO-8859-1"
 2    pageEncoding="ISO-8859-1"%>
 3<!DOCTYPE html PUBLIC "-//W3C//DTD HTML 4.01 Transitional//EN"
 4    "https://www.w3.org/TR/html4/loose.dtd">
 5<html>
 6<head>
 7<title>Upload File Response</title>
 8</head>
 9<body>
10    <%-- Using JSP EL to get message attribute value from request scope --%>
11    <h2>${requestScope.message}</h2>
12</body>
13</html>
部署描述
在 web.xml 文件上传的 servlet 文件中没有什么新鲜事,它只是用来将 index.html 作为欢迎文件。
1<?xml version="1.0" encoding="UTF-8"?>
2<web-app xmlns:xsi="https://www.w3.org/2001/XMLSchema-instance" xmlns="https://java.sun.com/xml/ns/javaee" xsi:schemaLocation="https://java.sun.com/xml/ns/javaee https://java.sun.com/xml/ns/javaee/web-app_3_0.xsd" version="3.0">
3  <display-name>ServletFileUploadExample</display-name>
4  <welcome-file-list>
5    <welcome-file>index.html</welcome-file>
6  </welcome-file-list>
7</web-app>
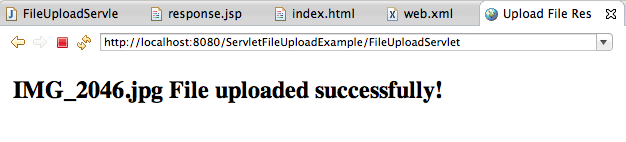
Now when we run the application, we get following pages as response. 
 The logs will show the directory location where file is saved and content-disposition header information.
1Upload File Directory=/Users/pankaj/Documents/workspace/j2ee/.metadata/.plugins/org.eclipse.wst.server.core/tmp0/wtpwebapps/ServletFileUploadExample/uploads
2content-disposition header= form-data; name="fileName"; filename="IMG_2046.jpg"
如果你运行 tomcat 通过命令行,并通过将应用程序导出为 WAR 文件到 webapps 目录中,你会得到不同的结构,但一个清晰的。