介绍
Reactstrap提供预先构建的Bootstrap 4组件,允许大量的灵活性和预先构建的验证。
在本教程中,您将使用Reactstrap在React应用程序中构建登录表格。
前提条件
- Node.js 的本地开发环境 遵循 如何安装 Node.js 并创建本地开发环境。
- 您可以阅读我们的 如何在 React.js 中编码系列
- Bootstrap 4 的一些熟悉。
本教程已通过 Node v16.2.0、npm v7.14.0、react v17.0.2、reactstrap v8.9.0 和 bootstrap v4.6.0 进行验证。
步骤1 - 设置项目
开始使用 create-react-app来生成 React App,然后安装依赖:
1npx create-react-app reactstrap-example
更改到新项目目录:
1cd reactstrap-example
现在,您可以运行 React 应用程序:
1npm start
修复您的项目中的任何错误或问题,并在网页浏览器中访问localhost:3000。
一旦你有一个工作 React 应用程序,你可以安装reactstrap:
1npm install [email protected]
然后,您可以安装bootstrap:
1npm install bootstrap@4
<$>[注] **注:**在使用 Reactstrap 时,重要的是要指定 Bootstrap 的 4.x 版本,以便安装相容版本。
接下来,在您的代码编辑器中打开 src/index.js 文件. 添加以下行以在您的项目中使用 Bootstrap 样式:
1[label src/index.js]
2import 'bootstrap/dist/css/bootstrap.min.css';
在此时刻,你将有一个新的React应用程序,具有Reactstrap和Bootstrap的依赖性。
步骤 2 – 使用表格组件
Reactstrap 允许我们预先构建的表单组件,包括从标准文本输入到更高级的文件上传输入。
首先,从 reactstrap 中导入组件。在这个例子中,我们将导入按钮,表格,FormGroup,输入和标签,直接在我们的登录表格中使用。
1import {
2  Button,
3  Form,
4  FormGroup,
5  Input,
6  Label
7} from 'reactstrap';
现在我们有所需的组件,让我们构建表格。
Reactstrap 包含标识,如类型,名称,ID和位置持有人。
type定义了输入类型,如文件上传、无线电按钮或电子邮件等更具体的文本输入name是将最终发送到我们的后端的关键值对的密钥id是我们在操纵 DOM 时使用的。
在代码编辑器中打开App.js,并添加以下代码行:
 1[label src/App.js]
 2import { Component } from 'react';
 3import {
 4  Button,
 5  Form,
 6  FormGroup,
 7  Input,
 8  Label
 9} from 'reactstrap';
10import './App.css';
11
12class App extends Component {
13  render() {
14    return (
15      <div className="App">
16        <h2>Sign In</h2>
17        <Form className="form">
18          <FormGroup>
19            <Label for="exampleEmail">Username</Label>
20            <Input
21              type="email"
22              name="email"
23              id="exampleEmail"
24              placeholder="[email protected]"
25            />
26          </FormGroup>
27          <FormGroup>
28            <Label for="examplePassword">Password</Label>
29            <Input
30              type="password"
31              name="password"
32              id="examplePassword"
33              placeholder="********"
34            />
35          </FormGroup>
36        <Button>Submit</Button>
37      </Form>
38    </div>
39  );
40}
41
42export default App;
然后,在代码编辑器中打开App.css,并用以下样式取代它:
 1[label App.css]
 2.App {
 3  border: 2px solid #d3d3d3;
 4  border-radius: .5em;
 5  margin-bottom: 1em;
 6  margin-left: auto;
 7  margin-right: auto;
 8  margin-top: 100px;
 9  padding: 1em;
10  text-align: left;
11  width: 600px;
12}
13
14.form {
15  padding: 1em;
16}
17
18label {
19  font-weight: 600;
20}
保存您的更改,并观察您的Web浏览器中的应用程序:
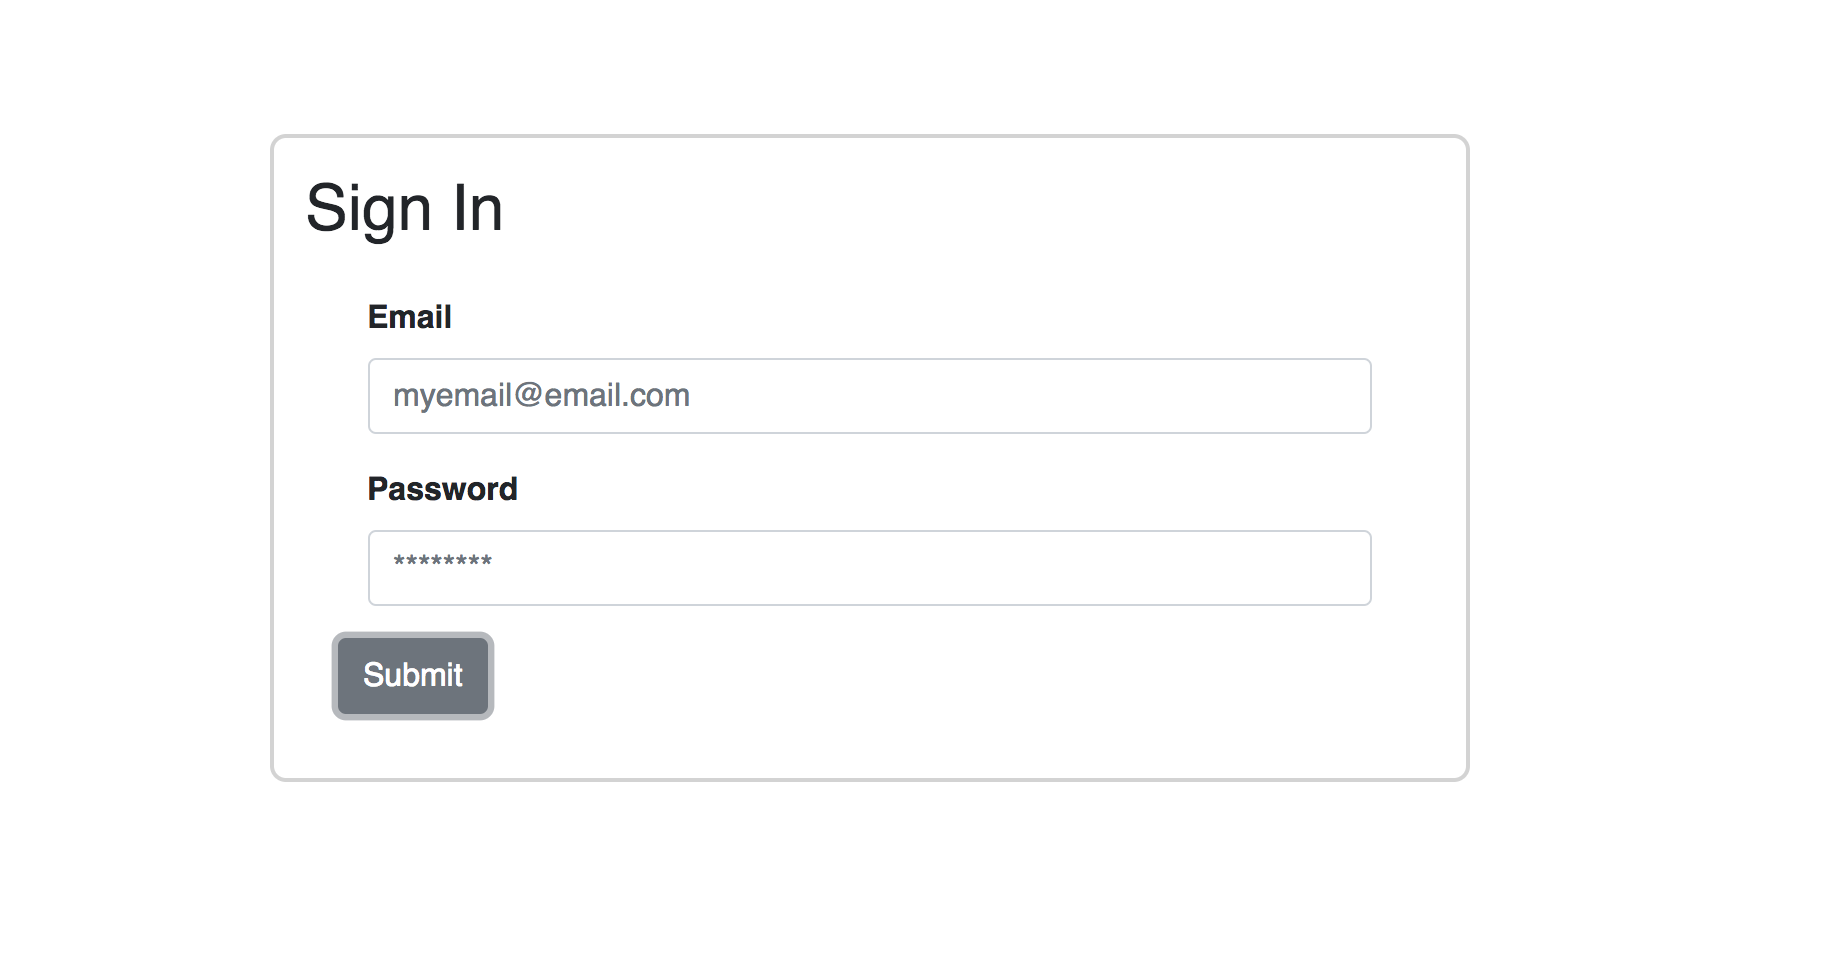
Reactstrap 提供了多种内置的方式来设计我们的表单组件. 以下是可能有用的一些关键项目:
- 颜色:Reactstrap 支持 Bootstrap 的内置颜色,当使用
className’s如has-success - 内线形式:在
<Form>中,我们可以添加<Form inline>以将您的Label和Input放在同一行 - 容器、列和列:
<Col>是 Reactstrap 对 Bootstrap 列的包装。
此时,你有一个 React 应用程序,使用 Bootstrap 样式登录表格。
步骤 3 – 添加验证和用户提示
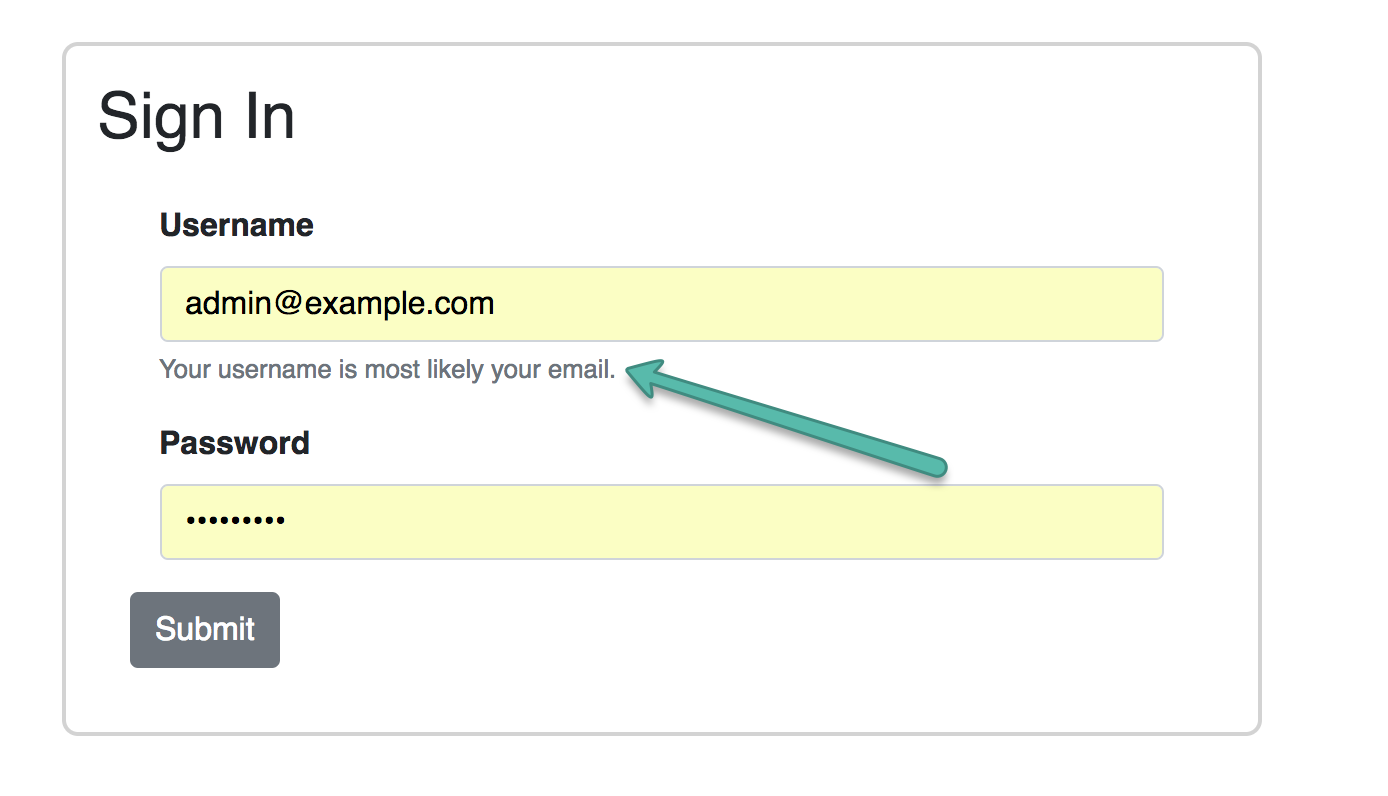
FormText允许我们在字段上方或下方添加额外的指示文本。
在此示例中,用户名字段将预期以电子邮件地址的形式的值。
1<FormText>Your username is most likely your email.</FormText>
保存您的更改,并观察您的Web浏览器中的应用程序:
在将FormFeedback添加到此示例之前,您需要管理状态:
 1constructor(props) {
 2  super(props);
 3  this.state = {
 4    email: '',
 5    validate: {
 6      emailState: '',
 7    },
 8  };
 9}
10
11render() {
12  const { email } = this.state;
13  // ...
14}
并对形式进行更改:
 1constructor(props) {
 2  super(props);
 3  // ...
 4  this.handleChange = this.handleChange.bind(this);
 5}
 6
 7handleChange = (event) => {
 8  const { target } = event;
 9  const value = target.type === 'checkbox' ? target.checked : target.value;
10  const { name } = target;
11
12  this.setState({
13    [name]: value,
14  });
15};
FormFeedback 即时验证字段. 您可以灵活地定制输入验证。 使用 Regex 添加功能来验证onChange 事件的电子邮件,并将有成功或有危险设置为状态。
 1validateEmail(e) {
 2  const emailRegex = /^(([^<>()[\]\\.,;:\s@"]+(\.[^<>()[\]\\.,;:\s@"]+)*)|(".+"))@((\[[0-9]{1,3}\.[0-9]{1,3}\.[0-9]{1,3}\.[0-9]{1,3}\])|(([a-zA-Z\-0-9]+\.)+[a-zA-Z]{2,}))$/;
 3
 4  const { validate } = this.state;
 5
 6  if (emailRegex.test(e.target.value)) {
 7    validate.emailState = 'has-success';
 8  } else {
 9    validate.emailState = 'has-danger';
10  }
11
12  this.setState({ validate });
13}
<$>[warning] 警告: 有标准规格来验证电子邮件地址. 此简化常规表达式仅供教程使用。
若要将此应用于您的输入,请将有效口号添加到您的条件:
1valid={ this.state.validate.emailState === 'has-success' }
和你的无效附件:
1invalid={ this.state.validate.emailState === 'has-danger' }
2/>
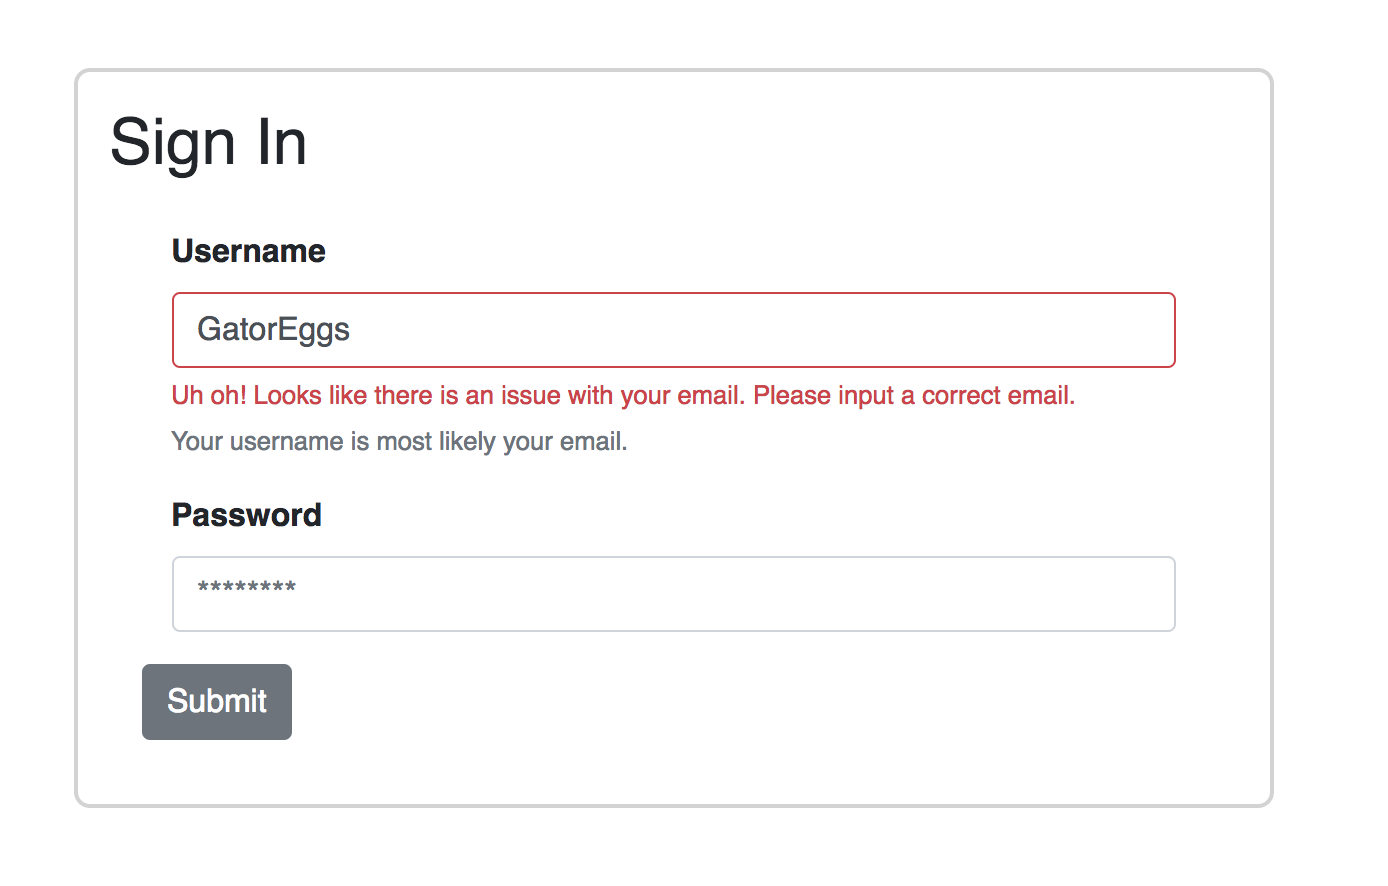
创建一个FormFeedback,以默认显示失败文本:
1<FormFeedback>
2  Uh oh! Looks like there is an issue with your email. Please input a correct email.
3</FormFeedback>
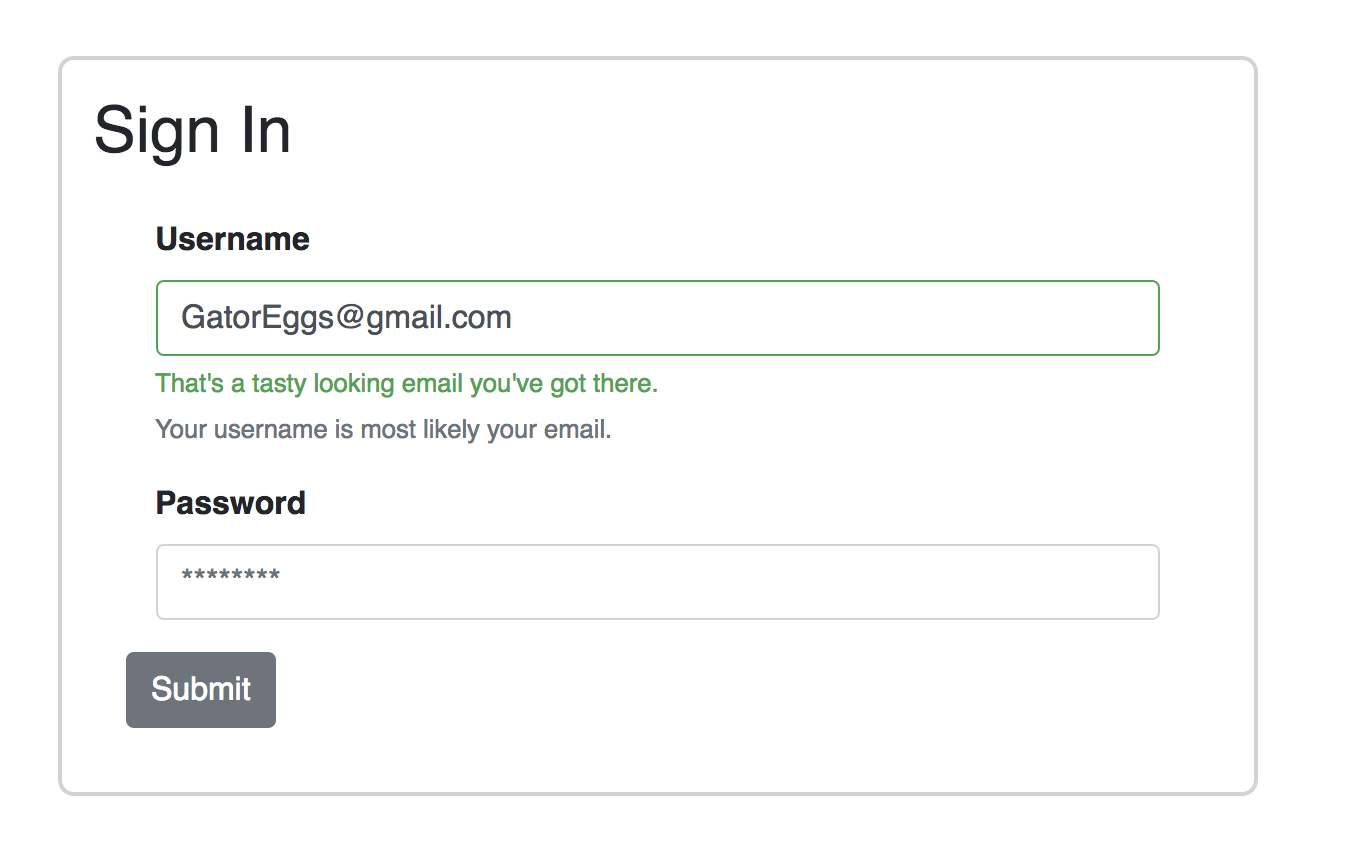
创建第二个FormFeedback以显示成功文本的有效支撑:
1<FormFeedback valid>
2  That's a tasty looking email you've got there.
3</FormFeedback>
然后,将值、验证电子邮件和handleChange添加到您的输入:
 1<Input
 2  type="email"
 3  name="email"
 4  id="exampleEmail"
 5  placeholder="[email protected]"
 6  valid={ this.state.validate.emailState === 'has-success' }
 7  invalid={ this.state.validate.emailState === 'has-danger' }
 8  value={ email }
 9  onChange={ (e) => {
10                      this.validateEmail(e);
11                      this.handleChange(e);
12                    } }
13/>
用户将收到有危险风格的反馈,当他们错误地输入他们的用户名:
当用户正确输入用户名时,用户将收到成功风格的反馈:
现在,您的表单使用FormText,FormFeedback和验证。
步骤4:提交表格
最后,在提交时,我们通常会将数据提交到我们的数据库,但在我们的示例中,我们将使用submitForm函数将电子邮件记录。
1submitForm(e) {
2  e.preventDefault();
3  console.log(`Email: ${ this.state.email }`);
4}
有了所有零件,App.js 将看起来如下:
  1[label src/App.js]
  2import { Component } from 'react';
  3import {
  4  Form,
  5  FormFeedback,
  6  FormGroup,
  7  FormText,
  8  Label,
  9  Input,
 10  Button,
 11} from 'reactstrap';
 12import './App.css';
 13
 14class App extends Component {
 15  constructor(props) {
 16    super(props);
 17    this.state = {
 18      email: '',
 19      password: '',
 20      validate: {
 21        emailState: '',
 22      },
 23    };
 24    this.handleChange = this.handleChange.bind(this);
 25  }
 26
 27  handleChange = (event) => {
 28    const { target } = event;
 29    const value = target.type === 'checkbox' ? target.checked : target.value;
 30    const { name } = target;
 31
 32    this.setState({
 33      [name]: value,
 34    });
 35  };
 36
 37  validateEmail(e) {
 38    const emailRex =
 39      /^(([^<>()[\]\\.,;:\s@"]+(\.[^<>()[\]\\.,;:\s@"]+)*)|(".+"))@((\[[0-9]{1,3}\.[0-9]{1,3}\.[0-9]{1,3}\.[0-9]{1,3}\])|(([a-zA-Z\-0-9]+\.)+[a-zA-Z]{2,}))$/;
 40
 41    const { validate } = this.state;
 42
 43    if (emailRex.test(e.target.value)) {
 44      validate.emailState = 'has-success';
 45    } else {
 46      validate.emailState = 'has-danger';
 47    }
 48
 49    this.setState({ validate });
 50  }
 51
 52  submitForm(e) {
 53    e.preventDefault();
 54    console.log(`Email: ${this.state.email}`);
 55  }
 56
 57  render() {
 58    const { email, password } = this.state;
 59
 60    return (
 61      <div className="App">
 62        <h2>Sign In</h2>
 63        <Form className="form" onSubmit={(e) => this.submitForm(e)}>
 64          <FormGroup>
 65            <Label>Username</Label>
 66            <Input
 67              type="email"
 68              name="email"
 69              id="exampleEmail"
 70              placeholder="[email protected]"
 71              valid={this.state.validate.emailState === "has-success"}
 72              invalid={this.state.validate.emailState === "has-danger"}
 73              value={email}
 74              onChange={(e) => {
 75                this.validateEmail(e);
 76                this.handleChange(e);
 77              }}
 78            />
 79            <FormFeedback>
 80              Uh oh! Looks like there is an issue with your email. Please input
 81              a correct email.
 82            </FormFeedback>
 83            <FormFeedback valid>
 84              That's a tasty looking email you've got there.
 85            </FormFeedback>
 86            <FormText>Your username is most likely your email.</FormText>
 87          </FormGroup>
 88          <FormGroup>
 89            <Label for="examplePassword">Password</Label>
 90            <Input
 91              type="password"
 92              name="password"
 93              id="examplePassword"
 94              placeholder="********"
 95              value={password}
 96              onChange={(e) => this.handleChange(e)}
 97            />
 98          </FormGroup>
 99          <Button>Submit</Button>
100        </Form>
101      </div>
102    );
103  }
104}
105
106export default App;
结论
在本教程中,您使用 Reactstrap 在 React 应用程序中构建登录表格,这允许您使用 Bootstrap 4 元素构建 React 组件。
如果您想了解更多关于 React 的信息,请参阅 我们的 React 主题页面以获取练习和编程项目。