如果你想用 React 创建跨平台移动应用程序,你可能听说过 React Native和 Expo。
总之,Expo可以被认为是一组库和工具,可以轻松访问原生设备功能和自定义用户界面,其中一些例子可能是相机,本地存储,联系人等。
我们将创建一个小型天气应用程序,该应用程序使用Expo与原生位置API进行交互,此外,我们还将在expo.io(https://expo.io)上发布我们的应用程序,以便其他用户与之互动!
要开始,继续创建一个帐户在 expo.io。
安装Expo CLI
我们可以通过在终端中运行以下操作来安装Expo CLI:
请记住,在运行此命令之前,您需要安装 Node.js和 iOS/Android SDK! <$>
1$ npm install expo-cli -g
然后我们可以访问各种命令,我们可以通过键入expo命令来查看包含描述的命令的完整列表。
1$ expo init my-project
2> blank
3
4$ cd my-project
5$ code .
现在Expo将创建一个新的项目,其中包括react,react-native和expoSDK,这意味着我们不需要自己安装React Native。
您还可能被要求此时登录您的Expo帐户,并使用您之前创建的凭证进行登录。
运行我们的项目
我们可以通过预建的npm脚本在iOS或Android上运行空白项目,我们也可以在Google Play/Apple App Store上下载Expo应用程序,以便在真实设备上快速轻松地运行。
让我们开始通过在模拟器上运行我们的应用程序(或两者!):
注意:您需要运行 macOS 的计算机才能在 iOS 模拟器上查看 Expo 应用程序。
1$ npm run ios
2$ npm run android
这将启动 Metro 包装器,本质上是一个 HTTP 服务器,该服务器将我们的代码与 Babel 编译,以瞄准最新的 JavaScript 功能。

如果一切顺利,你会看到屏幕上打开 App.js 开始在你的应用程序上工作! 让我们做同样的事情,但在我们的物理设备上:
- 在您的应用商店下载Expo应用程序
- 打开Expo应用程序并使用您的Expo帐户登录
- 从您的相机应用程序中扫描Metro Bundler页面(或您的终端)左下方的QR代码,当我们运行
npm run ios时打开 - 您的项目应该在Expo应用程序中打开!
如果这不起作用,请尝试切换连接到/从隧道/线路/本地模式。
您的第一個Expo App
我们现在可以继续前进并对我们的博览会应用程序进行更改,从App.js开始,我们将创建一个应用程序来获取用户位置的天气情况。
让我们从 在OpenWeatherMap API上创建帐户开始。
我们可以通过在api/Api.js中创建一个名为Api.js的文件来创建一个API来获取特定纬度和长度的天气:
1const APP_ID = 'YOUR_APP_ID';
2const APP_URL = `http://api.openweathermap.org/data/2.5/weather`;
3
4export const getWeather = async (lat, lon) => {
5    const res = await fetch(`${APP_URL}?lat=${lat}&lon=${lon}&units=metric&APPID=${APP_ID}`);
6    const weatherData = await res.json();
7    return weatherData;
8};
由于我们正在使用Expo,我们可以很容易地获取用户的位置。
 1import { Location, Permissions } from 'expo';
 2
 3// Omitted
 4async _getLocation () {
 5  const { status } = await Permissions.askAsync(Permissions.LOCATION);
 6
 7  if (status !== 'granted') {
 8    this.setState({
 9      error: 'User denied access to location.'
10    });
11  }
12
13  const location = await Location.getCurrentPositionAsync({});
14  this.setState({ location });
15}
在这个阶段,我们可以捕捉当前位置,并在WillMount组件内获取该纬度和长度的天气:
 1import { getWeather } from './api/Api';
 2
 3// Omitted
 4async componentWillMount () {
 5  this.setState({
 6    loading: true
 7  });
 8
 9  await this._getLocation();
10
11  const lat = this.state.location.coords.latitude;
12  const lon = this.state.location.coords.longitude;
13
14  const weatherData = await getWeather(lat, lon);
15
16  this.setState({
17    weatherData,
18    loading: false
19  });
20}
将这一点与我们的渲染视图相结合,使我们能够在App.js中找到以下组件:
1import React from "react";
2import { StyleSheet, Text, View, ImageBackground } from "react-native";
3import { Location, Permissions } from "expo";
4
5import { getWeather } from "./api/Api";
6
7export default class App extends React.Component {
8 state = {
9 weatherData: [],
10 loading: false
11 };
12
13 async componentWillMount() {
14 this.setState({
15 loading: true
16 });
17
18 await this._getLocation();
19
20 const lat = this.state.location.coords.latitude;
21 const lon = this.state.location.coords.longitude;
22
23 const weatherData = await getWeather(lat, lon);
24
25 this.setState({
26 weatherData,
27 loading: false
28 });
29 }
30
31 async _getLocation() {
32 const { status } = await Permissions.askAsync(Permissions.LOCATION);
33
34 if (status !== "granted") {
35 console.error("Not granted! Uh oh. :(");
36 }
37
38 const location = await Location.getCurrentPositionAsync({});
39 this.setState({ location });
40 }
41
42 render() {
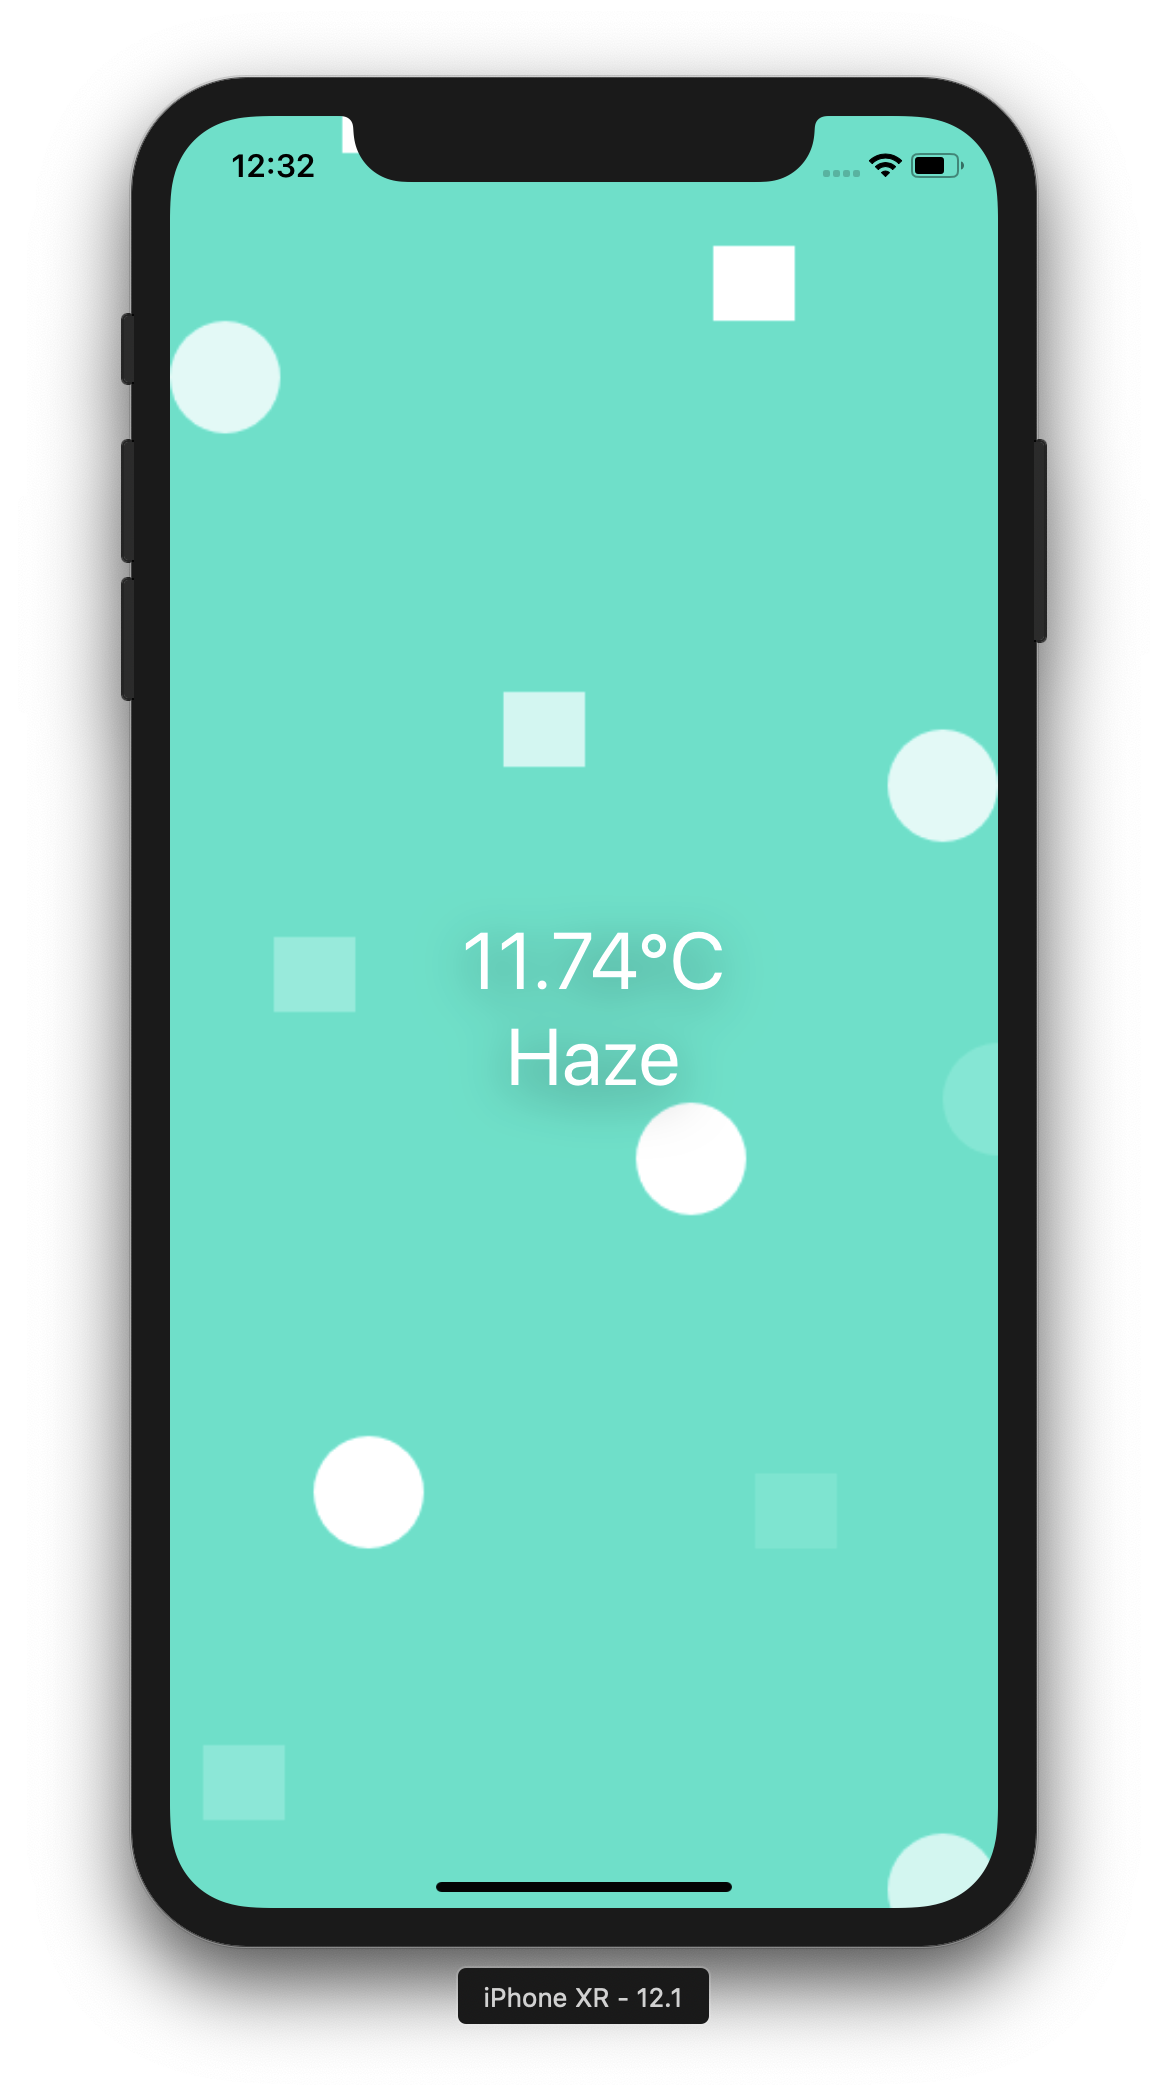
43 const { weather, main } = this.state.weatherData;
44
45 if (this.state.loading) {
46 return (
47 <ImageBackground
48 style={styles.background}
49 source={require("./assets/background.png")}
50 >
51 <View style={styles.container}>
52 <Text style={styles.text}>Loading...</Text>
53 </View>
54 </ImageBackground>
55 );
56 } else {
57 return (
58 <ImageBackground
59 style={styles.background}
60 source={require("./assets/background.png")}
61 >
62 <View style={styles.container}>
63 <View style={styles.weatherCard}>
64 <Text style={styles.text}>{main.temp}°C</Text>
65 <Text style={styles.text}>{weather[0].main}</Text>
66 </View>
67 </View>
68 </ImageBackground>
69 );
70 }
71 }
72}
73
74const styles = StyleSheet.create({
75 container: {
76 flex: 1,
77 alignItems: "center",
78 justifyContent: "center",
79 paddingLeft: 10,
80 color: "white"
81 },
82 background: {
83 width: "100%",
84 height: "100%"
85 },
86 weatherCard: {
87 width: 350,
88 height: 120,
89 borderRadius: 20,
90 shadowOffset: { width: 0, height: 6 },
91 shadowColor: "#000",
92 shadowOpacity: 0.5,
93 shadowRadius: 14,
94 elevation: 13,
95 padding: 10
96 },
97 text: {
98 fontSize: 40,
99 textAlign: "center",
100 color: "white"
101 }
102});
发布您的项目
当您想要发布应用程序时,Expo CLI 可以从终端执行此操作,然后运行以下操作来为 iOS 和 Android 构建:
 1expo publish
 2
 3[00:54:09] Unable to find an existing Expo CLI instance for this directory, starting a new one...
 4[00:54:22] Starting Metro Bundler on port 19001.
 5[00:54:24] Tunnel ready.
 6[00:54:24] Publishing to channel 'default'...
 7[00:54:26] Building iOS bundle
 8[00:54:55] Finished building JavaScript bundle in 28885ms.
 9[00:54:55] Building Android bundle
10[00:55:20] Finished building JavaScript bundle in 24779ms.
11[00:55:20] Analyzing assets
12[00:55:23] Finished building JavaScript bundle in 3504ms.
13[00:55:26] Finished building JavaScript bundle in 2951ms.
14[00:55:26] Uploading assets
15[00:55:27] Uploading /assets/background.png
16[00:55:29] Processing asset bundle patterns:
17[00:55:29] - /Users/paulhalliday/my-project/**/*
18[00:55:29] Uploading JavaScript bundles
19[00:55:41] Published
20[00:55:41] Your URL is https://exp.host/@paulhalliday/my-project
任何有URL的人都可以拿出QR代码并在Expo应用程序中打开应用程序。
如果您想使用相应的.IPA/APK 文件进行更高级的构建,以及更多,请查看 Expo 文档的详细指南。