今天我们将学习关于 python unittest 并通过 python 单元测试示例程序来了解。
Python 单元
Python unittest模块被用来测试一个源代码的单位。假设,你需要测试你的项目。你知道函数会返回什么样的数据。写了巨大的代码后,你需要检查它是否输出是正确的。通常,我们所做的就是打印输出并与参考输出文件匹配,或者手动检查输出。为了减少这种痛苦,Python已经引入了unittest模块。使用这个模块,你可以通过一些简单的代码检查函数的输出。
Python 单元测试示例
首先我们必须写一些代码来单元测试它们. 我们将有一个Python类(/community/tutorials/python-classes-objects)。 该类的主要目的是存储和检索人的名字. 所以,我们写 set_name() 函数来存储数据和 get_name() 函数来检索名称。
 1class Person:
 2    name = []
 3
 4    def set_name(self, user_name):
 5        self.name.append(user_name)
 6        return len(self.name) - 1
 7
 8    def get_name(self, user_id):
 9        if user_id >= len(self.name):
10            return 'There is no such user'
11        else:
12            return self.name[user_id]
13
14if __name__ == '__main__':
15    person = Person()
16    print('User Abbas has been added with id ', person.set_name('Abbas'))
17    print('User associated with id 0 is ', person.get_name(0))
我们将类文件命名为Person.py,上面的代码的输出将如下。
1$ python3.6 Person.py
2User Abbas has been added with id 0
3User associated with id 0 is Abbas
4$
Python 统一结构
现在,让我们来学习如何编码单元测试。通过分类unittest.TestCase来创建一个单个测试盒。通过上级或添加相应的函数,我们可以添加逻辑来测试。
 1import unittest
 2
 3class Testing(unittest.TestCase):
 4    def test_string(self):
 5        a = 'some'
 6        b = 'some'
 7        self.assertEqual(a, b)
 8
 9    def test_boolean(self):
10        a = True
11        b = True
12        self.assertEqual(a, b)
13
14if __name__ == '__main__':
15    unittest.main()
如何运行 python unittest 模块
If you’re using PyCharm IDE, you can simply press ctrl+shift+F10 to run unittest module. Otherwise you can use command prompt to run this module. For example, we named the file for unit-testing as Basic_Test.py. So the command to run python unittest will be: $python3.6 -m unittest Basic_Test.Testing If you want to see the verbose, then the command will be; $python3.6 -m unittest -v Basic_Test.Testing By using the PyCharm, we get the below output. 
Python 单元测试结果和基本功能
這個單位測試有3個可能的結果,以下列為:
- OK: 如果所有测试案例都通过,输出显示OK.
- ** 失败:** 如果任何测试案例都失败并提出了 AssertionError 例外
- ** 错误:** 如果提出了除 AssertionError 以外的任何例外
有几个功能在unittest模块下. 它们在下面列出。
| Method | Checks that |
|---|---|
| assertEqual(a,b) | a==b |
| assertNotEqual(a,b) | a != b |
| assertTrue(x) | bool(x) is True |
| assertFalse(x) | bool(x) is False |
| assertIs(a,b) | a is b |
| assertIs(a,b) | a is b |
| assertIsNot(a, b) | a is not b |
| assertIsNone(x) | x is None |
| assertIsNotNone(x) | x is not None |
| assertIn(a, b) | a in b |
| assertNotIn(a, b) | a not in b |
| assertIsInstance(a, b) | isinstance(a, b) |
| assertNotIsInstance(a, b) | not isinstance(a, b) |
Python单元测试示例
现在是时候为我们的源类人编写单元测试了。在这个类中,我们已经实现了两个函数,即get_name()和set_name()。现在,我们将使用unittest来测试这些函数,所以我们为这两个函数设计了两个测试案例。
 1import unittest
 2
 3# This is the class we want to test. So, we need to import it
 4import Person as PersonClass
 5
 6class Test(unittest.TestCase):
 7    """
 8    The basic class that inherits unittest.TestCase
 9    """
10    person = PersonClass.Person()  # instantiate the Person Class
11    user_id = []  # variable that stores obtained user_id
12    user_name = []  # variable that stores person name
13
14    # test case function to check the Person.set_name function
15    def test_0_set_name(self):
16        print("Start set_name test\n")
17        """
18        Any method which starts with ``test_`` will considered as a test case.
19        """
20        for i in range(4):
21            # initialize a name
22            name = 'name' + str(i)
23            # store the name into the list variable
24            self.user_name.append(name)
25            # get the user id obtained from the function
26            user_id = self.person.set_name(name)
27            # check if the obtained user id is null or not
28            self.assertIsNotNone(user_id)  # null user id will fail the test
29            # store the user id to the list
30            self.user_id.append(user_id)
31        print("user_id length = ", len(self.user_id))
32        print(self.user_id)
33        print("user_name length = ", len(self.user_name))
34        print(self.user_name)
35        print("\nFinish set_name test\n")
36
37    # test case function to check the Person.get_name function
38    def test_1_get_name(self):
39        print("\nStart get_name test\n")
40        """
41        Any method that starts with ``test_`` will be considered as a test case.
42        """
43        length = len(self.user_id)  # total number of stored user information
44        print("user_id length = ", length)
45        print("user_name length = ", len(self.user_name))
46        for i in range(6):
47            # if i not exceed total length then verify the returned name
48            if i < length:
49                # if the two name not matches it will fail the test case
50                self.assertEqual(self.user_name[i], self.person.get_name(self.user_id[i]))
51            else:
52                print("Testing for get_name no user test")
53                # if length exceeds then check the 'no such user' type message
54                self.assertEqual('There is no such user', self.person.get_name(i))
55        print("\nFinish get_name test\n")
56
57if __name__ == '__main__':
58    # begin the unittest.main()
59    unittest.main()
请注意,unittest 模块以其名称顺序执行测试函数,而不是按照它们定义的顺序执行测试函数,并且由于我们希望我们的 set_name 测试先执行,我们将我们的测试案例函数命名为 test_0_set_name 和 test_1_get_name。
Python 单元测试示例输出
Below images show the output produced by our unit test program - both in normal mode and in verbose mode. 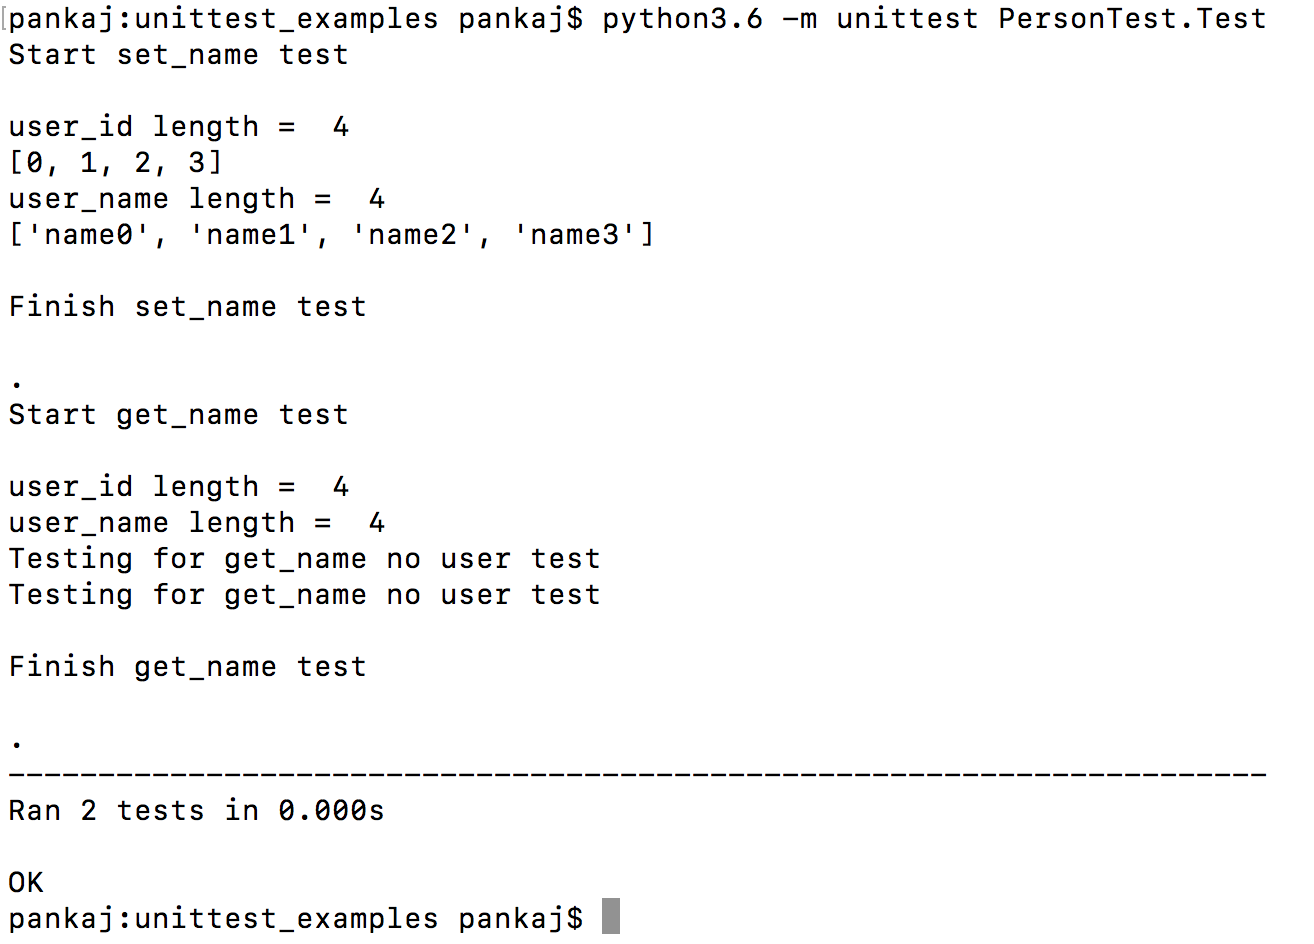
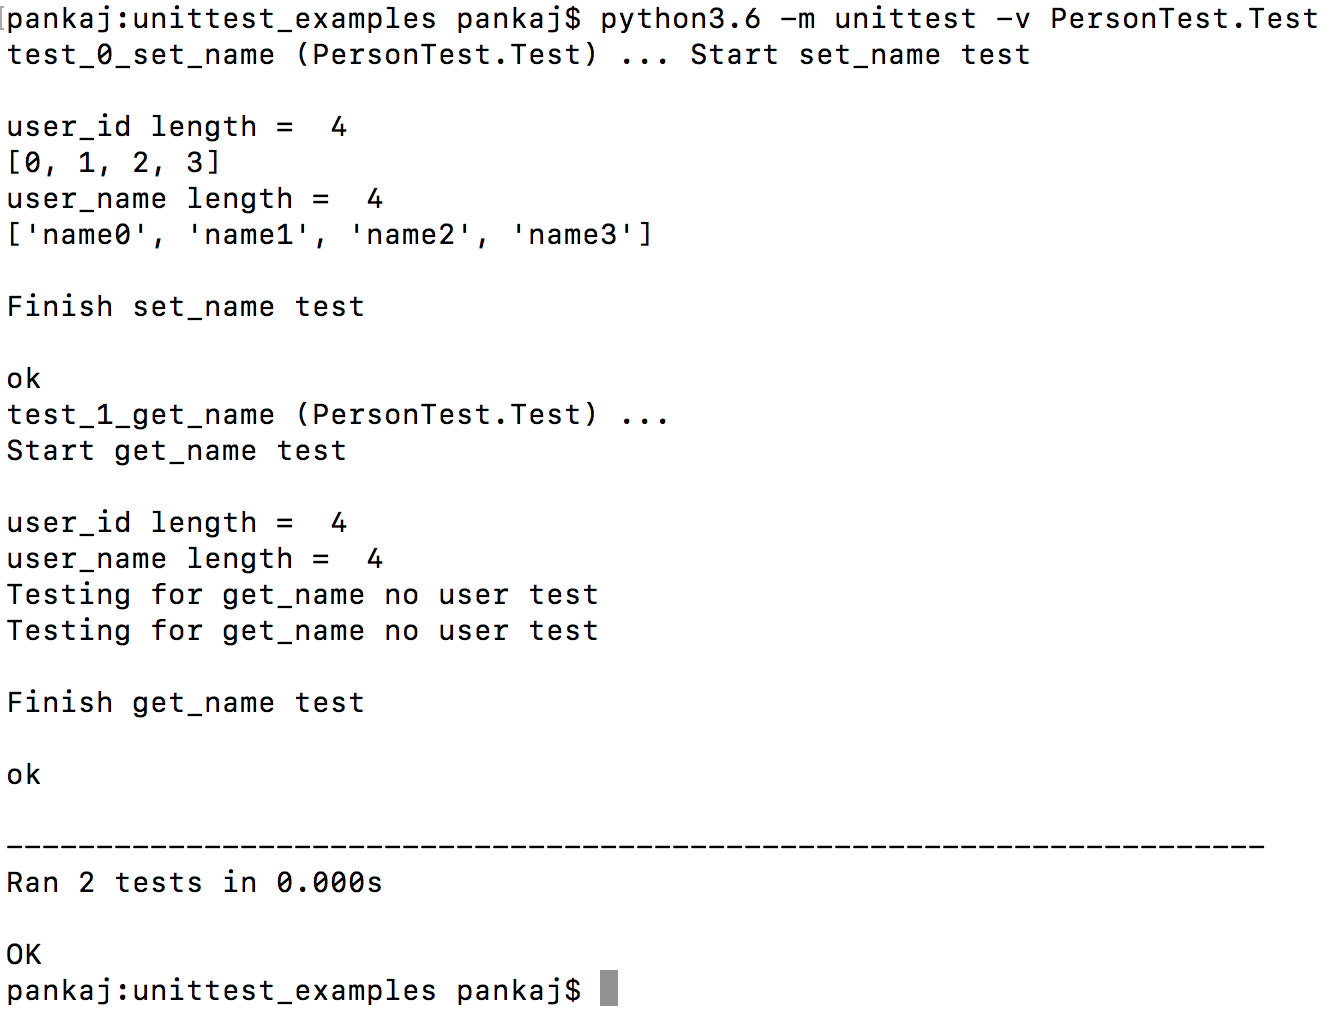
 1$ python3.6 -m unittest -v PersonTest.Test
 2test_0_set_name (PersonTest.Test) ... Start set_name test
 3
 4user_id length =  4
 5[0, 1, 2, 3]
 6user_name length =  4
 7['name0', 'name1', 'name2', 'name3']
 8
 9Finish set_name test
10
11ok
12test_1_get_name (PersonTest.Test) ...
13Start get_name test
14
15user_id length =  4
16user_name length =  4
17Testing for get_name no user test
18Testing for get_name no user test
19
20Finish get_name test
21
22ok
23
24----------------------------------------------------------------------
25Ran 2 tests in 0.000s
26
27OK
28$
这是关于 Python unittest 教程的一切. 要了解更多,请阅读 官方文档。