Hyperapp是一个非常小的微框架,用于构建声明式Web应用程序,大小只有1kB,API类似于React的,完美,对吗?我们将构建一个小型计数应用程序来演示Hiperapp的功能。
新的超级项目
要开始,我们可以创建一个新的 Node 应用程序并安装 hyperapp. 然后我们将使用 parcel服务这个应用程序:
 1# New directory, here we call it `hyper`
 2$ mkdir hyper && cd hyper
 3
 4# Initialise Node project
 5$ npm init -y
 6
 7# Install Hyperapp
 8$ npm i hyperapp
 9
10# Create index.html and app.js
11$ touch index.html
12$ touch app.js
13
14# Install `parcel` globally
15$ npm i parcel -g
16
17# Serve our application in the browser
18$ parcel index.html
然后,我们可以编写一个标准的 index.html 页面,其中包括 app.js,其中包含我们的 hyperapp 代码。
 1<!DOCTYPE html>
 2<html lang="en">
 3<head>
 4  <title>🎉 Hyperapp</title>
 5</head>
 6<body>
 7  <div id="app"></div>
 8  <script src="app.js"></script>
 9</body>
10</html>
构建一个计数
国家驱动的应用程序总是从一个Counter例子开始,这使我们能够习惯于我们的应用程序中的数据流。
1[label app.js]
2const state = {
3  count: 0
4}
然后我们可以根据该状态定义一个视图,可以使用标准模板语法来显示:
1[label app.js]
2// ...
3const view = state => (
4  <div>
5    <h1>{state.count}</h1>
6  </div>
7);
最后,我们可以将此附加到DOM内部的某个特定的元素中,我已经选择将此附加到一个div中,其中有app的id:
1[label app.js]
2// ...
3const el = document.getElementById('app');
4
5const main = app(state, {}, view, el);
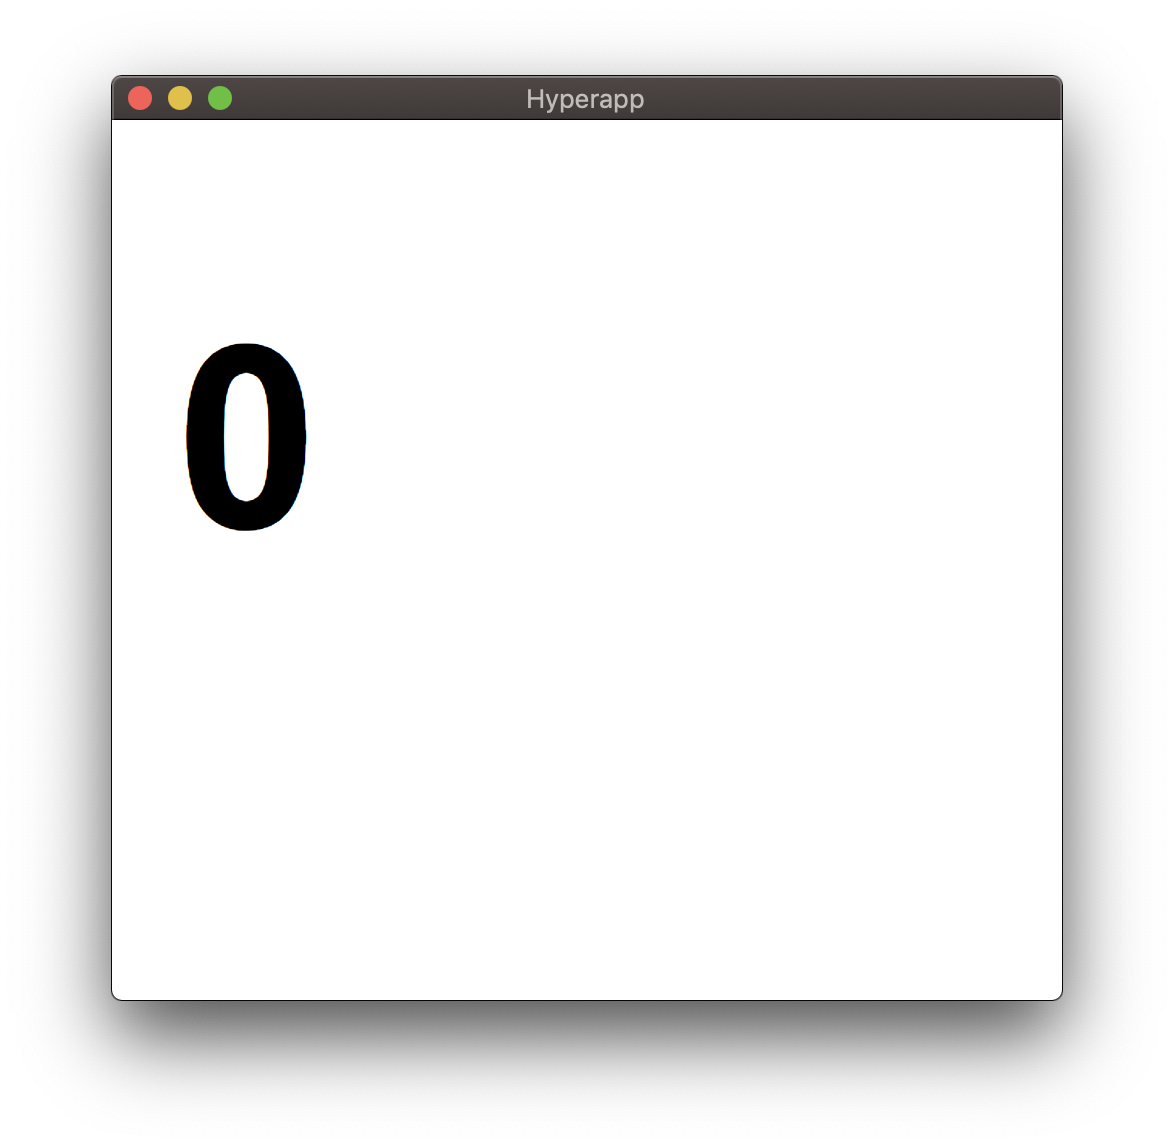
以下是我们的简单应用程序的样子:
由于状态是不可变的,不应该直接更新,我们现在可以添加行动来操纵我们的状态:
1[label app.js]
2// ...
3const actions = {
4  increment: () => state => ({ count: (state.count += 1) }),
5  decrement: () => state => ({ count: (state.count -= 1) })
6};
这可以连接到我们的主要和观点,让它可以访问我们的行动:
 1[label app.js]
 2// ...
 3const view = (state, actions) => (
 4  <div>
 5    <h1>{state.count}</h1>
 6    <button onclick={() => actions.increment()}>Increment</button>
 7    <button onclick={() => actions.decrement()}>Decrement</button>
 8  </div>
 9);
10
11const main = app(state, actions, view, el);
现在,如果我们选择增加或减少,我们会看到总数上升或下降。
如果我们想让这个数字上升或下降?让我们添加这个功能。
首先,我们可以将一个新项目添加到我们的状态对象中,我选择称之为diff,因为这代表了添加或扣除的区别:
1const state = {
2  count: 1,
3  diff: 1
4};
然后,我们可以根据以下情况将我们的行动更新为增加或减少:
1const actions = {
2  updateCount: diff => state => ({ diff: diff }),
3  increment: diff => state => ({ count: (state.count += Number(diff)) }),
4  decrement: diff => state => ({ count: (state.count -= Number(diff)) })
5};
最后,我们可以更新我们的观点:
1const view = (state, actions) => (
2  <div>
3    <input value={state.diff} oninput={e => actions.updateCount(e.target.value)} />
4
5    <h1>{state.count}</h1>
6    <button onclick={() => actions.increment(state.diff)}>Increment</button>
7    <button onclick={() => actions.decrement(state.diff)}>Decrement</button>
8  </div>
9);
现在我们有能力利用输入数据来更新我们的状态。
组件
现在让我们看看我们如何从我们的Hyperapp项目中制作组件,我们将创建一个计数组件,并看看我们如何将其嵌入到页面和路线中。
在components/Count.js创建一个新文件,并添加一个计数器,从props中输入一个计数器:
1[label Count.js]
2import { h } from 'hyperapp';
3
4const Count = ({ count }) => <h1>{count}</h1>;
5
6export default Count;
然后我们可以在app.js 中导入:
1[label app.js]
2import Count from './components/Count';
3
4// ...
然后,我们可以将计数作为附件转移到计数中的视图:
1[label app.js]
2// ...
3const view = () => (state, actions) => (
4  <div>
5    <Count count={state.count} />
6    <button onclick={actions.increment}>Increment</button>
7    <button onclick={actions.decrement}>Decrement</button>
8  </div>
9);
我还更新了我们的状态和行动为简单的增加和减少的计数:
1const state = {
2  count: 0
3};
4
5const actions = {
6  increment: () => ({ count: (state.count += 1) }),
7  decrement: () => ({ count: (state.count -= 1) })
8};
路线
我们还可以利用 Hyperapp 内部的路由器,让我们像这样安装路由器包(@hyperapp/router):
1$ npm i @hyperapp/router
然后我们可以导入``app.js内部的路由组件:
1[label app.js]
2import { Link, Route, location } from '@hyperapp/router';
现在我们可以创建两个不同的页面,主页和博客:
 1[label app.js]
 2// ...
 3const Home = () => (state, actions) => (
 4  <div>
 5    <Count count={state.count} />
 6    <button onclick={actions.increment}>Increment</button>
 7    <button onclick={actions.decrement}>Decrement</button>
 8  </div>
 9);
10
11const Blog = () => <h1>Blog!</h1>;
主页页面包含我们以前的对比示例,而博客页面只是一些文本,让我们将这些分配为路线和链接,并在视图中:
 1[label app.js]
 2// ...
 3const view = state => (
 4  <div>
 5    <ul>
 6      <li>
 7        <Link to="/">Home</Link>
 8      </li>
 9      <li>
10        <Link to="/blog">Blog</Link>
11      </li>
12    </ul>
13
14    <Route path="/" render={Home} />
15    <Route path="/blog" render={Blog} />
16  </div>
17);
接下来,我们需要让路由器访问位置,因为它是基于历史API。
 1[label app.js]
 2const state = {
 3  location: location.state,
 4  count: 0
 5};
 6
 7const actions = {
 8  location: location.actions,
 9  increment: () => state => ({ count: (state.count += 1) }),
10  decrement: diff => state => ({ count: (state.count -= 1) })
11};
最后,我们需要订阅位置本身:
1[label app.js]
2// ...
3const unsubscribe = location.subscribe(main.location);
现在我们能够在我们的应用程序内部选择不同的页面!
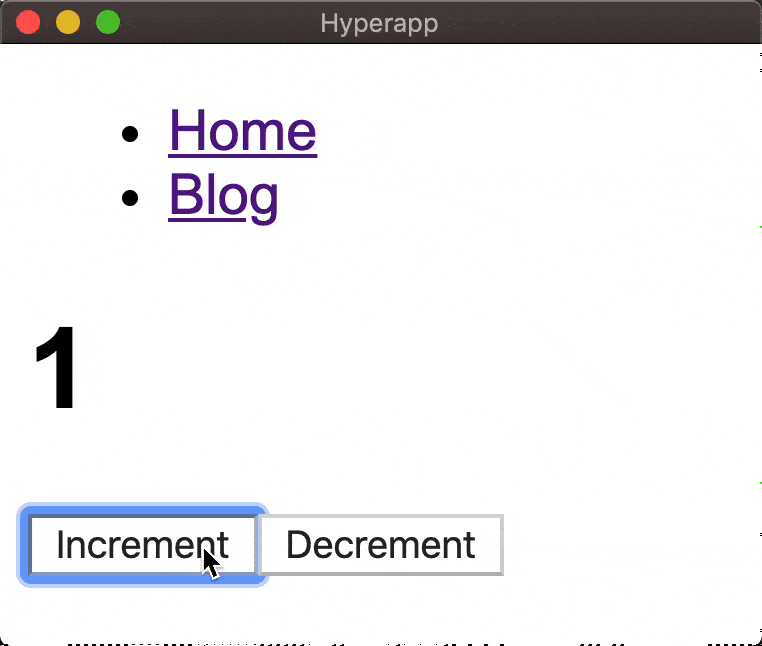
以下是路由示例的完整代码:
 1[label app.js]
 2import { h, app } from 'hyperapp';
 3import { Link, location } from '@hyperapp/router';
 4
 5import Count from './components/Count';
 6
 7const state = {
 8  location: location.state,
 9  count: 0
10};
11
12const actions = {
13  location: location.actions,
14  increment: () => state => ({ count: (state.count += 1) }),
15  decrement: diff => state => ({ count: (state.count -= 1) })
16};
17
18const Home = () => (state, actions) => (
19  <div>
20    <Count count={state.count} />
21    <button onclick={actions.increment}>Increment</button>
22    <button onclick={actions.decrement}>Decrement</button>
23  </div>
24);
25
26const Blog = () => <h1>Blog!</h1>;
27
28const view = state => (
29  <div>
30    <ul>
31      <li>
32        <Link to="/">Home</Link>
33      </li>
34      <li>
35        <Link to="/blog">Blog</Link>
36      </li>
37    </ul>
38
39    <Route path="/" render={Home} />
40    <Route path="/blog" render={Blog} />
41  </div>
42);
43
44const main = app(state, actions, view, document.body);
45
46const unsubscribe = location.subscribe(main.location);
结论
有了這一點,你應該離開賽車! 此外,也留意 Hyperapp 2.0,這應該很快就會出售。