作者选择了 自由和开源基金作为 写给捐款计划的一部分接受捐款。
介绍
end-to-end testing(简称_e2e_)是一个从用户的角度测试应用程序的整个生命周期的过程,在类似于生产的场景中。 此过程通常涉及部署一个脚本以自动导航应用程序的界面,像正常用户一样,测试特定功能和行为。 在 Node.js的开发中,您可以使用 Chrome API Puppeteer]和 JavaScript 测试框架 Jest的组合来自动化e2e测试,允许您确保您的应用程序的用户界面(UI)在修复错误并添加新功能时仍在运作。
在本教程中,你将写一个e2e测试,验证一个样本网页的帐户创建和登录功能的意图。首先,你将写一个基本的Puppeteer脚本打开浏览器并导航到一个测试网页,然后你将配置预设,使浏览器和页面实例在全球范围内可用。接下来,你将克隆mock-auth样本应用程序从GitHub上的DigitalOcean社区存储库(https://github.com/)并本地服务应用程序。这个样本应用程序将为用户提供一个界面来创建一个帐户并登录到该帐户。最后,你将调整你的Puppeteer脚本来填写帐户创建和登录表单并点击提交按钮,然后
<$>[警告] **警告:**网络扫描的道德和合法性是复杂的,并且不断发展。它们也根据您的位置,数据的位置和所涉及的网站而有所不同。本教程扫描了一个本地服务的样本应用程序,该应用程序是专门用于测试扫描应用程序。
前提条件
在您开始本指南之前,您将需要以下内容:
- Node.js 版本 `14.16.0 或更高版本安装在您的计算机上。 要在 macOS 或 Ubuntu 20.04 上安装此功能,请遵循 How To Install Node.js and Create a Local Development Environment on macOS或 Option 2 — Installing Node.js with Apt Using a NodeSource PPA section of How To Install Node.js on Ubuntu 20.04的步骤。
- 安装了 Chrome web browser 的本地桌面环境。 由于本教程中使用的 Puppeteer 脚本不是在无头模式下运行,需要运行测试的桌面环境( _*)
步骤1 - 启动您的测试计划
在此步骤中,您将创建 Node.js 测试程序的目录并安装所需的依赖性。本教程使用三个依赖性,您将使用 Node.js 的默认包管理器 npm安装。
首先,为此项目创建一个文件夹,并导航到该文件夹中。本教程将使用 end-to-end-test-tutorial作为项目的名称:
1mkdir end-to-end-test-tutorial
2cd end-to-end-test-tutorial
您将在此目录中运行所有后续命令。
现在您可以在目录中初始化 npm,以便它可以跟踪您的依赖性。
1npm init
此命令将显示一系列提示,您可以按ENTER按每个提示,或者您可以添加个性化描述。 请确保按ENTER并在提示输入点:和测试命令:时留下默认值。
填写这些提示将为您创建一个package.json文件,该文件将管理您的项目的依赖和一些额外的元数据。
然后,您将被要求保存文件. 键入是并按输入。 npm 将将此输出保存为您的package.json文件。
现在你可以安装你的依赖,你需要这个教程的三个依赖是:
jest:一个单元测试库.puppeteer:通过Chrome Devtools协议的高级抽象 APIjest-puppeteer:一个帮助您使用Puppeteer正确设置 Jest 的包
使用 npm 安装这些依赖:
1npm install --save jest puppeteer jest-puppeteer
当您运行此命令时,它将安装 Jest、Puppeteer、兼容的Chromium浏览器版本和jest-puppeteer库。
<$>[注] 注: 在 Linux 机器上,Puppeteer 可能需要一些额外的依赖性。如果您正在使用 Ubuntu 20.04,请检查 Debian Dependencies dropdown 内部的 Chrome headless 不会在 Puppeteer 故障排除文档的 UNIX部分启动。
1ldd ~/end-to-end-test-tutorial/node_modules/puppeteer/.local-chromium/linux-970485/chrome-linux/chrome | grep not
在此命令中,您正在使用ldd在您的项目安装的Chrome找到程序的依赖,然后点击grep找到所有含有不字的依赖的结果。
安装所需的依赖性之后,您的 package.json 文件将包含这些依赖性作为其 dependencies 的一部分,您可以通过在您偏好的文本编辑器中打开它来验证:
1nano package.json
这会显示一个类似于以下的文件:
 1[label end-to-end-test-tutorial/package.json]
 2{
 3  "name": "end-to-end-test-tutorial",
 4  "version": "1.0.0",
 5  "description": "",
 6  "main": "index.js",
 7  "scripts": {
 8    "test": "echo \"Error: no test specified\" && exit 1"
 9  },
10  "author": "",
11  "license": "ISC",
12  "dependencies": {
13    "jest": "^27.5.1",
14    "jest-puppeteer": "^6.1.0",
15    "puppeteer": "^13.5.0"
16  }
17}
这证实了依赖已经安装。
随着测试程序的启动和依赖设置,您将下一步配置它并添加一个初始的Puppeteer脚本,以确保一切都已正确设置。
步骤 2 – 配置您的测试计划
手动测试网站的方法是使用浏览器浏览网页,点击按钮,滚动网页,并确认每一次交互中都会渲染正确的网页和文本. 这些都是写自动端到端测试所涉及的相同程序:浏览器将计划地打开网页并导航接口,测试库将声称浏览器从网页中获得了预期的行为或输出。 在此步骤中,您将配置Jest和Puppeteer在您的Node.js应用程序中执行这些程序,然后用访问www.google.com的Puppeteer脚本测试配置。
首先,创建几个文件夹,为您的测试应用程序提供结构:
1mkdir actions
2mkdir logs
3mkdir specs
4mkdir utils
该行动文件夹将包含Puppeteer脚本,这些脚本将扫描您的本地网页,specs将保持测试本身,而utils将持有辅助文件,如模糊的凭证生成,尽管在本教程中没有使用,但创建一个日志文件夹是最好的做法,以保持测试结果。
一旦您创建了这些目录,请在您喜爱的编辑器中创建并打开jest.config.js文件:
1nano jest.config.js
将这些配置添加到文件中:
1[label end-to-end-test-tutorial/jest.config.js]
2module.exports = {
3  preset: 'jest-puppeteer',
4  roots: [ 'specs' ],
5};
这是一个 Jest 配置文件,设置为告诉 Jest 使用您所安装的jest-puppeteer库的预设配置,它还指定了specs文件夹作为您将在本教程中稍后写的测试脚本的位置。
然后,从 root 目录中创建并打开 jest-puppeteer.config.js 文件:
1nano jest-puppeteer.config.js
将这些配置添加到文件中:
1[label end-to-end-test-tutorial/jest-puppeteer.config.js]
2module.exports = {
3  launch: {
4    headless: false,
5      args: [ "--window-size=1366,768" ],
6  },
7  browser: 'chromium',
8}
这些配置定义了浏览器将如何打开来测试网页。 headless决定了浏览器是否与接口运行;在这种情况下,您正在配置Puppeteer以在您的桌面环境中打开窗口。 args用于将相关Puppeteer论点传递到浏览器实例。 在这种情况下,您正在使用它来指定打开的浏览器的窗口大小。 最后, browser指定了要使用的浏览器。 对于本教程来说,这是Chromium,但如果您安装了 `puppeteer-firefox',它可能是 [Firefox]。
保存和退出文件。
随着香料文件夹设置为包含所有测试的文件夹,您现在将在该文件夹中创建一个基本的测试文件。
导航到specs文件夹并创建一个users.test.js文件。打开users.test.js文件并添加以下代码来测试应用程序的功能:
 1[label end-to-end-test-tutorial/spec/users.test.js]
 2jest.setTimeout(60000)
 3
 4describe('Basic authentication e2e tests', () => {
 5  beforeAll( async () => {
 6  // Set a definite size for the page viewport so view is consistent across browsers
 7    await page.setViewport( {
 8      width: 1366,
 9      height: 768,
10      deviceScaleFactor: 1
11    } );
12
13    await page.goto('https://www.google.com');
14
15    await page.waitFor(5000);
16    } );
17
18  it( 'Should be truthy', async () => {
19    expect( true ).toBeTruthy();
20  })
21});
在此代码中,您首先使用setTimeout()方法将 Jest 的默认时间限制设置为 60 秒。 Jest 具有默认时间限制为 5 秒,测试必须通过或失败,否则测试会返回错误。
接下来,描述区块组使用描述关键字进行相关测试。在其中,beforeAll脚本允许您在本区块中的每一个测试之前运行特定代码。 它包含代码类似于本测试区块的本地变量,但在所有测试中都是全球性的。 在这里,您正在使用它来将浏览器中打开的页面的视图端设置为在jest-puppeteer.config.js中指定的浏览器大小。 然后,您使用页面对象导航到www.google.com(https://www.google.com)并等待五秒,这样您可以在浏览器关闭后看到页面。
接下来,您创建了一个模糊测试,以验证您所写的脚本是否有效,它检查布尔语的真是否是一个真值,如果一切正常工作,则总是如此。
保存和退出文件。
现在,你需要一个方法来运行测试,看看它是否按预期运行。 打开你的 package.json 文件,并根据以下代码块所示修改 scripts 部分:
 1[label end-to-end-test-tutorial/package.json]
 2{
 3  "name": "Doe's-e2e-test",
 4  "version": "1.0.0",
 5  "description": "An end to end test",
 6  "main": "index.js",
 7  "scripts": {
 8    "e2e": "jest"
 9  },
10  "keywords": [],
11  "author": "John Doe",
12  "license": "MIT"
13}
这将使关键字e2e调用jest命令来运行测试. 文件已保存后,使用以下命令在您的终端运行您的e2e测试:
1npm run e2e
运行此命令后,将打开一个新的浏览器窗口,导航到 Google,然后在控制台上打印以下输出:
 1[secondary_label Output]
 2
 3> jest
 4
 5 PASS specs/users.test.js (13.772s)
 6  Basic authentication e2e tests
 7    √ Should be truthy (3ms)
 8
 9Test Suites: 1 passed, 1 total
10Tests:       1 passed, 1 total
11Snapshots:   0 total
12Time:        14.221s, estimated 16s
13Ran all test suites.
这表明Puppeteer和Jest都正常工作,您现在已经准备好开始为网页撰写测试,但首先,您将设置样本网页,以便您有一个接口来测试。
步骤 3 – 运行样本 Web 界面
在此步骤中,您将从 DigitalOcean Community GitHub 存储库克隆样本应用程序,然后使用 Live Server 开发服务器本地运行它。
<$>[注] **注:**本教程只会从用户的角度检查此样本的用户界面;构建用户界面所需的开发超出了本教程的范围。
首先,打开一个新的终端,并在测试应用程序之外运行以下命令 git:
1git clone https://github.com/do-community/mock-auth.git
此代码包含 HTML, CSS和 JavaScript创建模仿身份验证接口。
接下来,使用以下命令在全球范围内安装 Live Server:
1npm install -g live-server
<$>[note]
**注:**在Ubuntu 20.04 等某些系统上,在全球范围内安装 npm 包可能会导致权限错误,这会中断安装。 由于避免使用sudo在npm install中是安全的最佳做法,您可以通过更改 npm 的默认目录来解决这个问题。
Live Server 是一个轻量级的开发服务器,具有实时重新加载的能力,它将采取你的静态 HTML 页面,并使它们在本地上可用。
接下来,导航到mock-auth样本界面:
1cd mock-auth
然后在本地开发服务器上启动应用程序,使用以下命令:
1live-server
在您的默认浏览器中,将打开一个网页,以http://127.0.0.1:8080,该网页将呈现如下图像:
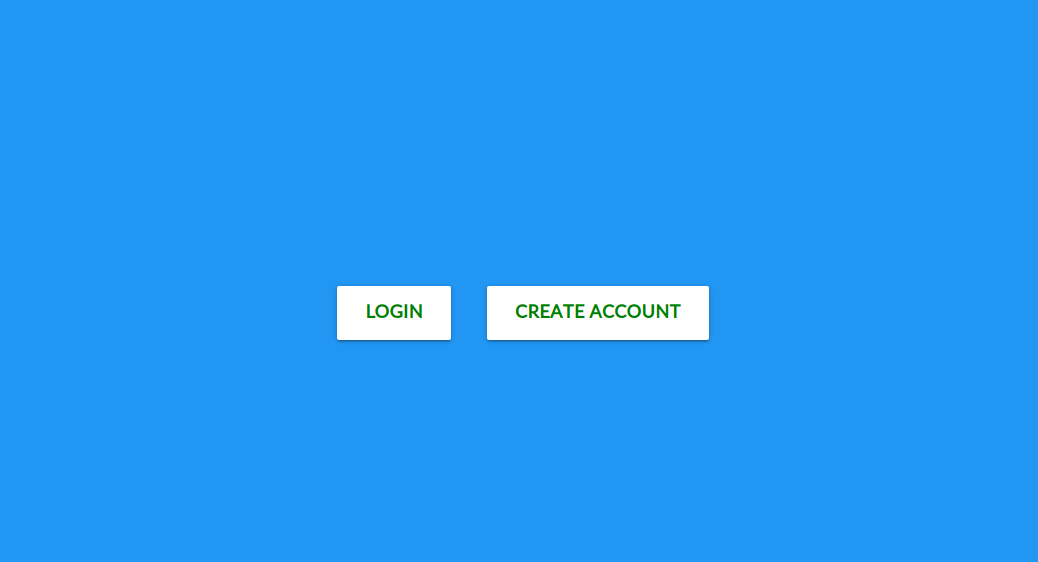
如果您点击 登录按钮,浏览器将加载一个登录表格,其中包含 用户名和 密码的字段。选择 创建帐户按钮将导致您到一个 创建帐户的表格,其中包含 全名, 用户名和 密码的字段。
步骤 4 – 测试帐户创建
当您在网站上创建帐户时,最常见的行为是网站导航您到一个有您的名字和有关新创建帐户的一些相关信息的欢迎页面。 在此步骤中,您将验证样本Web应用程序上的帐户创建页面以这种方式工作。
首先,回到具有测试程序的终端,并创建一个脚本来扫描样本 Web 应用程序的 Create Account 页面。
1nano actions/createAccount.js
打开此文件后,添加以下代码:
 1[label end-to-end-test-tutorial/actions/createAccount.js]
 2const chalk = require( 'chalk' );
 3
 4class createAccount {
 5  constructor( page ) {
 6    this.url = "http://127.0.0.1:8080/"
 7    this.page = page;
 8    this.signupBtn = '#signup';
 9    this.signupBody = '#signupBody';
10    this.fullnameField = '#fullname';
11    this.usernameField = '#username';
12    this.passwordField = '#password';
13    this.loginPageBtn = '#loginBtn';
14    this.signupPageBtn = '#signupBtn';
15  }
16}
17
18module.exports = ( page ) => new createAccount( page );
此片段首先导入‘chalk’模块,后者将用于在终端中格式化错误消息。这不是必要的,但会使您的错误报告更易于读取。接下来,您将创建一个名为‘createAccount’的 类。 构建器会采取一个‘页面’参数,然后为样本 Web 应用程序设置主页 URL,并将对象的属性设置为您的程序将在 DOM上交互的 HTML 元素的 ID 参考。 最后,您的代码将导出一个 函数来创建一个新的‘createAccount’类实例。
接下来,你会将一个注册方法添加到CreateAccount类,这将有助于你在页面上执行各种操作。
 1[label end-to-end-test-tutorial/actions/createAccount.js]
 2...
 3    this.signupPageBtn = '#signupBtn';
 4  }
 5
 6  async signup( fullname, username, password ) {
 7    try {
 8      await this.page.goto( this.url );
 9      await this.page.waitFor( this.signupBtn );
10      await this.page.click( this.signupBtn );
11      // Wait for the signupBody on the signup page to load
12      await this.page.waitFor( this.signupBody );
13
14      // Type the login credentials into the input fields
15      await this.page.type( this.fullnameField, fullname );
16      await this.page.waitFor( 1000 );
17      await this.page.type( this.usernameField, username );
18      await this.page.waitFor( 1000 );
19      await this.page.type( this.passwordField, password );
20      await this.page.waitFor( 1000 );
21
22      // Click then create account button
23      await this.page.click( this.signupPageBtn );
24
25      // Wait for homepage to load
26      await this.page.waitFor( '#firstname' );
27      await this.page.waitFor( 2000 );
28
29      const firstname = await this.page.$eval( '#homeBody #firstname', el =>  el.textContent );
30
31      return firstname;
32    } catch ( err ) {
33      console.log( chalk.red( 'ERROR => ', err ) );
34    }
35  }
36}
37
38module.exports = ( page ) => new createAccount( page );
在这里,您将注册方法声明为 与async关键字无同步。 此函数使用了试用...捕捉(https://developer.mozilla.org/en-US/docs/Web/JavaScript/Reference/Statements/try...catch)块来访问 Web 应用程序的 URL,并通过接口导航。
page.goto(url):导航浏览器到指定 URL.page.waitFor(百分之一秒或元素):延迟在页面上的其他操作,指定的百分之一秒,或直到元素已加载page.click(selector):点击页面上的元素page.type(selector, text):在指定的输入字段中的文本类型page.$eval(selector, callback(element)):选择元素并在其上运行调用函数
使用这些方法,登录函数首先导航页面到基本URL,然后等待登录按钮加载,然后点击此按钮,然后等待登录表单的体内加载。它在各自领域中键入全名、用户名和密码,然后按下登录按钮,然后等待欢迎页面加载。
保存和退出文件。
现在,您将撰写测试来验证帐户创建按预期工作,但在您继续之前,您必须决定使用哪些凭证创建新帐户。
在Utils文件夹中创建一个credentials.js文件:
1nano utils/credentials.js
将以下代码添加到文件中:
 1[label end-to-end-test-tutorial/utils/credentials.js]
 2module.exports = ( user ) => {
 3  let username = `${user}-${Math.random()}`
 4  let password = `${Math.random()}`;
 5  // Make sure both usernames and passwords are strings
 6  username = String( username );
 7  password = String( password );
 8  const fullname = "John Doe"
 9  let credential = { fullname, username, password };
10  return credential;
11}
此代码生成随机用户名、密码和硬代码的全名,然后将生成的凭证作为 JSON 对象返回。
保存并退出Credentials.js。
接下来,导航到specs文件夹,并在编辑器中打开users.test.js文件。
 1[label end-to-end-test-tutorial/specs/users.test.js]
 2let credentials = require( '../utils/credentials' );
 3
 4jest.setTimeout(60000);
 5
 6describe('Basic authentication e2e tests', () => {
 7  let credential;
 8  beforeAll( async () => {
 9  // Set a definite site for the page viewport so view is consistent across browsers
10    await page.setViewport( {
11      width: 1366,
12      height: 768,
13      deviceScaleFactor: 1
14    } );
15
16    credential = credentials( 'User' );
17
18    await page.goto('https://www.google.com');
19
20    await page.waitFor(5000);
21  } );
22
23  it( 'Should be truthy', async () => {
24    expect( true ).toBeTruthy();
25  })
26} );
在这里,您导入了您之前创建的凭证模块,然后创建了一个凭证变量,可用于该块中的所有测试,并使用beforeAll块将生成的凭证分配给该变量,该块在每个测试之前运行。
现在,您可以通过修改代码来编写实际执行验证的测试,如下所示:
 1[label end-to-end-test-tutorial/specs/users.test.js]
 2let credentials = require( '../utils/credentials' );
 3let createAccount = require( '../actions/createAccount' );
 4
 5jest.setTimeout(60000);
 6
 7describe('Basic authentication e2e tests', () => {
 8  let credential;
 9  beforeAll( async () => {
10  // Set a definite site for the page viewport so view is consistent across browsers
11    await page.setViewport( {
12      width: 1366,
13      height: 768,
14      deviceScaleFactor: 1
15    } );
16
17    credential = credentials( 'User' );
18    createAccount = await createAccount( page );
19  } );
20
21  it( 'Should be able to create an account', async () => {
22    const firstname = await createAccount.signup( credential.fullname, credential.username, credential.password );
23    page.waitFor( 1000 );
24    expect( credential.fullname ).toContain( firstname );
25  })
26
27} );
您现在已经导入了createAccount模块,并调用了注册方法,以便在程序导航接口后,在欢迎页面上显示全名。
保存脚本,然后使用npm run e2e命令运行它:
1npm run e2e
Chrome 浏览器将打开并自动创建使用生成的身份证件的帐户.一旦测试完成,以下输出将登录到您的控制台:
 1[secondary_label Output]
 2> jest
 3
 4 PASS specs/users.test.js (28.881s)
 5  Basic authentication e2e tests
 6    √ Should be able to create an account (26273ms)
 7
 8Test Suites: 1 passed, 1 total
 9Tests:       1 passed, 1 total
10Snapshots:   0 total
11Time:        29.087s
12Ran all test suites.
此脚本已经验证了帐户创建过程。
在此步骤中,您写了一本脚本,该脚本会扫描样本 Web 应用程序并自动创建一个帐户. 然后,您声称该过程按照预期运行,为扫描仪脚本写一个单元测试。
步骤5:测试登录过程
此步骤类似于创建帐户步骤,您将首先创建一个网页扫描仪脚本来导航登录页面,然后写一个单元测试以确认功能按预期工作。
首先,在您喜爱的编辑器中创建并打开loginAccount.js文件:
1nano actions/loginAccount.js
然后添加以下代码来穿过登录页面:
 1[label end-to-end-test-tutorial/actions/loginAccount.js]
 2const chalk = require( 'chalk' );
 3
 4class LoginAccount {
 5  constructor( page ) {
 6    this.url = "http://127.0.0.1:8080/"
 7    this.page = page;
 8    this.loginBtn = '#login';
 9    this.loginBody = '#loginBody';
10    this.usernameField = '#username';
11    this.passwordField = '#password';
12    this.loginPageBtn = '#loginBtn';
13  }
14
15  async login( username, password ) {
16    try {
17      await this.page.goto( this.url );
18      await this.page.waitFor( this.loginBtn );
19      await this.page.click( this.loginBtn );
20      // Wait for the loginBody on the login page to load
21      await this.page.waitFor( this.loginBody );
22
23      // Type the login credentials into the input fields
24      await this.page.type( this.usernameField, username );
25      await this.page.waitFor( 1000 );
26
27      await this.page.type( this.passwordField, password );
28      await this.page.waitFor( 1000 );
29
30      await this.page.click( this.loginPageBtn );
31
32      // Wait for homepage to load
33      await this.page.waitFor( '#firstname' );
34      await this.page.waitFor( 2000 );
35
36      const firstname = await this.page.$eval( '#homeBody #firstname', el =>  el.textContent );
37
38      return firstname;
39    } catch ( err ) {
40      console.log( chalk.red( 'ERROR => ', err ) );
41    }
42  }
43}
44
45module.exports = ( page ) => new LoginAccount( page );
这个代码类似于createAccount.js文件. 首先,你创建了一个LoginAccount类,并导出一个函数,该函数将页面对象作为参数。
LoginAccount类具有非同步的登录方法,它将用户名和密码作为参数,并帮助您在页面上执行各种操作。该代码首先导航到您的样本Web应用程序的URL,然后点击加载登录页面的按钮。登录页面已加载后,它填写了输入到登录方法的用户名和密码,然后通过点击登录按钮提交它。如果登录成功,它加载了欢迎页面并返回了第一名,您将通过您的单元测试。
保存和退出文件。
接下来,再次打开你的 users.test.js 文件,并如下修改它:
 1[label end-to-end-test-tutorial/specs/users.test.js]
 2let credentials = require( '../utils/credentials' );
 3let createAccount = require( '../actions/createAccount' );
 4let loginAccount = require( '../actions/loginAccount' );
 5
 6jest.setTimeout(60000);
 7
 8describe('Basic authentication e2e tests', () => {
 9  let credential;
10  beforeAll( async () => {
11  // Set a definite site for the page viewport so view is consistent across browsers
12    await page.setViewport( {
13      width: 1366,
14      height: 768,
15      deviceScaleFactor: 1
16    } );
17
18    credential = credentials( 'User' );
19    createAccount = await createAccount( page );
20    loginAccount = await loginAccount( page );
21  } );
22
23  it( 'Should be able to create an account', async () => {
24    const firstname = await createAccount.signup( credential.fullname,
25    credential.username, credential.password );
26    page.waitFor( 1000 );
27    expect( credential.fullname ).toContain( firstname );
28  })
29
30  it( 'Should be able to log in after a successful account creation', async () => {
31    const firstname = await loginAccount.login( credential.username, credential.password );
32    page.waitFor( 1000 );
33    expect( credential.fullname ).toContain( firstname );
34  } );
35
36} );
在此代码中,您导入了loginAccount模块,该模块被称为页面上的网页扫描函数,然后创建了一个新的测试声明,如果 Login页面上的名称包含在生成的凭证中。
保存文件,然后从终端运行npm run e2e:
1npm run e2e
网络扫描仪将打开一个浏览器,导航到登录页面,然后输入身份证,然后测试脚本将运行,以确定网络扫描仪是否进入了欢迎页面。
以下内容将登录到终端:
 1[secondary_label Output]
 2> jest
 3
 4 PASS specs/users.test.js (48.96s)
 5  Basic authentication e2e tests
 6    √ Should be able to create an account (21534ms)
 7    √ Should be able to log in after a successful account creation (12899ms)
 8
 9Test Suites: 1 passed, 1 total
10Tests:       2 passed, 2 total
11Snapshots:   0 total
12Time:        52.426s
13Ran all test suites.
这表明成功登录的测试顺利通过,但测试尚未完成;程序仍需要能够处理未成功的登录尝试。
如果提供了错误的用户名和密码组合,则会出现一个警告提示,并显示消息 ** 错误的用户名或密码已输入**. 要测试警告框消息,您可以在页面对象上听到一个对话事件(https://andsky.com/tech/tutorials/understanding-events-in-javascript)。
要执行此操作,请修改users.test.js脚本,如下所示:
 1[label end-to-end-test-tutorial/specs/users.test.js]
 2let credentials = require( '../utils/credentials' );
 3let createAccount = require( '../actions/createAccount' );
 4let loginAccount = require( '../actions/loginAccount' );
 5
 6jest.setTimeout(60000);
 7
 8describe('Basic authentication e2e tests', () => {
 9  let credential;
10  beforeAll( async () => {
11  // Set a definite site for the page viewport so view is consistent across browsers
12    await page.setViewport( {
13      width: 1366,
14      height: 768,
15      deviceScaleFactor: 1
16    } );
17
18    credential = credentials( 'User' );
19    createAccount = await createAccount( page );
20    loginAccount = await loginAccount( page );
21  } );
22
23  it( 'Should be able to create an account', async () => {
24    const firstname = await createAccount.signup( credential.fullname, credential.username, credential.password );
25    page.waitFor( 1000 );
26    expect( credential.fullname ).toContain( firstname );
27  })
28
29  it( 'Should be able to log in after a successful account creation', async () => {
30    const firstname = await loginAccount.login( credential.username,
31    credential.password );
32    page.waitFor( 1000 );
33    expect( credential.fullname ).toContain( firstname );
34  } );
35
36  it( 'Should not login on wrong credentials', async () => {
37    try {
38      page.on( 'dialog', dialog => {
39        expect( dialog.message() ).toBe( 'Invalid username or password inputted' );
40        dialog.accept();
41      });
42
43      await page.goto( 'http://127.0.0.1:8080/login.html' );
44      await page.type( '#username', 'username' );
45      await page.type( '#password', 'password' );
46      await page.click( '#loginBtn' );
47      await page.waitFor(5000) //Wait for the dialog to accept the prompt before proceeding
48
49    } catch(err){
50      console.log("An error occured while trying to login => ", err)
51    }
52  })
53
54} );
在此代码中,您已添加了一个新的声明,在执行任何页面交互之前先为对话事件设置一个事件倾听器。
接下来,代码导航到login.html页面,输入用户名和密码作为凭证,因为这些凭证与您创建帐户时输入的凭证不匹配,这会导致一个错误,这会触发您的声明正在等待的对话框。
保存您的 users.test.js 文件并运行测试:
1npm run e2e
接下来,注意所有测试都通过:
 1[secondary_label Output]
 2 PASS specs/users.test.js (25.736 s)
 3  Basic authentication e2e tests
 4    ✓ Should be able to create an account (11987 ms)
 5    ✓ Should be able to log in after a successful account creation (8196 ms)
 6    ✓ Should not login on wrong credentials (5168 ms)
 7
 8Test Suites: 1 passed, 1 total
 9Tests:       3 passed, 3 total
10Snapshots:   0 total
11Time:        25.826 s, estimated 27 s
12Ran all test suites.
这表明样本 Web 应用程序按预期运行。
结论
在本教程中,您使用Puppeteer和Jest为具有帐户创建和登录功能的样本Web应用程序编写自动测试。您配置Puppeteer和Jest一起工作,然后编写脚本导航Web应用程序UI并返回所遇到的HTML元素的值。
端到端测试不仅是测试用户界面的一种有用的方法,您还可以使用它来确定您的Web应用程序中的其他关键功能是否按预期工作。例如,您可以使用 设备模拟和网络转移来在多个设备上运行性能测试。 有关端到端测试的更多信息,请参阅官方文件 Puppeteer和 Jest。