作者选择了 多样性在技术基金作为 写给捐款计划的一部分接受捐款。
介绍
网页开发的一个重要部分是提供用户与某个元素交互时的反馈,这种交互是通过改变 state 来实现的,这表明用户如何在页面上使用或使用某个元素。
在本教程中,您将使用 :hover、 :active 和 :focus 用户操作和 :visited 位置假类类类. 您将使用 <a> 和 <button> 作为教程中的交互元素。 这些元素都具有相似的交互状态,并且在功能上与用户相同。 从开发角度来看, <a> 元素专门用于与 URL 交互,而 <button>' 元素用于触发形式或 [JavaScript](https://www.digitalocean.com/community/tutorial_series/how-to-code-in-javascript)] 函数。 除了与这四种不同的状态一起工作,您还将使用 transition` 属性来动画这些交互状态之间的风格。
前提条件
了解CSS(https://andsky.com/tech/tutorials/how-to-apply-css-styles-to-html-with-cascade-and-specificity)功能和盒子模型(https://andsky.com/tech/tutorials/how-to-work-with-the-box-model-in-css)。
- 了解 类型选择器,组合选择器和选择器组.
- 熟悉 文本布局和 颜色属性功能。
- 在本地计算机上存储的空格HTML文件是index.html,您可以从所选的文本编辑器和Web浏览器访问。 要开始,请参阅我们的【How To Set Up Your HTML Project](https://andsky.com/tech/tutorials/how-to-use-color-values-with-css)教程系列,并遵循【How To Use and Understand HTML Elements](https://andsky.com/tech/tutorials/how-to-use-color-values-with-css)有关浏览器中如何查看HTML的相同说明。 如果您是新
设置初始HTML和CSS
要开始使用链接和按钮,您首先将设置必要的HTML和CSS作为教程的基础,在本节中,您将写出所有必要的HTML和一些初始CSS风格,以处理布局并开始视觉美学。
首先,在文本编辑器中打开index.html,然后将以下突出 HTML 添加到文件中:
1[label index.html]
2<!doctype html>
3<html>
4  <head>
5  </head>
6  <body>
7  </body>
8</html>
接下来,转到<head>标签并添加一个<meta>标签来定义HTML文件的字符集,然后设置页面的标题,添加一个<meta>标签,定义移动设备应该如何渲染页面,最后加载CSS文件以<link>标签。
 1[label index.html]
 2<!doctype html>
 3<html>
 4  <head>
 5    <meta charset="utf-8">
 6    <meta name="viewport" content="width=device-width, initial-scale=1">
 7    <title>Link and Buttons with State</title>
 8    <link rel="stylesheet" href="styles.css">
 9  </head>
10  <body>
11  </body>
12</html>
添加<head>内容后,再转到<body>元素中添加内容,以创建一个信息块,用<a>和<button>标签作为交互元素。
1[label index.html]
2<!doctype html>
3<html>
4 <head>
5 <meta charset="utf-8">
6 <meta name="viewport" content="width=device-width, initial-scale=1">
7 <title>Link and Buttons with State</title>
8 <link rel="stylesheet" href="styles.css">
9 </head>
10 <body>
11 <section>
12 <header>
13 <button class="link" type="button">
14 Close Window
15 </button>
16 </header>
17 <div>
18 <p>
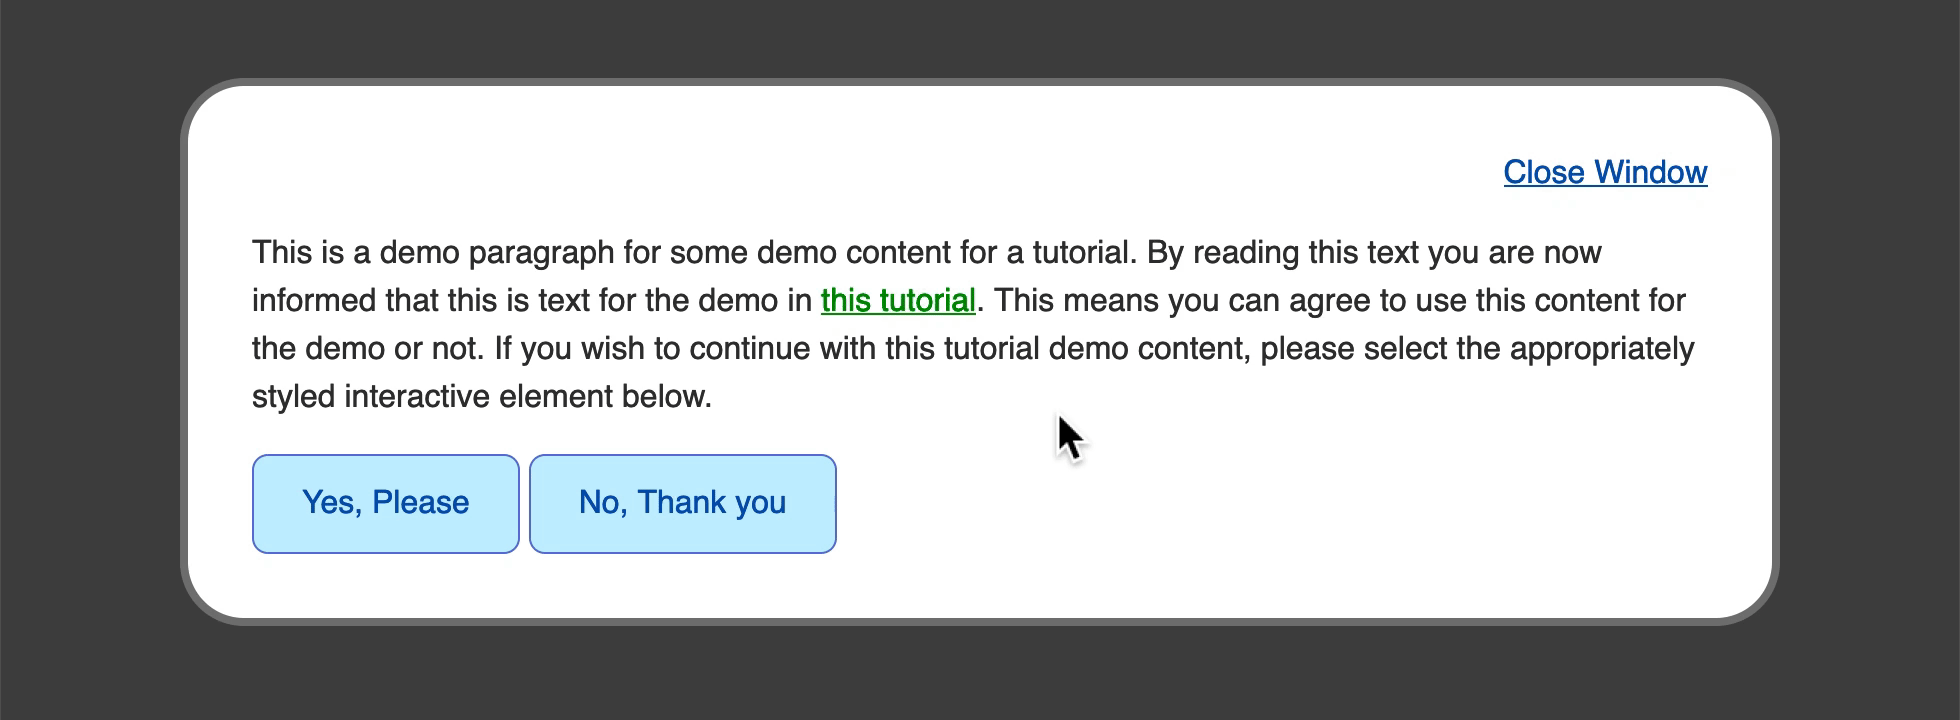
19 This is a demo paragraph for some demo content for a tutorial. By reading this text you are now informed that this is text for the demo in <a href="https://do.co/tutorials">this tutorial</a>. This means you can agree to use this content for the demo or not. If you wish to continue with this tutorial demo content, please select the appropriately styled interactive element below.
20 </p>
21 <div>
22 <button class="button" type="button">
23 Yes, Please
24 </button>
25 <a class="button" href="#">
26 No, Thank you
27 </a>
28 </div>
29 </div>
30 </section>
31 </body>
32</html>
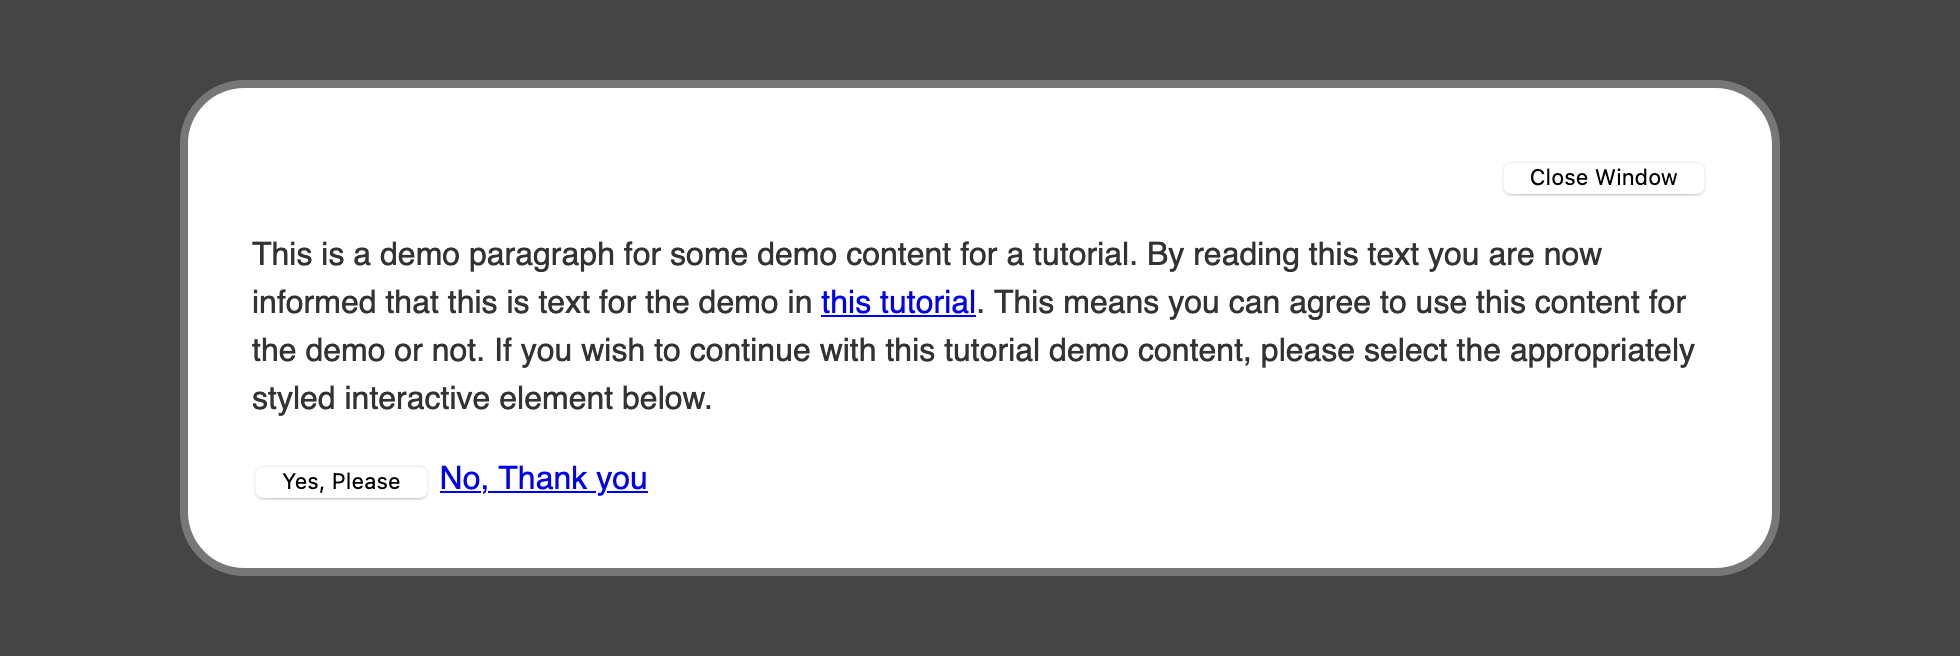
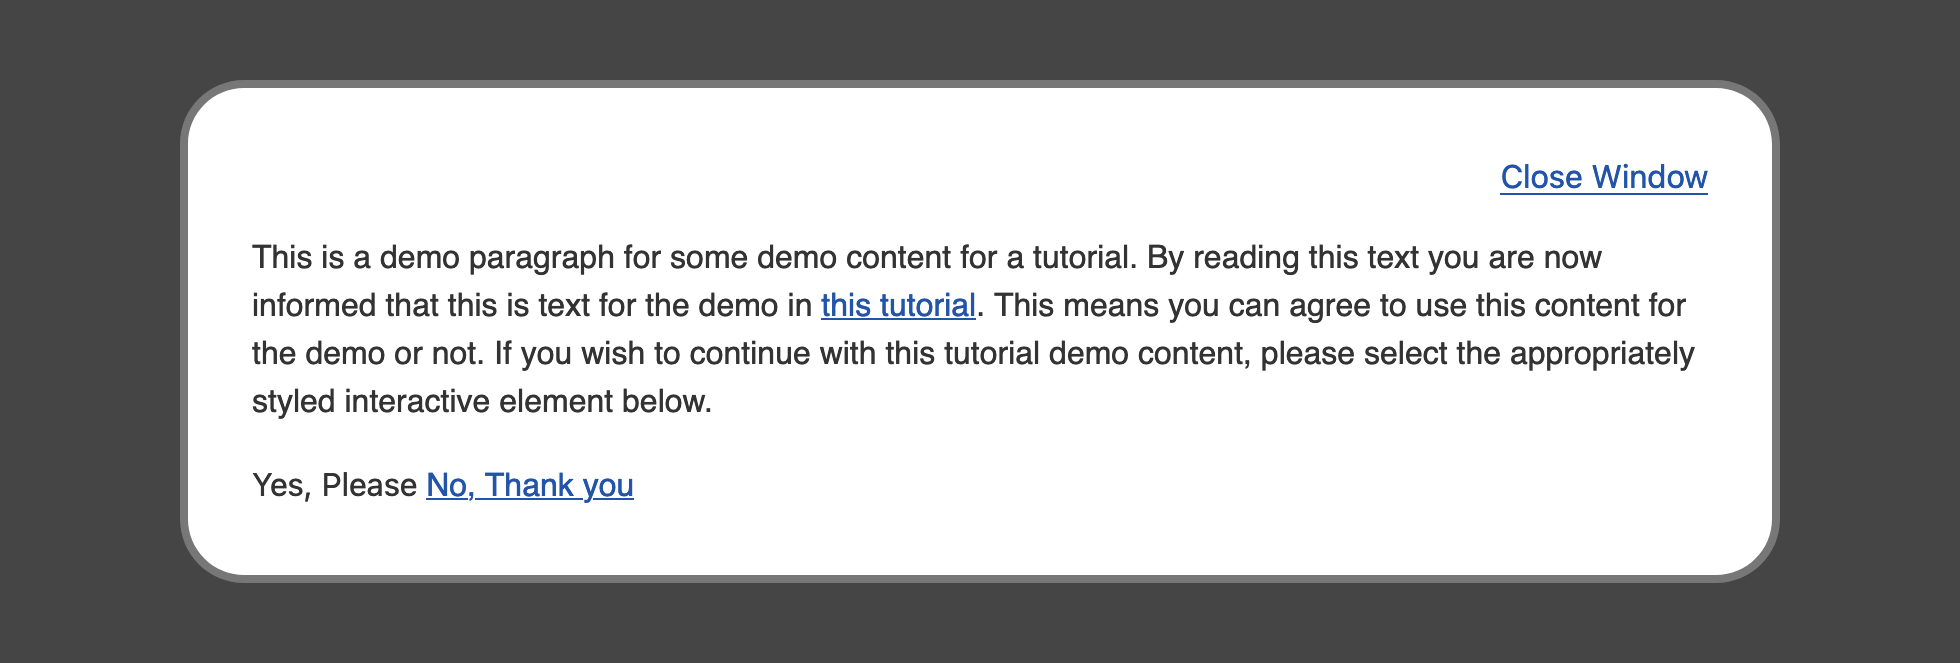
将您的更改保存到 index.html,并打开您的 Web 浏览器,在那里打开 index.html 文件. 页面的内容将在白色背景上显示为黑色字体字体. <button> 元素风格将根据您的浏览器和操作系统而异,但页面将看起来类似于以下图像:

接下来,在与index.html文件相同的目录中创建一个名为 styles.css 的文件. 代码块中的下列风格将为容器设置一个包含您将在教程的剩余时间内使用的 <button> 和 <a> 元素的基本风格。
 1[label styles.css]
 2body {
 3  background-color: #454545;
 4  color: #333;
 5  font-family: sans-serif;
 6  line-height: 1.5;
 7}
 8
 9section {
10  margin: 2rem auto;
11  width: 90%;
12  max-width: 50rem;
13  box-sizing: border-box;
14  padding: 2rem;
15  border-radius: 2rem;
16  border: 0.25rem solid #777;
17  background-color: white;
18}
19
20header {
21  text-align: right;
22}
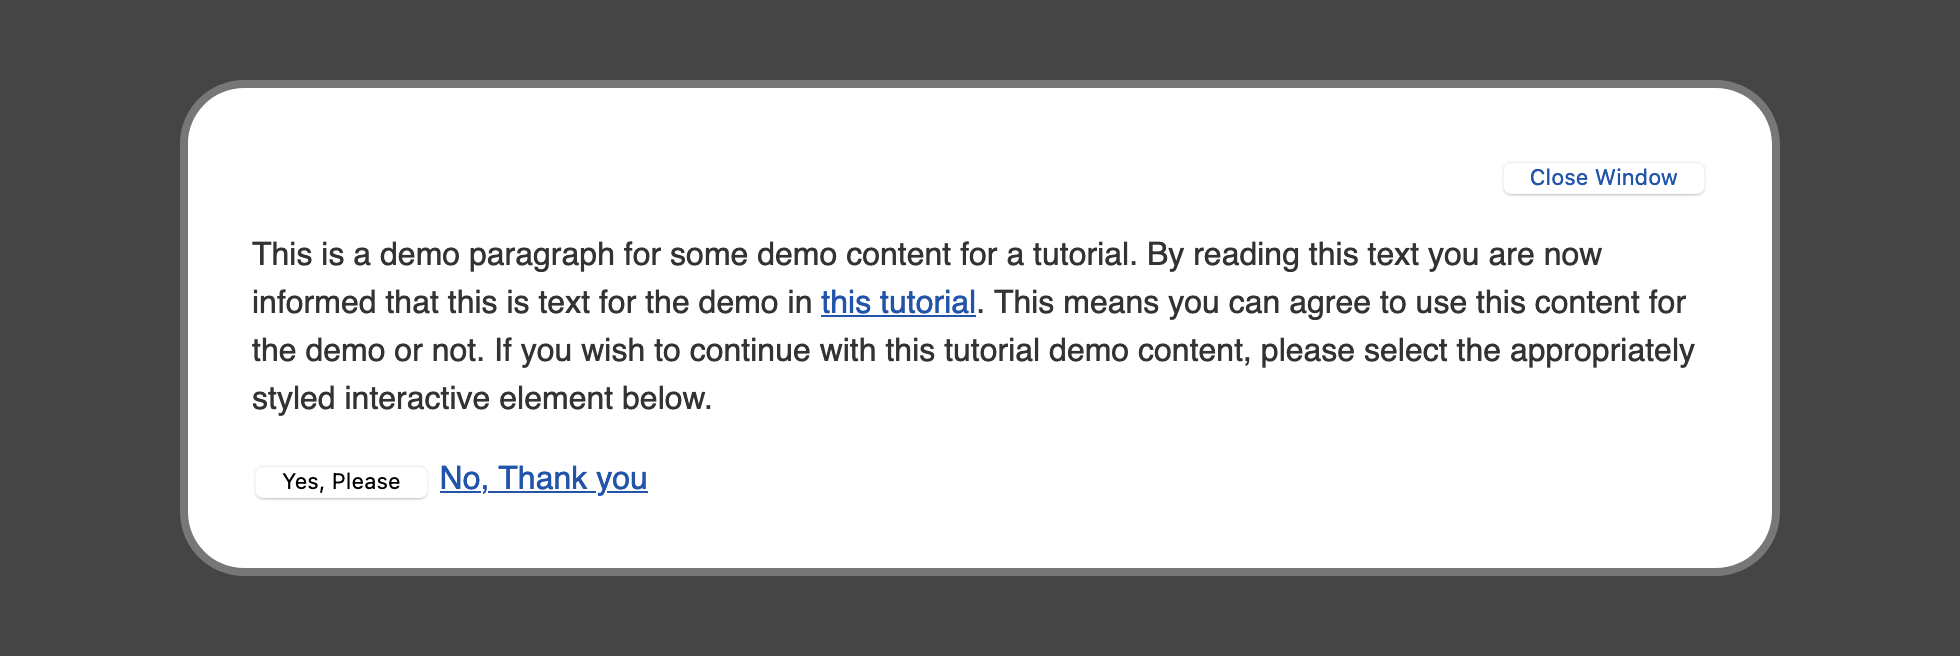
此代码块中的CSS为示范内容区域的三个部分添加了风格。第一个是体选择器,它应用暗灰色背景,然后定义默认字体属性。第二个选择器专注于<section>元素,该元素是示范内容的主要容器,并创建了一个具有大、圆的角落和最大宽度的白色区块,所以它只会增长到指定数量。最后,头部元素选择器将文本对齐到右边,所以关闭窗口按钮是<section>容器的极右上角。
如果您想了解有关如何使用 CSS 元素选择器的更多信息,请参阅 How To Select HTML Elements to Style with CSS。
将您的更改保存到 styles.css 文件,并在浏览器中重新加载 index.html 文件. 页面风格将从浏览器的默认设置转变为自定义风格,如下图所示:
您已经设置了您的HTML,并为页面的内容加载了基本风格,接下来您将创建一个自定义的默认链接风格,并提供一种方法来将该默认风格应用到按钮元素中。
创建文本链接的风格
在本节中,您将通过设置新颜色创建自定义的默认链接风格,然后将删除默认按钮风格,以使按钮看起来像默认链接。
对于本节的第一部分,您将设置默认的链接风格,用于一般的<a>元素和一个类的.link,然后可以将一般的链接风格应用到<按钮>元素。
1[label styles.css]
2...
3a,
4.link {
5  color: #25a;
6}
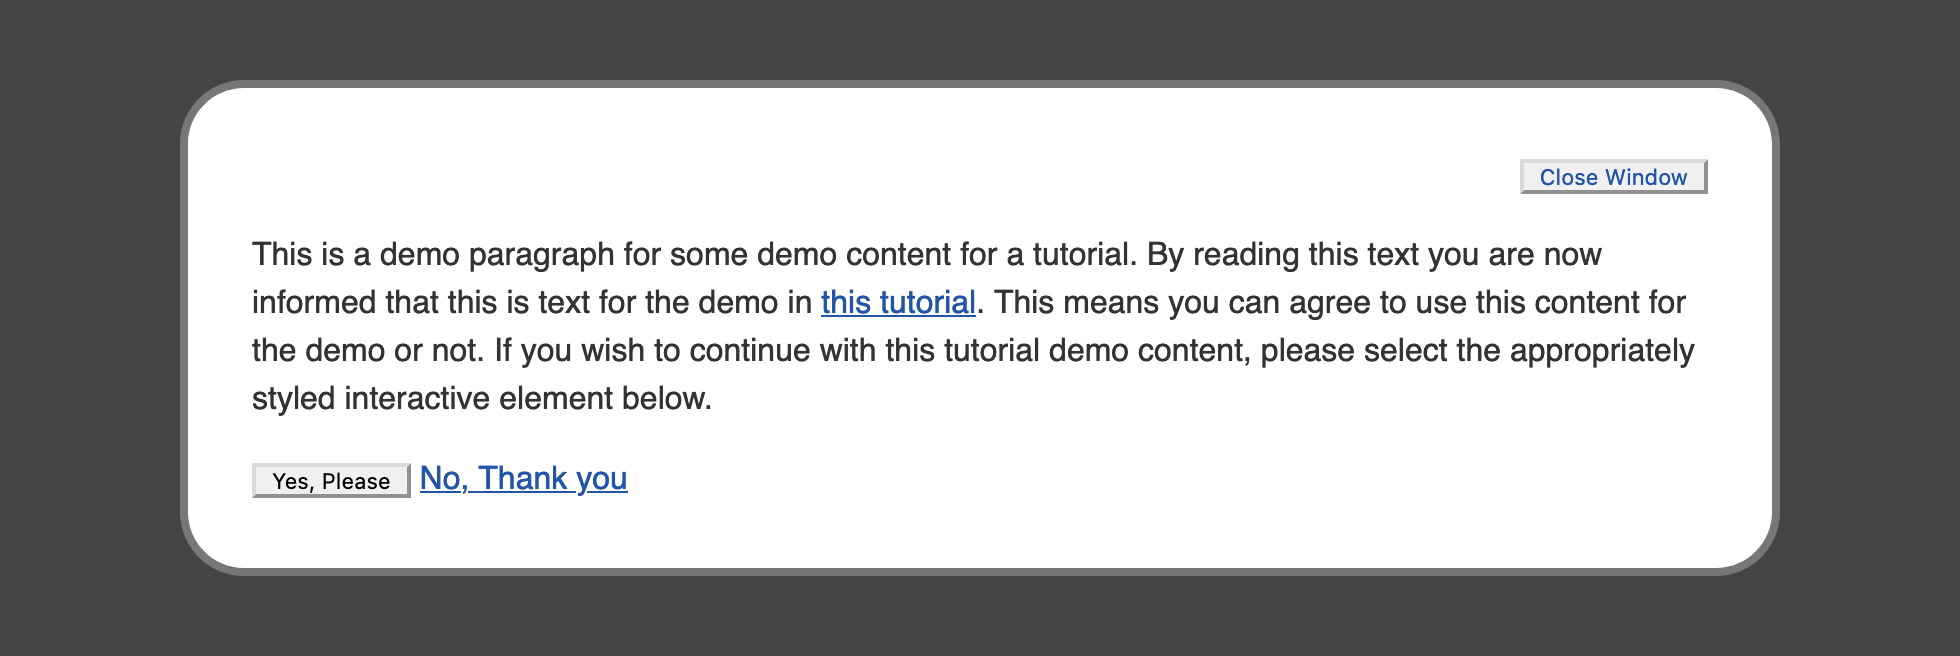
将您的更改保存到 styles.css,并在您的浏览器中打开 index.html。 页面上的 元素现在比默认浏览器链接蓝色更深蓝色。 此外,具有class="link的
接下来,开始删除按钮的默认外观。默认情况下,浏览器会为按钮元素的外观和感觉添加大量定制,以确保它们可以被区分为交互元素。为了删除浏览器添加到这些元素的额外风格,请返回到文本编辑器中的styles.css,创建一个按钮元素选择器,并添加两种类似的属性,如下代码块所示:
 1[label styles.css]
 2...
 3a,
 4.link {
 5  color: #25a;
 6}
 7
 8button {
 9  -webkit-appearance: none;
10  appearance: none;
11}
第一个属性是 -webkit- appearance: none;,这被称为 vendor prefix 属性。 该属性的 -webkit- 位置仅被建立在 WebKit 浏览器引擎衍生件上的浏览器读取,例如 Safari或 Chrome。
供应商前缀的使用正在下降,但仍在发生. 重要的是将任何供应商前缀属性放在非前缀属性之前,以避免在支持前缀和非前缀变体的浏览器上超级属性。
將您的變更儲存為「styles.css」並在瀏覽器中更新「index.html」。「按鈕」元素不會失去所有風格;相反,它將簡化為預設風格,預期從網頁規格。
要删除按钮的剩余默认风格,您需要添加几种属性。 回到文本编辑器中的styles.css文件,然后进入按钮选项。 接下来,您将添加属性来删除背景颜色,边界,边界和插件。 然后,您将删除按钮元素的属性,即颜色,字体和文本对齐,以继承页面的值。
以下代码块展示了如何设置此设置:
 1[label styles.css]
 2...
 3button {
 4  -webkit-appearance: none;
 5  appearance: none;
 6  background-color: transparent;
 7  border: none;
 8  margin: 0;
 9  padding: 0;
10  color: inherit;
11  font: inherit;
12  text-align: center;
13}
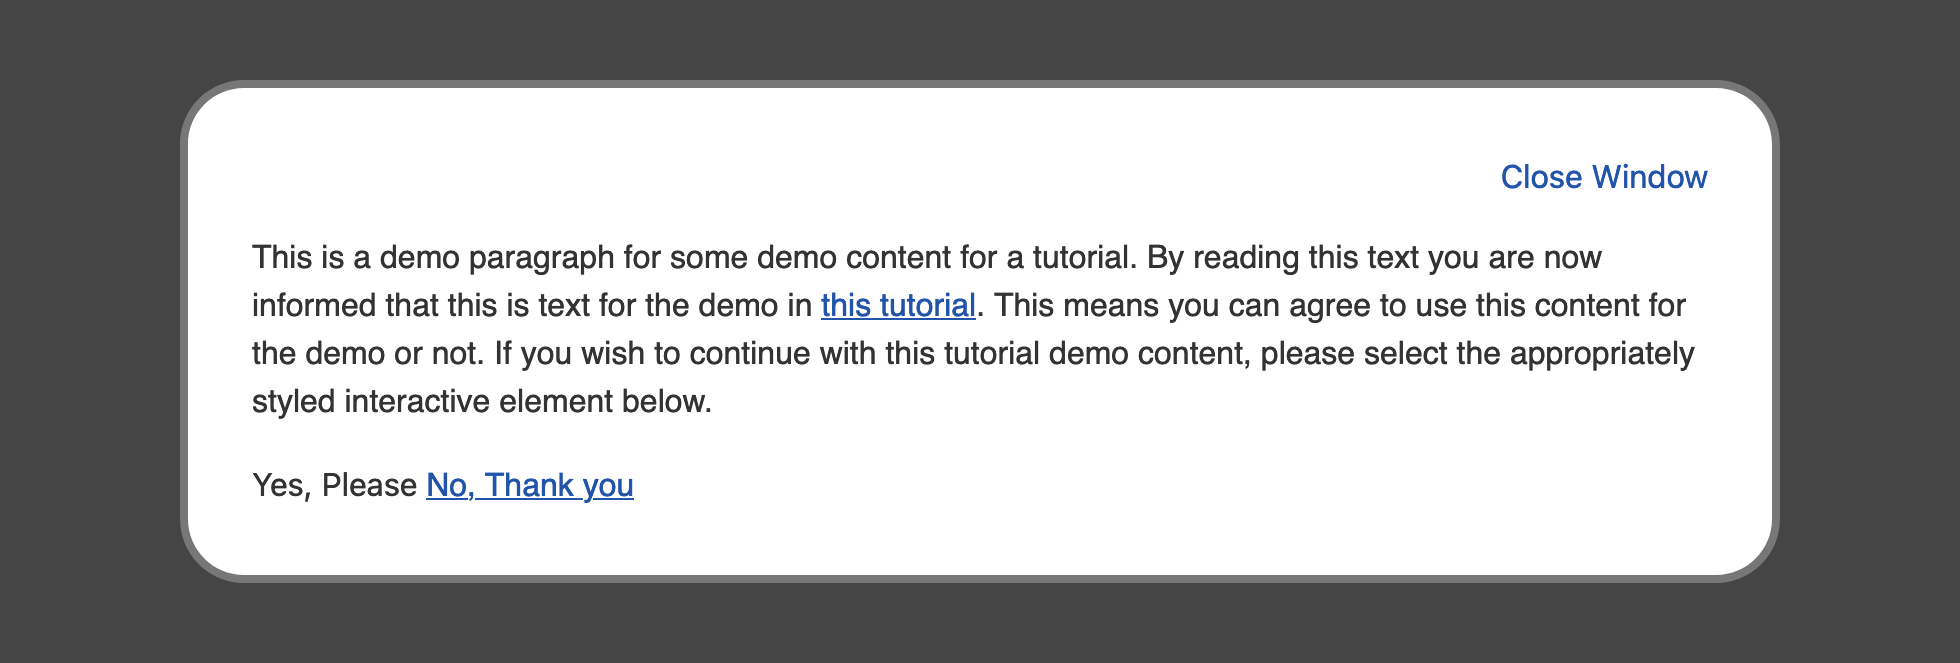
将这些更改保存到 styles.css,并在您的 Web 浏览器中更新 `index.html。 两个按钮现在已经失去了默认风格, ** 关闭窗口** 按钮在风格上更接近链接。
要完成使关闭窗口按钮看起来像一个文本链接,请在文本编辑器中打开styles.css。在a,.link组选择器下,仅为.link类添加一个新的类选择器。添加一个具有underline值的text-decoration属性。然后添加一个名为cursor的属性,该属性定义了鼠标指针在该元素上时如何出现,并将该值设置为pointer。
 1[label styles.css]
 2...
 3a,
 4.link {
 5...
 6}
 7
 8.link {
 9  text-decoration: underline;
10  cursor: pointer;
11}
12...
将这些更改保存到您的styles.css文件中,然后返回您的浏览器并更新index.html。关闭窗口按钮现在将显示并以类似的方式表现为一般的<a>元素风格。
在本节中,您为<a>元素创建了自定义默认风格,并创建了一个.link类来将链接风格应用于<button>元素。
创建一个按钮的风格
接下来,您将创建一个自定义的按钮类型风格,使用类选择器,以便可以在一个<按钮>或<a>元素中使用风格。
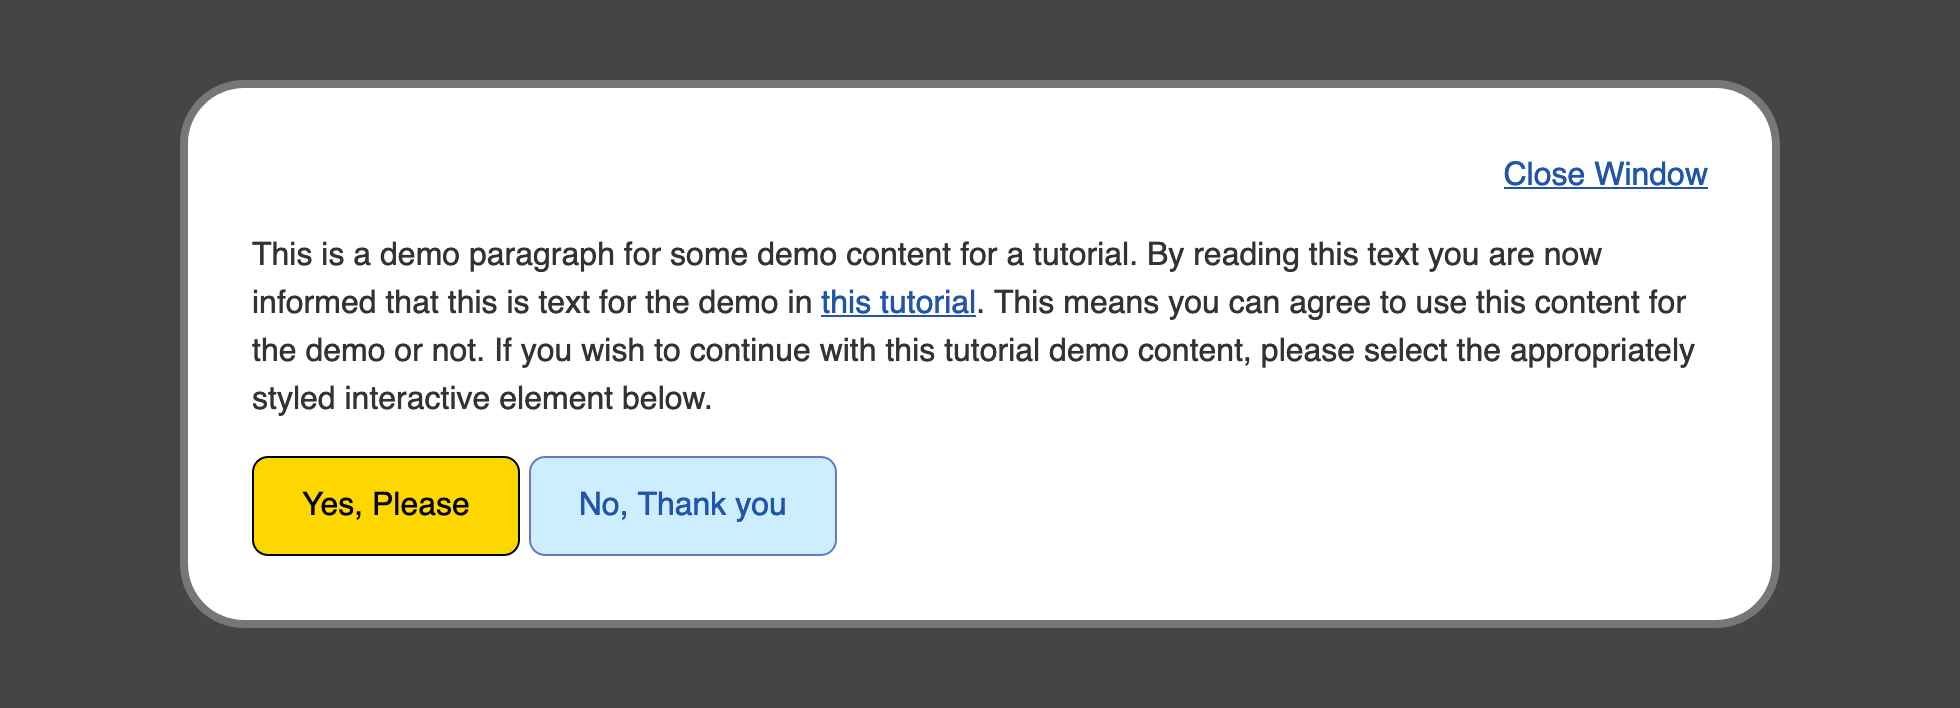
首先,在文本编辑器中打开styles.css。 创建一个名为.button的新类选择器。 此处的风格将重新定义前一步在. button元素选择器上设置的许多属性。 您将用. color属性添加颜色到文本中,用. background-color属性填写形状,然后用. border属性提供一些定义。 随后,您将用. border-radius属性给按钮一个圆角。 最后,您将使用.padding短手给文本上面和下面空间,然后在左边和右边增加一倍。
以下代码块包含这些值:
1[label styles.css]
2...
3.button {
4  color: #25a;
5  background-color: #cef;
6  border: 1px solid #67c;
7  border-radius: 0.5rem;
8  padding: 0.75rem 1.5rem;
9}
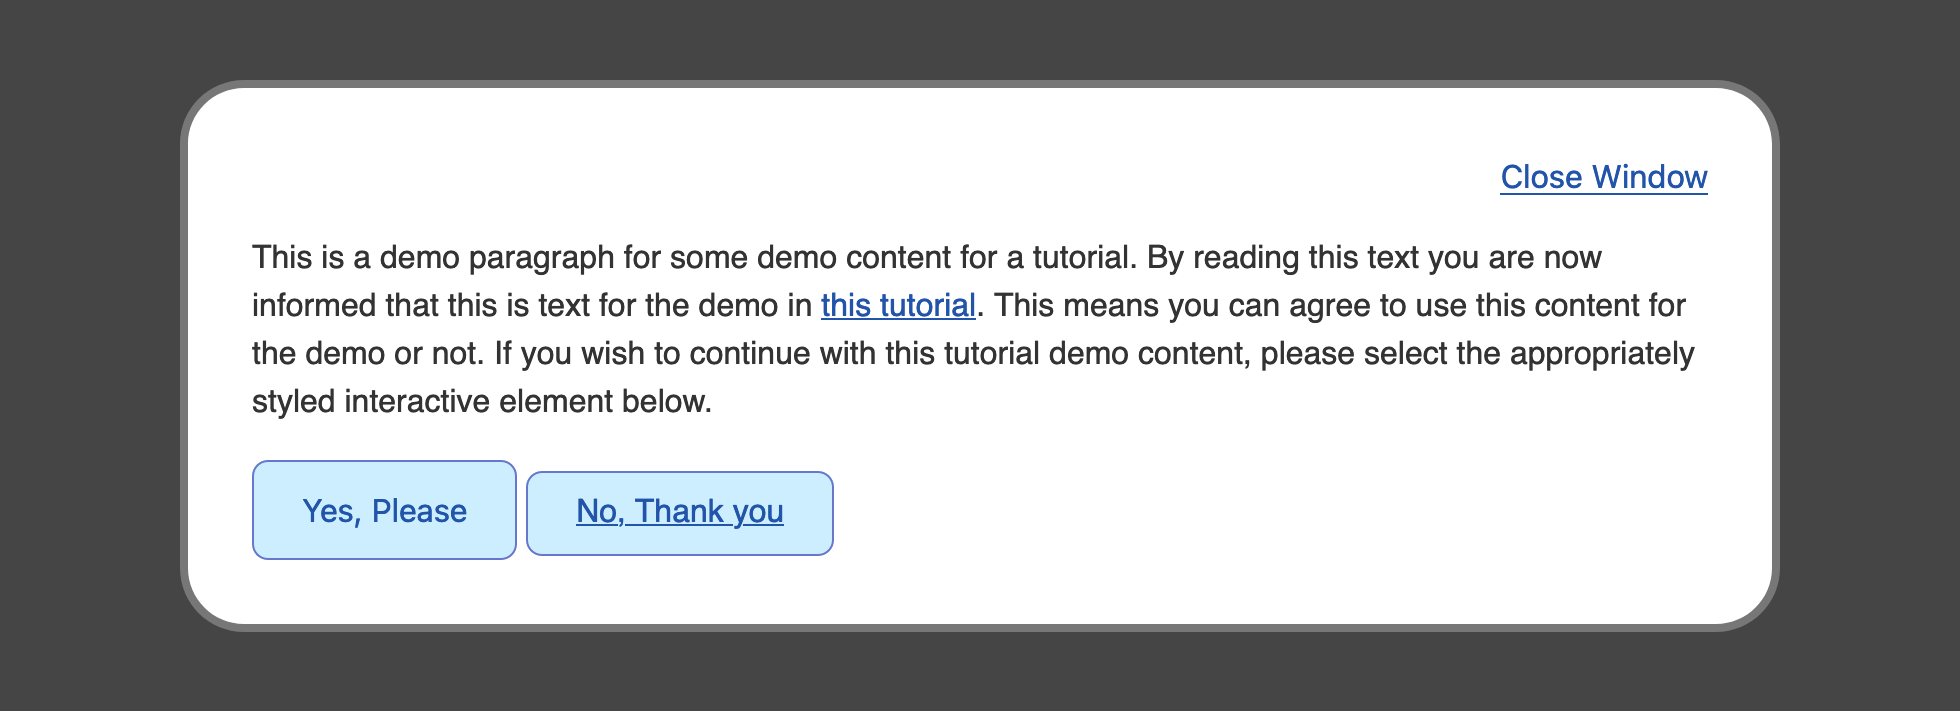
将您的更改保存到 styles.css,然后返回您的浏览器以更新 index.html 文件。 Yes, Please 和 No, Thank you 按钮的外观将改变以匹配属性。 文本与默认的 a 风格相同,背景上有更轻的蓝色,边界的另一个深蓝色。 下面的图像显示了浏览器中的这种情况:
由于 不,谢谢按钮使用一个<a>元素而不是一个<按钮>,需要在.button选择器中添加一些额外的属性来平衡这两个元素之间的默认值。
返回文本编辑器中的styles.css并转到.button类选择器。 首先,添加一个显示:内线块,这是按钮元素的默认风格。 接下来,添加一个文本装饰:没有来从<a>元素中删除底线。 与.link选择器一样,添加一个指针:指针到选择器中,以便在鼠标指针在元素上方时获得指针手图标。 最后,添加一个垂直对齐:底部规则。 这个最后的属性不是所有浏览器都需要的,但它定义了元素的底部在一行上的位置:
 1[label styles.css]
 2...
 3.button {
 4  color: #25a;
 5  background-color: #cef;
 6  border: 1px solid #67c;
 7  border-radius: 0.5rem;
 8  padding: 0.75rem 1.5rem;
 9  display: inline-block;
10  text-decoration: none;
11  cursor: pointer;
12  vertical-align: bottom;
13}
将这些添加到styles.css,然后在您的浏览器中更新index.html。两个按钮现在在视觉外观上相当,并且相互借用了默认属性,因此它们被认为具有相似的交互。

在本节中,您创建了一个自定义类型选择器,以使用按钮式的风格来格式化<按钮>和<a>元素。
将:hover伪类应用于链接和按钮
现在,您将使用:hover假类类来创建一个替代式的样式,显示当标记器在元素上时。假类类是由一个(:)和附加到选择器的条件的名称定义的特殊条件组。
在文本编辑器中打开styles.css。在a,.link的组选择器下方,通过将每个选择器附加到:hover伪类:a:hover,.link:hover。
 1[label styles.css]
 2...
 3a,
 4.link {
 5  ...
 6}
 7
 8a:hover,
 9.link:hover {
10  color: #b1b;
11}
12...
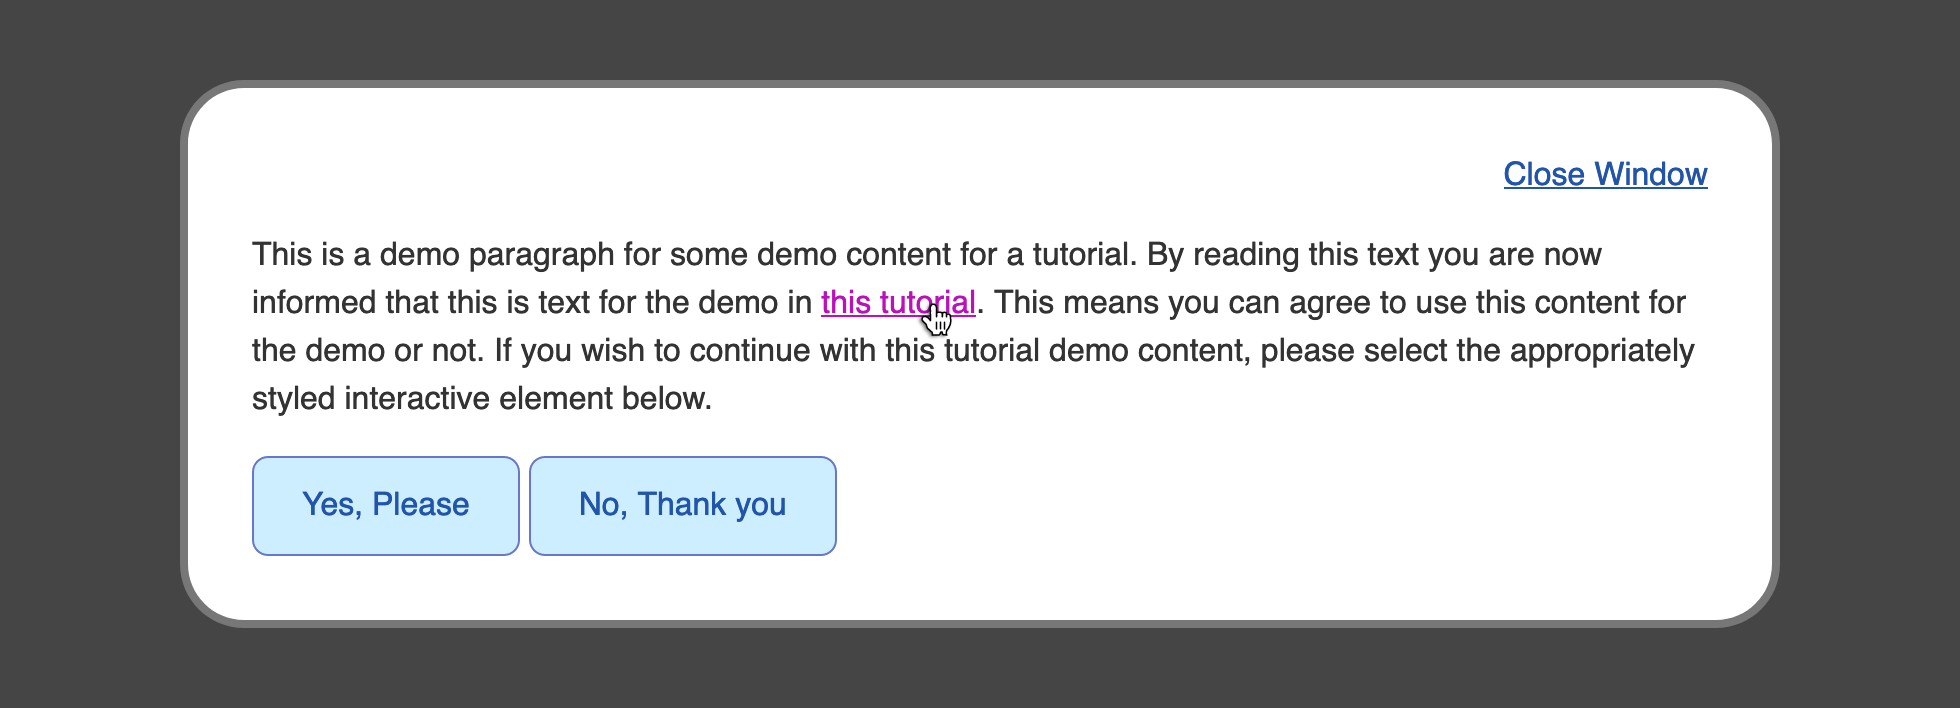
将更改保存到您的 styles.css 文件中,并在您的浏览器中更新 `index.html。 通过 此教程的链接或 ** 关闭窗口**的按钮启动调色。
接下来,要在文本编辑器中添加.button元素的hover状态,请返回到styles.css。在.button类选择器下方,添加一个.button:hover选择器,以创建专门用于hover交互的风格。接下来,在选择器内,添加颜色属性,在按钮上设置颜色属性为白色,然后创建一个背景颜色和一个边界颜色,两个属性都设置为#25a:
 1[label styles.css]
 2...
 3.button {
 4  ...
 5}
 6
 7.button:hover {
 8  color: white;
 9  background-color: #25a;
10  border-color: #25a;
11}
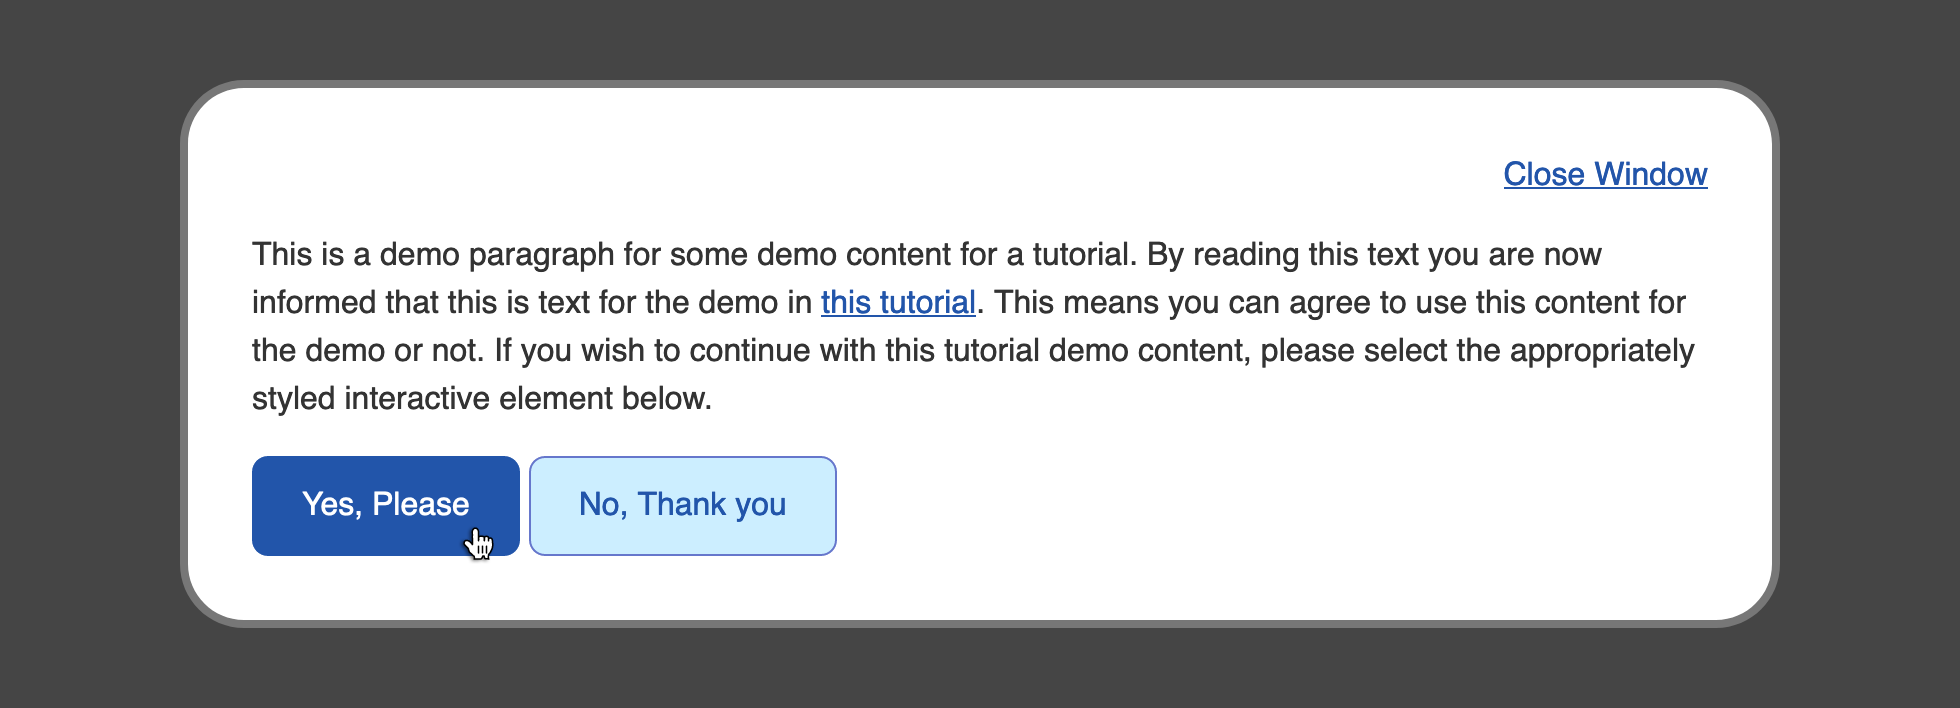
将这些更改保存到您的styles.css文件,然后返回您的浏览器以更新index.html文件. 现在,拿起鼠标指示器,在底部的两个按钮中旋转。 风格从深蓝色文本和边界的蓝色背景变为深蓝色背景,带有白色文本。 下面的图像显示鼠标指示器在 Yes, Please按钮上方时的旋转风格。
在本节中,您使用了:hover假类类来创建元素的风格更改,取决于指针位于元素的顶部。
应用:focus假类类
而不是使用鼠标或触摸屏,网站访问者有时会使用他们的键盘来导航和与页面元素交互。这通常是通过使用TAB键来完成的,该键将循环通过页面上的交互元素。
要开始使用页面的元素的焦点状态,请在文本编辑器中打开你的 styles.css 文件. 开始使用一个新的选择器在 a:hover,.link:hover 组选择器下方,并为焦点状态使用一个新的组选择器: a:focus,.link:focus。
定制焦点状态的最重要部分是确保它与默认状态明显不同. 在这里,您将使 :focus 假类类风格具有黑色文本和黄金背景:
 1[label styles.css]
 2...
 3a:hover,
 4.link:hover {
 5  ...
 6}
 7
 8a:focus,
 9.link:focus {
10  color: black;
11  outline: 2px solid gold;
12  background-color: gold;
13}
14...
在这种情况下,您将颜色属性设置为黑色,背景颜色属性设置为黄金。
边界属性与边界短语属性相似,因为它接受宽度、风格和颜色,但是,与边界属性不同,边界始终围绕整个元素,不能设置到一个特定的侧面。
将您的更改保存到 styles.css,并在您的 Web 浏览器中更新 index.html。 开始按 TAB` 键,直到浏览器将焦点带到 关闭窗口,并以黄金背景突出 本教程的元素。
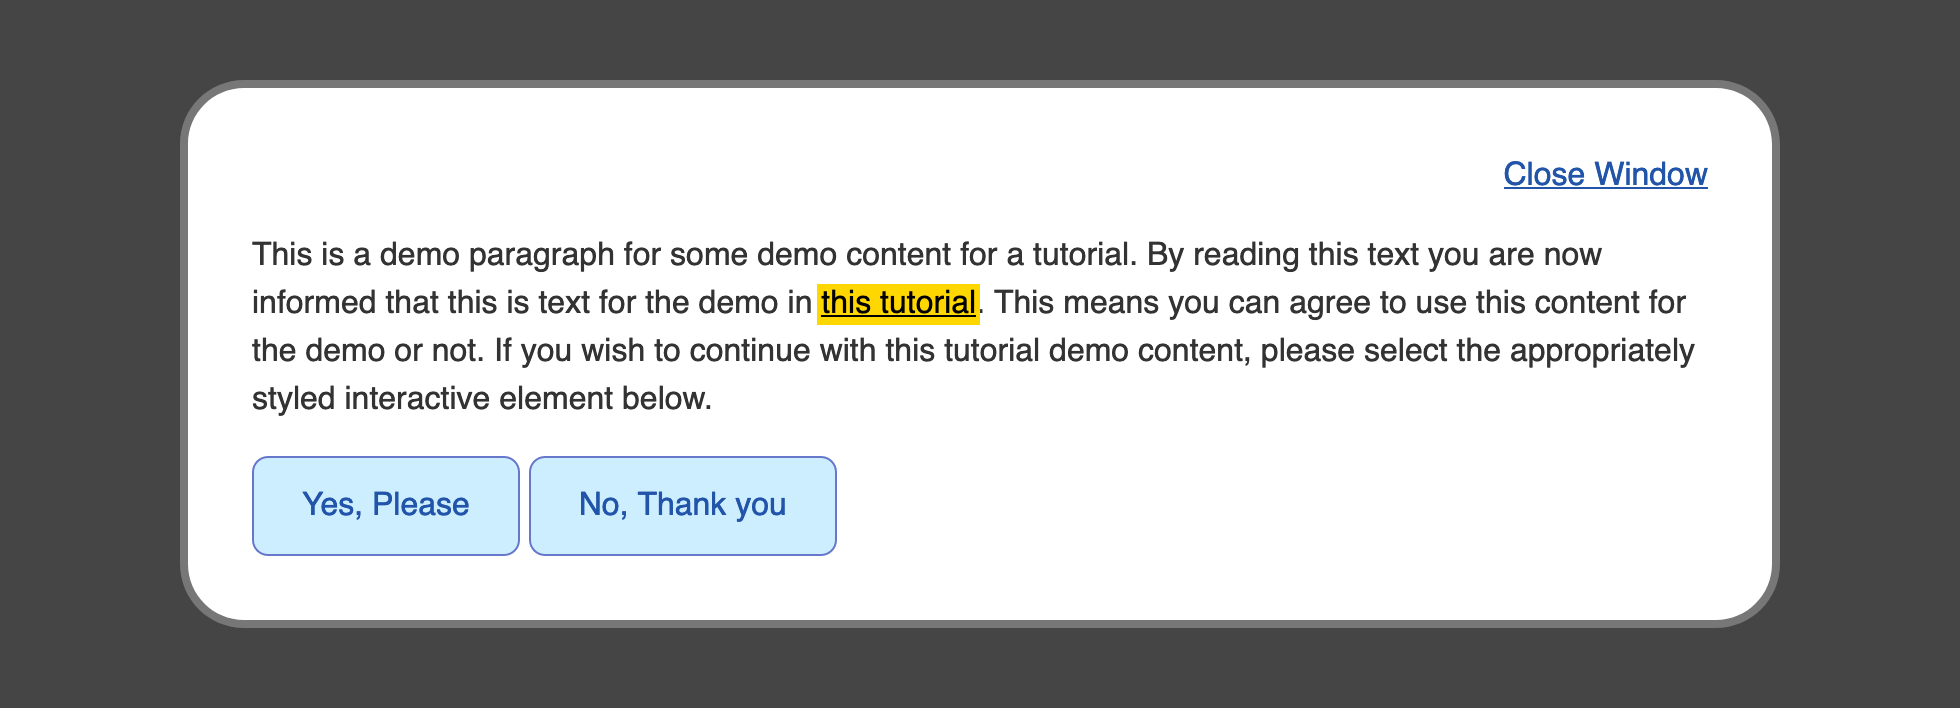
接下来,要将类似的自定义焦点风格应用到 .button 类元素中,请先创建 .button:focus 类和假类类选择器。 由于 .button 元素已经使用了 border,您将使用它来表示焦点,从而通过将属性设置为 none 来删除 outline 默认值。 与之前的链接一样, color 属性将设置为 black,而 background-color 属性将设置为 gold。 最后,将 border-color 属性设置为 black:
 1[label styles.css]
 2...
 3.button:hover {
 4  ...
 5}
 6
 7.button:focus {
 8  outline: none;
 9  color: black;
10  background-color: gold;
11  border-color: black;
12}
请确保将您的添加到 styles.css,然后返回您的浏览器以更新您的 index.html 文件. 再次,使用 TAB 键,循环通过键盘可聚焦的元素在页面上,直到您到达 .button 元素。 它们现在将以金色背景和黑色文本与黑色边界点亮。 下面的图像显示了如何在浏览器中显示 Yes, Please 按钮当聚焦:
在本节中,您使用了:focus假类类来创建自定义风格,这些风格在网站访问者使用键盘导航页面时出现。
应用:活跃假类类
您将使用的下一个假类类是互动元素的:活跃状态. 活跃状态是元素与之互动的状态,通常通过鼠标下载或鼠标点击操作。
要开始使用:active假类类,请在文本编辑器中打开styles.css。 在a:focus,.link:focus的组选择器块后,添加一个新的选择器块,使用组选择器a:active,.link:active。
请注意,某些浏览器会混合一个:focus假类类和一个:active假类类的风格,以防止这种情况发生,您需要通过将它们设置为无和透明来删除outline和背景颜色属性:
 1[label styles.css]
 2...
 3a:focus,
 4.link:focus {
 5  ...
 6}
 7
 8a:active,
 9.link:active {
10  color: #808;
11  outline: none;
12  background-color: transparent;
13}
14...
将:active假类类添加到您的styles.css文件中,然后在您的 Web 浏览器中重新加载index.html。下面的动画显示了:active状态如何从粉红色变为粉红色,当鼠标在 此教程链接上点击时。

接下来,要将一个活跃状态应用到 .button,在文本编辑器中返回 styles.css。 添加一个 .button:active假类选择器,并应用:hover风格的黑色变体的风格。 对于color属性,将值设置为轻灰色,使用ddd。 对于 背景色和边界色属性,将值设置为暗蓝色,值为#127`。 以下代码块的突出部分展示了如何写成:
 1[label styles.css]
 2...
 3.button:focus {
 4  ...
 5}
 6
 7.button:active {
 8  color: #ddd;
 9  background-color: #127;
10  border-color: #127;
11}
请确保将这些更改保存到styles.css,然后返回浏览器以更新index.html。在内容底部的两个按钮中将鼠标按钮旋转,然后点击下方。按钮将从蓝色文本和边界的蓝色背景转变为白色文本的完整蓝色按钮,然后在点击时将其变成黑色蓝色按钮。下面的动画展示了鼠标按钮点击时从:hover到:active状态的变化如何:

在下一节中,您将使用 :visited 假类类来提供一个指标,其中具有 href 属性的 ` 元素访问了该链接。
应用访问假类类
在以前的假类类涉及用户与元素的活跃互动时,假类类:访问表示元素之前曾与它互动过,具体地说,假类:访问表示具有href属性的<a>在浏览器历史中存在,这意味着这些链接已经被访问过。
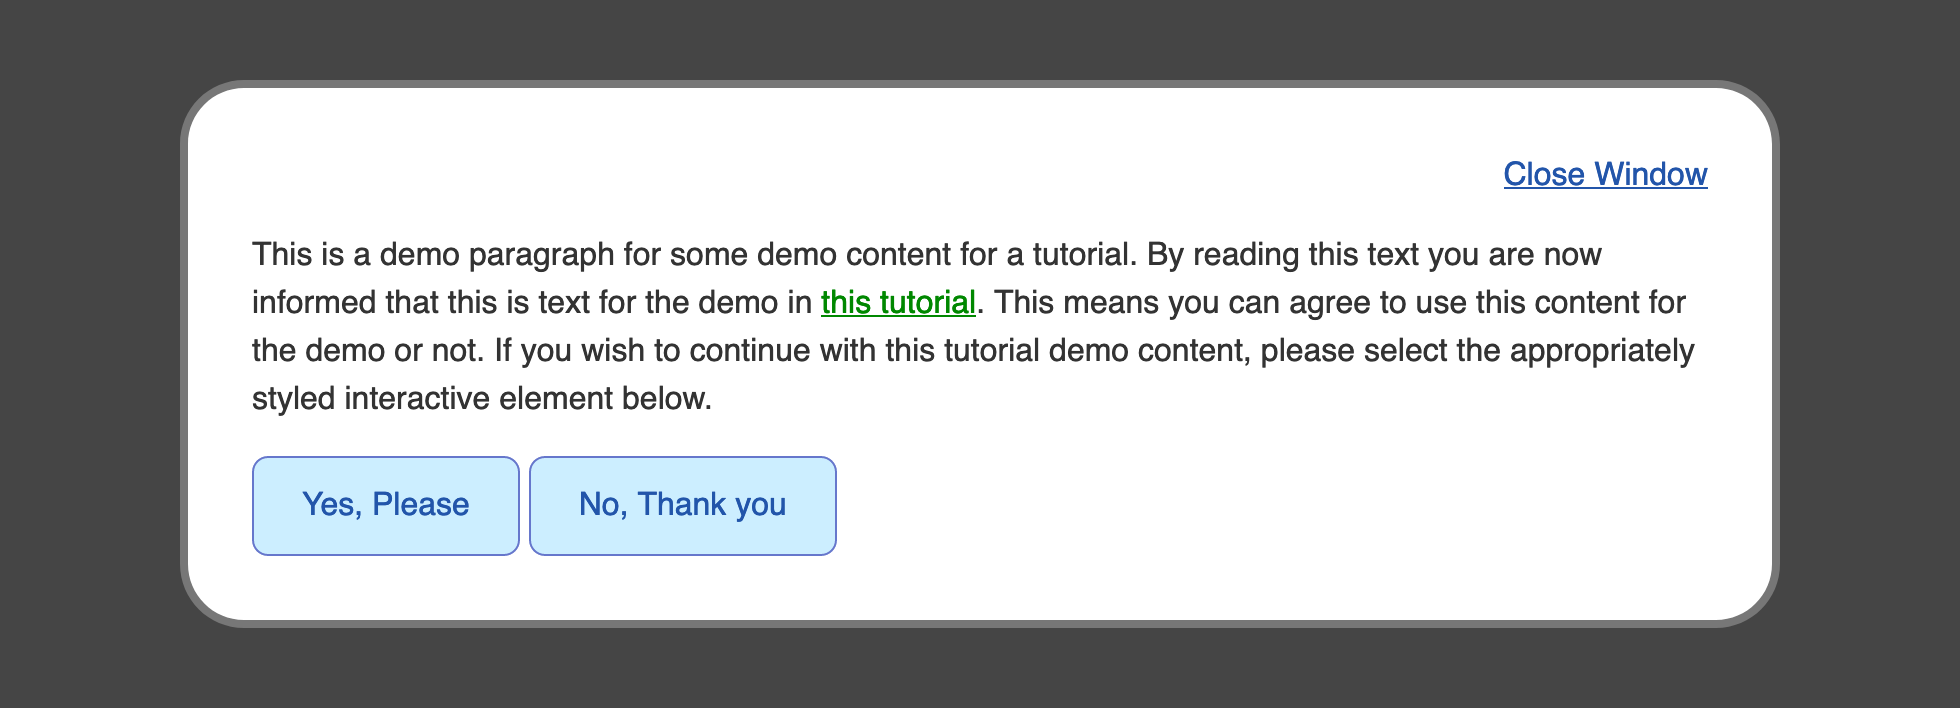
要在文本链接上创建自定义 :visited' 指标,请在文本编辑器中打开你的 styles.css' 文件。 在 a:active,.link:active' 组选项下方,添加一个针对 a:visited,.link:visted' 组选项的新组选项。 默认 :visited' 链接风格通常是紫色。 为演示目的, :visited' 颜色将是深绿色。
添加一个值为#080的颜色属性,如下列突出代码所示:
 1[label styles.css]
 2...
 3a:active,
 4.link:active {
 5  ...
 6}
 7
 8a:visited,
 9.link:visited {
10  color: #080;
11}
12...
将此更改保存到styles.css文件,然后在您的 Web 浏览器中打开index.html。如果没有,请继续点击 本教程和 不,谢谢 <a>元素链接。

现在,按钮中的绿色文本会分心 不,谢谢按钮的目的,此外,当访问的链接再次与一个 :hover 或 :活跃 状态进行交互时,暗绿色仍然保留,而不是每个状态的定义颜色。
要解决这些情况,请在文本编辑器中返回你的 styles.css 文件。 首先,将 a:hover,.link:hover 组选择器附加到具有活跃 :hover 状态的 :visited 元素的附加场景中,将 a:visited:hover,.link:visited:hover 添加到它。 同样,将 a:active,.link:active 选择器块扩展到 a:visited:active,.link:visited:active。 最后,对 .button 元素的所需访问状态要与默认状态相同。 因此, .button 选择器需要成为 .button,.button:visited 的组选择器,因此访问的状态
 1[label styles.css]
 2...
 3a:hover,
 4.link:hover,
 5a:visited:hover,
 6.link:visited:hover {
 7  color: #b1b;
 8}
 9...
10a:active,
11.link:active,
12a:visited:active,
13.link:visited:active {
14  color: #808;
15}
16
17a:visited,
18.link:visited {
19  color: #080;
20}
21...
22.button,
23.button:visited {
24  ...
25}
26
27.button:hover,
28.button:visited:hover {
29  color: white;
30  background-color: #25a;
31  border-color: #25a;
32}
33...
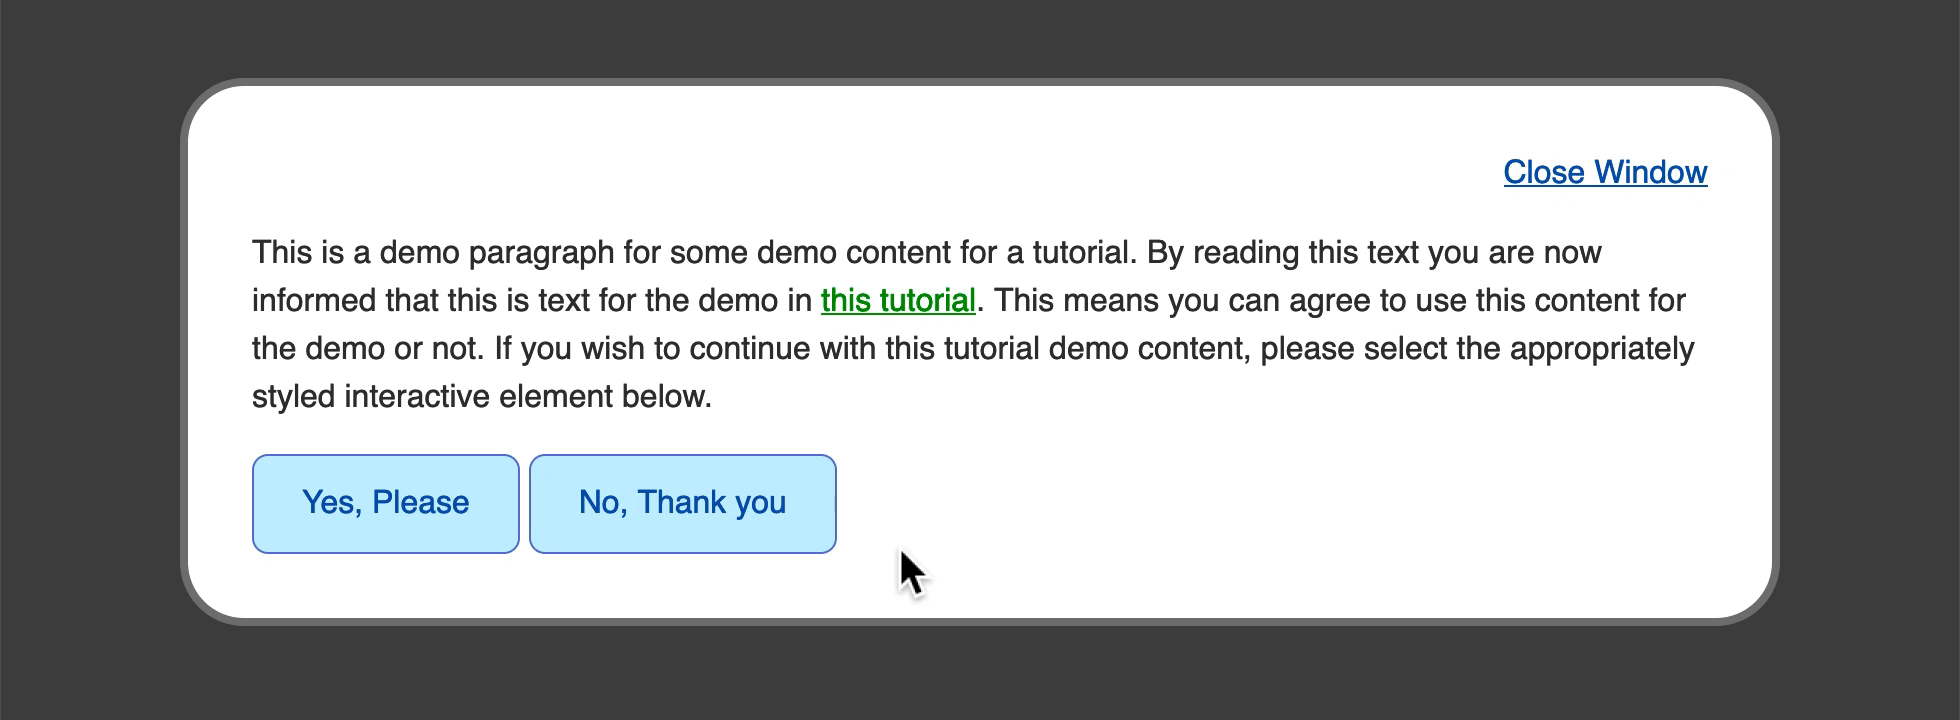
将您的更改保存到 styles.css 文件中,并在 Web 浏览器中重新加载 index.html。默认文本 :visited` 链接现在以所需的暗绿色颜色显示,而按钮风格链接保持按钮外观。
您使用了:访问假类类来创建特定时链接在浏览器历史中存在的风格,指向已访问的用户链接。本节结束了关于假类类的工作,并使用它们来定义特定状态的特定风格。
使用过渡来动摇国家之间
在处理元素状态时,状态间的风格变化可能会突然发生。过渡属性用于将风格从一个状态混合并动画到另一个状态,以避免这种突然发生。
过渡属性可以是两个给定的值之间计算的任何属性。 颜色包括在其中,因为它们是数值,即使使用颜色名称。 过渡持续时间属性是过渡应该发生多长时间的数值。 持续时间的值通常以s单位或毫秒为代表,用ms单位。 最后,过渡时间函数控制了动画随着时间的推移如何进行,允许您进行微妙的改变以增强动画。
要开始使用过渡属性,打开你的styles.css文件,然后转到a,.link组选择器和.button,.button:visited组选择器。添加一个具有所有 0.5s线性值的过渡属性。所有是过渡属性的值,该值告诉浏览器动画状态之间变化的所有属性。0.5s是过渡持续时间的值,相当于半秒;这也可以表示为500ms。最后,线性位置是过渡时间功能的值,该值告诉浏览器在整个持续时间内从一个值移动到另一个值以恒定的增量:
 1[label styles.css]
 2...
 3a,
 4.link {
 5  ...
 6  transition: all 0.5s linear;
 7}
 8...
 9.button,
10.button:visited {
11  ...
12  transition: all 0.5s linear;
13}
将更改保存到 styles.css,然后在 Web 浏览器中打开 `index.html。页面加载后,开始与链接和按钮元素进行交互,并注意不同状态之间的风格动画。
要让动画感觉更快、更自然,请返回您的styles.css文件并调整过渡属性值。对于a.link组选择器,请将持续时间从0.5s更改为250ms,这是与以前相比的半个持续时间。然后将线性时间函数值更改为ease-in-out。这将创建一个动画,开始缓慢,加速在中间,并减慢到尽头。然后,对于.button.button:visited组选择器,请更改持续时间到更快的180ms,并将时间功能设置为与链接相同的ease-in-out值:
 1[label styles.css]
 2
 3...
 4a,
 5.link {
 6  ...
 7  transition: all 250ms ease-in-out;
 8}
 9...
10.button,
11.button:visited {
12  ...
13  transition: all 180ms ease-in-out;
14}
将这些更改保存到您的styles.css文件,然后在您的 Web 浏览器中刷新index.html页面。 状态之间的过渡动画仍然会动画,但现在更快,感觉更快。 有了过渡属性,重要的是用值玩耍,找到适合设计的动画。 下面的动画显示了按钮从默认状态过渡到:hover状态过渡到:active状态的速度更快。
您现在已经创建了状态之间的动画,该过渡属性有助于使状态之间的变化更有吸引力和乐趣。
结论
提供互动元素状态之间的清晰差异是网站的宝贵资产,通过提供对互动的视觉反馈来帮助网站访问者传达重要的概念。
在本教程中,您已经成功地使用了主要状态的假类类来创建不同的交互元素的多种风格。您还了解到,在<按钮>和<a>元素背后有不同的目的,但在视觉上它们可以传达相似的概念。最后,您使用过渡属性来提供这些状态之间的顺利动画,以创建更有吸引力的交互元素。在创建网站时,要记住这些四种状态,以便访问者获得这个重要的交互反馈。
如果您想阅读更多 CSS 教程,请尝试 How To Style HTML with CSS series中的其他教程。