介绍
Seafile是一个开源,自托,文件同步和共享平台. 用户可以存储和可选地加密数据在自己的服务器上,存储空间是唯一的限制。 使用Seafile,您可以使用跨平台同步和密码保护的链接共享文件和文件夹,以期限日期的文件。 文件版本功能意味着用户可以恢复已删除和修改的文件或文件夹。
在本教程中,您将安装并配置Seafile在Ubuntu 20.04服务器上。您将使用MariaDB来存储Seafile的不同组件的数据,以及Apache作为代理服务器来处理Web流量。完成本教程后,您将能够使用Web接口从桌面或移动客户端访问Seafile,允许您同步和与服务器上的其他用户或群组或公众共享您的文件。
前提条件
在您开始本指南之前,您将需要以下内容:
一个 Ubuntu 20.04 服务器,至少有 2GB 的 RAM 设置,通过遵循此 初始服务器设置为 Ubuntu 20.04] 教程,包括一个 sudo 非根用户和防火墙。
- A MariaDB 数据库服务器安装和配置。 遵循本教程中的步骤(How To Install MariaDB on Ubuntu 20.04)(https://andsky.com/tech/tutorials/how-to-install-mariadb-on-ubuntu-20-04) 教程。 一个 Apache 网络服务器与一个虚拟主机配置为注册的域名,如下 How To Install the Apache Web Server on Ubuntu 20.04)。 一个 SSL 证书安装在您的服务器上,如下 [How To Secure Apache with Let's Encrypt on Ubuntu 20.04](
步骤 1 – 创建海洋元件的数据库
Seafile需要三个组件才能正常工作,这三个组件是:
- Seahub:Seafile的网页前端,用Python编写使用Django(https://www.djangoproject.com/)网页框架. 从Seahub你可以使用网页浏览器访问、管理和共享你的文件。
- Seafile服务器:管理原始文件上传、下载和同步的数据服务大师。你不会直接与服务器进行交互,而是使用客户端程序或Seahub Web接口。
- Ccnet服务器:RPC服务大师能够在Seafile的不同组件之间实现内部通信。例如,当你使用Seafubah,它可以使用Ccnet RPC服务访问来自Seafile服务器的数据。
每个组件将其数据单独存储在其自己的数据库中. 在此步骤中,您将创建三个MariaDB数据库和一个用户,然后继续设置服务器。
首先,使用 SSH 登录服务器,使用您的用户名和 IP 地址:
1[environment local]
2ssh sammy@your_server_ip
连接到 MariaDB 数据库服务器作为管理员(根):
1sudo mariadb
在 MariaDB 提示中,使用以下 SQL 命令创建数据库用户:
1CREATE USER 'sammy'@'localhost' IDENTIFIED BY 'password';
接下来,您将创建以下数据库来存储三个Seafile组件的数据:
ccnetdbfor the Ccnet server.seahubdbfor the Seahub web frontend.seafiledbfor the Seafile file server.
在 MariaDB 提示中,创建您的数据库:
1CREATE DATABASE `ccnetdb` CHARACTER SET = 'utf8';
2CREATE DATABASE `seafiledb` CHARACTER SET = 'utf8';
3CREATE DATABASE `seahubdb` CHARACTER SET = 'utf8';
然后,向 Seafile 数据库用户授予所有权限,以访问并对这些数据库进行更改:
1GRANT ALL PRIVILEGES ON `ccnetdb`.* to `sammy`@localhost;
2GRANT ALL PRIVILEGES ON `seafiledb`.* to `sammy`@localhost;
3GRANT ALL PRIVILEGES ON `seahubdb`.* to `sammy`@localhost;
退出 MariaDB 提示,键入退出:
1exit
现在,您已经创建了一个用户和存储每个 Seafile 组件数据所需的数据库,您将安装配置 Seafile 服务器包所需的依赖性。
步骤 2 — 安装依赖并下载 Seafile
Seafile 的某些部分是用 Python 编写的,因此需要额外的 Python 模块和程序来工作. 在此步骤中,您将在下载和提取 Seafile 服务器包之前安装这些必要的依赖。
首先,安装 pip — Python 包管理器. 相应的 Debian 包被称为 python3-pip. 您可以使用 apt 安装它:
1sudo apt install -y python3-pip
一旦 pip 安装,您可以使用pip3命令从 Python 包索引(PyPI)中安装额外的依赖:
1pip3 install Pillow captcha django-simple-captcha
<$>[注]
注: 使用上面的pip3 install命令的sudo是不必要的。这些包将安装在用户的sammy主目录中,在/home/sammy/.local/lib/python3.8/site-packages下,因此不需要 root 特权。
Seafile 需要Pillow,一个用于图像处理的 python 库,以及captcha和django-simple-captcha来提供 captcha 支持。
现在你已经安装了必要的依赖,你可以下载Seafile服务器包。
Seafile 在设置过程中创建额外的目录. 要保持它们的所有组织,创建一个新的目录并更改它:
1mkdir seafile
2cd seafile
您现在可以从 网站下载 Seafile 服务器的最新版本(7.1.4)通过运行以下命令:
1wget https://download.seadrive.org/seafile-server_7.1.4_x86-64.tar.gz
Seafile 将下载分发为压缩的 tar 档案,这意味着您需要在继续之前提取它。
1tar -zxvf seafile-server_7.1.4_x86-64.tar.gz
现在转到提取的目录:
1cd seafile-server-7.1.4
在此阶段,您已下载并提取了Seafile服务器包,并安装了必要的依赖程序,您现在已经准备好配置Seafile服务器。
步骤 3 – 配置 Seafile 服务器
Seafile需要一些关于您的设置的信息,在您第一次启动服务之前. 这包括域名和数据库配置等细节. 要启动提供这些信息的请求系列,您可以运行setup_seafile_mysql.sh脚本,该脚本包含在您在上一步提取的档案中。
运行使用bash的脚本:
1bash setup-seafile-mysql.sh
点击进入继续。
脚本现在会提示你一系列问题. 任何提到默认值的地方,按ENTER键将使用该值。
本教程使用Seafile作为服务器名称,但如果需要,您可以更改它。
1What is the name of the server?
2It will be displayed on the client. 3 - 15 letters or digits
3[ server name ] Seafile
接下来,输入此 Seafile 实例的域名。
1What is the ip or domain of the server?.
2For example: www.mycompany.com, 192.168.1.101
3[ This server's ip or domain ] your_domain
对于文件服务器端口,请按ENTER来接受默认值。
1Which port do you want to use for the seafile fileserver?
2[ default "8082" ]
下一个提示允许您确认数据库配置. 您可以创建新的数据库或使用现有数据库进行设置. 对于本教程,您已经在步骤 1 中创建了必要的数据库,所以在这里选择选项 2。
1-------------------------------------------------------
2Please choose a way to initialize seafile databases:
3-------------------------------------------------------
4
5[1] Create new ccnet/seafile/seahub databases
6[2] Use existing ccnet/seafile/seahub databases
7
8[ 1 or 2 ] 2
剩下的问题与 MariaDB 数据库服务器有关,您只需要提供您在步骤 1 中创建的 mariadb用户的用户名和密码。
 1What is the host of mysql server?
 2
 3[ default "localhost" ]
 4
 5What is the port of mysql server?
 6
 7[ default "3306" ]
 8
 9Which mysql user to use for seafile?
10
11[ mysql user for seafile ] sammy
12
13What is the password for mysql user "seafile"?
14
15[ password for seafile ] password
在提供密码后,脚本将要求 Seafile 数据库的名称。 使用 ccnetdb, seafiledb,和 seahubdb` 用于本教程。 然后,脚本将检查是否有成功连接到数据库,然后继续显示初始配置的摘要。
 1Enter the existing database name for ccnet:
 2[ ccnet database ] ccnetdb
 3
 4verifying user "sammy" access to database ccnetdb ... done
 5
 6Enter the existing database name for seafile:
 7[ seafile database ] seafiledb
 8
 9verifying user "sammy" access to database seafiledb ... done
10
11Enter the existing database name for seahub:
12[ seahub database ] seahubdb
13
14verifying user "sammy" access to database seahubdb ... done
15
16---------------------------------
17This is your configuration
18---------------------------------
19
20    server name:            Seafile
21    server ip/domain:       your_domain
22
23    seafile data dir:       /home/sammy/seafile/seafile-data
24    fileserver port:        8082
25
26    database:               use existing
27    ccnet database:         ccnetdb
28    seafile database:       seafiledb
29    seahub database:        seahubdb
30    database user:          sammy
31
32--------------------------------
33Press ENTER to continue, or Ctrl-C to abort
34---------------------------------
点击进入来确认。
 1[secondary_label Output]
 2Generating ccnet configuration ...
 3done
 4Successly create configuration dir /home/sammy/seafile/ccnet.
 5
 6Generating seafile configuration ...
 7done
 8
 9Generating seahub configuration ...
10----------------------------------------
11Now creating seahub database tables ...
12----------------------------------------
13creating seafile-server-latest symbolic link ... done
14
15-----------------------------------------------------------------
16Your seafile server configuration has been finished successfully.
17-----------------------------------------------------------------
18run seafile server:     ./seafile.sh { start | stop | restart }
19run seahub server:     ./seahub.sh  { start <port> | stop | restart <port> }
20-----------------------------------------------------------------
21If you are behind a firewall, remember to allow input/output of these tcp ports:
22-----------------------------------------------------------------
23port of seafile fileserver:   8082
24port of seahub:               8000
25
26When problems occur, Refer to
27        https://github.com/haiwen/seafile/wiki
28for information.
由于您将在Apache后面运行Seafile,因此在防火墙中打开端口8082和8000是不必要的,因此您可以忽略输出的这一部分。
您已经完成了服务器的初始配置,下一步,您将在启动 Seafile 服务之前配置 Apache 网页服务器。
步骤 4 – 配置 Apache Web Server
在此步骤中,您将配置 Apache 网页服务器将所有请求转发到 Seafile. 使用 Apache 以这种方式允许您使用没有端口号的 URL,启用 HTTPS 连接到 Seafile,并利用 Apache 提供的缓存功能以获得更好的性能。
要开始转发请求,您需要在Apache配置中启用proxy_http模块,该模块提供了代理 HTTP 和 HTTPS 请求的功能。
1sudo a2enmod proxy_http
<$>[注] 注: Apache ** rewrite** 和 ** ssl** 模块也需要用于此设置. 您已经在预先条件部分列出的第二个 Apache 教程中启用了这些模块作为配置 Let's Encrypt 的一部分。
接下来,更新your_domain的虚拟主机配置,将请求转发到Seafile文件服务器和Seahub Web接口。
在文本编辑器中打开配置文件:
1sudo nano /etc/apache2/sites-enabled/your_domain-le-ssl.conf
从ServerAdmin到SSLCertificateKeyFile的行是您设置的初始Apache和Let's Encrypt配置的一部分,作为前提的一部分。
 1[label /etc/apache2/sites-enabled/your_domain-le-ssl.conf]
 2
 3<IfModule mod_ssl.c>
 4<VirtualHost *:443>
 5    ServerAdmin admin@your_domain
 6    ServerName your_domain
 7    ServerAlias www.your_domain
 8    DocumentRoot /var/www/your_domain/html
 9    ErrorLog ${APACHE_LOG_DIR}/your_domain-error.log
10    CustomLog ${APACHE_LOG_DIR}/your_domain-access.log combined
11
12    SSLCertificateFile /etc/letsencrypt/live/your_domain/fullchain.pem
13    SSLCertificateKeyFile /etc/letsencrypt/live/your_domain/privkey.pem
14    Include /etc/letsencrypt/options-ssl-apache.conf
15
16    Alias /media  /home/sammy/seafile/seafile-server-latest/seahub/media
17    <Location /media>
18        Require all granted
19    </Location>
20
21    # seafile fileserver
22    ProxyPass /seafhttp http://127.0.0.1:8082
23    ProxyPassReverse /seafhttp http://127.0.0.1:8082
24    RewriteEngine On
25    RewriteRule ^/seafhttp - [QSA,L]
26
27    # seahub web interface
28    SetEnvIf Authorization "(.*)" HTTP_AUTHORIZATION=$1
29    ProxyPass / http://127.0.0.1:8000/
30    ProxyPassReverse / http://127.0.0.1:8000/
31</VirtualHost>
32</IfModule>
该代码指令将 URL 路径 your_domain/media 绘制到 Seafile 所使用的文件系统中的本地路径。下列位置指令允许访问该目录中的内容。ProxyPass和ProxyPassReverse指令使 Apache 作为此主机的反向代理,将请求转发到/和/seafhttp到Seafile 网络接口和在本地主机端口8000和8082运行的文件服务器。
保存和退出文件。
测试虚拟主机配置中是否存在任何语法错误:
1sudo apache2ctl configtest
如果它报告Syntax OK,那么您的配置没有问题。重新启动Apache,以便更改生效:
1sudo systemctl restart apache2
您现在已经配置了 Apache 作为 Seafile 文件服务器和 Seahub 的反向代理服务器,然后在开始服务之前,您将更新 Seafile 配置中的 URL。
步骤 5 — 更新 Seafile 配置和启动服务
由于您现在正在使用 Apache 来向 Seafile 提供所有请求的代理,您需要在启动 Seafile 服务之前使用文本编辑器在conf 目录中更新 Seafile 配置文件中的 URL。
在文本编辑器中打开ccnet.conf:
1nano /home/sammy/seafile/conf/ccnet.conf
更改文件中的SERVICE_URL设置,以指向没有端口号的新的 HTTPS URL,例如:
1[label Update /home/sammy/seafile/conf/ccnet.conf]
2SERVICE_URL = https://your_domain
保存和退出文件,一旦您添加了内容。
现在在文本编辑器中打开seahub_settings.py:
1nano /home/sammy/seafile/conf/seahub_settings.py
现在,您可以将FILE_SERVER_ROOT设置添加到文件中,以指定文件服务器正在收听文件上传和下载的路径:
1[label Update /home/sammy/seafile/conf/seahub_settings.py]
2SECRET_KEY = "..."
3FILE_SERVER_ROOT = 'https://your_domain/seafhttp'
保存并退出seahub_settings.py。
现在您可以启动 Seafile 服务和 Seahub 接口:
1cd /home/sammy/seafile/seafile-server-7.1.4
2./seafile.sh start
3./seahub.sh start
因为这是你第一次开始Seahub服务,它会提示你创建一个管理员帐户. 输入这个管理员用户的有效电子邮件地址和密码:
 1[secondary_label Output]
 2What is the email for the admin account?
 3[ admin email ] admin@your_domain
 4
 5What is the password for the admin account?
 6[ admin password ] password-here
 7
 8Enter the password again:
 9[ admin password again ] password-here
10
11----------------------------------------
12Successfully created seafile admin
13----------------------------------------
14Seahub is started
15
16Done.
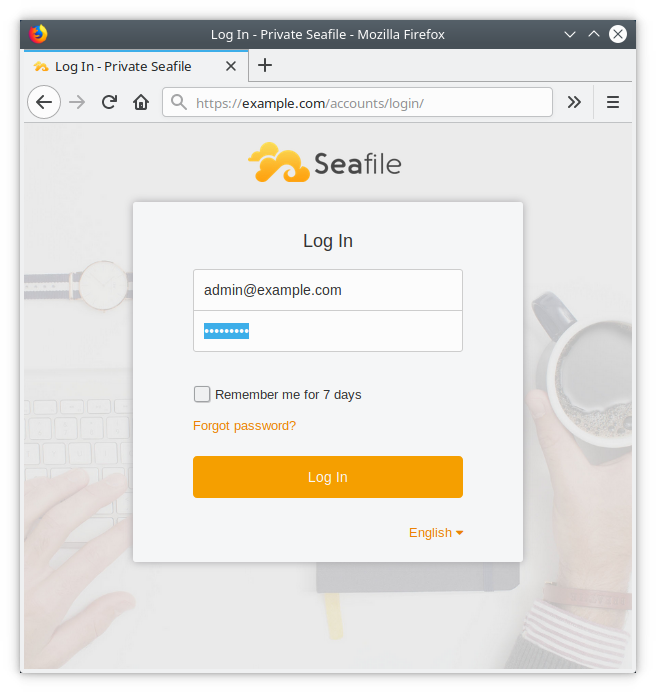
在 Web 浏览器中打开 https://your_domain,并使用您的 Seafile 管理员电子邮件地址和密码登录。
一旦成功登录,您可以访问管理员界面或创建新的用户。
现在您已经验证了 Web 界面正常工作,您可以在下一步启动这些服务在系统启动时自动启动。
步骤 6 – 允许 Seafile 服务器在系统启动时启动
要允许文件服务器和 Web 接口在启动时自动启动,您可以创建相应的systemd服务文件并激活它们。
為 Seafile 檔案伺服器建立「systemd」服務檔案:
1sudo nano /etc/systemd/system/seafile.service
将以下内容添加到文件中:
 1[label Create /etc/systemd/system/seafile.service]
 2[Unit]
 3Description=Seafile
 4After=network.target mariadb.service
 5
 6[Service]
 7Type=forking
 8ExecStart=/home/sammy/seafile/seafile-server-latest/seafile.sh start
 9ExecStop=/home/sammy/seafile/seafile-server-latest/seafile.sh stop
10User=sammy
11Group=sammy
12
13[Install]
14WantedBy=multi-user.target
在这里,ExectStart和ExecStop行表示启动和停止Seafile服务的命令.该服务将以sammy为用户和组运行。
保存seafile.service和退出。
為 Seahub 網頁接口建立「systemd」服務檔案:
1sudo nano /etc/systemd/system/seahub.service
这与Seafile服务类似,唯一的区别在于Web接口在Seafile服务后启动。
 1[label Create /etc/systemd/system/seahub.service]
 2[Unit]
 3Description=Seafile hub
 4After=network.target seafile.service
 5
 6[Service]
 7Type=forking
 8ExecStart=/home/sammy/seafile/seafile-server-latest/seahub.sh start
 9ExecStop=/home/sammy/seafile/seafile-server-latest/seahub.sh stop
10User=sammy
11Group=sammy
12
13[Install]
14WantedBy=multi-user.target
保存seahub.service和退出。
您可以在 理解 Systemd 单元和单元文件教程中了解有关 systemd 单元文件的更多信息。
最后,要允许 Seafile 和 Seahub 服务在启动时自动启动,请执行以下命令:
1sudo systemctl enable seafile.service
2sudo systemctl enable seahub.service
当服务器重新启动时,Seafile将自动启动。
此时,您已经完成了服务器的设置,现在可以测试每个服务。
步骤 7 – 测试文件同步和共享功能
在此步骤中,您将测试您设置的服务器的文件同步和共享功能,并确保它们正常工作. 要做到这一点,您需要在单独的计算机和/或移动设备上安装 Seafile 客户端程序。
请访问 Seafile 网站上的 下载页面,并按照说明在您的计算机上安装该程序的最新版本。 Seafile 客户端可用于各种 Linux 发行版 (Ubuntu, Debian, Fedora, Centos/RHEL, Arch Linux), MacOS 和 Windows. 移动客户端可用于 Android 和 iPhone/iPad 设备从各自的应用商店。
一旦安装了Seafile客户端,您可以测试文件同步和共享功能。
在您的计算机或设备上打开 Seafile 客户端程序. 接受 Seafile 文件夹的默认位置,然后单击 Next。
在下一个窗口中,输入服务器地址、用户名和密码,然后单击 ** 登录**。
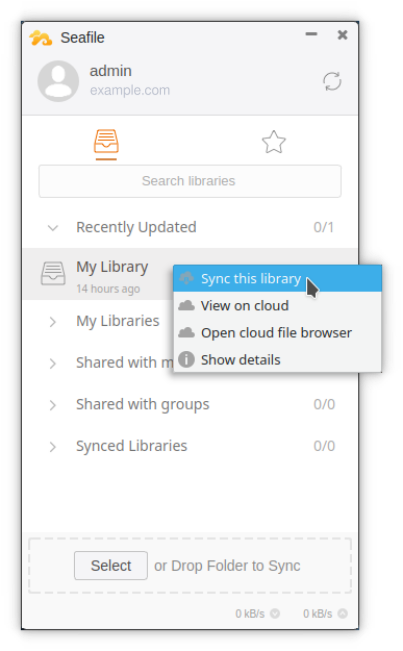
在主页上,右键单击我的图书馆并单击同步此图书馆 接受计算机或设备上的位置的默认值。
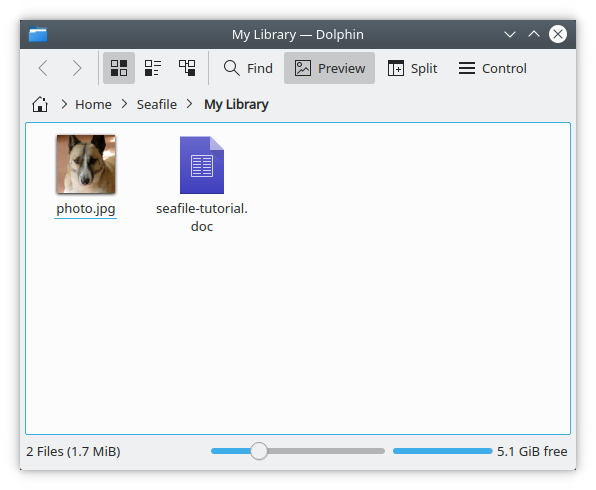
将文件(如文件或照片)添加到我的图书馆文件夹中。过了一段时间,该文件将上传到服务器上。
现在,登录到https://your_domain的 Web 界面,并验证您的文件是否存在于服务器上。
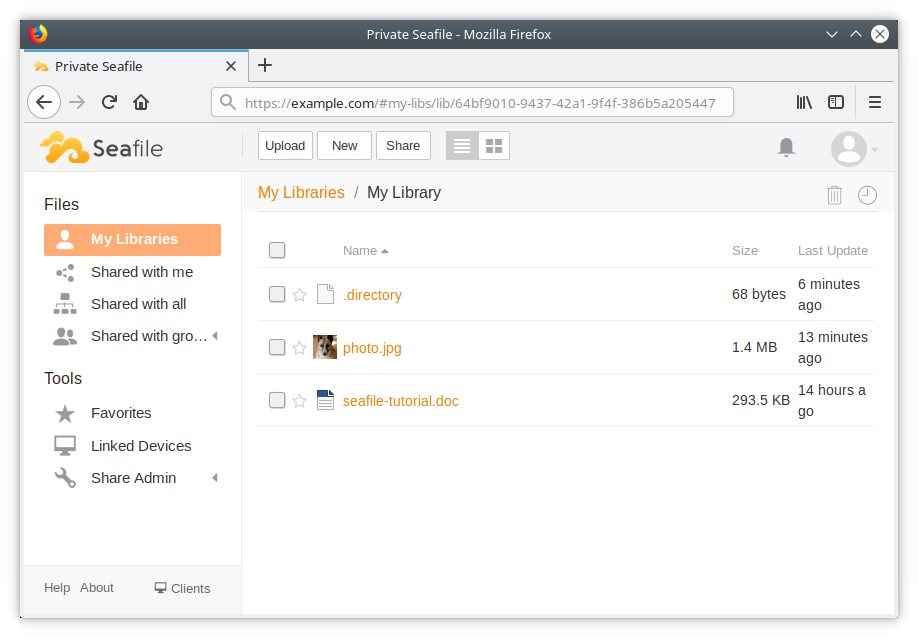
点击文件旁边的 Share 以生成您可以共享的此文件的下载链接。
您已经验证了文件同步是否正常工作,并且您可以使用 Seafile 同步和共享来自多个设备的文件和文件夹。
结论
在本教程中,您设置了Seafile服务器的私人实例,现在您可以开始使用该服务器来同步文件,添加用户和组,并在不依赖外部服务的情况下与他们或公众共享文件。
当新版本的服务器可用时,请参阅手册的 升级部分,以了解执行升级的步骤。