Tiki Wiki is an easy to use content management system written in PHP, that can be used to create forums, blogs, file and image galleries, and so on.
To begin we will spin up a Ubuntu 12.10 x64 cloud server:
Step 1 - Install LAMP stack
export DEBIAN_FRONTEND=noninteractive
apt-get -y install apache2 mysql-server mysql-client php5 php5-mysql php5-gd
Step 2 - Create a Database and User for Tiki Wiki
Make sure to replace PassWord with your own value below:
mysqladmin create tiki
mysql -Bse "create user 'tiki'@'localhost' identified by 'PassWord';"
mysql -Bse "grant all privileges on \`tiki\`.* to 'tiki'@'localhost';"
mysqladmin flush-privileges
Step 3 - Download Tiki Wiki
cd /root
wget "http://downloads.sourceforge.net/project/tikiwiki/Tiki_10.x_Sun/10.2/tiki-10.2.tar.gz"
tar xvfz tiki-10.2.tar.gz
rm -rf /var/www/* && cp -Rf /root/tiki-10.2/* /var/www/
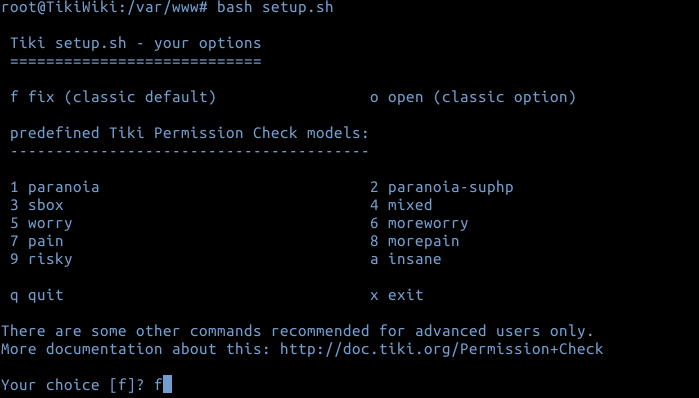
Step 4 - Install Tiki Wiki
You can press Enter for all of these questions:
cd /var/www
bash setup.sh
Now you would need to proceed with installation from browser.
Navigate over to your cloud server's IP /tiki-install.php (http://198.199.88.201/tiki-install.php in our case):

Hit Continue, Accept License Agreement, and once you get to Database settings, put the following credentials:
Database type: MYSQL improved (mysqli)
Host name: localhost
Database name: tiki
User name: tiki
Password: PassWord (or one you specified in Step 2 above)

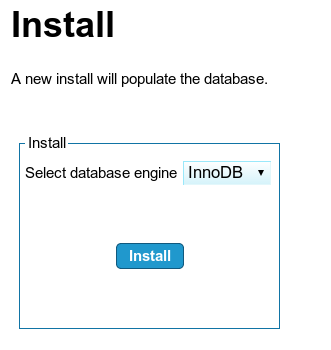
For database type, select InnoDB:
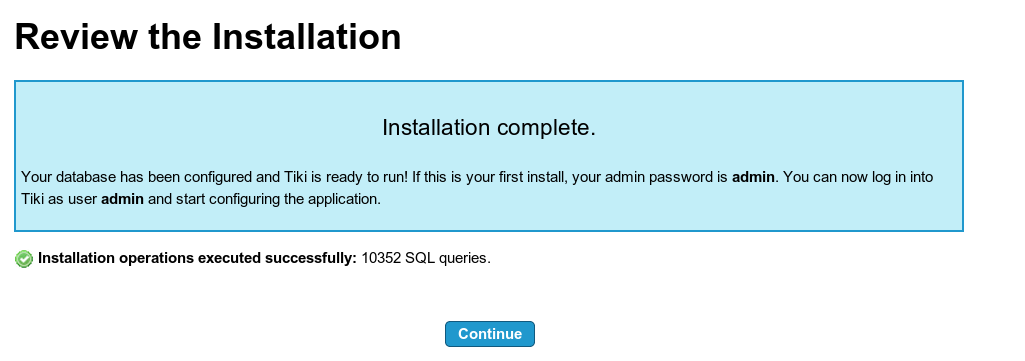
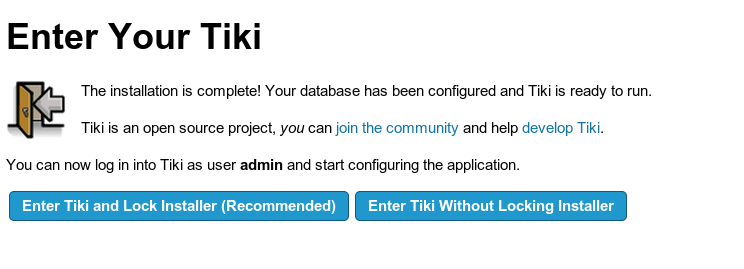
Note that the default username is admin and password is admin
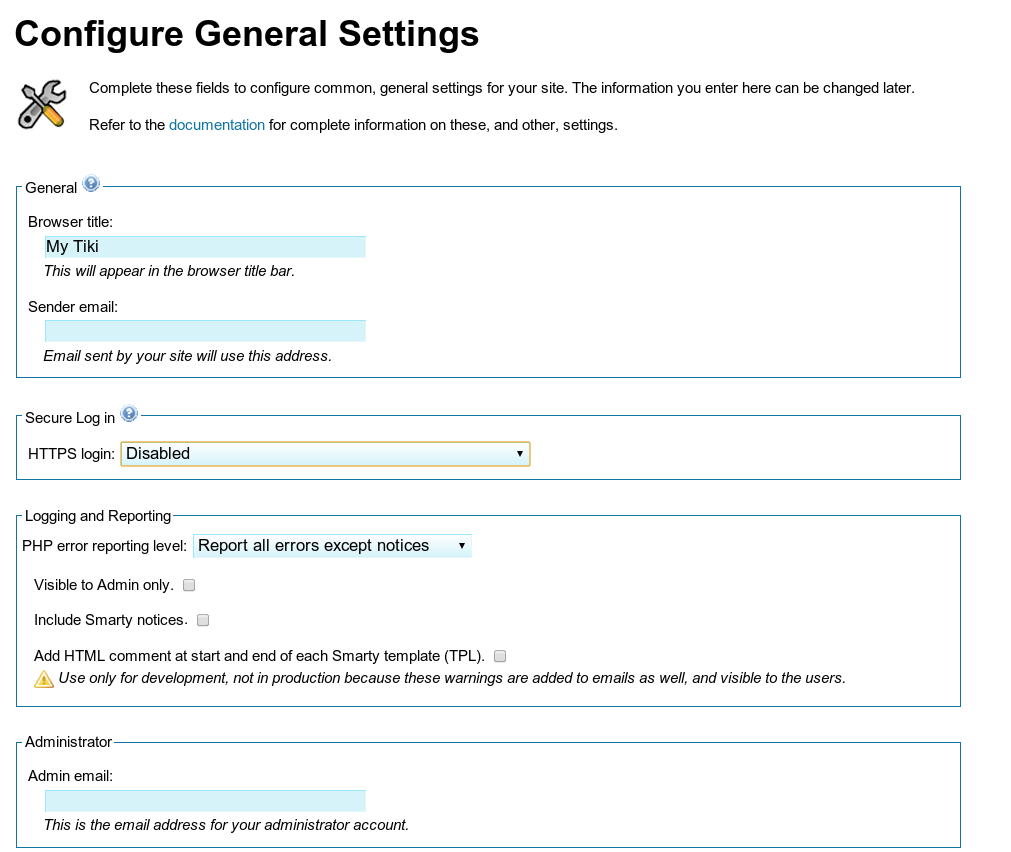
Select whether you want to use HTTPS (SSL), enter your e-mail, and select Visible To Admin Only for PHP error reporting:
Next, Enter the Wiki and Lock Installer:
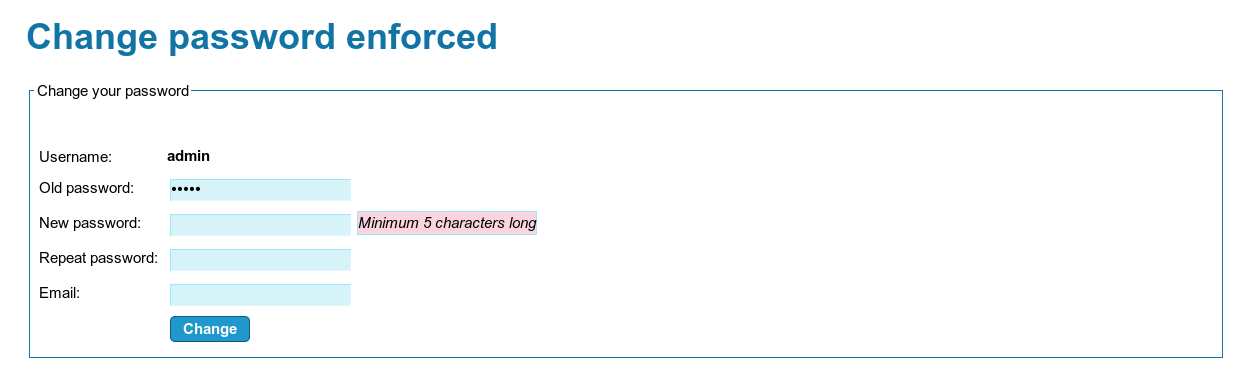
You will be required to change your admin password:
And you are all done!