作者选择了 多样性在技术基金作为 写给捐款计划的一部分接受捐款。
介绍
TypeScript是 JavaScript的超组,在构建时添加可选的静态打字,从而减少对运行时错误的调试。 它多年来已发展成为对JavaScript的强大替代品。 与此同时,Gatsby(https://www.gatsbyjs.com/)已成为创建静态网站的有用的前端框架。 TypeScript的静态打字功能与像Gatsby这样的静态站点生成器相结合,Gatsby在TypeScript中内置了编码的支持。
在本教程中,您将使用Gatsby的内置功能来配置TypeScript的Gatsby项目. 在本教程之后,您将学习如何将TypeScript集成到您的Gatsby项目中。
前提条件
- 联合国 您需要同时安装[Node] (https://nodejs.org/en/about/)和[npm] (https://docs.npmjs.com/about-npm),以便分别运行一个开发环境和处理TypeScript-或Gatsby相关的软件包. 这个教程用Node.js版本14.17.2和npm版本6.14.13进行了测试. 要安装在macOS或Ubuntu 18.04上,请遵循如何在macOS上安装节点js并创建本地开发环境中的步骤,或者使用[如何在Ubuntu 20.04上安装节点js]的PPA**部分(https://andsky.com/tech/tutorials/how-to-install-node-js-on-ubuntu-20-04)中的步骤。
- 您需要安装在您的计算机上的 Gatsby CLI 命令行工具 。 要设置此功能,请读取如何设置您的第一个盖茨比站点开头. 此教程已在 Gatsby v3. 9.0 和 Gatsby CLI v3. 9.0.
- 上测试过. 您需要足够的JavaScript知识,特别是ES6+语法,如分解和进出口. 您可以在 JavaScript (https://andsky.com/tech/tutorials/understanding-destructuring-rest-parameters-and-spread-syntax-in-javascript) 和 [JavaScript (https://andsky.com/tech/tutorials/understanding-modules-and-import-and-export-statements-in-javascript) 中找到关于这些主题的更多信息。
- 此外, 您还需要安装在您的机器上的 TypeScript 。 要做到这一点,请参看[官方TypeScript网站] (https://www.typescriptlang.org/download). 如果您在使用 [Visual Studio Code] (https://code.visualstudio.com/] 以外的编辑器, 您可能需要经过几个额外步骤, 以确保您在构建时有 TypeScript 进行类型检查并显示任何错误 。 例如,如果使用Atom,则需要安装'atom-typescript' package,才能实现真正的TypeScript体验. 如果您只想要为您的项目下载 TypeScript, 请在 Gatsby 项目文件夹设置后进行 。 ( _) (英语)
步骤 1 — 创建一个新的盖茨比网站并删除锅炉板
要开始,您将创建您的Gatsby网站,并确保您可以运行服务器并查看该网站。之后,您将删除一些未使用的锅炉文件和代码。
打开计算机的控制台/终端,执行以下命令:
1gatsby new gatsby-typescript-tutorial
这将需要几秒钟才能运行,因为它为Gatsby网站设置了必要的锅板文件和文件夹。
1cd gatsby-typescript-tutorial
若要确保网站的开发环境可以正确启动,请运行以下命令:
1gatsby develop
几秒钟后,您将在控制台中收到以下消息:
1[secondary_label Output]
2...
3You can now view gatsby-starter-default in the browser.
4
5  http://localhost:8000
通常,默认端口为:8000,但您可以通过运行gatsby develop -p another_number来更改。
转到您喜爱的浏览器,在地址栏中键入http://localhost:8000,以便找到该网站。
<$>[注] **注:**在构建您的Gatsby网站时可能导致以下错误的「gatsby-plugin-sharp」版本 3.9.0 已知问题:
1[secondary_label Output]
2 ERROR
3
4ENOENT: no such file or directory, open 'your_file_path/gatsby-typescript-tutorial/.cache/caches/gatsby-plugin-sharp/diskstore-f6dcddbf3c9007cd2587894f75b5cd62.json'
此错误的解决方法是将gatsby-plugin-sharp降级至版本 3.8.0. 要做到这一点,请打开您的package.json文件并进行以下突出更改:
 1[gatsby-typescript-tutorial/package.json]
 2...
 3  "dependencies": {
 4    "gatsby": "^3.9.0",
 5    "gatsby-plugin-gatsby-cloud": "^2.9.0",
 6    "gatsby-plugin-image": "^1.9.0",
 7    "gatsby-plugin-manifest": "^3.9.0",
 8    "gatsby-plugin-offline": "^4.9.0",
 9    "gatsby-plugin-react-helmet": "^4.9.0",
10    "gatsby-plugin-sharp": "3.8.0",
11    "gatsby-source-filesystem": "^3.9.0",
12    "gatsby-transformer-sharp": "^3.9.0",
13    "prop-types": "^15.7.2",
14    "react": "^17.0.1",
15    "react-dom": "^17.0.1",
16    "react-helmet": "^6.1.0"
17  },
18...
保存文件,然后使用以下命令重新安装依赖:
1npm install
现在使用 Gatsby CLI 删除公共和.cache文件夹,以便使用新的依赖列表重新构建它们:
1gatsby clean
您现在将能够在本地开发服务器上启动您的 Gatsby 网站,使用gatsby develop。有关此解决方案的更多信息,请通过错误: ENOENT:没有此类文件或目录的GitHub 记忆线阅读(https://githubmemory.com/repo/gatsbyjs/gatsby/issues/32288)。
接下来,您将删除所有不必要的文件,包括gatsby-node.js,gatsby-browser.js和gatsby-ssr.js:
1rm gatsby-node.js
2rm gatsby-browser.js
3rm gatsby-ssr.js
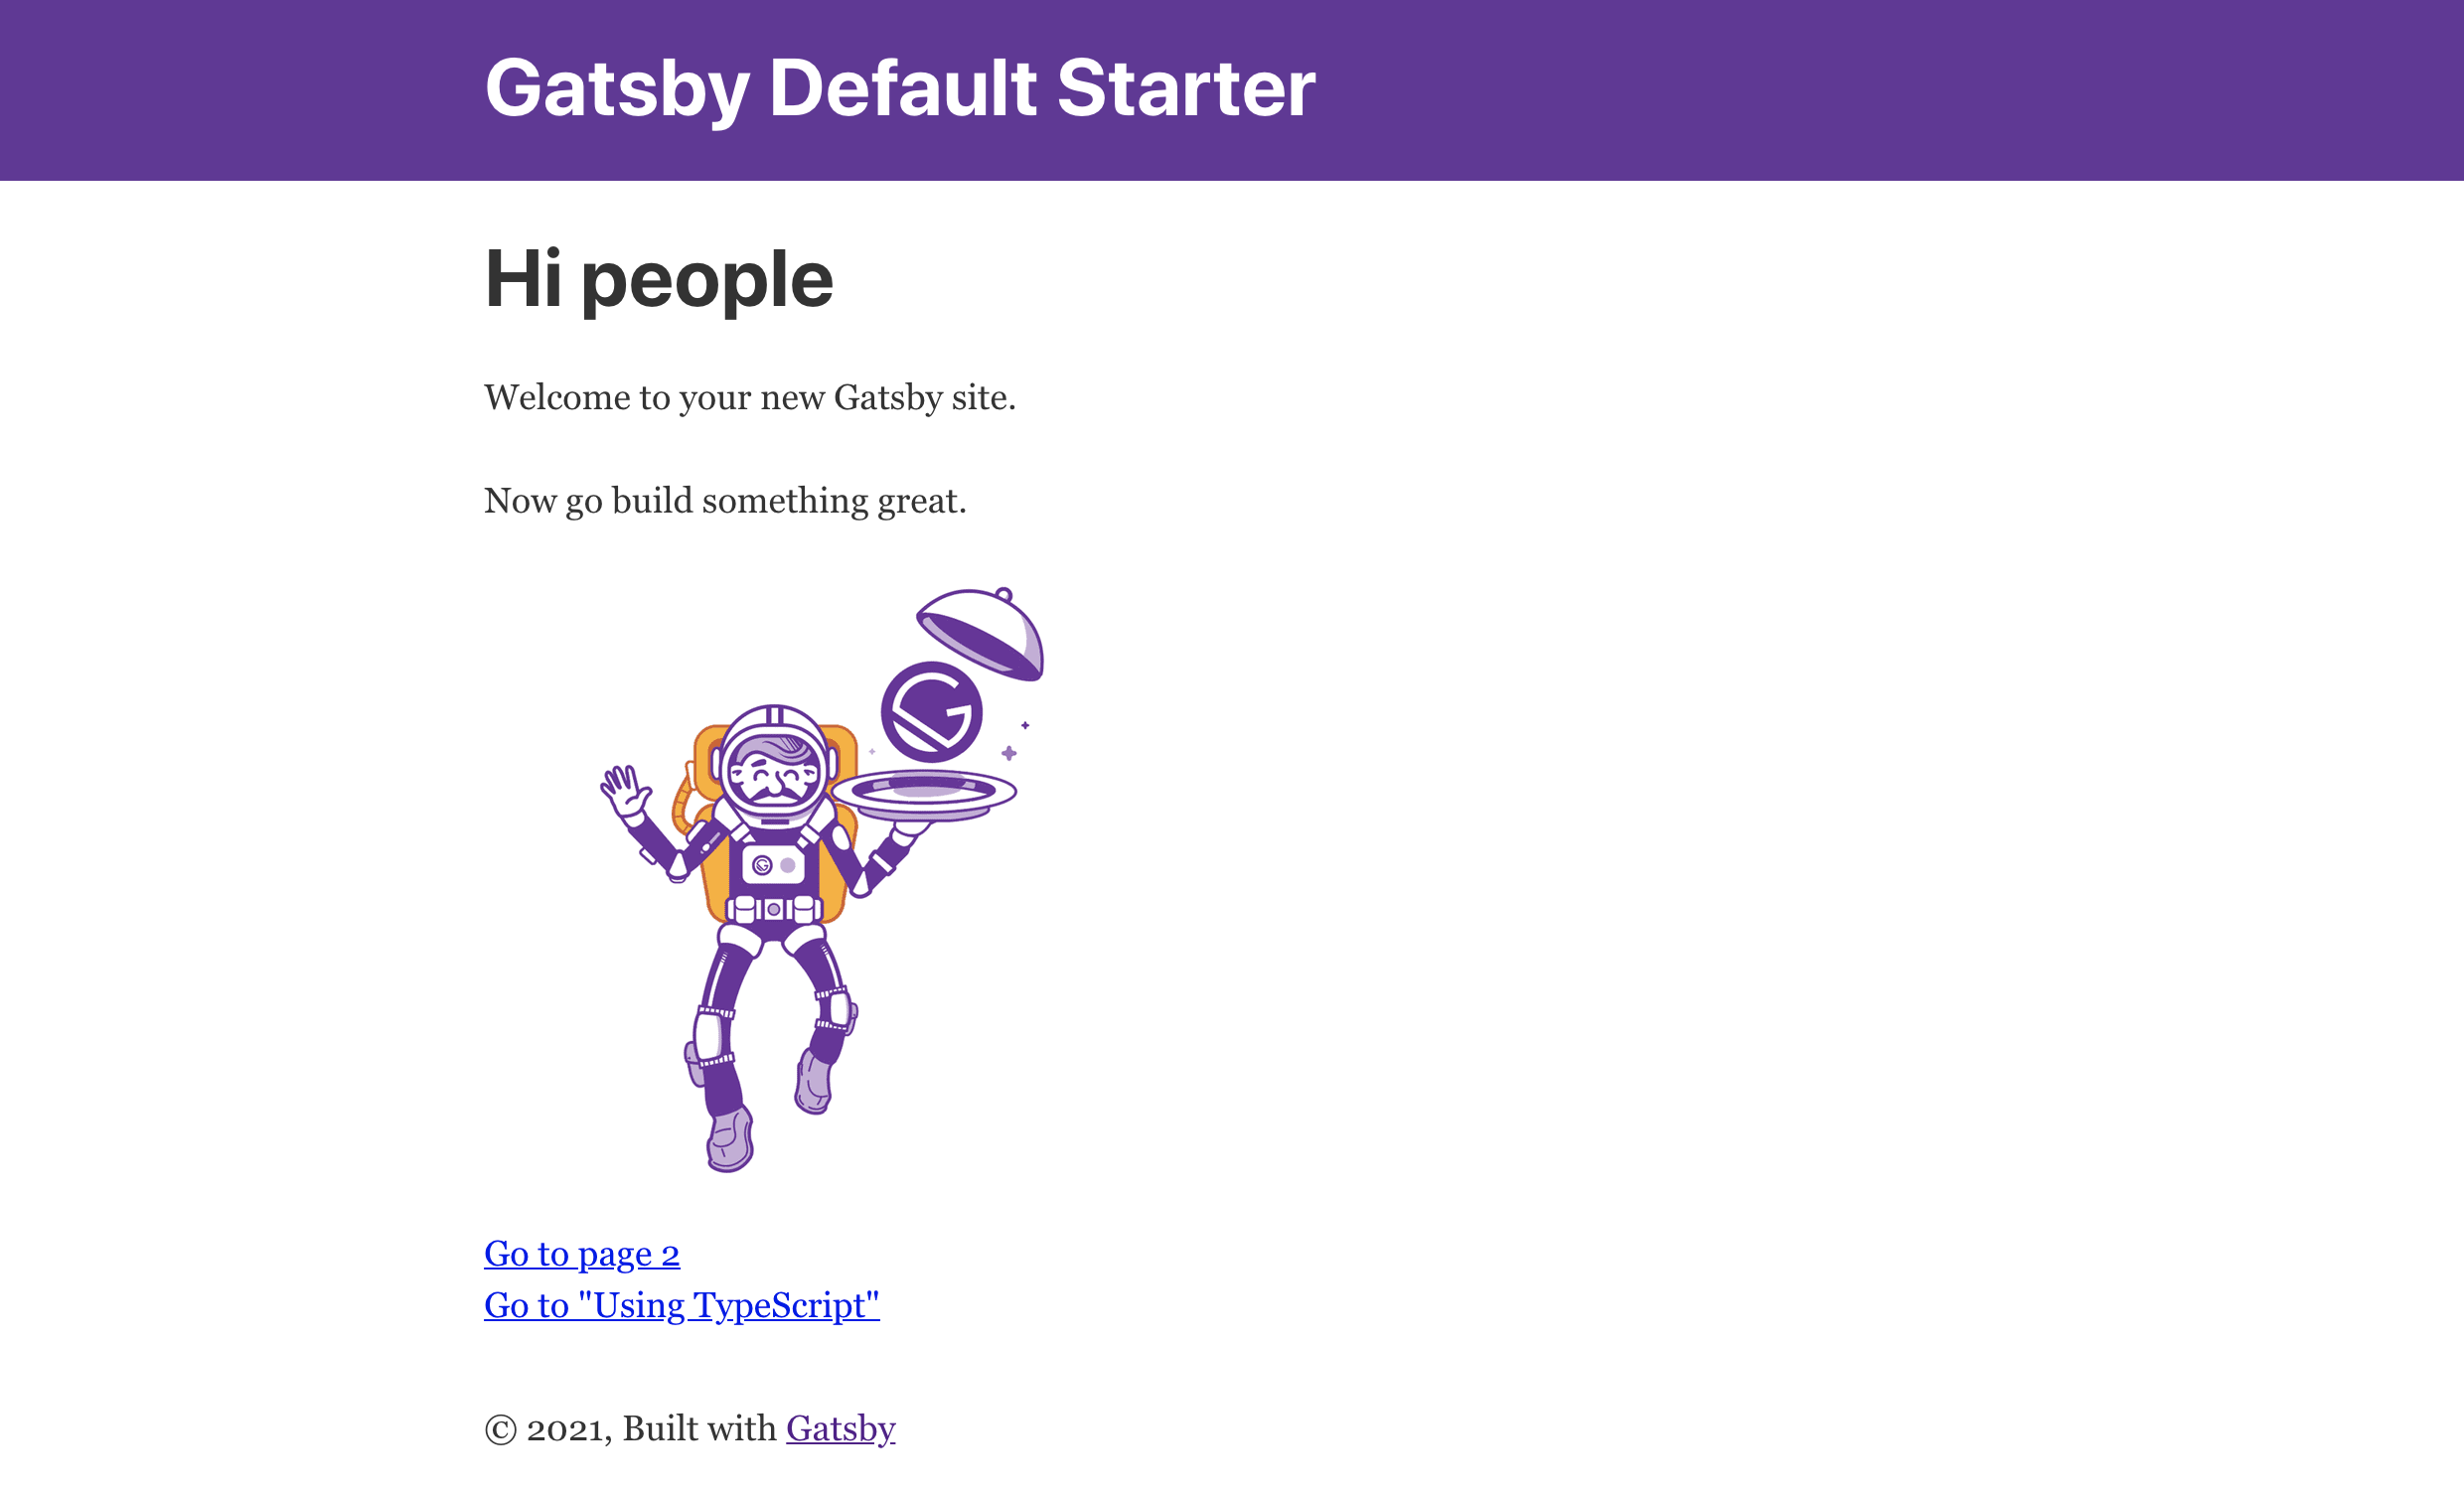
接下来,要完成设置,您将从项目的索引页面中删除一些 boilerplate 代码. 在项目的 root 目录中,前往src目录,接着是pages,然后打开index.js文件。
对于本教程,您只会使用一个<StaticImage />组件,因此您可以删除与<Link />组件相关的代码,以及h1和p元素。
 1[label gatsby-typescript-tutorial/src/pages/index.js]
 2import * as React from "react"
 3import { StaticImage } from "gatsby-plugin-image"
 4
 5import Layout from "../components/layout"
 6import Seo from "../components/seo"
 7
 8const IndexPage = () => (
 9  <Layout>
10    <Seo title="Home" />
11    <StaticImage
12      src="../images/gatsby-astronaut.png"
13      width={300}
14      quality={95}
15      formats={["AUTO", "WEBP", "AVIF"]}
16      alt="A Gatsby astronaut"
17      style={{ marginBottom: `1.45rem` }}
18    />
19  </Layout>
20)
21
22export default IndexPage
保存并关闭文件。
现在你已经创建了你的项目,并完成了一些初始设置,你已经准备好安装必要的插件。
步骤2 - 安装依赖性
为了在Gatsby中设置TypeScript的支持,您需要一些额外的插件和依赖,您将在此步骤中安装。
该 gatsby-plugin-typescript插件已经配备了新创建的Gatsby网站,除非您想要更改其默认选项,否则您不必将该插件明确添加到您的gatsby-config.js文件中。
由于您的应用程序可以读取TypeScript文件,您现在将Gatsby的JavaScript文件更改为TypeScript文件扩展. 特别是,将header.js,layout.js和seo.js更改为src/components和index.js为header.tsx,layout.tsx,seo.tsx和index.tsx:
1mv src/components/header.js src/components/header.tsx
2mv src/components/layout.js src/components/layout.tsx
3mv src/components/seo.js src/components/seo.tsx
4mv src/pages/index.js src/pages/index.tsx
您正在使用 mv 命令将文件重命名为第二个参数. .tsx 是文件扩展,因为这些文件使用 JSX。
然而,关于gatsby-plugin-typescript插件有一个重要警告:它不包括在构建时进行类型检查(TypeScript的核心功能)。如果你使用VS Code,这不会是一个问题,因为TypeScript是Visual Studio中支持的语言,但如果你使用另一个编辑器,如Atom(https://atom.io/),你需要做一些额外的配置来实现完整的TypeScript开发体验。
由于 Gatsby 是一个基于 React 的框架,所以还建议添加一些与 React 相关的额外打字。
1npm add @types/react
若要为与 React DOM 相关的类型添加类型检查,请使用此命令:
1npm add @types/react-dom
现在你已经熟悉了gatsby-plugin-typescript插件,你已经准备好在下一步中为TypeScript配置你的Gatsby网站。
步骤 3 — 用 tsconfig.json 文件为 Gatsby 配置 TypeScript
在此步骤中,你将创建一个tsconfig.json文件.一个tsconfig.json文件有两个主要目的:建立TypeScript项目的根目录(包括)和超越TypeScript编译器的默认配置(compilerOptions).有几种方法来创建这个文件。如果你有tsc命令行工具安装在npm中,你可以创建一个新的tsconfig文件与tsc –init。
相反,在目录根部创建一个新的文件(‘gatsby-typescript-project/’),并命名它为‘tsconfig.json’。
接下来,创建一个具有两个属性的对象,compilerOptions和include,其中包含以下代码:
 1[label gatsby-typescript-tutorial/tsconfig.json]
 2{
 3  "compilerOptions": {
 4    "module": "commonjs",
 5    "target": "es6",
 6    "jsx": "preserve",
 7    "lib": ["dom", "es2015", "es2017"],
 8    "strict": true,
 9    "noEmit": true,
10    "isolatedModules": true,
11    "esModuleInterop": true,
12    "skipLibCheck": true,
13    "noUnusedLocals": true,
14    "noUnusedParameters": true,
15    "removeComments": false
16  },
17  "include": ["./src/**/*"]
18}
<$>[注]
注:
此配置部分基于 gatsby-starter-typescript-plus的启动程序。
保存此文件并在完成后关闭它。
包括属性指向文件名或路径的 数组,编译器知道如何从TypeScript转换到JavaScript。
以下是compilerOptions中使用的每个选项的简要解释:
*模块' - 为项目设置模块系统;commonjs'默认使用.
*目标' - 取决于您正在使用的JavaScript的哪个版本,这个选项决定了哪些特性降级,以及哪些特性要离开。 如果您的项目部署在较旧的环境与较新环境之间,这将有所帮助。 (_) ( )* jsx ' - 确定如何在.tsx ' 档案中处理JSX。 保留 ' 选项使JSX保持不变。
lib' - 不同JS库/APIs(dom',es2015'等)的一系列特定类型定义 (- ) *严格' - 当设定为真实'时,可以使TypeScript在构建时进行类型检查。 (- ) *no Emit' - 由于Gatsby已经使用Babel来编译您的代码来读取可读取的JavaScript(- ) * ,所以你将这个选项改为ret' 离开 TypeScript。 模块- 通过选择 Babel 作为您的编译器/翻译器, 您选择一次编译一个文件, 这可能在运行时造成潜在的问题 。 设置此选项为true允许 TypeScript 在您即将遇到这个问题时警告您 。 (_) ( )*sModuleIterop' - 启用此选项可以使您使用通用JS(您的成套模块`)和ES模块(导入和导出自定义变量和函数)更好地合作,并允许所有导入的命名对象。未使用本地对象 ' 和未使用本地对象 ' - 启用这两个选项可以禁用TypeScript通常会报告的错误,如果您要创建未使用的本地变量或参数。 () ) * `remove Comments' - 设置为'false' (或根本不设置) 允许在任何类型脚本文件被转换为 JavaScript. () 后出现注释 。 (英语)
您可以了解更多有关这些不同选项的信息,并通过访问 TypeScript 的参考指南为 tsconfig。
现在,TypeScript 已为 Gatsby 配置,您将通过在src/components和src/pages中重构一些锅板文件来完成您的TypeScript集成。
步骤 4 — 用于 TypeScript 的seo.tsx重构
在此步骤中,您将添加一些TypeScript语法到seo.tsx文件. 此步骤深入解释TypeScript的一些概念;下一步将显示如何以更简短的方式重构其他锅炉板代码。
TypeScript的一个特征是其语法的灵活性.如果你不想明确地添加输入到你的变量,你不必这样做. 盖茨比认为,在工作流中采用TypeScript可以而且应该是增量,所以这个步骤将专注于三个核心TypeScript概念:
- 基本类型
- 定义类型和界面
- 处理构建时间错误
TypeScript 中的基本类型
TypeScript 支持 基本数据类型,包括: boolean, number 和 string. 与 TypeScript 相比,主要的语法差异在于,现在可以用相关类型定义变量。
例如,以下代码块显示如何用突出代码分配基本类型:
1let num: number;
2num = 0
3
4let str: string;
5str = "TypeScript & Gatsby"
6
7let typeScriptIsAwesome: boolean;
8typeScriptIsAwesome = true;
在此代码中,num必须是数字,str必须是字符串,typeScriptIsAwesome必须是boolean。
现在你将检查在seo.tsx文件中的defaultProps和propTypes声明,位于src/components目录中。
 1[label gatsby-typescript-tutorial/src/components/seo.tsx]
 2...
 3import * as React from "react"
 4import PropTypes from "prop-types"
 5import { Helmet } from "react-helmet"
 6import { useStaticQuery, graphql } from "gatsby"
 7
 8...
 9      ].concat(meta)}
10    />
11  )
12}
13
14SEO.defaultProps = {
15  lang: `en`,
16  meta: [],
17  description: ``,
18}
19
20SEO.propTypes = {
21  description: PropTypes.string,
22  lang: PropTypes.string,
23  meta: PropTypes.arrayOf(PropTypes.object),
24  title: PropTypes.string.isRequired,
25}
26
27export default SEO
默认情况下,一个Gatsby网站的SEO组件配备了使用PropTypes(https://reactjs.org/docs/typechecking-with-proptypes.html)的弱打字系统。DefaultProps和propTypes被明确表示,使用了进口的PropsTypes类别。例如,在propTypes对象的meta prop(或 alias)中,它的值是一个对象组合,每个对象本身都是PropTypes组件的 prop。
因为你正在使用TypeScript,你将取代这个打字系统。继续删除DefaultProps和propTypes(以及文件顶部的PropTypes的import声明)。
 1[label gatsby-typescript-tutorial/src/components/seo.tsx]
 2...
 3import * as React from "react"
 4import { Helmet } from "react-helmet"
 5import { useStaticQuery, graphql } from "gatsby"
 6
 7...
 8      ].concat(meta)}
 9    />
10  )
11}
12
13export default SEO
现在你已经删除了默认打字,你会用TypeScript写出类型外名。
TypeScript 接口的定义
在TypeScript中,用于定义自定义类型的形状使用一个**界面。这些界面用于代表复杂数据的值类型,如React组件和函数参数。
添加以下突出的线条:
 1[label gatsby-typescript-tutorial/src/components/seo.tsx]
 2...
 3import * as React from "react"
 4import { Helmet } from "react-helmet"
 5import { useStaticQuery, graphql } from "gatsby"
 6
 7interface SEOProps {
 8  description?: string,
 9  lang?: string,
10  meta?: Array<{name: string, content: string}>,
11  title: string
12}
13
14...
SEOProps界面实现了SEO.propTypes所做的,通过设置每个属性相关的数据类型,并根据需要与?字符标记一些。
键入一个函数
与JavaScript一样,函数在TypeScript应用中起着重要的作用,你甚至可以通过指定输入到它们中的参数的数据类型来键入函数。在seo.tsx文件中,你现在将处理定义的SEO函数组件。在SEOProps的界面被定义的地方,你将明确声明SEO组件的函数参数类型,以及SEOProps的返回类型:
添加以下突出的代码:
 1[label gatsby-typescript-tutorial/src/components/seo.tsx]
 2...
 3interface SEOProps {
 4  description?: string,
 5  lang?: string,
 6  meta?: Array<{name: string, content: string}>,
 7  title: string
 8}
 9
10function SEO({ description='', lang='en', meta=[], title }: SEOProps) {
11  ...
12}
在这里,您为SEO函数参数设置默认值,以便它们与界面保持一致,并添加了:SEOProps的界面,请记住,您至少必须在SEO组件的参数列表中包含标题,因为它被定义为您之前定义的SEOProps界面中的必要属性。
最后,您可以通过设置它们的类型来修改metaDescription和defaultTitle常数声明,在这种情况下是string:
 1[label gatsby-typescript-tutorial/src/components/seo.tsx]
 2...
 3function SEO({ description='', lang='en', meta=[], title }: SEOProps) {
 4  const { site } = useStaticQuery(
 5    graphql`
 6      query {
 7        site {
 8          siteMetadata {
 9            title
10            description
11            author
12          }
13        }
14      }
15    `
16  )
17
18  const metaDescription: string = description || site.siteMetadata.description
19  const defaultTitle: string = site.siteMetadata?.title
20...
TypeScript 中的另一个类型是任何类型. 对于您处理的变量类型不明确或难以定义的情况下,请使用任何作为最后手段来避免任何构建时的错误。
使用任何类型的例子是处理来自第三方的数据,例如 API 请求或 GraphQL 查询。在seo.tsx文件中,破坏的网站属性用 GraphQL 静态查询定义,将其类型设置为任何:
 1[label gatsby-typescript-tutorial/src/components/seo.tsx]
 2...
 3interface SEOProps {
 4  description?: string,
 5  lang?: string,
 6  meta?: Array<{name: string, content: string}>,
 7  title: string
 8}
 9
10function SEO({ description='', lang='en', meta=[], title }: Props) {
11  const { site }: any = useStaticQuery(
12    graphql`
13      query {
14        site {
15          siteMetadata {
16            title
17            description
18            author
19          }
20        }
21      }
22    `
23  )
24  ...
25}
保存和退出文件。
重要的是始终保持定义的值与它们的类型一致,否则,您将看到通过TypeScript编译器出现构建时的错误。
构建时间错误
将有助于习惯于TypeScript在构建时会捕获和报告的错误,这个想法是,TypeScript在构建时捕获这些错误,主要是与类型相关的错误,这减少了长期的调试量(在构建时)。
一个构建时间错误的例子是,当您声明一种类型的变量,但分配给它另一种类型的值时,如果您要将转移到SEO组件中的一个关键字参数的值更改为另一种类型的值,TypeScript 编译器将检测不一致并报告错误。
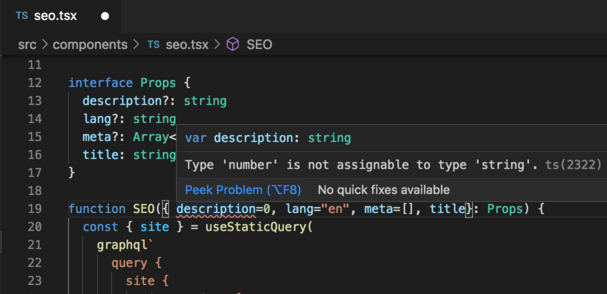
错误表示类型数字不能被分配到键入字符串。 这是因为,当您设置界面时,您表示描述属性将是类型字符串`。
步骤5 – 重构剩余的锅炉板
最后,您将使用 TypeScript 重构剩余的锅炉板文件: layout.tsx 和 header.tsx. 像 seo.tsx,这些组件文件位于 src/components 目录中。
打开src/components/layout.tsx。向下,定义为Layout.propTypes。
 1[label gatsby-typescript-tutorial/src/components/layout.tsx]
 2/**
 3 * Layout component that queries for data
 4 * with Gatsby's useStaticQuery component
 5 *
 6 * See: https://www.gatsbyjs.com/docs/use-static-query/
 7 */
 8
 9import * as React from "react"
10import PropTypes from "prop-types"
11import { useStaticQuery, graphql } from "gatsby"
12...
13
14Layout.propTypes = {
15  children: PropTypes.node.isRequired,
16}
17
18export default Layout
由于布局中的孩子可以是从简单的文本到 React 儿童组件的任何东西,请使用ReactNode作为相关类型,通过导入靠近顶部并将其添加到界面:
添加以下突出的线条:
 1[label gatsby-typescript-tutorial/src/components/layout.tsx]
 2...
 3import * as React from "react"
 4import { useStaticQuery, graphql } from "gatsby"
 5
 6import Header from "./header"
 7import "./layout.css"
 8
 9interface LayoutProps {
10  children: ReactNode
11}
12
13const Layout = ({ children }: LayoutProps) => {
14  ...
接下来,将一个类型添加到存储一个收集网站标题数据的 GraphQL 查询的数据变量中,因为这个查询对象来自像 GraphQL 这样的第三方实体,所以给数据一个任何类型。
 1[label gatsby-typescript-tutorial/src/components/layout.tsx]
 2...
 3const Layout = ({ children }: LayoutProps) => {
 4  const data: any = useStaticQuery(graphql`
 5  query MyQuery {
 6    site {
 7      siteMetadata {
 8        title
 9      }
10    }
11  }
12`)
13
14const siteTitle: string = data.site.siteMetadata?.title || `Title`
15
16  return (
17    <>
18      <Header siteTitle={siteTitle} />
19      <div
20...
保存并关闭文件。
现在打开src/components/header.tsx文件. 此文件还附有预定义的 prop 类型,使用PropTypes类。 像seo.tsx和layout.tsx,用相同的 prop 名称代替Header.defaultProps和Header.propTypes:
 1[label gatsby-typescript-tutorial/src/components/header.tsx]
 2import * as React from "react"
 3import { Link } from "gatsby"
 4
 5interface HeaderProps {
 6  siteTitle: string
 7}
 8
 9const Header = ({ siteTitle }: HeaderProps) => (
10  <header
11    style={{
12      background: `rebeccapurple`,
13      marginBottom: `1.45rem`,
14    }}
15  >
16    <div
17      style={{
18        margin: `0 auto`,
19        maxWidth: 960,
20        padding: `1.45rem 1.0875rem`,
21      }}
22    >
23      <h1 style={{ margin: 0 }}>
24        <Link
25          to="/"
26          style={{
27            color: `white`,
28            textDecoration: `none`,
29          }}
30        >
31          {siteTitle}
32        </Link>
33      </h1>
34    </div>
35  </header>
36)
37
38export default Header
保存并关闭文件。
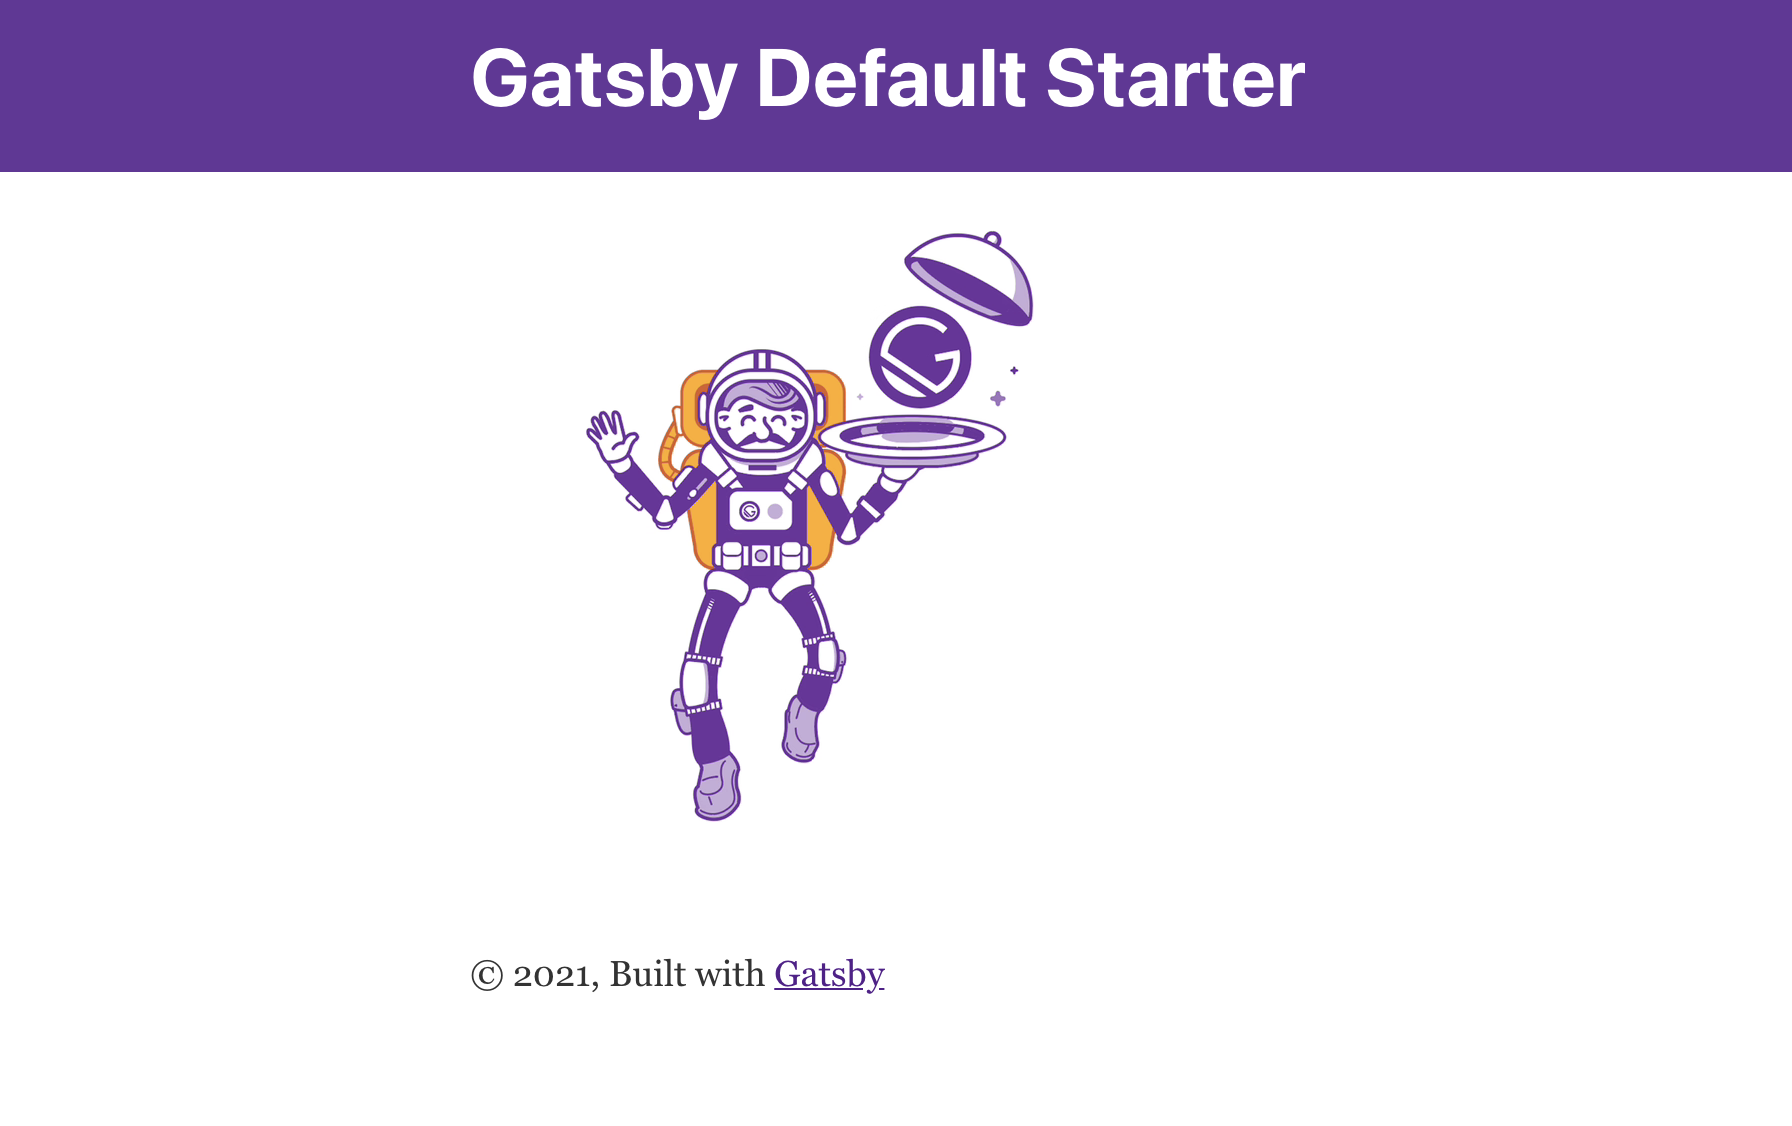
随着您的文件为 TypeScript 进行了重构,您现在可以重新启动服务器,以确保一切正常工作。
1gatsby develop
当您导航到localhost:8000,您的浏览器将显示如下:
结论
TypeScript 的静态打字功能在尽量减少调试方面有很长的路要走,它也是 Gatsby 站点的一个很好的语言,因为它是默认支持的。
要了解更多关于TypeScript和你可以用它做的一切,请转到我们的 How To Code in TypeScript 系列。