作者选择了 开放式互联网 / 自由言论基金作为 写给捐赠计划的一部分接受捐款。
介绍
网络正在不断发展,现在它可以实现以前仅在本地移动设备上可用的功能。JavaScript(https://developers.google.com/web/fundamentals/primers/service-workers/)的引入为网络提供了新发现的功能,比如背景同步、离线缓存和发送 推送通知。
推送通知允许用户选择接收移动和Web应用程序的更新,并允许用户使用自定义和相关的内容重新参与现有应用程序。
在本教程中,您将在 Ubuntu 18.04 上设置一个 Django 应用程序,该应用程序每次需要用户访问该应用程序时都会发送推送通知. 为了创建这些通知,您将使用 Django-Webpush)包,并设置并注册服务人员向客户端显示通知。
前提条件
在您开始本指南之前,您将需要以下内容:
您可以遵循本 初始服务器设置指南中的指南,以获取有关如何创建 Ubuntu 18.04 服务器的更多信息。
pip和venv安装在这些指南(https://andsky.com/tech/tutorials/how-to-install-the-django-web-framework-on-ubuntu-18-04#install-with-pip-in-a-virtual-environment)下。 在您的主目录中创建的名为djangopush的 Django 项目,在 [在 Ubuntu 18.04 上创建样本 Django 项目] 上设置这些指南。
步骤 1 — 安装 Django-Webpush 并获取 Vapid 键
Django-Webpush 是一个包,允许开发人员在 Django 应用程序中集成和发送 Web 推送通知. 我们将使用该包从我们的应用程序中触发和发送推送通知. 在此步骤中,您将安装 Django-Webpush 并获得用于识别您的服务器和确保每个请求的独特性所必需的 Voluntary Application Server Identification (VAPID) 密钥。
请确保您位于您在前提条件下创建的 ~/djangopush 项目目录中:
1cd ~/djangopush
激活您的虚拟环境:
1source my_env/bin/activate
升级您的pip版本,以确保它是最新的:
1pip install --upgrade pip
安装 Django Webpush 时:
1pip install django-webpush
安装后,将其添加到您的settings.py文件中的应用程序列表中。
1nano ~/djangopush/djangopush/settings.py
将webpush添加到INSTALLED_APPS列表中:
1[label ~/djangopush/djangopush/settings.py]
2...
3
4INSTALLED_APPS = [
5    ...,
6    'webpush',
7]
8...
保存文件并离开编辑器。
在应用程序上运行 迁移,将您对数据库架构所做的更改应用:
1python manage.py migrate
输出将是这样的,表明成功的迁移:
1[secondary_label Output]
2Operations to perform:
3  Apply all migrations: admin, auth, contenttypes, sessions, webpush
4Running migrations:
5  Applying webpush.0001_initial... OK
设置 Web 推送通知的下一步是获取 VAPID 密钥. 这些密钥识别应用程序服务器,可以用来减少推送订阅 URL 的保密性,因为它们限制了特定服务器的订阅。
要获取 VAPID 密钥,请导航到 web 应用程序 wep-push-codelab。
接下来,在settings.py中创建一个新的条目,以获取您的 VAPID 信息。
1nano ~/djangopush/djangopush/settings.py
接下来,添加一个名为WEBPUSH_SETTINGS的新指令与您的VAPID公共和私钥和您的电子邮件下面的AUTH_PASSWORD_VALIDATORS:
 1[label ~/djangopush/djangopush/settings.py]
 2...
 3
 4AUTH_PASSWORD_VALIDATORS = [
 5    ...
 6]
 7
 8WEBPUSH_SETTINGS = {
 9   "VAPID_PUBLIC_KEY": "your_vapid_public_key",
10   "VAPID_PRIVATE_KEY": "your_vapid_private_key",
11   "VAPID_ADMIN_EMAIL": "[email protected]"
12}
13
14# Internationalization
15# https://docs.djangoproject.com/en/2.0/topics/i18n/
16
17...
不要忘了用你自己的信息来替换your_vapid_public_key,your_vapid_private_key和[email protected]。
接下来,我们将设置视图,显示应用程序的首页,并触发向订阅用户的推送通知。
步骤2 - 设置观点
在此步骤中,我们将为我们的主页设置一个基本的 home view 和 HttpResponse 响应对象,以及一个 send_push 视图。 视图是返回来自 Web 请求的响应对象的函数。
请导航到 ~/djangopush/djangopush 文件夹:
1cd ~/djangopush/djangopush
在文件夹中运行ls将显示项目的主要文件:
1[secondary_label Output]
2/__init__.py
3/settings.py
4/urls.py
5/wsgi.py
此文件夹中的文件由您在前提条件下创建项目的django-admin工具自动生成。settings.py文件包含整个项目的配置,如安装的应用程序和静态根文件夹。urls.py文件包含项目的URL配置。
在~/djangopush/djangopush目录中创建一个名为views.py的新文件,该文件将包含您的项目的视图:
1nano ~/djangopush/djangopush/views.py
我们将创建的第一个视图是首页视图,该视图将显示用户可以发送推送通知的首页。
1[label ~/djangopush/djangopush/views.py]
2from django.http.response import HttpResponse
3from django.views.decorators.http import require_GET
4
5@require_GET
6def home(request):
7    return HttpResponse('<h1>Home Page<h1>')
Home视图由require_GET装饰器装饰,该视图仅限于 GET 请求。
我们将创建的下一个视图是send_push,该视图将使用django-webpush包来处理发送的推送通知。它将仅限于POST请求,并且将免受 Cross Site Request Forgery (CSRF)的保护。这样做将允许您使用 Postman或任何其他RESTful服务来测试视图。
若要创建send_push视图,请先添加以下导入,以启用 JSON 响应,并在webpush库中访问send_user_notification函数:
1[label ~/djangopush/djangopush/views.py]
2from django.http.response import JsonResponse, HttpResponse
3from django.views.decorators.http import require_GET, require_POST
4from django.shortcuts import get_object_or_404
5from django.contrib.auth.models import User
6from django.views.decorators.csrf import csrf_exempt
7from webpush import send_user_notification
8import json
接下来,添加require_POST装饰程序,该装饰程序将使用用户发送的请求体来创建和触发推送通知:
 1[label ~/djangopush/djangopush/views.py]
 2@require_GET
 3def home(request):
 4    ...
 5
 6@require_POST
 7@csrf_exempt
 8def send_push(request):
 9    try:
10        body = request.body
11        data = json.loads(body)
12
13        if 'head' not in data or 'body' not in data or 'id' not in data:
14            return JsonResponse(status=400, data={"message": "Invalid data format"})
15
16        user_id = data['id']
17        user = get_object_or_404(User, pk=user_id)
18        payload = {'head': data['head'], 'body': data['body']}
19        send_user_notification(user=user, payload=payload, ttl=1000)
20
21        return JsonResponse(status=200, data={"message": "Web push successful"})
22    except TypeError:
23        return JsonResponse(status=500, data={"message": "An error occurred"})
对于发送_推送视图,我们使用两种装饰器:要求_POST 装饰器,该装饰器仅限于 POST 请求,以及免除 CSRF 保护的装饰器。
此视图预计 POST 数据,并执行以下操作:它获得请求的体,并使用 json包将 JSON 文档转化为 Python 对象,使用 `json.loads'。
视图预计请求体对象具有三个属性:
head:推送通知的标题.body:通知的身体.id:请求用户的id。
如果缺少任何所需的属性,则视图将返回一个JSONResponse具有404Not Found状态。如果使用该提供的主要密钥的用户存在,则视图将返回使用django.shortcuts库的get_object_or_404函数的用户与匹配的主要密钥。
此视图还使用来自webpush库的send_user_notification函数,该函数需要三个参数:
*「使用者」:推送通知的收件人.
payload:通知信息,其中包括通知「頭部」和「身體」。ttl:如果使用者不在線狀態下,通知應儲存的秒數最長時間。
如果没有出现错误,视图将返回一个JSONResponse和200成功状态和数据对象. 如果出现KeyError,视图将返回500内部服务器错误状态。
在下一步中,我们将创建相应的 URL 路径,以匹配我们创建的视图。
步骤 3 – 将 URL 映射到视图
Django 允许创建连接到视图的 URLs以使用一个名为URLconf的Python模块。此模块将 URL 路径表达式绘制到 Python 函数(您的视图)。通常,当您创建项目时,会自动生成一个 URL 配置文件。
有关视图的更多信息,请参阅 How To Create Django Views。
打开urls.py:
1nano ~/djangopush/djangopush/urls.py
文件将看起来像这样:
 1[label ~/djangopush/djangopush/urls.py]
 2
 3"""untitled URL Configuration
 4
 5The `urlpatterns` list routes URLs to views. For more information please see:
 6    https://docs.djangoproject.com/en/2.1/topics/http/urls/
 7Examples:
 8Function views
 9    1. Add an import:  from my_app import views
10    2. Add a URL to urlpatterns:  path('', views.home, name='home')
11Class-based views
12    1. Add an import:  from other_app.views import Home
13    2. Add a URL to urlpatterns:  path('', Home.as_view(), name='home')
14Including another URLconf
15    1. Import the include() function: from django.urls import include, path
16    2. Add a URL to urlpatterns:  path('blog/', include('blog.urls'))
17"""
18from django.contrib import admin
19from django.urls import path
20
21urlpatterns = [
22    path('admin/', admin.site.urls),
23]
下一步是将您创建的视图绘制到 URL。 首先,添加包括导入,以确保 Django-Webpush 库的所有路径都被添加到您的项目中:
1[label ~/djangopush/djangopush/urls.py]
2
3"""webpushdjango URL Configuration
4...
5"""
6from django.contrib import admin
7from django.urls import path, include
接下来,导入您在最后一步中创建的视图,并更新urlpatterns列表以绘制您的视图:
 1[label ~/djangopush/djangopush/urls.py]
 2
 3"""webpushdjango URL Configuration
 4...
 5"""
 6from django.contrib import admin
 7from django.urls import path, include
 8
 9from .views import home, send_push
10
11urlpatterns = [
12                  path('admin/', admin.site.urls),
13                  path('', home),
14                  path('send_push', send_push),
15                  path('webpush/', include('webpush.urls')),
16              ]
在这里,urlpatterns列表注册了django-webpush包的URL,并将您的视图绘制到/send_push和/home的URL。
让我们测试/home视图,以确保它按预期工作. 确保您位于项目的根目录:
1cd ~/djangopush
启动您的服务器,运行以下命令:
1python manage.py runserver your_server_ip:8000
点击http://your_server_ip:8000浏览,您应该看到以下首页:
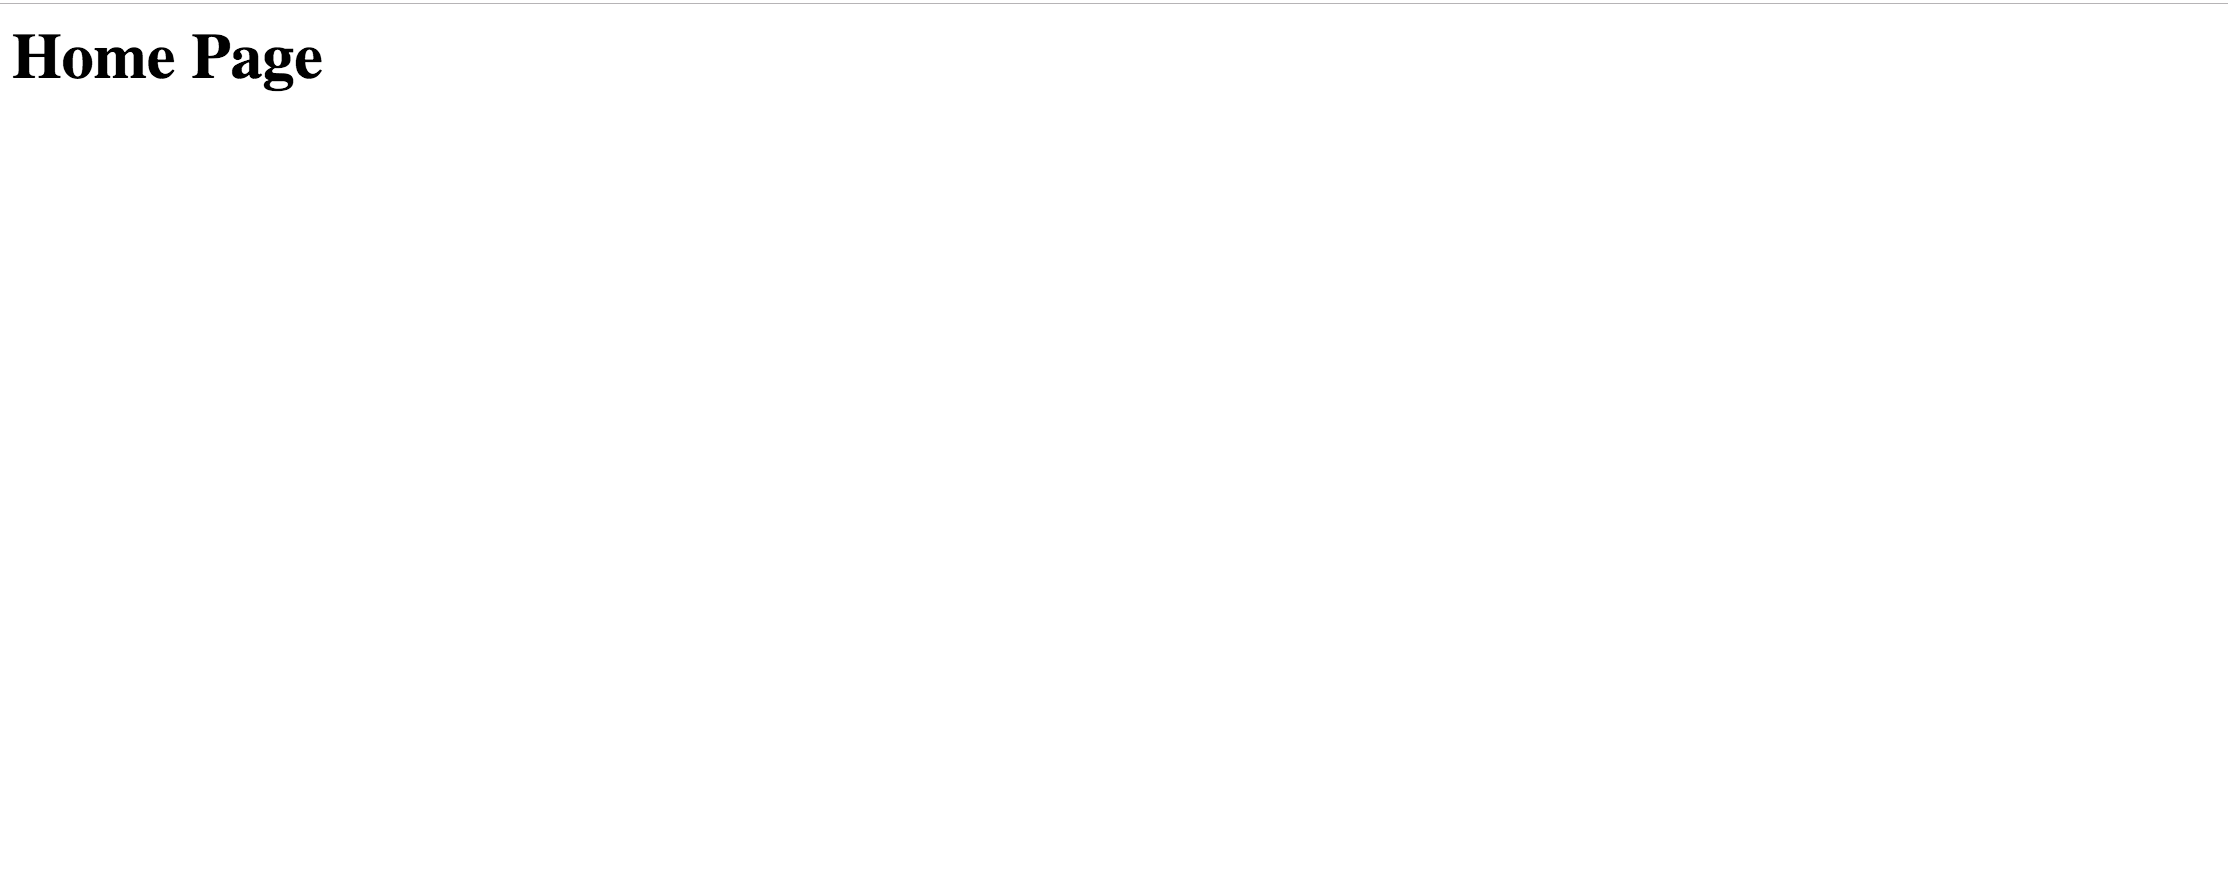
在此时,您可以用CTRL+C杀死服务器,我们将继续创建模板并使用渲染函数在我们的视图中渲染它们。
步骤4:创建模板
Django 的模板引擎允许您用类似于 HTML 文件的模板来定义应用程序的面向用户的层面,在此步骤中,您将创建和渲染一个模板用于家视图。
在项目的根目录中创建一个名为模板的文件夹:
1mkdir ~/djangopush/templates
如果您在这个时候在项目的根文件夹中运行ls,输出将看起来像这样:
1[secondary_label Output]
2/djangopush
3/templates
4db.sqlite3
5manage.py
6/my_env
在模板文件夹中创建一个名为home.html的文件:
1nano ~/djangopush/templates/home.html
将下列代码添加到文件中,创建一个表单,用户可以输入信息来创建推送通知:
 1{% load static %}
 2<!DOCTYPE html>
 3<html lang="en">
 4<head>
 5    <meta charset="UTF-8">
 6    <meta name="viewport" content="width=device-width, initial-scale=1.0">
 7    <meta http-equiv="X-UA-Compatible" content="ie=edge">
 8    <meta name="vapid-key" content="{{ vapid_key }}">
 9    {% if user.id %}
10        <meta name="user_id" content="{{ user.id }}">
11    {% endif %}
12    <title>Web Push</title>
13    <link href="https://fonts.googleapis.com/css?family=PT+Sans:400,700" rel="stylesheet">
14</head>
15
16<body>
17<div>
18    <form id="send-push__form">
19        <h3 class="header">Send a push notification</h3>
20        <p class="error"></p>
21        <input type="text" name="head" placeholder="Header: Your favorite airline 😍">
22        <textarea name="body" id="" cols="30" rows="10" placeholder="Body: Your flight has been cancelled 😱😱😱"></textarea>
23        <button>Send Me</button>
24    </form>
25</div>
26</body>
27</html>
文件的体包括一个有两个字段的表单:一个输入元素将包含通知的头部/标题,一个textarea元素将包含通知的体。
在文件的头部部分,有两个meta标签,将持有VAPID公共密钥和用户的ID. 这些两种变量需要注册用户并向他们发送推送通知。 用户的ID需要在这里,因为你将向服务器发送AJAX请求,并将使用id来识别用户。
下一步是告诉Django在哪里找到你的模板. 要做到这一点,你会编辑settings.py并更新TEMPLATES列表。
打开settings.py文件:
1nano ~/djangopush/djangopush/settings.py
将下列内容添加到DIRS列表中,以指定通往模板目录的路径:
 1[label ~/djangopush/djangopush/settings.py]
 2...
 3TEMPLATES = [
 4    {
 5        'BACKEND': 'django.template.backends.django.DjangoTemplates',
 6        'DIRS': [os.path.join(BASE_DIR, 'templates')],
 7        'APP_DIRS': True,
 8        'OPTIONS': {
 9            'context_processors': [
10                ...
11            ],
12        },
13    },
14]
15...
接下来,在您的views.py文件中,更新home视图以返回home.html模板。
1nano ~/djangpush/djangopush/views.py
首先,添加一些额外的导入,包括设置配置,其中包含来自settings.py文件的所有项目设置,以及来自django.shortcuts的渲染函数:
1[label ~/djangopush/djangopush/views.py]
2...
3from django.shortcuts import render, get_object_or_404
4...
5import json
6from django.conf import settings
7
8...
接下来,删除您在首页视图中添加的初始代码,并添加以下内容,说明您刚刚创建的模板将如何渲染:
1[label ~/djangopush/djangopush/views.py]
2...
3
4@require_GET
5def home(request):
6   webpush_settings = getattr(settings, 'WEBPUSH_SETTINGS', {})
7   vapid_key = webpush_settings.get('VAPID_PUBLIC_KEY')
8   user = request.user
9   return render(request, 'home.html', {user: user, 'vapid_key': vapid_key})
代码分配以下变量:
webpush_settings:从settings配置中分配到WEBPUSH_SETTINGS属性的值。vapid_key:从webpush_settings对象中获取VAPID_PUBLIC_KEY值,以便将其发送给客户端。 这个公共密钥对私钥进行检查,以确保具有公共密钥的客户端可以从服务器接收推送消息。
render 函数将返回一个 HTML 文件和一个包含当前用户和服务器的 vapid 公共密钥的 context object。
随着我们的模板创建和家视图的更新,我们可以继续配置Django来服务我们的静态文件。
步骤 5 – 服务静态文件
网页应用程序包括CSS、JavaScript和其他图像文件,Django称之为静态文件。Django允许您从项目中的每个应用程序中收集所有静态文件到一个单一的位置,从那里它们被服务。这个解决方案被称为django.contrib.staticfiles。
打开Settings.py:
1nano ~/djangopush/djangopush/settings.py
在settings.py中,首先确保STATIC_URL已定义:
1[label ~/djangopush/djangopush/settings.py]
2...
3STATIC_URL = '/static/'
接下来,添加一个名为STATICFILES_DIRS的目录列表,Django会搜索静态文件:
1[label ~/djangopush/djangopush/settings.py]
2...
3STATIC_URL = '/static/'
4STATICFILES_DIRS = [
5    os.path.join(BASE_DIR, "static"),
6]
您现在可以将STATIC_URL添加到您的urls.py文件中定义的路径列表中。
打开文件:
1nano ~/djangopush/djangopush/urls.py
添加以下代码,将导入静态 url 配置并更新urlpatterns列表. 这里的帮助函数使用我们在settings.py文件中提供的STATIC_URL和STATIC_ROOT属性来服务项目的静态文件:
1[label ~/djangopush/djangopush/urls.py]
2
3...
4from django.conf import settings
5from django.conf.urls.static import static
6
7urlpatterns = [
8    ...
9]  + static(settings.STATIC_URL, document_root=settings.STATIC_ROOT)
随着我们的静态文件设置配置,我们可以继续对应用程序的首页进行样式化。
步骤6 - 设计首页
设置您的应用程序以服务静态文件后,您可以创建一个外部样式表,并将其链接到home.html文件来样式化首页. 您的所有静态文件将存储在项目的根文件夹中的静态目录中。
在静态文件夹中创建一个静态文件夹和一个css文件夹:
1mkdir -p ~/djangopush/static/css
在css文件夹中打开名为styles.css的 css 文件:
1nano ~/djangopush/static/css/styles.css
为主页添加以下风格:
 1[label ~/djangopush/static/css/styles.css]
 2
 3body {
 4    height: 100%;
 5    background: rgba(0, 0, 0, 0.87);
 6    font-family: 'PT Sans', sans-serif;
 7}
 8
 9div {
10    height: 100%;
11    display: flex;
12    align-items: center;
13    justify-content: center;
14}
15
16form {
17    display: flex;
18    flex-direction: column;
19    align-items: center;
20    justify-content: center;
21    width: 35%;
22    margin: 10% auto;
23}
24
25form > h3 {
26    font-size: 17px;
27    font-weight: bold;
28    margin: 15px 0;
29    color: orangered;
30    text-transform: uppercase;
31}
32
33form > .error {
34    margin: 0;
35    font-size: 15px;
36    font-weight: normal;
37    color: orange;
38    opacity: 0.7;
39}
40
41form > input, form > textarea {
42    border: 3px solid orangered;
43    box-shadow: unset;
44    padding: 13px 12px;
45    margin: 12px auto;
46    width: 80%;
47    font-size: 13px;
48    font-weight: 500;
49}
50
51form > input:focus, form > textarea:focus {
52    border: 3px solid orangered;
53    box-shadow: 0 2px 3px 0 rgba(0, 0, 0, 0.2);
54    outline: unset;
55}
56
57form > button {
58    justify-self: center;
59    padding: 12px 25px;
60    border-radius: 0;
61    text-transform: uppercase;
62    font-weight: 600;
63    background: orangered;
64    color: white;
65    border: none;
66    font-size: 14px;
67    letter-spacing: -0.1px;
68    cursor: pointer;
69}
70
71form > button:disabled {
72    background: dimgrey;
73    cursor: not-allowed;
74}
创建风格表时,您可以使用 static template tags将其链接到 home.html 文件。
1nano ~/djangopush/templates/home.html
更新头部部分以包含对外部风格表的链接:
 1[label ~/djangopush/templates/home.html]
 2
 3{% load static %}
 4<!DOCTYPE html>
 5<html lang="en">
 6
 7<head>
 8    ...
 9    <link href="{% static '/css/styles.css' %}" rel="stylesheet">
10</head>
11<body>
12    ...
13</body>
14</html>
请确保您位于主项目目录,并重新启动服务器以检查您的工作:
1cd ~/djangopush
2python manage.py runserver your_server_ip:8000
当你访问http://your_server_ip:8000,它应该是这样的:
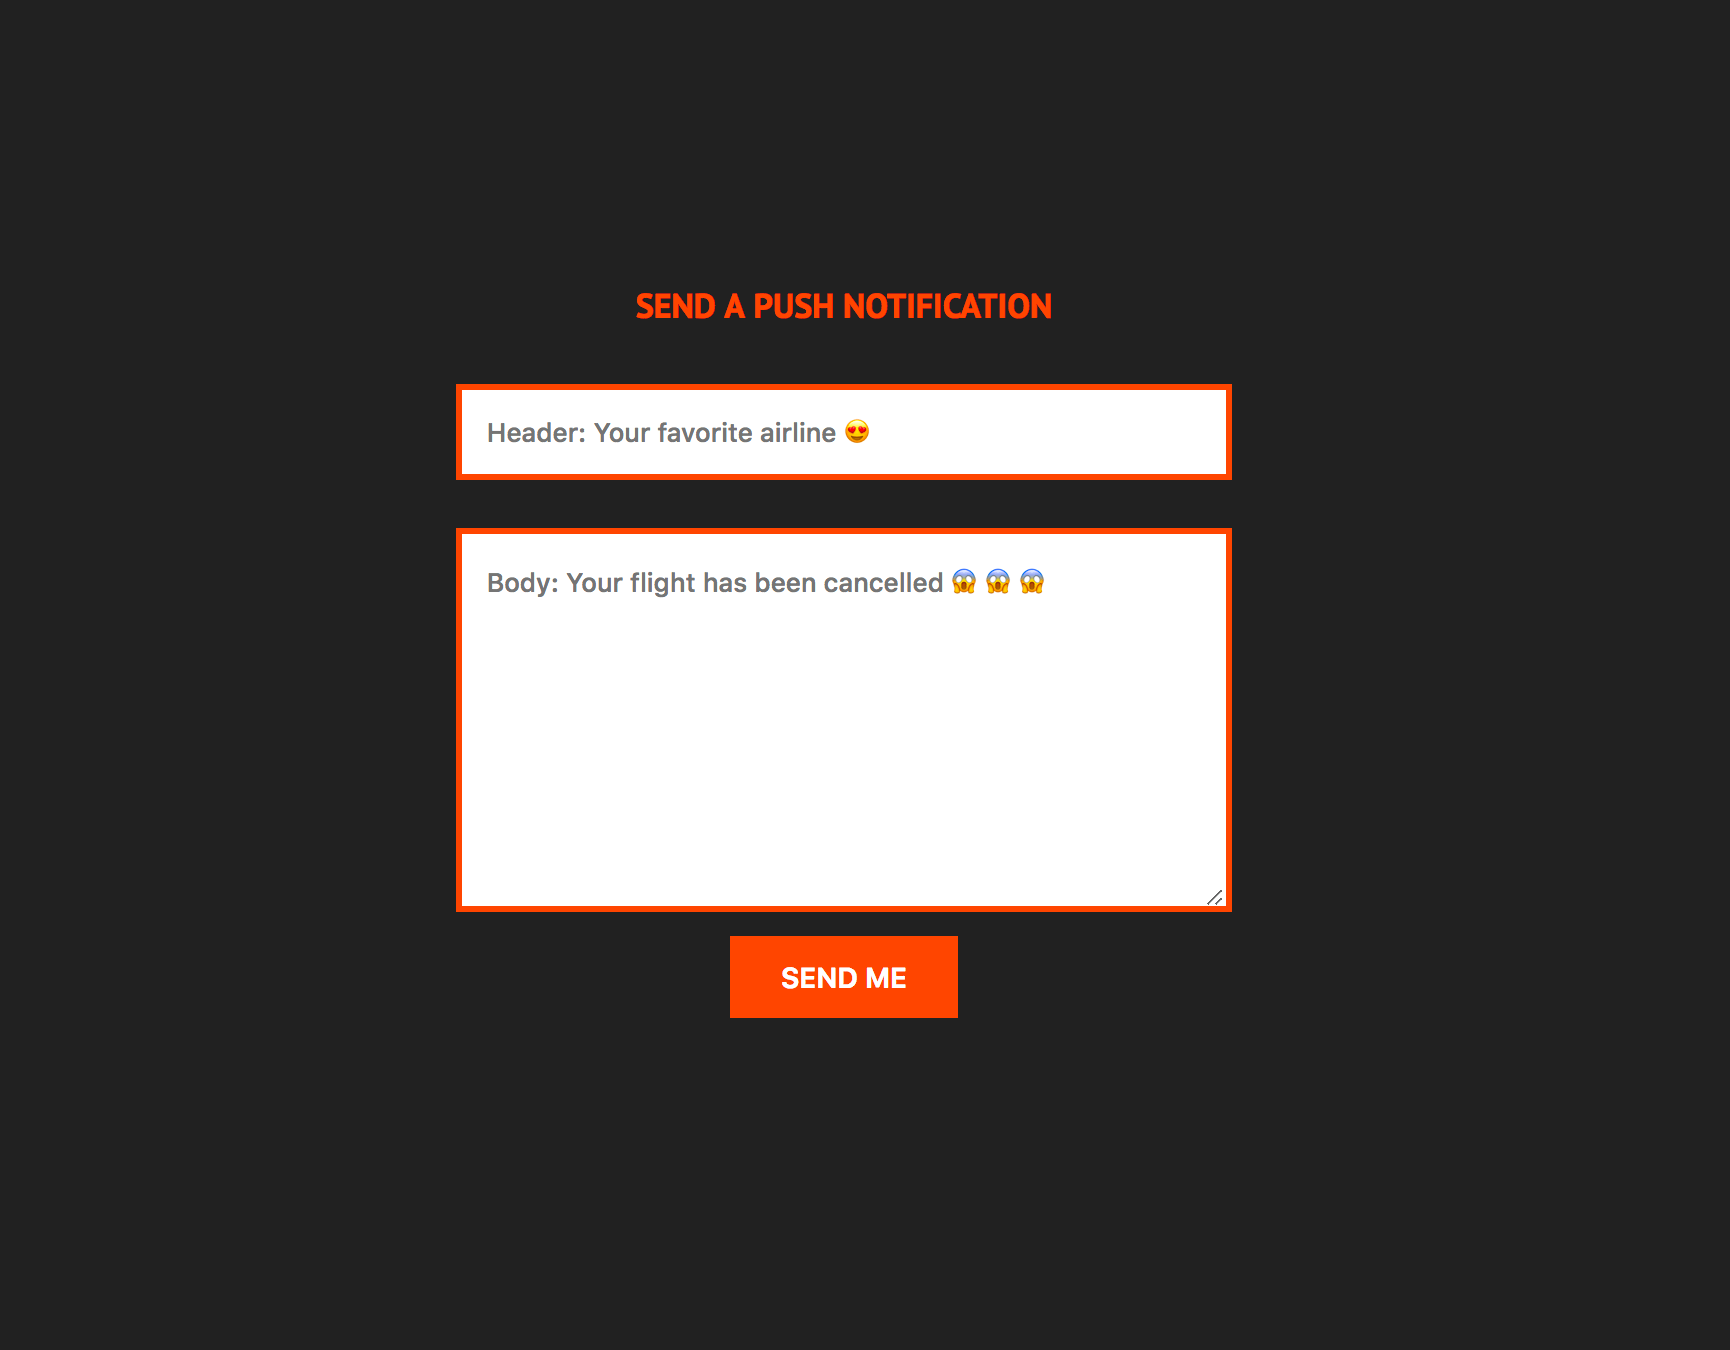 Again, you can kill the server with
 CTRL+C.
现在,您已经成功创建了home.html页面并定制了它,您可以订阅用户每次访问主页时推送通知。
步骤 7 – 注册服务工作者并订阅用户推送通知
网页推送通知可以通知用户,如果他们订阅的应用程序有更新,或者促使他们重新参与他们过去使用的应用程序,它们依赖于两个技术,即 push API 和 notifications API。
当服务器向服务人员提供信息,服务人员使用通知 API 显示此信息时,会引用推送。
我们将向用户订阅推送,然后将订阅信息发送到服务器来注册他们。
在静态目录中,创建一个名为js的文件夹:
1mkdir ~/djangopush/static/js
创建一个名为registerSw.js的文件:
1nano ~/djangopush/static/js/registerSw.js
添加以下代码,在尝试注册服务人员之前检查服务人员是否在用户的浏览器上受支持:
 1[label ~/djangopush/static/js/registerSw.js]
 2
 3const registerSw = async () => {
 4    if ('serviceWorker' in navigator) {
 5        const reg = await navigator.serviceWorker.register('sw.js');
 6        initialiseState(reg)
 7
 8    } else {
 9        showNotAllowed("You can't send push notifications ☹️😢")
10    }
11};
首先,registerSw函数在注册前检查浏览器是否支持服务人员。注册后,它与注册数据一起调用initializeState函数。
接下来,在registerSw函数下方添加以下代码,以检查用户是否有资格收到推送通知,然后尝试订阅:
 1[label ~/djangopush/static/js/registerSw.js]
 2
 3...
 4
 5const initialiseState = (reg) => {
 6    if (!reg.showNotification) {
 7        showNotAllowed('Showing notifications isn\'t supported ☹️😢');
 8        return
 9    }
10    if (Notification.permission === 'denied') {
11        showNotAllowed('You prevented us from showing notifications ☹️🤔');
12        return
13    }
14    if (!'PushManager' in window) {
15        showNotAllowed("Push isn't allowed in your browser 🤔");
16        return
17    }
18    subscribe(reg);
19}
20
21const showNotAllowed = (message) => {
22    const button = document.querySelector('form>button');
23    button.innerHTML = `${message}`;
24    button.setAttribute('disabled', 'true');
25};
initializeState函数检查如下:
- 用户是否已启用通知,使用
reg.showNotification值。 - 用户是否已授予应用程序显示通知的权限。
如果这些检查中的任何一个都失败,则将调用显示不允许函数,并取消订阅。
显示不允许函数在按钮上显示消息,如果用户无法接收通知,则将其禁用;如果用户限制了应用程序显示通知或浏览器不支持推送通知,则还会显示适当的消息。
一旦我们确认用户有资格接收推送通知,下一步是使用pushManager订阅,然后在showNotAllowed函数下方添加以下代码:
 1[label ~/djangopush/static/js/registerSw.js]
 2
 3...
 4
 5function urlB64ToUint8Array(base64String) {
 6    const padding = '='.repeat((4 - base64String.length % 4) % 4);
 7    const base64 = (base64String + padding)
 8        .replace(/\-/g, '+')
 9        .replace(/_/g, '/');
10
11    const rawData = window.atob(base64);
12    const outputArray = new Uint8Array(rawData.length);
13    const outputData = outputArray.map((output, index) => rawData.charCodeAt(index));
14
15    return outputData;
16}
17
18const subscribe = async (reg) => {
19    const subscription = await reg.pushManager.getSubscription();
20    if (subscription) {
21        sendSubData(subscription);
22        return;
23    }
24
25    const vapidMeta = document.querySelector('meta[name="vapid-key"]');
26    const key = vapidMeta.content;
27    const options = {
28        userVisibleOnly: true,
29        // if key exists, create applicationServerKey property
30        ...(key && {applicationServerKey: urlB64ToUint8Array(key)})
31    };
32
33    const sub = await reg.pushManager.subscribe(options);
34    sendSubData(sub)
35};
调用pushManager.getSubscription函数将返回为一个活跃的订阅的数据. 当一个活跃的订阅存在时,将调用sendSubData函数以作为参数传输的订阅信息。
当没有活跃的订阅时,VAPID公共密钥,即Base64 URL-safe编码,将使用urlB64ToUint8Array函数转换为Uint8Array。
成功订阅用户后,下一步是将订阅数据发送到服务器. 数据将发送到由django-webpush包提供的webpush/save_information终端。
 1[label ~/djangopush/static/js/registerSw.js]
 2
 3...
 4
 5const sendSubData = async (subscription) => {
 6    const browser = navigator.userAgent.match(/(firefox|msie|chrome|safari|trident)/ig)[0].toLowerCase();
 7    const data = {
 8        status_type: 'subscribe',
 9        subscription: subscription.toJSON(),
10        browser: browser,
11    };
12
13    const res = await fetch('/webpush/save_information', {
14        method: 'POST',
15        body: JSON.stringify(data),
16        headers: {
17            'content-type': 'application/json'
18        },
19        credentials: "include"
20    });
21
22    handleResponse(res);
23};
24
25const handleResponse = (res) => {
26    console.log(res.status);
27};
28
29registerSw();
保存_信息终端需要有关订阅状态(订阅和取消订阅),订阅数据和浏览器的信息。
完成的檔案看起來像這樣:
 1[label ~/djangopush/static/js/registerSw.js]
 2
 3const registerSw = async () => {
 4    if ('serviceWorker' in navigator) {
 5        const reg = await navigator.serviceWorker.register('sw.js');
 6        initialiseState(reg)
 7
 8    } else {
 9        showNotAllowed("You can't send push notifications ☹️😢")
10    }
11};
12
13const initialiseState = (reg) => {
14    if (!reg.showNotification) {
15        showNotAllowed('Showing notifications isn\'t supported ☹️😢');
16        return
17    }
18    if (Notification.permission === 'denied') {
19        showNotAllowed('You prevented us from showing notifications ☹️🤔');
20        return
21    }
22    if (!'PushManager' in window) {
23        showNotAllowed("Push isn't allowed in your browser 🤔");
24        return
25    }
26    subscribe(reg);
27}
28
29const showNotAllowed = (message) => {
30    const button = document.querySelector('form>button');
31    button.innerHTML = `${message}`;
32    button.setAttribute('disabled', 'true');
33};
34
35function urlB64ToUint8Array(base64String) {
36    const padding = '='.repeat((4 - base64String.length % 4) % 4);
37    const base64 = (base64String + padding)
38        .replace(/\-/g, '+')
39        .replace(/_/g, '/');
40
41    const rawData = window.atob(base64);
42    const outputArray = new Uint8Array(rawData.length);
43    const outputData = outputArray.map((output, index) => rawData.charCodeAt(index));
44
45    return outputData;
46}
47
48const subscribe = async (reg) => {
49    const subscription = await reg.pushManager.getSubscription();
50    if (subscription) {
51        sendSubData(subscription);
52        return;
53    }
54
55    const vapidMeta = document.querySelector('meta[name="vapid-key"]');
56    const key = vapidMeta.content;
57    const options = {
58        userVisibleOnly: true,
59        // if key exists, create applicationServerKey property
60        ...(key && {applicationServerKey: urlB64ToUint8Array(key)})
61    };
62
63    const sub = await reg.pushManager.subscribe(options);
64    sendSubData(sub)
65};
66
67const sendSubData = async (subscription) => {
68    const browser = navigator.userAgent.match(/(firefox|msie|chrome|safari|trident)/ig)[0].toLowerCase();
69    const data = {
70        status_type: 'subscribe',
71        subscription: subscription.toJSON(),
72        browser: browser,
73    };
74
75    const res = await fetch('/webpush/save_information', {
76        method: 'POST',
77        body: JSON.stringify(data),
78        headers: {
79            'content-type': 'application/json'
80        },
81        credentials: "include"
82    });
83
84    handleResponse(res);
85};
86
87const handleResponse = (res) => {
88    console.log(res.status);
89};
90
91registerSw();
接下来,在home.html中为registerSw.js文件添加一个脚本标签。
1nano ~/djangopush/templates/home.html
在body元素的关闭标签之前添加script标签:
 1[label ~/djangopush/templates/home.html]
 2
 3{% load static %}
 4<!DOCTYPE html>
 5<html lang="en">
 6
 7<head>
 8   ...
 9</head>
10<body>
11   ...
12   <script src="{% static '/js/registerSw.js' %}"></script>
13</body>
14</html>
由于服务工作者尚不存在,如果您离开应用程序运行或尝试重新启动,则会看到错误消息。
步骤8 - 创建服务工人
要显示推送通知,您需要在应用程序的主页上安装一个活跃的服务工作者,我们将创建一个服务工作者,该工作者会听取推送事件并在准备时显示消息。
因为我们希望服务员的范围是整个域,我们需要在应用程序的根部安装它. 您可以在本文中概述这个过程的更多信息 如何注册服务员。
创建文件:
1nano ~/djangopush/templates/sw.js
添加以下代码,该代码告诉服务人员聆听推送事件:
 1[label ~/djangopush/templates/sw.js]
 2
 3// Register event listener for the 'push' event.
 4self.addEventListener('push', function (event) {
 5    // Retrieve the textual payload from event.data (a PushMessageData object).
 6    // Other formats are supported (ArrayBuffer, Blob, JSON), check out the documentation
 7    // on https://developer.mozilla.org/en-US/docs/Web/API/PushMessageData.
 8    const eventInfo = event.data.text();
 9    const data = JSON.parse(eventInfo);
10    const head = data.head || 'New Notification 🕺🕺';
11    const body = data.body || 'This is default content. Your notification didn\'t have one 🙄🙄';
12
13    // Keep the service worker alive until the notification is created.
14    event.waitUntil(
15        self.registration.showNotification(head, {
16            body: body,
17            icon: 'https://i.imgur.com/MZM3K5w.png'
18        })
19    );
20});
服务工作者会听取推送事件。在回调函数中,将事件数据转换为文本。我们使用默认的标题和身体字符串,如果事件数据没有这些字符串。显示通知函数将通知标题、要显示的通知标题和一个 选项对象作为参数。
要让您的服务工作者为您的整个域工作,您需要在应用程序的根部安装它. 我们将使用 TemplateView来允许服务工作者访问整个域。
打开 urls.py 文件:
1nano ~/djangopush/djangopush/urls.py
在urlpatterns列表中添加新的导入陈述和路径,以创建基于类的视图:
1[label ~/djangopush/djangopush/urls.py]
2...
3from django.views.generic import TemplateView
4
5urlpatterns = [
6                  ...,
7                  path('sw.js', TemplateView.as_view(template_name='sw.js', content_type='application/x-javascript'))
8              ] + static(settings.STATIC_URL, document_root=settings.STATIC_ROOT)
在这种情况下,TemplateView.as_view方法通过将最近创建的服务工作者作为模板和应用程序/x-javascript作为模板的content_type来创建服务工作者的路径。
您现在创建了一个服务工作者,并将其注册为路线,接下来,您将在主页上设置表单以发送推送通知。
第9步:发送推送通知
使用主页的表单,用户应该能够在服务器运行时发送推送通知. 您也可以使用任何 RESTful 服务(如 Postman)发送推送通知. 当用户从主页的表单发送推送通知时,数据将包括头和身体,以及接收用户的ID。
1{
2    head: "Title of the notification",
3    body: "Notification body",
4    id: "User's id"
5}
为了听取表单的提交事件,并将用户输入的数据发送到服务器,我们将在~/djangopush/static/js目录中创建一个名为site.js的文件。
打开文件:
1nano ~/djangopush/static/js/site.js
首先,将一个提交事件听器添加到表单中,这将允许您将表单输入值和用户ID存储在您的模板的meta标签中:
 1[label ~/djangopush/static/js/site.js]
 2
 3const pushForm = document.getElementById('send-push__form');
 4const errorMsg = document.querySelector('.error');
 5
 6pushForm.addEventListener('submit', async function (e) {
 7    e.preventDefault();
 8    const input = this[0];
 9    const textarea = this[1];
10    const button = this[2];
11    errorMsg.innerText = '';
12
13    const head = input.value;
14    const body = textarea.value;
15    const meta = document.querySelector('meta[name="user_id"]');
16    const id = meta ? meta.content : null;
17    ...
18    // TODO: make an AJAX request to send notification
19});
pushForm函数在表单中获取输入、textarea和按钮,并从meta标签中获取信息,包括名称属性user_id和用户ID,存储在标签的内容属性中。
要向服务器发送请求,我们会使用原始的 Fetch API。我们在这里使用 Fetch,因为它是大多数浏览器支持的,并且不需要外部库来工作。
 1[label ~/djangopush/static/js/site.js]
 2const pushForm = document.getElementById('send-push__form');
 3const errorMsg = document.querySelector('.error');
 4
 5pushForm.addEventListener('submit', async function (e) {
 6     ...
 7    const id = meta ? meta.content : null;
 8
 9     if (head && body && id) {
10        button.innerText = 'Sending...';
11        button.disabled = true;
12
13        const res = await fetch('/send_push', {
14            method: 'POST',
15            body: JSON.stringify({head, body, id}),
16            headers: {
17                'content-type': 'application/json'
18            }
19        });
20        if (res.status === 200) {
21            button.innerText = 'Send another 😃!';
22            button.disabled = false;
23            input.value = '';
24            textarea.value = '';
25        } else {
26            errorMsg.innerText = res.message;
27            button.innerText = 'Something broke 😢.. Try again?';
28            button.disabled = false;
29        }
30    }
31    else {
32        let error;
33        if (!head || !body){
34            error = 'Please ensure you complete the form 🙏🏾'
35        }
36        else if (!id){
37            error = "Are you sure you're logged in? 🤔. Make sure! 👍🏼"
38        }
39        errorMsg.innerText = error;
40    }
41});
如果有三个所需参数头,身体和id,我们会发送请求并暂时禁用提交按钮。
完成的檔案看起來像這樣:
 1[label ~/djangopush/static/js/site.js]
 2const pushForm = document.getElementById('send-push__form');
 3const errorMsg = document.querySelector('.error');
 4
 5pushForm.addEventListener('submit', async function (e) {
 6    e.preventDefault();
 7    const input = this[0];
 8    const textarea = this[1];
 9    const button = this[2];
10    errorMsg.innerText = '';
11
12    const head = input.value;
13    const body = textarea.value;
14    const meta = document.querySelector('meta[name="user_id"]');
15    const id = meta ? meta.content : null;
16
17    if (head && body && id) {
18        button.innerText = 'Sending...';
19        button.disabled = true;
20
21        const res = await fetch('/send_push', {
22            method: 'POST',
23            body: JSON.stringify({head, body, id}),
24            headers: {
25                'content-type': 'application/json'
26            }
27        });
28        if (res.status === 200) {
29            button.innerText = 'Send another 😃!';
30            button.disabled = false;
31            input.value = '';
32            textarea.value = '';
33        } else {
34            errorMsg.innerText = res.message;
35            button.innerText = 'Something broke 😢.. Try again?';
36            button.disabled = false;
37        }
38    }
39    else {
40        let error;
41        if (!head || !body){
42            error = 'Please ensure you complete the form 🙏🏾'
43        }
44        else if (!id){
45            error = "Are you sure you're logged in? 🤔. Make sure! 👍🏼"
46        }
47        errorMsg.innerText = error;
48    }
49});
最后,将site.js文件添加到home.html:
1nano ~/djangopush/templates/home.html
添加脚本标签:
 1[label ~/djangopush/templates/home.html]
 2
 3{% load static %}
 4<!DOCTYPE html>
 5<html lang="en">
 6
 7<head>
 8   ...
 9</head>
10<body>
11   ...
12   <script src="{% static '/js/site.js' %}"></script>
13</body>
14</html>
在此时,如果您离开应用程序运行或尝试重新启动,您会看到一个错误,因为服务人员只能在安全域或在本地主机上运作。
步骤 10 – 创建安全隧道来测试应用程序
服务人员需要在任何站点上运行安全连接,除了本地主机,因为它们可以允许连接被劫持,响应被过滤和制造。
打开第二个终端窗口并确保您在您的主目录中:
1[environment second]
2cd ~
如果您在前提条件下开始使用干净的 18.04 服务器,则需要安装unzip:
1[environment second]
2sudo apt update && sudo apt install unzip
点击下载 Ngrok:
1[environment second]
2wget https://bin.equinox.io/c/4VmDzA7iaHb/ngrok-stable-linux-amd64.zip
3unzip ngrok-stable-linux-amd64.zip
将ngrok移动到/usr/local/bin,以便您可以从终端访问ngrok命令:
1[environment second]
2sudo mv ngrok /usr/local/bin
在您的第一个终端窗口中,请确保您在您的项目目录中,并启动您的服务器:
1cd ~/djangopush
2python manage.py runserver your_server_ip:8000
您需要在为您的应用程序创建安全隧道之前完成此操作。
在您的第二个终端窗口中,导航到您的项目文件夹,并激活您的虚拟环境:
1[environment second]
2cd ~/djangopush
3source my_env/bin/activate
创建您的应用程序的安全隧道:
1[environment second]
2ngrok http your_server_ip:8000
您将看到以下输出,其中包括有关安全 ngrok URL 的信息:
 1[secondary_label Output]
 2[environment second]
 3ngrok by @inconshreveable                                                                                                                       (Ctrl+C to quit)
 4
 5Session Status online
 6Session Expires 7 hours, 59 minutes
 7Version 2.2.8
 8Region United States (us)
 9Web Interface http://127.0.0.1:4040
10Forwarding http://ngrok_secure_url -> 203.0.113.0:8000
11Forwarding https://ngrok_secure_url -> 203.0.113.0:8000
12
13Connections ttl opn rt1 rt5 p50 p90
14                              0 0 0.00 0.00 0.00 0.00
从控制台输出中复制ngrok_secure_url,您需要在settings.py文件中将其添加到ALLOWED_HOSTS列表中。
打开另一个终端窗口,导航到您的项目文件夹,并激活您的虚拟环境:
1[environment third]
2cd ~/djangopush
3source my_env/bin/activate
打开settings.py文件:
1[environment third]
2nano ~/djangopush/djangopush/settings.py
使用 ngrok 安全隧道更新ALLOWED_HOSTS列表:
1[label ~/djangopush/djangopush/settings.py]
2...
3
4ALLOWED_HOSTS = ['your_server_ip', 'ngrok_secure_url']
5...
导航到安全的管理员页面登录: https://ngrok_secure_url/admin/. 你会看到一个屏幕,看起来像这样的:

在此屏幕上输入您的 Django 管理员用户信息. 这应该是您在 前提步骤中登录管理员界面时输入的相同信息。
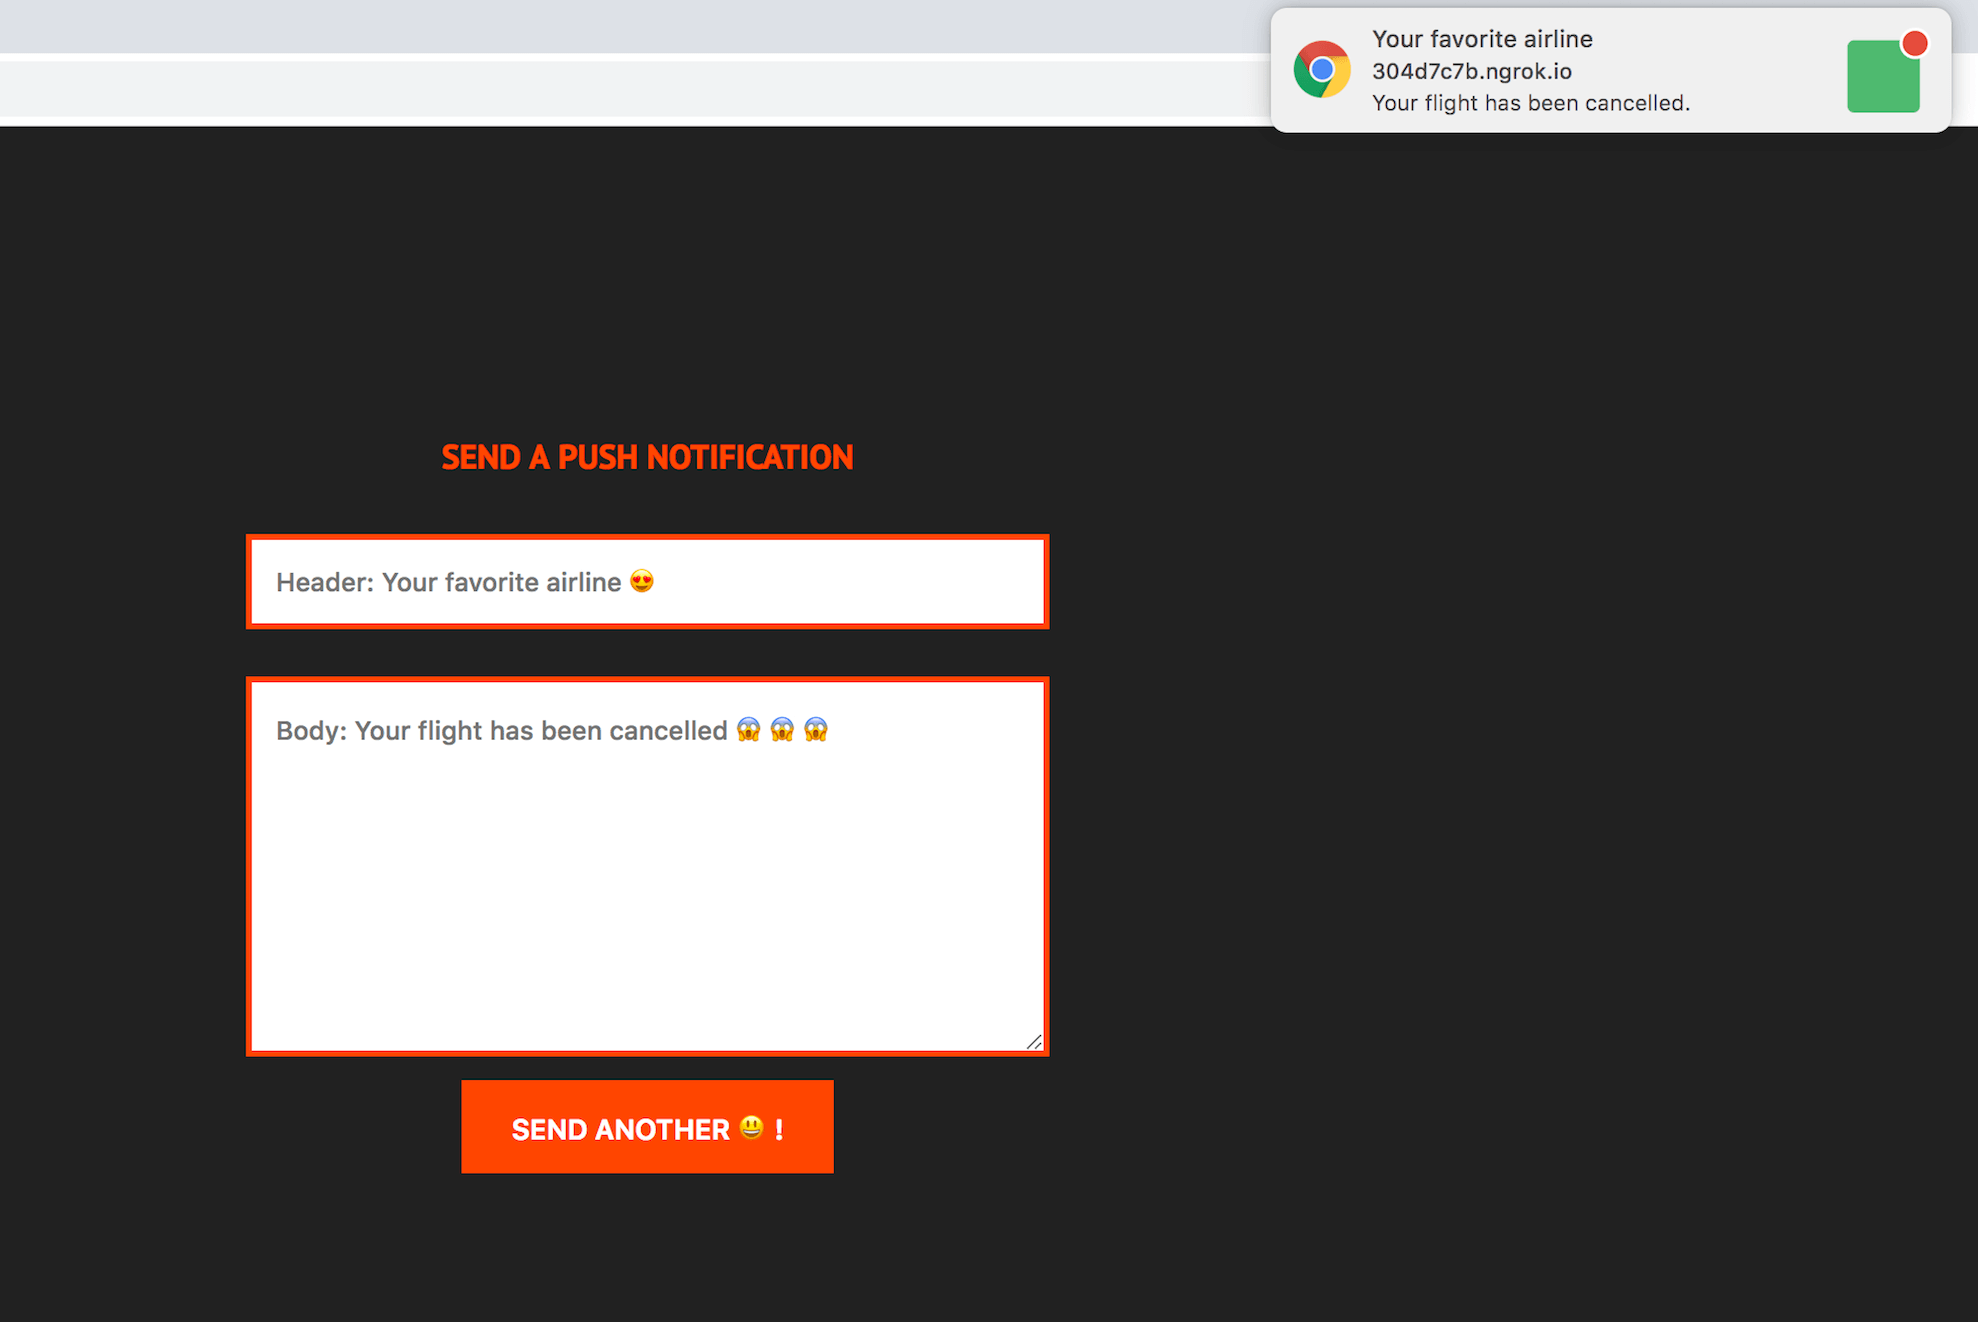
请访问您的浏览器中的https://ngrok_secure_url。 您将看到一个提示请求允许显示通知的提示。 点击允许按钮,让您的浏览器显示推送通知:
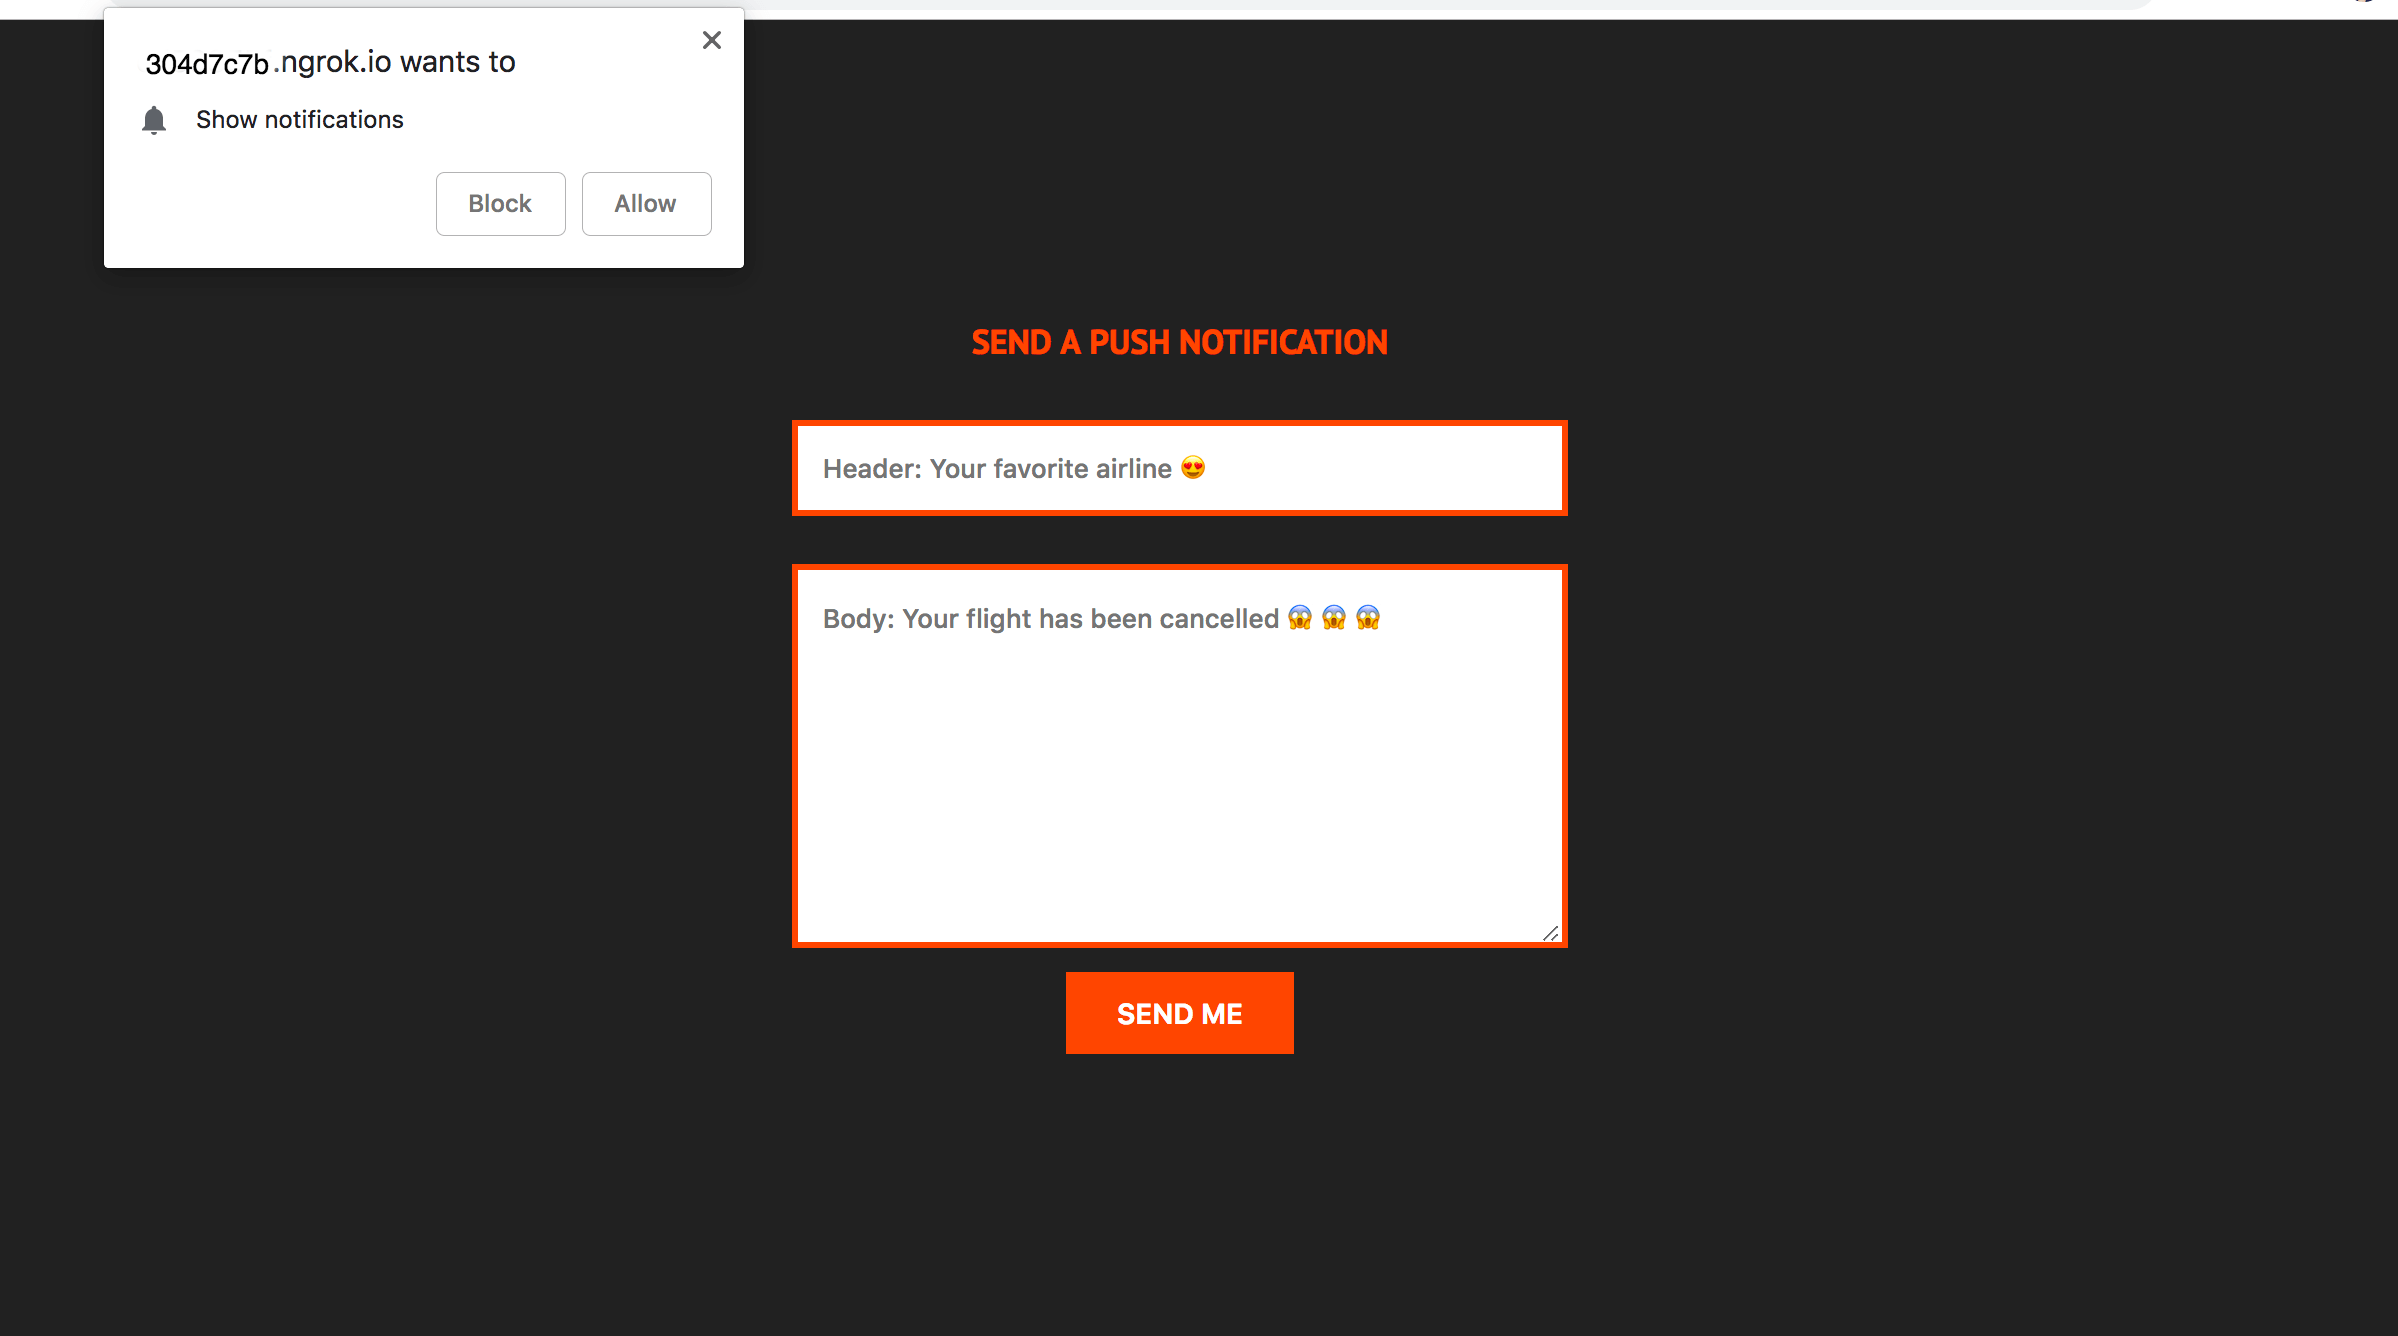
提交填写的表格会显示类似于此的通知:
<$>[注] **注:**在尝试发送通知之前,请确保您的服务器正在运行。
如果您收到通知,则您的应用程序正按预期运作。
您创建了一个 Web 应用程序,在服务器上触发推送通知,并在服务人员的帮助下接收和显示通知,您还通过了从应用程序服务器发送推送通知所需的 VAPID 密钥的步骤。
结论
在本教程中,您将了解如何使用通知 API 订阅用户推送通知、安装服务人员和显示推送通知。
您可以通过配置通知以在点击时打开应用程序的特定区域来进一步。