作者选择了 Code.org以作为 Write for Donations计划的一部分接受捐款。
介绍
Let's Encrypt是一个证书授权机构(CA),它为 Transport Layer Security (TLS) 加密提供免费证书,它提供一个名为 Certbot的软件客户端,这简化了证书创建、验证、签名、安装和更新过程。
Let’s Encrypt 现在支持 wildcard 证书,允许您使用单个证书保护域的所有子域,如果您想要托管多个服务,如 Web 接口, API 和其他网站,则这将是有用的。
要从 Let’s Encrypt 获得 wildcard 证书,您必须使用 Certbot 的 DNS 插件之一,其中包括:
- certbot-dns-cloudflare
- certbot-dns-route53
- certbot-dns-google
- certbot-dns-digitalocean
您选择的插件取决于哪个服务托管您的DNS记录. 在本教程中,您将使用Certbot在CentOS 7上的CloudFlare验证获得您的域名的野卡证书。
前提条件
要完成本教程,您将需要以下内容:
- 一个 CentOS 7 服务器设置是通过遵循 CentOS 7 初始服务器设置指南,包括一个 sudo 非根用户和防火墙。
- 一个完全注册的域名. 您可以在 Namecheap购买域名,在 Freenom免费获取域名,或使用您选择的域名注册器。 A Cloudflare帐户. 在 Cloudflare 的 DNS 中为您的域名设置 DNS 记录,以及配置了一些子域名。
步骤1:安装Certbot
默认情况下,certbot包不通过CentOS的包管理器可用,您需要启用EPEL(https://fedoraproject.org/wiki/EPEL)存储库来安装Certbot及其插件。
若要添加 CentOS 7 EPEL 存储库,请执行以下命令:
1sudo yum install -y epel-release
安装完成后,您可以安装certbot:
1sudo yum install -y certbot
然后安装Certbot的CloudFlare插件:
1sudo yum install -y python2-cloudflare python2-certbot-dns-cloudflare
美元(注)
如果您正在使用另一个DNS服务,您可以使用yum search命令找到相应的插件:
1yum search python2-certbot-dns
美元
您已经准备好您的服务器获得证书,现在您需要从 CloudFlare 获取 API 密钥。
步骤 2 – 获取 CloudFlare API
为了让 Certbot 自动更新 wildcard 证书,您需要为其提供 CloudFlare 登录和 API 密钥。
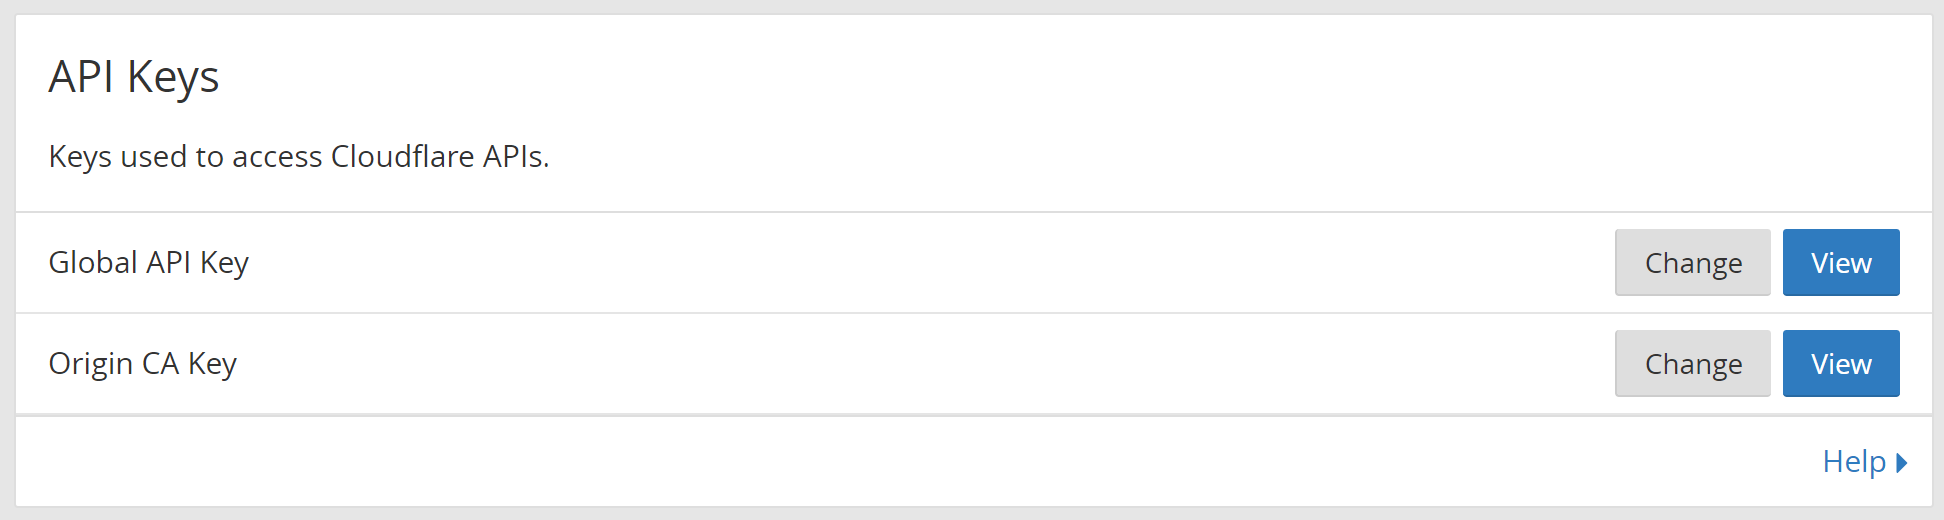
登录您的 Cloudflare 帐户,并导航到 个人资料页面。
在全球API密钥行中点击查看按钮。
出于安全原因,您将被要求重新输入您的 Cloudflare 帐户密码。 输入并验证 CAPTCHA。 然后再单击 View 按钮。
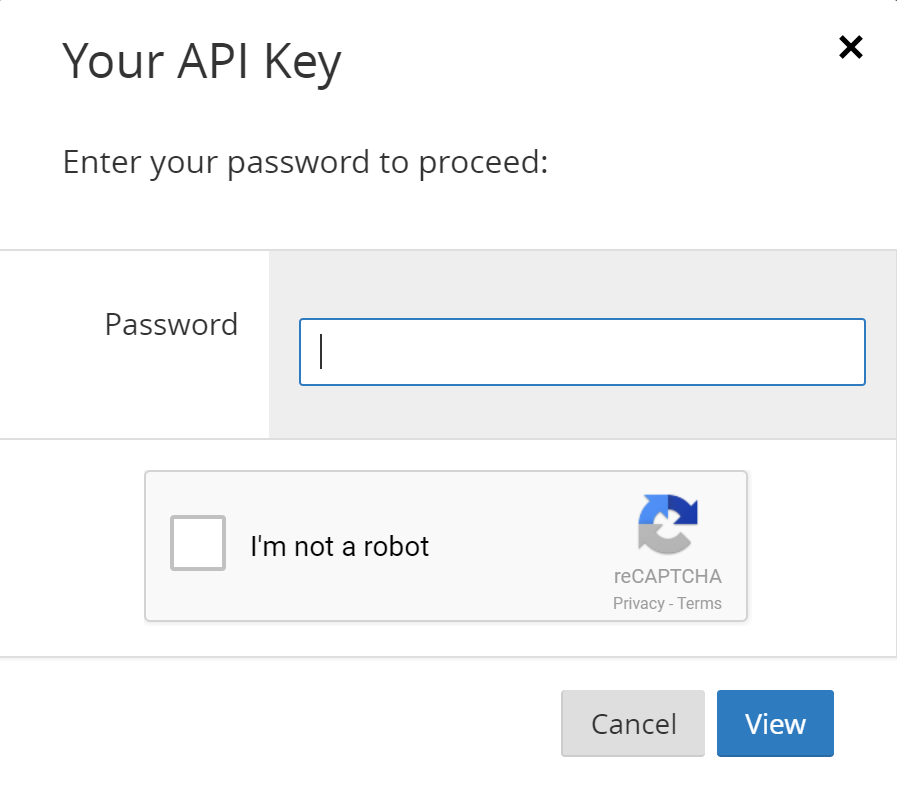
复制此密钥,您将在下一步使用它。
现在回到您的服务器继续获得证书的过程。
步骤 3 – 配置 Certbot
您有所有必要的信息来告诉Certbot如何使用Cloudflare,但让我们将其写入配置文件,以便Sertbot可以自动使用它。
首先运行certbot命令没有任何参数来创建初始配置文件:
1sudo certbot
接下来,在/etc/letsencrypt目录中创建一个配置文件,其中包含您的 CloudFlare 电子邮件和 API 密钥:
1sudo vi /etc/letsencrypt/cloudflareapi.cfg
添加以下内容,以您的 Cloudflare 登录和 API 密钥代替位置持有人:
1[label /etc/letsencrypt/cloudflareapi.cfg]
2dns_cloudflare_email = your_cloudflare_login
3dns_cloudflare_api_key = your_cloudflare_api_key
保存文件并退出编辑器 使用 Cloudflare 的 API 密钥,您可以从命令行做相同的事情,您可以从 Cloudflare 用户界面做,所以为了保护您的帐户,让配置文件只能由其所有者读取,以便其他人无法获得您的密钥:
1sudo chmod 600 /etc/letsencrypt/cloudflareapi.cfg
有了配置文件,让我们获得证书。
步骤4:获得证书
为了获得证书,我们将使用certbot命令,并指定我们想要的插件,我们想要使用的凭证文件,以及我们应该使用的服务器来处理请求。
运行以下命令来获取您的域名的野卡证书:
1sudo certbot certonly --cert-name your_domain --dns-cloudflare --dns-cloudflare-credentials /etc/letsencrypt/cloudflareapi.cfg --server https://acme-v02.api.letsencrypt.org/directory -d "*.your_domain" -d your_domain
您将被要求指定应接收紧急更新和安全通知的电子邮件地址:
1[secondary_label Output]
2...
3Plugins selected: Authenticator dns-cloudflare, Installer None
4Enter email address (used for urgent renewal and security notices) (Enter 'c' to
5cancel): your email
您将被要求同意以下服务条款:
1[secondary_label Output]
2-------------------------------------------------------------------------------
3Please read the Terms of Service at
4https://letsencrypt.org/documents/LE-SA-v1.2-November-15-2017.pdf. You must
5agree in order to register with the ACME server at
6https://acme-v02.api.letsencrypt.org/directory
7-------------------------------------------------------------------------------
8(A)gree/(C)ancel: A
然后,您将被要求与电子边界 基金会分享您的电子邮件地址:
1[secondary_label Output]
2-------------------------------------------------------------------------------
3Would you be willing to share your email address with the Electronic Frontier
4Foundation, a founding partner of the Let's Encrypt project and the non-profit
5organization that develops Certbot? We'd like to send you email about EFF and
6our work to encrypt the web, protect its users and defend digital rights.
7-------------------------------------------------------------------------------
8(Y)es/(N)o: N
然后Certbot将获得您的证书,您将看到以下消息:
 1[secondary_label Output]
 2IMPORTANT NOTES:
 3 - Congratulations! Your certificate and chain have been saved at:
 4   /etc/letsencrypt/live/your_domain/fullchain.pem
 5   Your key file has been saved at:
 6   /etc/letsencrypt/live/your_domain/privkey.pem
 7   Your cert will expire on 2018-07-31. To obtain a new or tweaked
 8   version of this certificate in the future, simply run certbot
 9   again. To non-interactively renew *all* of your certificates, run
10   "certbot renew"
11 - Your account credentials have been saved in your Certbot
12   configuration directory at /etc/letsencrypt. You should make a
13   secure backup of this folder now. This configuration directory will
14   also contain certificates and private keys obtained by Certbot so
15   making regular backups of this folder is ideal.
16 - If you like Certbot, please consider supporting our work by:
17
18   Donating to ISRG / Let's Encrypt:   https://letsencrypt.org/donate
19   Donating to EFF:                    https://eff.org/donate-le
现在你有你的 wildcard 证书,让我们来看看 Certbot 为你下载了什么。 使用ls命令来查看包含你的密钥和证书的目录内容:
1sudo ls /etc/letsencrypt/live/your_domain
1[secondary_label Output]
2cert.pem chain.pem fullchain.pem privkey.pem README
README文件包含有关这些文件的信息:
1$ cat /etc/letsencrypt/live/your_domain/README
你会看到这样的输出:
 1[label README]
 2This directory contains your keys and certificates.
 3
 4`privkey.pem`  : the private key for your certificate.
 5`fullchain.pem`: the certificate file used in most server software.
 6`chain.pem`    : used for OCSP stapling in Nginx >=1.3.7.
 7`cert.pem`     : will break many server configurations, and should not be used
 8                 without reading further documentation (see link below).
 9
10We recommend not moving these files. For more information, see the Certbot
11User Guide at https://certbot.eff.org/docs/using.html#where-are-my-certificates.
从这里,您可以使用 wildcard 证书配置服务器,通常只需要两个文件:fullchain.pem 和privkey.pem。
例如,您可以配置多个基于 Web 的服务:
- wwww.example.com
- api.example.com
- mail.example.com
要做到这一点,您将需要一个Web服务器,如Apache或Nginx. 这些服务器的安装和配置超出了本教程的范围,但以下指南将指导您通过所有必要的步骤来配置服务器并应用您的证书。
对于 Nginx,看看这些教程:
对于 Apache,请参阅这些教程:
现在让我们看看自动更新证书。
步骤5:更新证书
让我们加密发行短期证书,这些证书有效期为90天,我们需要设置一个cron任务来检查证书的到期,并自动更新它们。
让我们创建一个 cron 任务 将每天运行更新检查。
使用以下命令打开crontab文件进行编辑:
1sudo crontab -e
将下列行添加到文件中,以便尝试每天更新证书:
1[label crontab]
230 2 * * * certbot renew --noninteractive
30 2 * * *意思是每天凌晨2点30分运行下面的命令。- 命令
certbot renew会检查系统上安装的所有证书,并更新任何在不到三十天内到期的证书。
您需要在更新证书后重新加载您的 Web 服务器。更新命令包括在证书更新之前或之后运行命令或脚本的挂钩,您还可以在域的更新配置文件中配置这些挂钩。
例如,要重新加载您的 Nginx 服务器,请打开更新配置文件:
1sudo vi /etc/letsencrypt/renewal/your_domain.conf
然后在[renewalparams]部分中添加以下行:
1[label /etc/letsencrypt/renewal/your_domain.conf]
2renew_hook = systemctl reload nginx
现在,Certbot 会在安装更新证书后自动重新启动您的 Web 服务器。
结论
在本教程中,您已经安装了Certbot客户端,使用DNS验证获得了您的 wildcard证书,并启用了自动更新。