介绍
网络应用程序通常提供自己的身份验证和授权方法,但网络服务器本身可以用来限制访问,如果这些是不充分或不可用,但是,网络服务器身份验证也代表了一个非常可预测的 attack surface 或 attack vector,通过它人们可以尝试获得访问。
如果您查看任何受广泛流通的网络服务器的日志,您将经常看到重复的,系统的登录尝试,代表用户和机器人一样的暴力攻击。
对于这种责任完全不可接受的大规模生产部署,通常会在任何私人终端前部署像 WireGuard这样的VPN,所以没有额外的软件抽象或网关,就无法直接连接到外部互联网上的这些URL。
在完成VPN设置之前或除此之外,您还可以实施一个名为Fail2ban的工具。Fail2ban可以通过创建规则来显著减轻暴力攻击,从而自动改变您的防火墙配置,以便在某些失败的登录尝试后禁止特定IP。
在本指南中,您将学习如何在Ubuntu 20.04服务器上安装fail2ban,并配置它来监控您的Nginx日志,以检测入侵尝试。
前提条件
要了解如何创建此类用户,请遵循 Ubuntu 20.04 初始服务器设置指南。
- Nginx 安装在您的系统上,遵循本指南的 步骤 1 和 2 在 如何在 Ubuntu 20.04 上安装 Nginx上。
- Nginx 安装并配置与密码身份验证如下 How To Set Up Password Authentication with Nginx on Ubuntu 20.04)。
步骤 1 — 安装和配置 Fail2ban
Fail2ban 可在 Ubuntu 软件存储库中使用。 作为非 root 用户,请开始运行以下命令,以更新您的包列表并安装 Fail2ban:
1sudo apt update
2sudo apt install fail2ban
Fail2ban 在安装后会自动设置背景服务,但默认情况下是禁用,因为其某些默认设置可能会导致不必要的效果。
1systemctl status fail2ban.service
1[secondary_label Output]
2○ fail2ban.service - Fail2Ban Service
3     Loaded: loaded (/lib/systemd/system/fail2ban.service; disabled; vendor preset: enabled
4     Active: inactive (dead)
5       Docs: man:fail2ban(1)
您可以立即启用 Fail2ban,但首先,您将查看其的一些功能。
fail2ban 服务将其配置文件保存在 /etc/fail2ban 目录中. 有一个名为 jail.conf' 的默认文件。 进入该目录并使用 head -20` 打印该文件的前 20 行:
1cd /etc/fail2ban
2head -20 jail.conf
 1[secondary_label Output]
 2#
 3# WARNING: heavily refactored in 0.9.0 release. Please review and
 4#          customize settings for your setup.
 5#
 6# Changes:  in most of the cases you should not modify this
 7#           file, but provide customizations in jail.local file,
 8#           or separate .conf files under jail.d/ directory, e.g.:
 9#
10# HOW TO ACTIVATE JAILS:
11#
12# YOU SHOULD NOT MODIFY THIS FILE.
13#
14# It will probably be overwritten or improved in a distribution update.
15#
16# Provide customizations in a jail.local file or a jail.d/customisation.local.
17# For example to change the default bantime for all jails and to enable the
18# ssh-iptables jail the following (uncommented) would appear in the .local file.
19# See man 5 jail.conf for details.
20#
21# [DEFAULT]
正如你所看到的,这个文件的头几个行是 评论 – 它们以#字符开始,表示它们应该作为文档而不是设置读取。 正如你所看到的,这些评论指示你不要直接修改这个文件。 相反,你有两种选择:要么在jail.d/目录中的多个文件中创建Fail2ban的个别配置文件,要么在jail.local文件中创建和收集您的所有本地设置。
在本教程中,您将创建jail.local,您可以通过复制jail.conf来完成此操作:
1sudo cp jail.conf jail.local
现在你可以开始进行配置更改。在nano或你最喜欢的文本编辑器中打开文件:
1sudo nano jail.local
改变缺陷
您将开始通过评估文件中设置的默认设置。这些将被找到文件中的[DEFAULT]部分。这些项目设置了一般的策略,并且可以按每个应用程序进行翻译。如果您使用nano,您可以通过按Ctrl+W来搜索文件,输入搜索字符串,然后按Enter。
第一個要看的項目之一是不受「fail2ban」政策的客戶列表,這是「ignoreip」指令所設定的。有時將自己的IP地址或網絡添加到例外列表中,以避免自己被關閉。這比SSH更不像是網頁伺服器登入的問題,因為如果你能夠保持容器存取,你總是可以逆轉禁令。你可以解釋這個行,並在現有的列表中添加額外的IP地址或網絡。
1[label /etc/fail2ban/jail.local]
2[DEFAULT]
3
4. . .
5#ignoreip = 127.0.0.1/8 your_home_IP
您可能想要调整的另一个项目是破坏时间,它控制了侵权成员被禁用了多少秒钟。 理想情况是将此设置为足够长的时间来干扰恶意的自动化努力,而足够短,以允许用户纠正错误。
1[label /etc/fail2ban/jail.local]
2[DEFAULT]
3
4. . .
5bantime = 10m
接下来的两个条款决定了用于确定违规客户端的日志线的范围。findtime指定了秒数的时间,而maxretry指示了在该时间内容忍的尝试数量。
1[label /etc/fail2ban/jail.local]
2[DEFAULT]
3
4. . .
5findtime = 10m
6maxretry = 5
设置邮件通知(可选)
您可以随时启用电子邮件通知以接收邮件。 您必须先在您的服务器上设置一个MTA,以便它可以发送电子邮件。 若要了解如何使用Postfix,请遵循 如何在ubuntu 22.04上安装和配置Postfix。
一旦你已经设置了MTA,你将不得不调整某些额外的设置在文件的 /etc/fail2ban/jail.local部分中。 开始通过设置 mta指令。 如果你设置了Postfix,如上面的教程所示,改变这个值为邮件:
1[label /etc/fail2ban/jail.local]
2[DEFAULT]
3
4. . .
5mta = mail
在destemail字段中提供将接收邮件的电子邮件地址。发件人选项配置了邮件将发送的地址,需要与您的Postfix配置兼容:
1[label /etc/fail2ban/jail.local]
2[DEFAULT]
3
4. . .
5destemail = [email protected]
6sendername = root@<fq-hostname>
该行动参数配置了 Fail2ban 想要设置禁令时所采取的操作。在该参数之前,该文件中定义了action_值。默认操作是更新您的防火墙配置以拒绝侵权主机的流量,直到禁令时间过期。
1[label /etc/fail2ban/jail.local]
2[DEFAULT]
3. . .
4action = $(action_)s
5. . .
默认情况下提供的其他action_脚本,您可以用上面的$(action_)代替:
 1[label /etc/fail2ban/jail.local]
 2…
 3# ban & send an e-mail with whois report to the destemail.
 4action_mw = %(action_)s
 5            %(mta)s-whois[sender="%(sender)s", dest="%(destemail)s", protocol="%(protocol)s", chain="%(chain)s"]
 6
 7# ban & send an e-mail with whois report and relevant log lines
 8# to the destemail.
 9action_mwl = %(action_)s
10             %(mta)s-whois-lines[sender="%(sender)s", dest="%(destemail)s", logpath="%(logpath)s", chain="%(chain)s"]
11…
action_mw 和 action_mwl 都将使用您提供的配置来处理发送电子邮件。
步骤 2 – 配置 Fail2Ban 以监控 Nginx 日志
现在你已经有了一些一般的fail2ban设置,你可以启用一些 Nginx 特定的监狱,这将监控你的 Web 服务器日志的特定模式。
配置文件中的每个监狱都被标记为包含监狱名称的标题 - 每个部分但[DEFAULT]部分表示特定监狱的配置. 默认情况下,只有[ssh]监狱被启用。
要启用 Nginx 登录尝试的日志监控,请启用[nginx-http-auth]监狱。
1[label /etc/fail2ban/jail.local]
2…
3[nginx-http-auth]
4
5enabled  = true
6port     = http,https
7logpath = %(nginx_error_log)s
8. . .
当你完成更改时,保存并关闭文件. 如果你使用nano,按Ctrl+X,然后在提示时,按Y,然后输入。
步骤 3 – 审查 Nginx 监狱的过滤器
您可能已经注意到,在jail.local中的[nginx-http-auth]块中没有任何 Nginx 特定的规则,这些规则不会在 Fail2ban 中自动加密,事实上,[nginx-http-auth]标题直接与 Fail2ban 的filter.d预包装过滤器目录中的文件名称相匹配。 如果您列出此目录的内容,您可以看到其他可用的预包装过滤器,如果您需要使用:
1ls /etc/fail2ban/filter.d
 1[secondary_label Output]
 23proxy.conf freeswitch.conf proftpd.conf
 3apache-auth.conf froxlor-auth.conf pure-ftpd.conf
 4apache-badbots.conf gitlab.conf qmail.conf
 5apache-botsearch.conf grafana.conf recidive.conf
 6apache-common.conf groupoffice.conf roundcube-auth.conf
 7apache-fakegooglebot.conf gssftpd.conf scanlogd.conf
 8apache-modsecurity.conf guacamole.conf screensharingd.conf
 9apache-nohome.conf haproxy-http-auth.conf selinux-common.conf
10apache-noscript.conf horde.conf selinux-ssh.conf
11apache-overflows.conf ignorecommands sendmail-auth.conf
12apache-pass.conf kerio.conf sendmail-reject.conf
13apache-shellshock.conf lighttpd-auth.conf sieve.conf
14assp.conf mongodb-auth.conf slapd.conf
15asterisk.conf monit.conf softethervpn.conf
16bitwarden.conf murmur.conf sogo-auth.conf
17…
现在,让我们来看看nginx-http-auth.conf:
1cat /etc/fail2ban/filter.d/nginx-http-auth.conf
 1[secondary_label Output]
 2# fail2ban filter configuration for nginx
 3
 4[Definition]
 5
 6failregex = ^ \[error\] \d+#\d+: \*\d+ user "(?:[^"]+|.*?)":? (?:password mismatch|was not found in "[^\"]*"), client: <HOST>, server: \S*, request: "\S+ \S+ HTTP/\d+\.\d+", host: "\S+"(?:, referrer: "\S+")?\s*$
 7
 8ignoreregex =
 9
10datepattern = {^LN-BEG}
11…
这些文件包含 普通表达式(用于文本解析的常见缩写)来确定日志中的行是否是一个未成功的身份验证尝试。
在接下来的步骤中,您将启用并测试 Fail2ban。
步骤 4 – 激活您的 Nginx 监狱
在此时,您可以启用 Fail2ban 服务,以便从现在起自动运行。
1sudo systemctl enable fail2ban
然后,用systemctl start首次手动启动:
1sudo systemctl start fail2ban
您可以检查它是否在systemctl 状态下运行:
1sudo systemctl status fail2ban
 1[secondary_label Output]
 2● fail2ban.service - Fail2Ban Service
 3     Loaded: loaded (/lib/systemd/system/fail2ban.service; enabled; vendor preset: enabled
 4     Active: active (running) since Fri 2022-07-08 17:19:38 UTC; 7s ago
 5       Docs: man:fail2ban(1)
 6   Main PID: 5962 (fail2ban-server)
 7      Tasks: 7 (limit: 2327)
 8     Memory: 12.6M
 9        CPU: 195ms
10     CGroup: /system.slice/fail2ban.service
11             └─5962 /usr/bin/python3 /usr/bin/fail2ban-server -xf start
<$>[注]
注: 若要实施任何未来的配置更改,您需要重新启动 fail2ban 服务。
获取有关启用监狱的信息
您可以通过使用fail2ban-client命令查看所有已启用的监狱:
1sudo fail2ban-client status
您应该看到允许监狱的列表:
1[secondary_label Output]
2Status
3|- Number of jail:      2
4`- Jail list:           nginx-http-auth, sshd
如果您想看到任何一个监狱执行禁令的细节,请再次使用fail2ban-client:
1sudo fail2ban-client status nginx-http-auth
 1[secondary_label Output]
 2Status for the jail: nginx-http-auth
 3|- filter
 4|  |- File list:        /var/log/nginx/error.log
 5|  |- Currently failed: 0
 6|  `- Total failed:     0
 7`- action
 8   |- Currently banned: 0
 9   |  `- IP list:
10   `- Total banned:     0
在本教程的最后一步中,您将故意测试被禁用,以验证您的 Fail2ban 配置正在工作。
步骤5 – 测试 Fail2Ban 政策
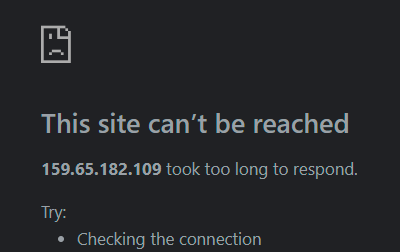
重要的是要测试您的 Fail2ban 策略,以确保它们按预期阻止流量。 要做到这一点,请在本地的 Web 浏览器中导航到您的服务器上。 在 Nginx 身份验证提示下,反复输入错误的身份验证信息。 经过几次尝试,服务器应该停止对您完全响应,仿佛您的连接失效:
如果您查看nginx-http-auth配置的状态,并使用fail2ban-client,您将看到您的 IP 地址被从网站上禁用:
1sudo fail2ban-client status nginx-http-auth
 1[secondary_label Output]
 2Status for the jail: nginx-http-auth
 3|- Filter
 4|  |- Currently failed: 0
 5|  |- Total failed:     5
 6|  `- File list:        /var/log/nginx/error.log
 7`- Actions
 8   |- Currently banned: 1
 9   |- Total banned:     1
10   `- Banned IP list:   108.172.85.62
您也可以通过检查您的iptables输出来查看新规则。iptables是您服务器上与低级端口和防火墙规则进行交互的命令。如果您遵循DigitalOcean对初始服务器设置的指南,您将使用ufw来管理更高级别的防火墙规则。
1sudo iptables -S
 1[secondary_label Output]
 2-P INPUT DROP
 3-P FORWARD DROP
 4-P OUTPUT ACCEPT
 5-N f2b-nginx-http-auth
 6-N ufw-after-forward
 7-N ufw-after-input
 8-N ufw-after-logging-forward
 9-N ufw-after-logging-input
10-N ufw-after-logging-output
11-N ufw-after-output
12-N ufw-before-forward
13-N ufw-before-input
14-N ufw-before-logging-forward
15-N ufw-before-logging-input
16-N ufw-before-logging-output
17…
如果您将iptables -S的输出输入到grep以搜索这些规则中的字符串f2b,您可以看到 fail2ban 添加的规则:
1sudo iptables -S | grep f2b
1[secondary_label Output]
2-N f2b-nginx-http-auth
3-A INPUT -p tcp -m multiport --dports 80,443 -j f2b-nginx-http-auth
4-A f2b-nginx-http-auth -s 108.172.85.62/32 -j REJECT --reject-with icmp-port-unreachable
5-A f2b-nginx-http-auth -j RETURN
由 Fail2ban 添加了包含REJECT --reject-with icmp-port-unreachable的行,应该反映您本地机器的 IP 地址。当您确信您的规则正在运作时,您可以通过键入fail2ban-client手动解禁您的 IP 地址:
1sudo fail2ban-client set nginx-http-auth unbanip 108.172.85.62
您现在应该能够再次尝试身份验证。
结论
Fail2ban 提供了大量的灵活性来构建适合您的特定安全需求的策略. 通过查看 /etc/fail2ban/jail.local 文件中的变量和模式,以及它依赖的文件在 /etc/fail2ban/filter.d 和 /etc/fail2ban/action.d 目录中,您可以找到许多可以根据您的需求进行调整和更改的元素。 通过 fail2ban 保护您的服务器可以为您提供有用的安全基线。
有关如何使用fail2ban 的更多方法,请参阅 How Fail2Ban Works to Protect Services on a Linux Server和 How To Protect SSH with Fail2Ban on Ubuntu 20.04。