介绍
谷歌地图是一个由谷歌提供的地图服务,支持各种配置设置. 将谷歌地图添加到您的应用程序中可以为用户提供比街道地址或坐标集更多的背景信息。
本教程旨在将 Google 地图 API 集成到您的 React 组件中,并允许您在您的网站上显示地图。
前提条件
要完成本教程,您将需要:
- Node.js 是本地安装的,您可以按照 如何安装 Node.js 并创建本地开发环境进行操作。
- 熟悉 React JavaScript 框架。
- A Google Maps JavasScript API 密钥.
- 这将需要 Google 帐户,登录到 Google Cloud Platform Console,创建一个新的项目,并为该项目启用 Google Maps JavasScript API。
<$>[注]
注: 要在使用 Google 地图 API 时避免仅用于开发目的消息,您需要提供有效的信用卡,并将其与 Google Cloud Project 的计费帐户相关联,但不需要此教程。
本教程已通过 Node v14.2.0、npm v6.14.5、react v16.13.1 和 google-maps-react v.2.0.6 进行验证。
步骤 1 – 设置一个 React 应用程序
对于本教程,您将使用 create-react-app来设置一个新的React应用程序。
首先,运行npx,在终端窗口中使用create-react-app:
1npx create-react-app react-googlemaps
然后,导航到您的新项目目录:
1cd react-googlemaps
在添加任何代码之前,让我们安装你的依赖性:
1npm install [email protected]
<$>[注]
注: 可选,此时您可以在您的src目录中删除不必要的文件和导入。您将不需要logo.svg,App.css,index.css。 如果您删除index.css,您还应该在index.html中删除index.css的导入,以避免构建错误。
在此时刻,你有一个 React 应用程序与google-maps-react库. 你现在可以使用应用程序中的地图探索。
步骤 2 — 使用地图和GoogleApiWrapper
接下来,您需要编辑您的App.js文件,并用您的组件代替代码,该组件将加载谷歌地图。
打开App.js:
1nano src/App.js
将App.js的内容替换为以下代码行:
 1[label src/App.js]
 2import React, { Component } from 'react';
 3import { Map, GoogleApiWrapper } from 'google-maps-react';
 4
 5const mapStyles = {
 6  width: '100%',
 7  height: '100%'
 8};
 9
10export class MapContainer extends Component {
11  render() {
12    return (
13      <Map
14        google={this.props.google}
15        zoom={14}
16        style={mapStyles}
17        initialCenter={
18          {
19            lat: -1.2884,
20            lng: 36.8233
21          }
22        }
23      />
24    );
25  }
26}
27
28export default GoogleApiWrapper({
29  apiKey: 'YOUR_GOOGLE_MAPS_API_KEY_GOES_HERE'
30})(MapContainer);
<$>[注]
注: 将YOUR_GOOGLE_MAPS_API_KEY_GOES_HERE替换为您的 Google 地图 JavasScript API 密钥。
<$>[警告] 警告: 请确保避免将 API 密钥保存到您向公共存储库(如 GitHub)承诺的任何文件中,因为它可以被其他人用于您不打算的目的。
对于一个基本的Google地图的功能,这就是你所需要的代码。
Map组件包含一些可选的附件:
style- CSS 风格对象zoom- 代表地图中心更紧密的焦点的数值initialCenter- 包含纬度和长度坐标的对象
在这个例子中,你正在定义:
- 具有
100%宽度和100%高度的 CSS 风格对象 - 缩放值为
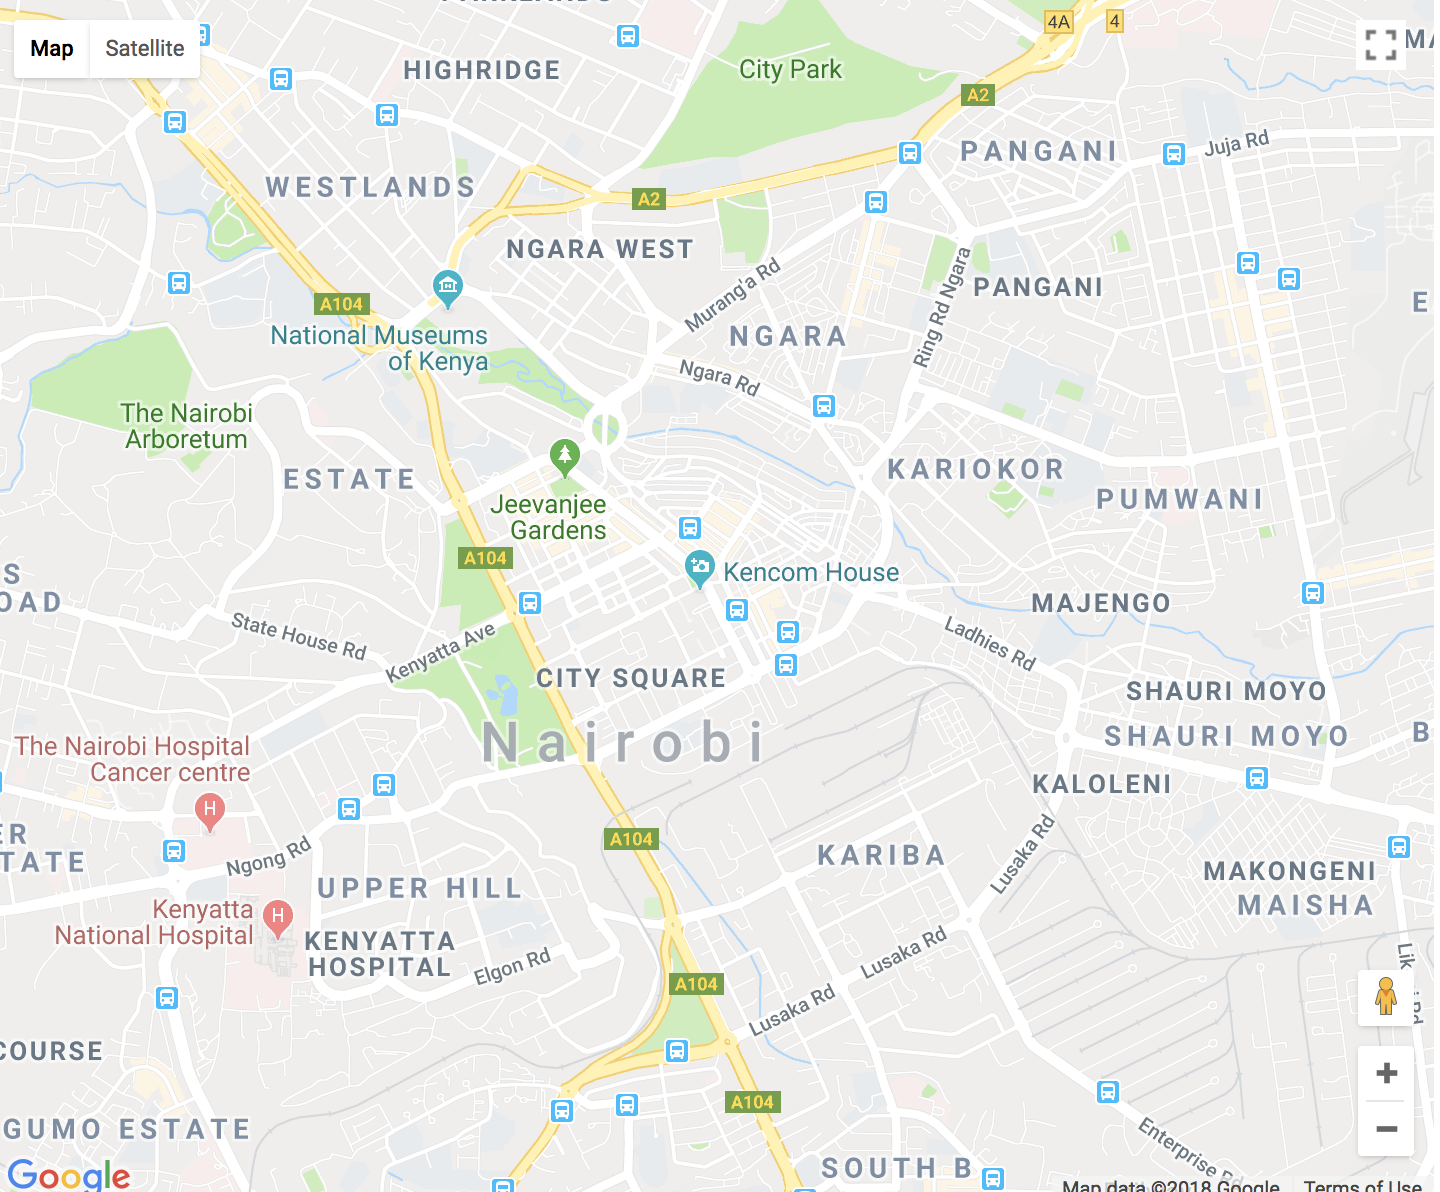
14 - 位置为
1.2884, 36.8233(肯尼亚内罗毕的肯尼亚国际会议中心)
打开终端并运行您的应用程序:
1npm start
并确保地图加载到浏览器:
GoogleApiWrapper是一个高级组件(HOC)(https://reactjs.org/docs/higher-order-components.html),它提供了一个围绕Google API的包装程序。另一种方式是,可以通过传递一个函数来配置GoogleApiWrapperHOC,该函数将与包装组件的代理人呼叫,并应返回配置对象:
1export default GoogleApiWrapper(
2  (props) => ({
3    apiKey: props.apiKey
4  }
5))(MapContainer)
此时,您在 React 应用程序中有 Google 地图,您现在可以探索实现 Google 地图的其他功能。
步骤 3 – 使用标记和InfoWindow
你现在将添加一个 Marker和一个 InfoWindow到你的代码中。
首先,您需要从google-maps-react库导入Marker和InfoWindow组件,以帮助您实现两者加载。
1[label src/App.js]
2import React, { Component } from 'react';
3import { Map, GoogleApiWrapper, InfoWindow, Marker } from 'google-maps-react';
请注意,您的组件以前是无国籍的吗?您需要为国家管理添加状态。
 1[label src/App.js]
 2// ...
 3
 4export class MapContainer extends Component {
 5  state = {
 6    showingInfoWindow: false,  // Hides or shows the InfoWindow
 7    activeMarker: {},          // Shows the active marker upon click
 8    selectedPlace: {}          // Shows the InfoWindow to the selected place upon a marker
 9  };
10
11  // ...
12}
接下来,您需要为地图和标记点击时添加事件处理器。
 1[label src/App.js]
 2// ...
 3
 4export class MapContainer extends Component {
 5  // ...
 6
 7  onMarkerClick = (props, marker, e) =>
 8    this.setState({
 9      selectedPlace: props,
10      activeMarker: marker,
11      showingInfoWindow: true
12    });
13
14  onClose = props => {
15    if (this.state.showingInfoWindow) {
16      this.setState({
17        showingInfoWindow: false,
18        activeMarker: null
19      });
20    }
21  };
22
23  // ...
24}
onMarkerClick方法用于显示InfoWindow,这是google-maps-react库的一个组件,它为您提供了显示点击Marker的详细信息的弹出窗口的能力。
OnClose方法是用来关闭InfoWindow,用户点击InfoWindow上的关闭按钮。
让我们通过在渲染方法中添加<Marker>和<InfoWindow>组件来完成您的组件:
1[label src/App.js]
2// ...
3
4export class MapContainer extends Component {
5 // ...
6
7 render() {
8 return (
9 <Map
10 google={this.props.google}
11 zoom={14}
12 style={mapStyles}
13 initialCenter={
14 {
15 lat: -1.2884,
16 lng: 36.8233
17 }
18 }
19 >
20 <Marker
21 onClick={this.onMarkerClick}
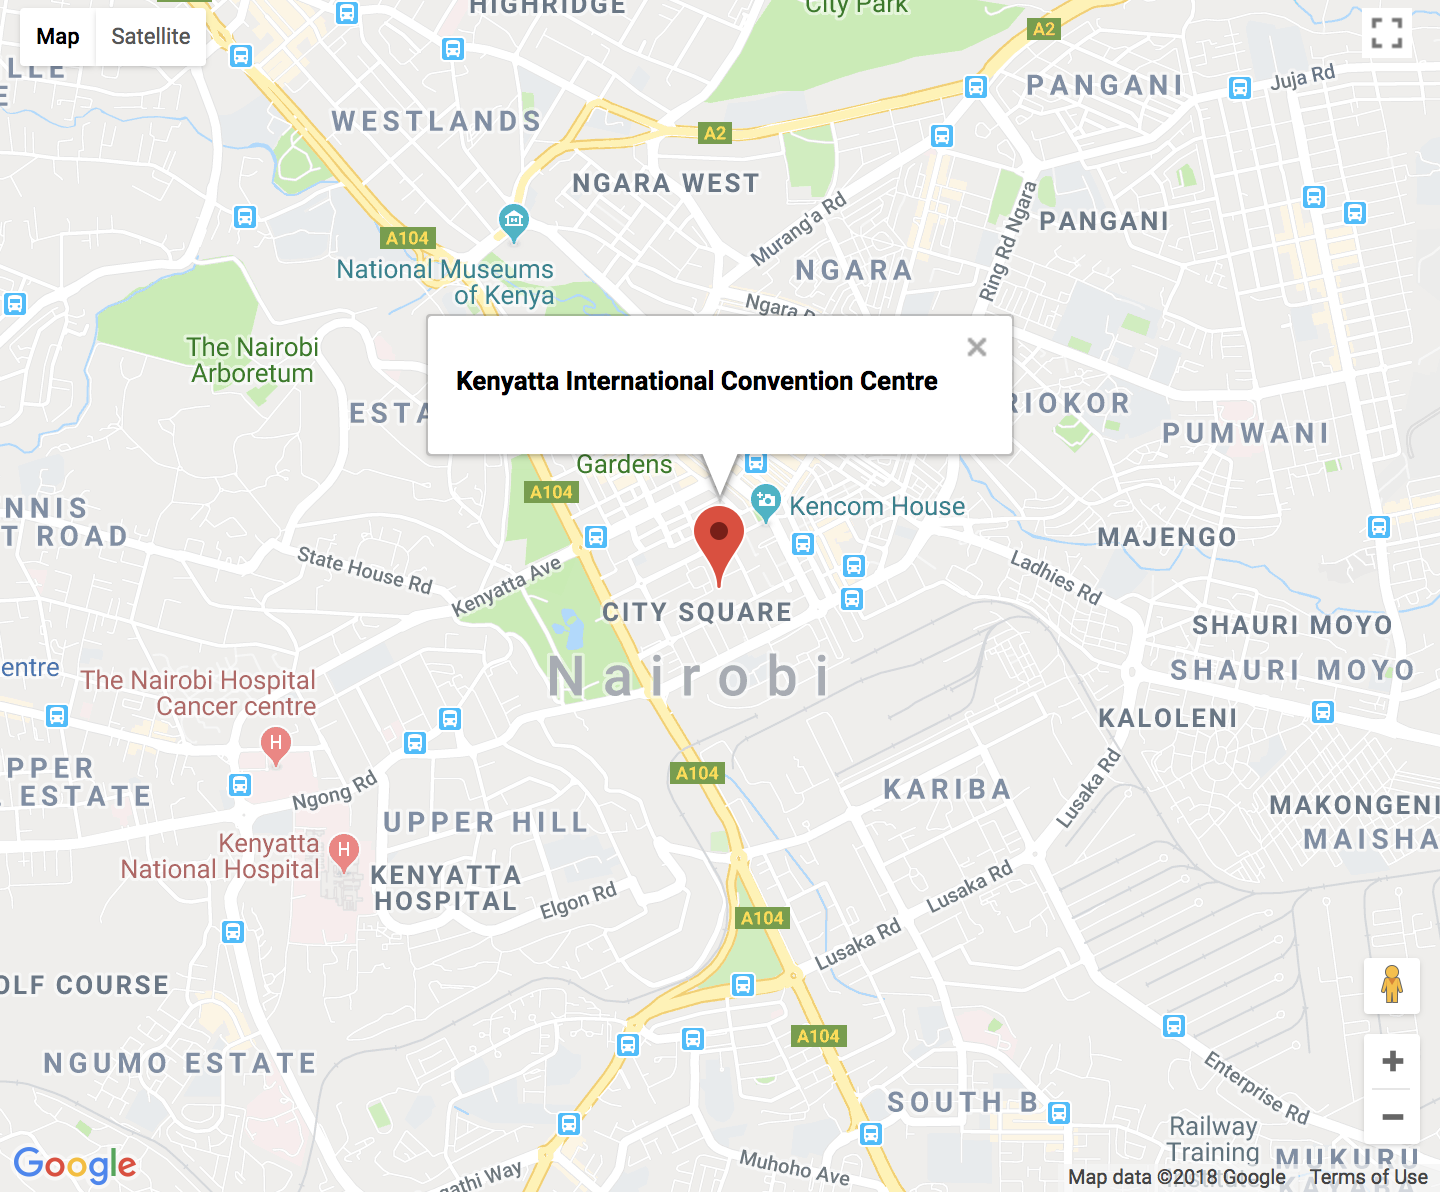
22 name={'Kenyatta International Convention Centre'}
23 />
24 <InfoWindow
25 marker={this.state.activeMarker}
26 visible={this.state.showingInfoWindow}
27 onClose={this.onClose}
28 >
29 <div>
30 <h4>{this.state.selectedPlace.name}</h4>
31 </div>
32 </InfoWindow>
33 </Map>
34 );
35 }
36}
运行您的 app:
1npm start
并确保您在点击时具有InfoWindow的标记:
作为一个后续实践,你可以去在你的<Map>上添加一些更多的<Marker>和更多的互动性到你的<InfoWindow>。
步骤 4 – 显示用户当前位置
您将使用 Navigator,这是一个只读的属性,返回一个地理位置对象,使网页内容可以访问设备的位置。
在你的src目录中,创建一个新的文件,并命名它为Map.js:
1nano src/Map.js
您将创建一个名为CurrentLocation的组件 - 在这里您将构建所有功能来检索浏览器的位置:
 1[label src/Map.js]
 2import React from 'react';
 3import ReactDOM from 'react-dom';
 4
 5const mapStyles = {
 6  map: {
 7    position: 'absolute',
 8    width: '100%',
 9    height: '100%'
10  }
11};
12
13export class CurrentLocation extends React.Component {
14  // ...
15}
16
17export default CurrentLocation;
您将首先在您的<CurrentLocation>组件中添加一些默认副本,因为如果当前位置不提供,您将需要将地图设置为中心。
 1[label src/Map.js]
 2// ...
 3
 4CurrentLocation.defaultProps = {
 5  zoom: 14,
 6  initialCenter: {
 7    lat: -1.2884,
 8    lng: 36.8233
 9  },
10  centerAroundCurrentLocation: false,
11  visible: true
12};
接下来,您需要使您的组件具有状态:
 1[label src/Map.js]
 2// ...
 3
 4export class CurrentLocation extends React.Component {
 5  constructor(props) {
 6    super(props);
 7
 8    const { lat, lng } = this.props.initialCenter;
 9
10    this.state = {
11      currentLocation: {
12        lat: lat,
13        lng: lng
14      }
15    };
16  }
17}
18
19// ...
让我们还更新您的<CurrentLocation>组件,以处理由于网络问题或意外维护而无法使用Google Maps API的场景,并处理提供浏览器当前位置并将地图重新定位到该位置的情况。
 1[label src/Map.js]
 2// ...
 3
 4export class CurrentLocation extends React.Component {
 5  // ...
 6
 7  componentDidUpdate(prevProps, prevState) {
 8    if (prevProps.google !== this.props.google) {
 9      this.loadMap();
10    }
11    if (prevState.currentLocation !== this.state.currentLocation) {
12      this.recenterMap();
13    }
14  }
15}
16
17// ...
让我们定义在更新组件状态中的currentLocation时呼叫的recenterMap()函数,它将使用panTo()方法更改地图的中心。
 1[label src/Map.js]
 2// ...
 3
 4export class CurrentLocation extends React.Component {
 5  // ...
 6
 7  recenterMap() {
 8    const map = this.map;
 9    const current = this.state.currentLocation;
10    const google = this.props.google;
11    const maps = google.maps;
12
13    if (map) {
14      let center = new maps.LatLng(current.lat, current.lng);
15      map.panTo(center);
16    }
17  }
18}
19
20// ...
接下来,当地图已经加载时,您将需要处理该场景,这将由componentDidMount()生命周期方法来处理,该方法将设置回调以获取当前位置。
 1[label src/Map.js]
 2// ...
 3
 4export class CurrentLocation extends React.Component {
 5  // ...
 6
 7  componentDidMount() {
 8    if (this.props.centerAroundCurrentLocation) {
 9      if (navigator && navigator.geolocation) {
10        navigator.geolocation.getCurrentPosition(pos => {
11          const coords = pos.coords;
12          this.setState({
13            currentLocation: {
14              lat: coords.latitude,
15              lng: coords.longitude
16            }
17          });
18        });
19      }
20    }
21    this.loadMap();
22  }
23}
24
25// ...
注意loadMap()函数?让我们继续前进并定义它。
 1[label src/Map.js]
 2// ...
 3
 4export class CurrentLocation extends React.Component {
 5  // ...
 6
 7  loadMap() {
 8    if (this.props && this.props.google) {
 9      // checks if google is available
10      const { google } = this.props;
11      const maps = google.maps;
12
13      const mapRef = this.refs.map;
14
15      // reference to the actual DOM element
16      const node = ReactDOM.findDOMNode(mapRef);
17
18      let { zoom } = this.props;
19      const { lat, lng } = this.state.currentLocation;
20      const center = new maps.LatLng(lat, lng);
21
22      const mapConfig = Object.assign(
23        {},
24        {
25          center: center,
26          zoom: zoom
27        }
28      );
29
30      // maps.Map() is constructor that instantiates the map
31      this.map = new maps.Map(node, mapConfig);
32    }
33  }
34}
35
36// ...
loadMap()函数被调用后,该组件已被渲染,并捕捉到对DOM组件的引用,您希望您的地图被放置在哪里。
但是,您需要确保以前的<Marker>选择您的当前位置(即浏览器的当前位置),因此您需要通过renderChildren()方法输入家长-孩子组件通信,该方法将负责在儿童组件上调用该方法。
 1[label src/Map.js]
 2// ...
 3
 4export class CurrentLocation extends React.Component {
 5  // ...
 6
 7  renderChildren() {
 8    const { children } = this.props;
 9
10    if (!children) return;
11
12    return React.Children.map(children, c => {
13      if (!c) return;
14
15      return React.cloneElement(c, {
16        map: this.map,
17        google: this.props.google,
18        mapCenter: this.state.currentLocation
19      });
20    });
21  }
22}
23
24// ...
最后,让我们添加你的render()方法:
 1[label src/Map.js]
 2// ...
 3
 4export class CurrentLocation extends React.Component {
 5  // ...
 6
 7  render() {
 8    const style = Object.assign({}, mapStyles.map);
 9
10    return (
11      <div>
12        <div style={style} ref="map">
13          Loading map...
14        </div>
15        {this.renderChildren()}
16      </div>
17    );
18  }
19}
20
21// ...
最后,您需要在App.js中更新您的MapContainer组件:
1nano src/App.js
将Map组件替换为新的CurrentLocation组件:
1[label src/App.js]
2import React, { Component } from 'react';
3import { GoogleApiWrapper, InfoWindow, Marker } from 'google-maps-react';
4
5import CurrentLocation from './Map';
6
7export class MapContainer extends Component {
8 state = {
9 showingInfoWindow: false,
10 activeMarker: {},
11 selectedPlace: {}
12 };
13
14 onMarkerClick = (props, marker, e) =>
15 this.setState({
16 selectedPlace: props,
17 activeMarker: marker,
18 showingInfoWindow: true
19 });
20
21 onClose = props => {
22 if (this.state.showingInfoWindow) {
23 this.setState({
24 showingInfoWindow: false,
25 activeMarker: null
26 });
27 }
28 };
29
30 render() {
31 return (
32 <CurrentLocation
33 centerAroundCurrentLocation
34 google={this.props.google}
35 >
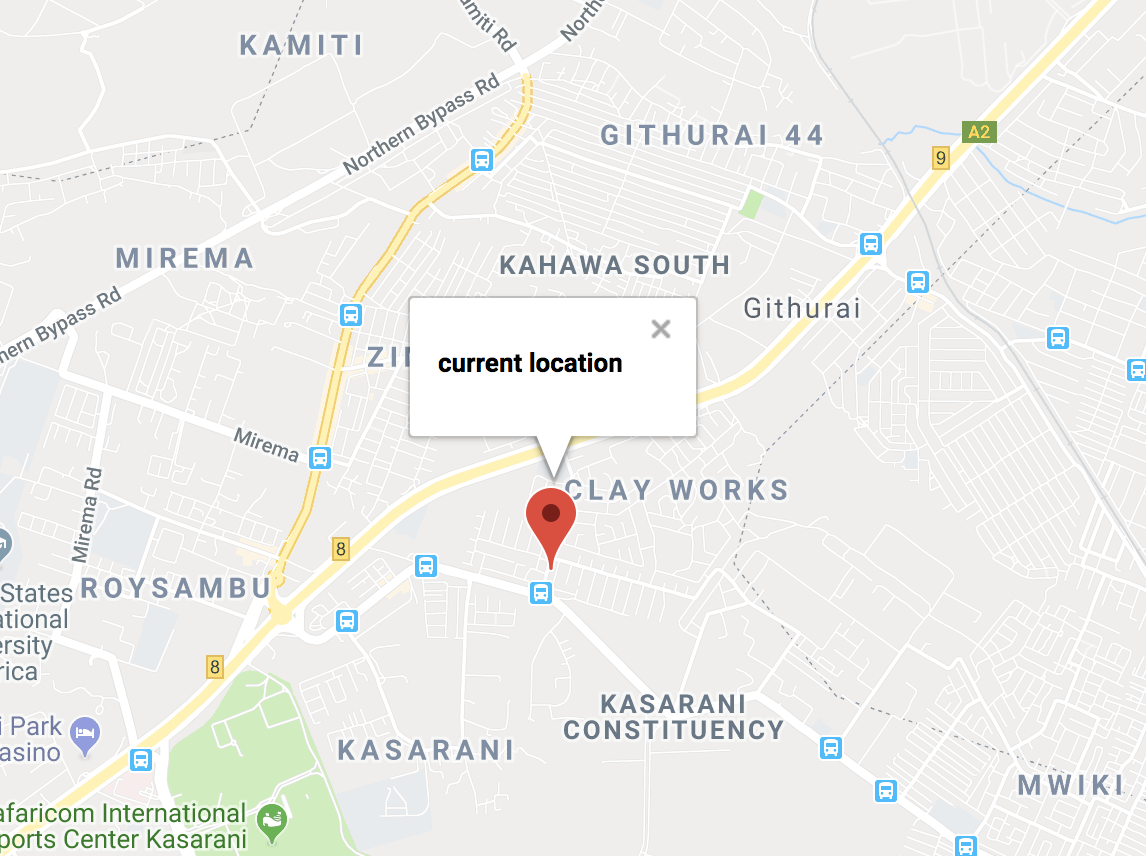
36 <Marker onClick={this.onMarkerClick} name={'Current Location'} />
37 <InfoWindow
38 marker={this.state.activeMarker}
39 visible={this.state.showingInfoWindow}
40 onClose={this.onClose}
41 >
42 <div>
43 <h4>{this.state.selectedPlace.name}</h4>
44 </div>
45 </InfoWindow>
46 </CurrentLocation>
47 );
48 }
49}
50
51export default GoogleApiWrapper({
52 apiKey: 'YOUR_GOOGLE_MAPS_API_KEY_GOES_HERE'
53})(MapContainer);
运行您的 app:
1npm start
转到你的浏览器,你的地图应该首先加载你的初始中心,然后重新加载,以选择你的浏览器的当前位置与标记定位到这个位置,在这里,你完成了:
结论
在这篇文章中,你可以加载你的<Map>反应组件,添加一个Marker,并与它关联一个InfoWindow。
基于这些知识,您可以实施更先进的功能,例如有多行和多角,或将事件倾听器添加到您的地图中。
如果您想了解更多关于 React 的信息,请查看我们的 如何在 React.js 中编码系列,或查看 我们的 React 主题页面以获取练习和编程项目。