介绍
Munin 是一个系统、网络和基础设施监控应用程序,通过 Web 浏览器提供图表中的信息,它围绕客户端服务器架构而设计,并可配置以监控所安装的机器(Munin master)和任何数量的客户端机器,这些客户端机器在 Munin 语言中被称为 _Munin 节点。
在本文中,我们将安装和配置Munin以监控其安装的服务器和一个节点. 要在多个节点上安装Munin,只需遵循在每个系统上创建一个节点的说明。
前提条件
- 两个 Debian 8.1 滴滴
- 每个滴滴,一个具有 sudo 特权的非 root 用户
除非另有说明,本教程中的所有命令都应该作为具有 sudo 特权的非 root 用户运行. 要了解如何创建用户并授予他们 sudo 特权,请参阅 Debian 8 初始服务器设置。
步骤 1 – 安装必要的包
我们将首先开始工作Munin大师。安装Munin之前,需要安装一些依赖。
虽然 Munin 可以与大多数流行的 Web 服务器(如 Nginx 和 Lighttpd)一起工作,但默认情况下,它是专为与 Apache Web 服务器一起工作而设计的,所以请确保 Apache 已安装并配置在 Munin 主机上。
1sudo apt-get update
2sudo apt-get install -y apache2
- 要确保对生成图表进行缩放的动态缩放功能在点击时正常工作,请安装下列功能:
1sudo apt-get install -y libcgi-fast-perl libapache2-mod-fcgid
安装这两个包后,应该启用fcgid模块。
1/usr/sbin/apachectl -M | grep -i cgi
产量应该是:
1fcgid_module (shared)
如果输出是空的,则不启用,然后可以使用:
1sudo a2enmod fcgid
当执行apachectl命令时,您可以忽略以下警告:
1Could not reliably determine the server's fully qualified domain name ...
Apache 将继续与 Munin 一起使用此警告。
其余的配置将使图形缩放正常工作,将在步骤3中涵盖。
步骤 2 – 在 Munin 主机上安装 Munin
Munin 的安装包在 Debian 存储库中可用,所以它可以通过发行版的包管理器进行安装. 在此步骤中,您将从稳定分支安装 Munin 主包。
要安装它,类型:
1sudo apt-get install -y munin
步骤 3 – 配置 Munin 主机
Munin 主机的主要配置文件 munin.conf 以及其功能所需的其他文件可以在 /etc/munin 目录及其子目录中找到。
配置文件由至少两个部分组成 - 一个 全球 和至少一个 主机 部分. 可选地,可以有一个 群组 部分。 主机和组部分以各自的名称开始,在方块中。
要开始修改它:
1cd /etc/munin
2sudo nano munin.conf
寻找这些行并放弃评论,即删除前面的 # 符号。 dbdir 存储包含实际监控信息的所有rrdfiles; htmldir 存储图像和网站文件; logdir 保留日志; rundir 保留状态文件;和 tmpldir 是HTML模板的位置。 请确保将 htmldir从/var/cache/munin/www`更改到您的Web目录。
1[label /etc/munin/munin.conf]
2dbdir     /var/lib/munin
3htmldir   /var/www/munin
4logdir    /var/log/munin
5rundir    /var/run/munin
6...
7tmpldir	/etc/munin/templates
由于htmldir不存在,让我们创建并 chown 它,以便它属于munin系统用户:
1sudo mkdir /var/www/munin
2sudo chown munin:munin /var/www/munin
最后,在munin.conf中寻找第一个宿主树,它应该读到:
1[label /etc/munin/munin.conf]
2[localhost.localdomain]
3    address 127.0.0.1
4    use_node_name yes
将该树的名称更改为唯一识别服务器的名称. 在本示例中,我们将使用 MuninMaster :
1[label /etc/munin/munin.conf]
2[MuninMaster]
3    address 127.0.0.1
4    use_node_name yes
这就是配置文件的全部,所以保存并关闭它。
在相同的 /etc/munin 目录中,我们将修改的下一个文件是 apache24.conf,这是 Munin 的 Apache 2.4 配置文件. 它与 `/etc/apache2/conf-available/munin.conf' 相关联。
1sudo nano apache24.conf
在文件的顶部,修改第一个行,以反映您在munin.conf中指定的和之前创建的 htmldir 路径。 根据本文中使用的目录路径,它应该读到如下,这使得您可以通过附加 munin 到服务器上托管的服务器的 IP 地址或域:
1[label /etc/munin/apache24.conf]
2Alias /munin /var/www/munin
要确保您可以远程访问 Munin 的 Web 界面,请删除目录部分并用以下内容替换:
1[label /etc/munin/apache24.conf]
2<Directory /var/www/munin>
3        Require all granted
4        Options FollowSymLinks SymLinksIfOwnerMatch
5</Directory>
同樣做與最後的位置部分. 刪除「要求本地」行,並以以下方式取代它:
1[label /etc/munin/apache24.conf]
2<Location /munin-cgi/munin-cgi-graph>
3        Require all granted
4        Options FollowSymLinks SymLinksIfOwnerMatch
5        ...
6</Location>
保存并关闭文件,然后重新启动 Munin 和 Apache:
1sudo systemctl restart munin-node
2sudo systemctl restart apache2
您现在可以通过将您的 Web 浏览器指向服务器 IP 地址/munin 来访问 Munin 的 Web 界面。
步骤 4 — 将节点添加到 Munin Master
在此步骤中,我们将展示如何将节点添加到 Munin 主机中,这包括修改 Munin 主机的配置文件以指定节点的主机树,在节点上安装 Munin 节点包,并修改其配置文件,以便由 Munin 主机监控。
让我们从 Munin 节点开始,那就是你创建的 Debian 8 Droplet。
登录到 ** Munin 节点** ,更新包数据库,并安装 Munin 节点包:
1sudo apt-get update
2sudo apt-get install -y munin-node
安装成功完成后,节点的配置应该位于 /etc/munin 目录中。
1sudo nano /etc/munin/munin-node.conf
向文件的中间,寻找一个 **允许 ^127.0.0.1$ ** 行,并修改它以反映Munin 主机的 IP 地址. 请注意,IP 地址是 regex 格式,所以假设主服务器的 IP 地址是 123.46.78.100,该行应该读到:
1[label /etc/munin/munin-node.conf]
2allow ^123\.456\.78\.100$
保存并关闭文件. 然后重新启动 Munin:
1sudo systemctl restart munin-node
在 Munin 主机 上,打开主配置文件:
1sudo nano /etc/munin/munin.conf
我们在这个文件中所需要做的就是为(远程)节点插入一个主机树. 最简单的方法是复制和修改主机的主机树. 请确保用您添加的节点的IP地址代替节点-ip地址:
1[MuninNode]
2    address node-ip-address
3    use_node_name yes
保存并关闭文件,然后重新启动 Apache:
1sudo systemctl restart apache2
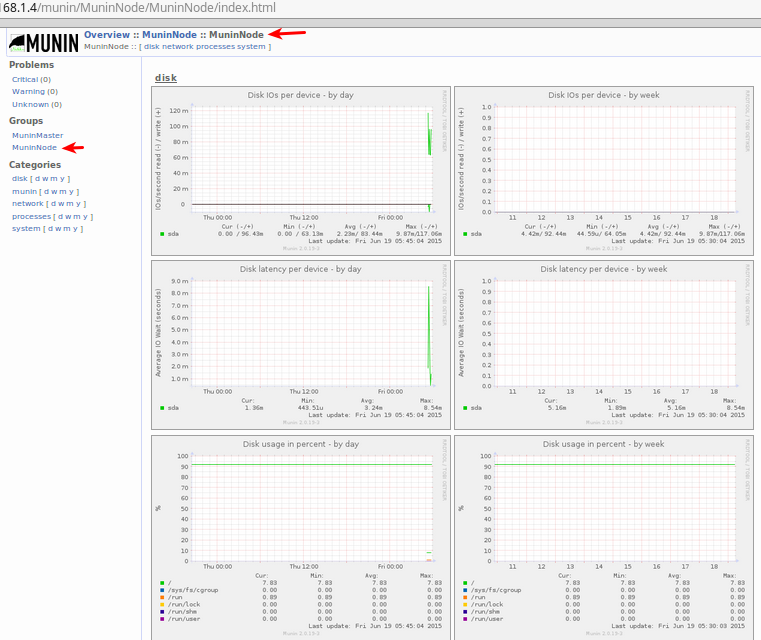
Munin 每 5 分钟检查新节点,等待几分钟,然后重新加载 Munin 主人的 Web 接口. 您应该看到节点的条目。 如果您还没有看到它,请在 5 分钟内再次尝试。 使用此方法,您可以添加尽可能多的节点,如您需要监控。
步骤 5 – 启用额外的插件
Munin 使用插件脚本监控系统,并且默认情况下,大约有十几个插件被安装和活跃。 可用的插件的完整列表位于 /usr/share/munin/plugins 目录中。 为了查看在您的系统上可以使用哪些插件, Munin 提供了以下命令:
1sudo munin-node-configure --suggest
输出应该是这样的:
 1Plugin                     | Used | Suggestions
 2------                     | ---- | -----------
 3cps_                       | no   | no
 4cpu                        | yes  | yes
 5cpuspeed                   | no   | no [missing /sys/devices/system/cpu/cpu0/cpufreq/stats/time_in_state]
 6cupsys_pages               | no   | no [could not find logdir]
 7df                         | yes  | yes
 8df_inode                   | yes  | yes
 9fail2ban                   | no   | yes
10ip_                        | no   | yes
在使用列中含有是的插件意味着它所指的,而在建议列中含有是的插件意味着它可以使用。在两个列中含有不的插件意味着它没有使用,并且在系统上无法使用。
在 Munin 主机和节点上,您还可以在 `/etc/munin/plugins' 目录中看到已安装的插件列表。
当您安装 Munin 时应该安装一个munin-plugins-extra包. 如果不是,请使用它。
1sudo apt-get install munin-plugins-extra
要启用目前尚未使用的可用插件,请从/usr/share/munin/plugins目录中创建一个符号链接到/etc/munin/plugin目录。
例如,要启用 Fail2ban 插件,先安装 Fail2ban:
1sudo apt-get install fail2ban
然后,创建启用 Munin 插件的 symlink:
1sudo ln -s /usr/share/munin/plugins/fail2ban /etc/munin/plugins
重新启动MUNIN:
1sudo systemctl restart munin-node
等待几分钟,重新加载 Web 界面,你应该看到 Fail2ban 标题下的图表 Hosts 被 fail2ban 黑名单 ** 在 Munin 主人的 ** network 类别下。
故障解析
如果您在配置 Munin 主机、 Munin 节点或让主机查看节点时遇到问题,请查看日志文件以获取错误消息:
- Munin 主机:
/var/log/munin/munin-update.log - Munin 节点:
/var/log/munin/munin-node.log
您也可以查看 项目页面以获取额外的故障排除提示。
结论
将远程服务器添加到被监控的系统,就像在远程服务器(或节点)上安装munin-node包,然后修改服务器和节点的配置文件以指向其他IP地址一样简单。
Munin 通过使用插件工作,但并非所有插件都被启用,有关插件的信息可以在 项目页面上找到。