Introduction
OpenX is a popular advertisement server written in PHP. It has a web interface that allows you to easily manage your ad campaigns and track statistics.
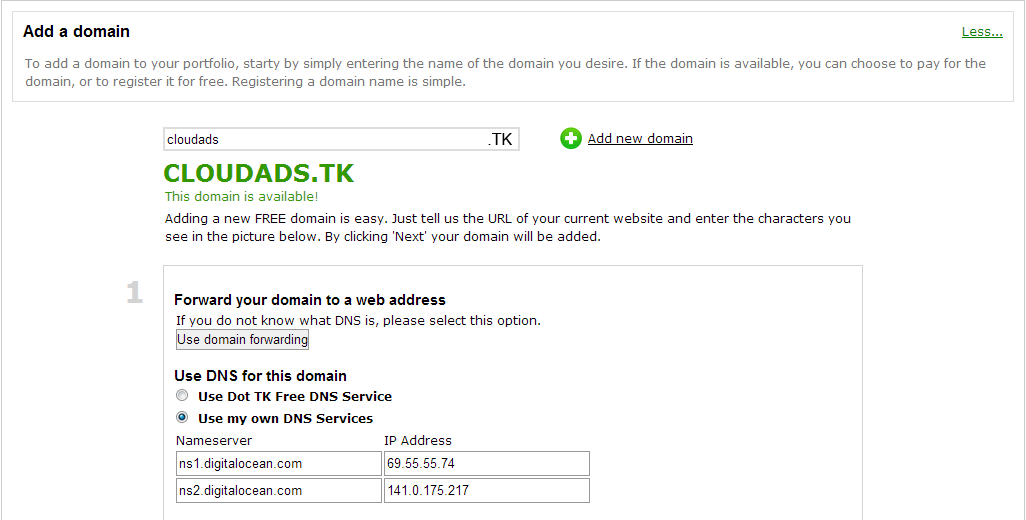
Step 1 - Create A Domain Name
Having a domain name is essential. If you would like to get a free domain, you can get one from dot.tk.
For our purposes, we will register a free domain, cloudads.tk and point it to DigitalOcean name servers:
ns1.digitalocean.com (69.55.55.74)
ns2.digitalocean.com (141.0.175.217)
Step 2 - Spin Up A New Droplet and Configure DNS
Spin up a Ubuntu 12.10 x64 droplet with at least 1GB of RAM and 1 CPU Core. As your OpenX server grows, it would be best to separate database from webserver, and scale them up separately.
If you are just starting out, a single server would be sufficient for both.
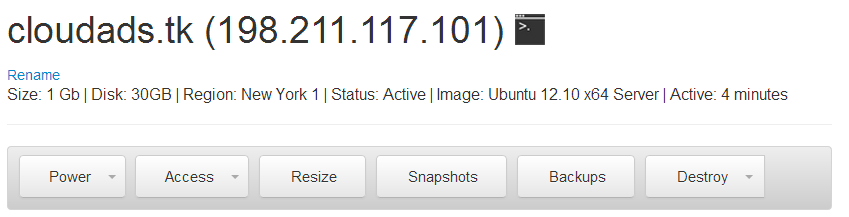
We should also add some SWAP memory, and for our droplet we'll add 2 GB:
dd if=/dev/zero of=/swap bs=1024 count=2097152
mkswap /swap && chown root. /swap && chmod 0600 /swap && swapon /swap
echo /swap swap swap defaults 0 0 >> /etc/fstab
echo vm.swappiness = 0 >> /etc/sysctl.conf && sysctl -p
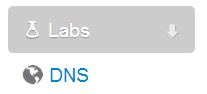
Now head over to DigitalOcean's Control Panel and click DNS (under Labs):
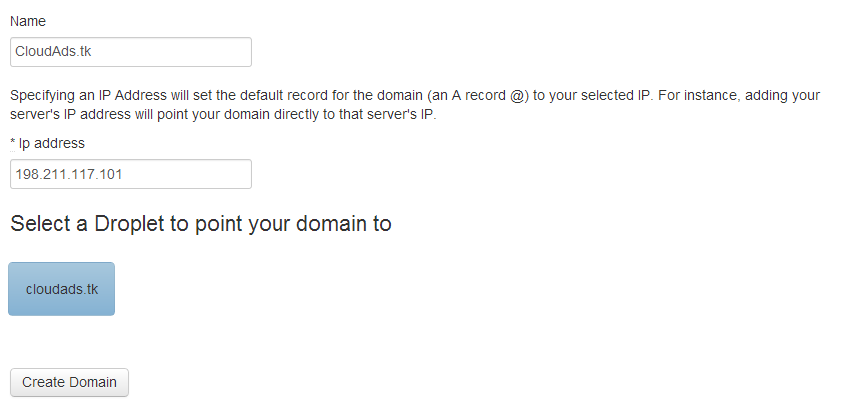
Click "Add Domain" and select the droplet you just created:
Step 3 - Install Packages
apt-get install nginx mysql-server php5 php5-mysql php5-fpm php5-gd
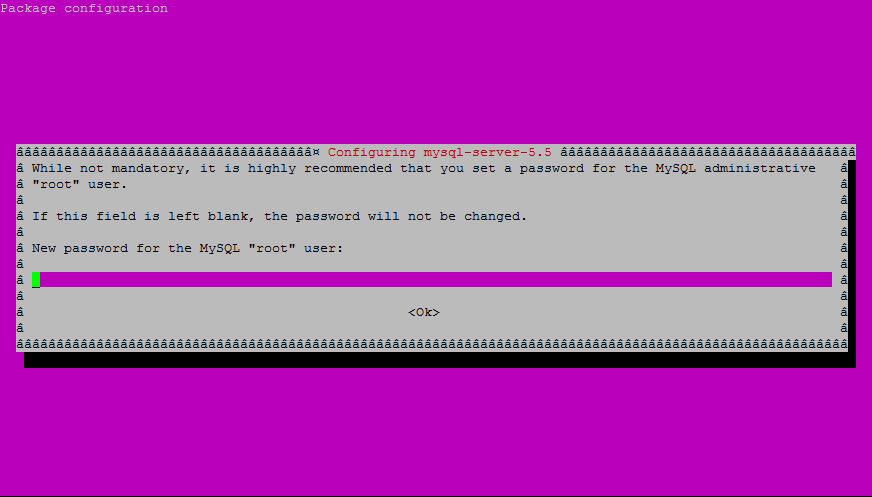
When prompted for MySQL root password, enter your own value, we will choose "PassWord":
Edit /root/.my.cnf and add the following lines:
[client]
user=root
pass=PassWord
Step 4 - Setup Database and Create User
Now you can connect to MySQL server, and also run command-line commands. We should create a new database and user. Make sure to change to your own PassWord value:
mysqladmin create openx
mysql -Bse "create user 'openx'@'localhost' identified by 'PassWord'"
mysql -Bse "grant all privileges on \`openx\`.* to 'openx'@'localhost'"
mysqladmin flush-privileges
Step 5 - Configure Nginx and PHP5-FPM
Set date.timezone "America/New_York" for New York datacenter, or "Europe/Amsterdam" for Amsterdam datacenter:
echo "date.timezone=America/New_York" >> /etc/php5/fpm/php.ini
Edit your Nginx config and add the following lines to /etc/nginx/sites-available/default (modify server_name and folders for your own domain):
server {

        root /usr/share/nginx/www/cloudads.tk;
        index index.html index.htm index.php;
        server_name cloudads.tk www.cloudads.tk;

        location / {
                try_files $uri $uri/ /index.html;
        }

        location ~ \.php$ {
                fastcgi_split_path_info ^(.+\.php)(/.+)$;
                # NOTE: You should have "cgi.fix_pathinfo = 0;" in php.ini
                fastcgi_pass unix:/var/run/php5-fpm.sock;
                fastcgi_index index.php;
                include fastcgi_params;
        }
}

Step 6 - Install OpenX
cd /usr/share/nginx/www
mkdir cloudads.tk
wget http://download.openx.org/openx-2.8.10.tar.bz2
tar jxvf openx-2.8.10.tar.bz2
mv openx-2.8.10/* cloudads.tk/
service nginx start && service php5-fpm restart
Make sure to set correct folder permissions:
chmod -R a+w /usr/share/nginx/www/cloudads.tk/var
chmod -R a+w /usr/share/nginx/www/cloudads.tk/var/cache
chmod -R a+w /usr/share/nginx/www/cloudads.tk/var/plugins
chmod -R a+w /usr/share/nginx/www/cloudads.tk/var/templates_compiled
chmod -R a+w /usr/share/nginx/www/cloudads.tk/plugins
chmod -R a+w /usr/share/nginx/www/cloudads.tk/www/admin/plugins
chmod -R a+w /usr/share/nginx/www/cloudads.tk/www/images
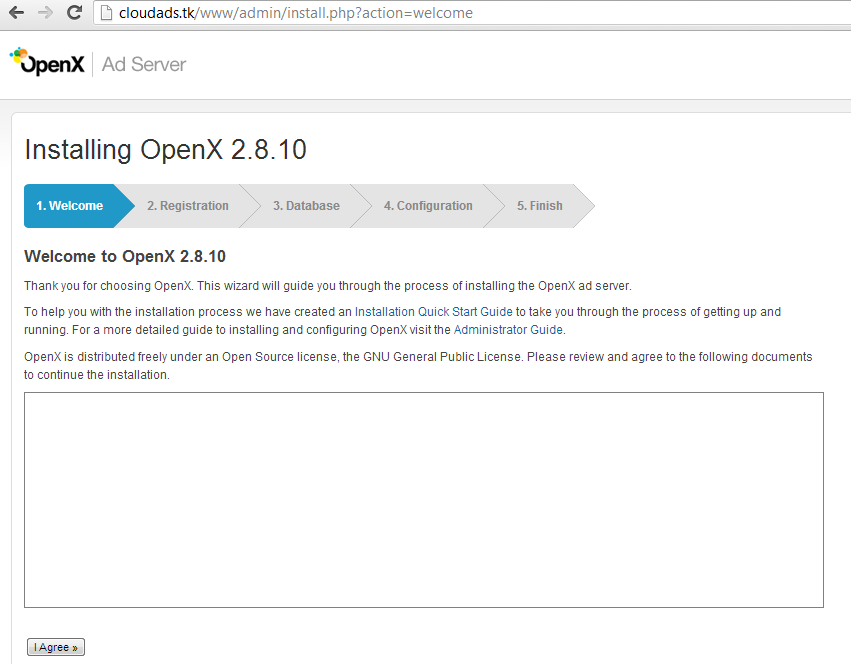
Navigate over to your droplet's IP address or domain if it has already propagated. You should see the OpenX Installer:
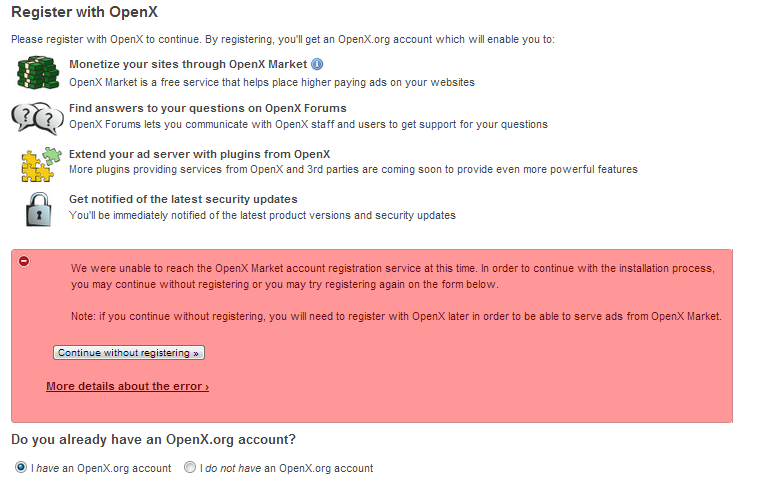
In this next step you will be prompted to register for OpenX.org account:
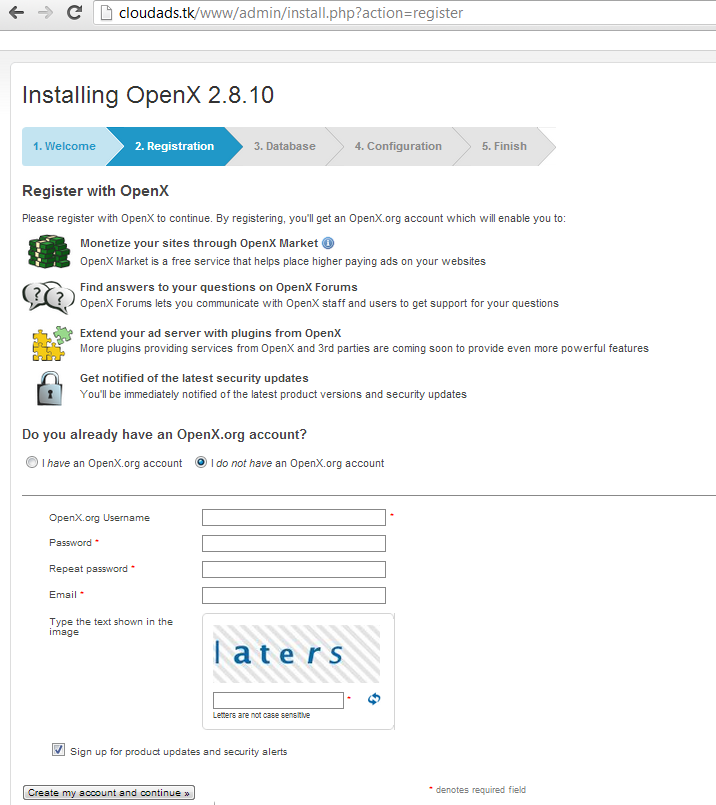
It seems to be timing out for us, so we can skip this step by temporarily disabling outgoing SSL connections and trying any username/password
You would have to add the following iptables rules and restart PHP5-FPM:
iptables -I OUTPUT 1 -p tcp --dport 443 -j REJECT
service php5-fpm restart
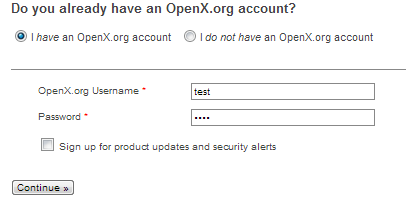
Now you can start over by navigating to http://cloudads.tk but when you get to Step "2.Registration" simply enter any username/password (test/test for example):
And since outbound SSL connections are blocked, OpenX will be unable to verify your credentials, and offer you to skip this step:
You can register for OpenX Market at http://pc.openx.com/ or your OpenX Admin Panel (My Account -> OpenX Market -> Get Started).
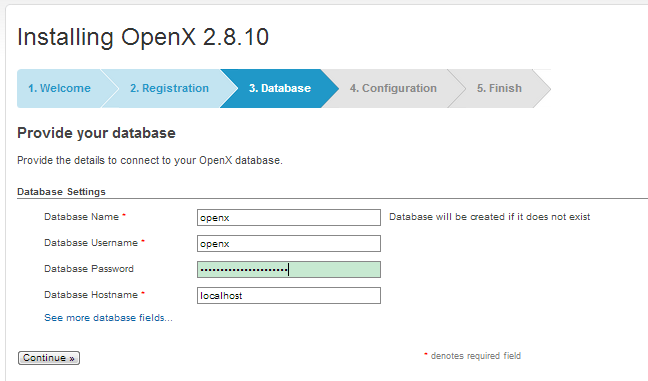
In this next step, you will enter OpenX database credentials that we set in Step 4.
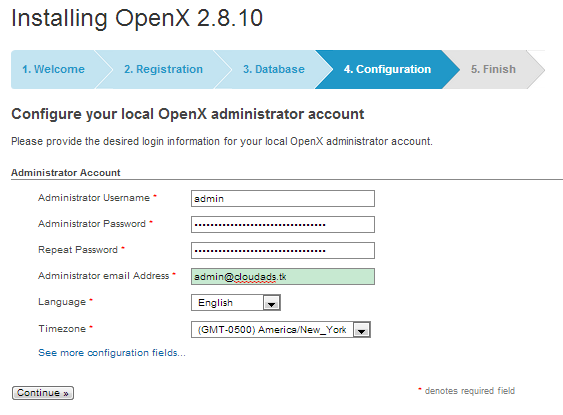
Now you will create an OpenX Admin account, make sure to pick a password with a large character set:
This is the last step in Installation process, where all configuration files are created:

Step 7 - Disable your Dashboard and Allow Outgoing SSL Connections:
sed -i 's/dashboardEnabled.*$/dashboardEnabled=0/' /usr/share/nginx/www/cloudads.tk/var/cloudads.tk.conf.php
iptables -D OUTPUT 1
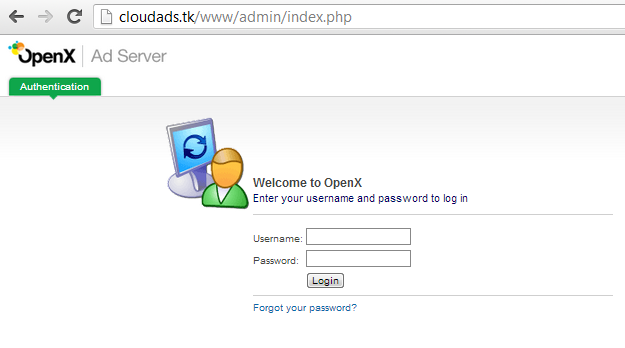
Now you can login to your OpenX Admin Panel:
And you are all done!