Introduction
In this tutorial, we're going to download and install the latest version of Go and the latest version of the Revel web framework on top of that. In case you're not familiar with Revel, here's a snippet about the framework from their website:
A high productivity web framework for the Go language, in the spirit of Rails and Play!
Revel really does focus on programmer productivity. It can handle a lot of the usual stumbling blocks for creating solid web applications (routing, validation, templating, caching, etc.) for you, leaving you to focus on building a lean application quickly. "So," I (almost) hear you cry, "How's it any different from Rails?" Well for starters, it's fast. Very fast. It uses the Go HTTP server, which has been tested to serve requests three to ten times as fast as Rails. Other benchmarks conclude similarly. It's also a great way to learn Go.
If you're not already familiar with Go, there's a quote on the website that sums it up pretty effectively:
Go is an open source programming environment that makes it easy to build simple, reliable, and efficient software.
Go is developed by some very clever people at Google (including Ken Thompson, designer of the UNIX operating system and all-round Computer Science champion). They're already using it for a number of internal products and services, including their newly revamped dl.google.com. In a nutshell, it's a language with power that's closing in on C, with a (relatively) high-level syntax like most modern scripting languages.
Step 1: Create the Virtual Private Server
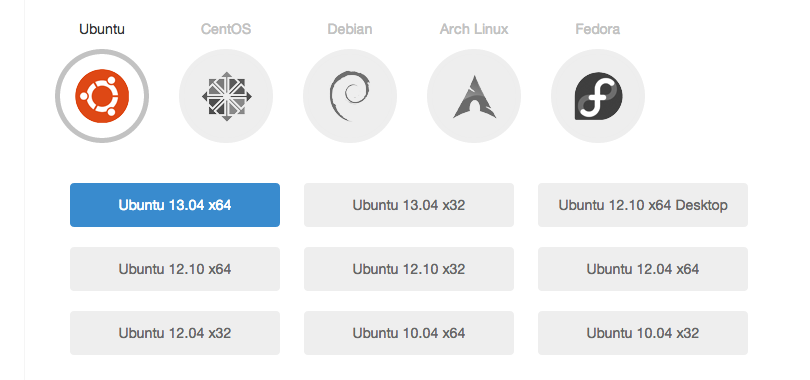
In this tutorial, I'll be using an Ubuntu 13.04 x64 cloud server.
Go ahead and create the VPS. Once it's done, SSH in.
Step 2: Setting Up a User
The first thing we're going to do is set up a user account as we'll be keeping the go binaries and our working directory within our user's home directory. For the steps in this section, replace USER with your own username.
First, we're going to create the user and set a password:
sudo useradd -m -d /home/USER -s /bin/bash -U USER
passwd USER
Next, we're going to add our user to the admin group to grant superuser privileges:
groupadd admin && usermod -a -G admin USER
Finally, we're going to login and change to our home directory:
su USER
cd ~/
Step 3: Installing Go
Currently, aptitude is a little behind the most recent release of Go (1.02 vs 1.1). We're going to download and install Go from the latest package on Google Code.
First, we need to update aptitude and grab git:
sudo apt-get update
sudo apt-get install git mercurial
Next, we're going to download Go:
wget http://go.googlecode.com/files/go1.3.3.linux-amd64.tar. tar xf go1.3.3.linux-amd64.tar.gz rm go1.3.3.linux-amd64.tar.gzgz
We now need to add some environment variables to our .profile to define where our Go installation lives:
echo "export GOROOT=\$HOME/go" >> ~/.profile
echo "PATH=$PATH:\$GOROOT/bin" >> ~/.profile
source ~/.profile
You should now be able to see the currently installed version of Go:
go version
We can now set up our Go path. This is the folder (or set of folders) specified by the GOPATH environment variable. It's important to note that this cannot be the same as the GOROOT variable, which specifies where our Go installation itself lives.
The Go documentation refers to the GOPATH variable as:
a colon-separated list of paths inside which Go code, package objects, and executables may be found.
In this tutorial, we'll only be using one GOPATH directory; ~/gocode. This will be where we store the source for the Revel framework, its dependencies, and the example chat app that we will run in this tutorial. Our GOPATH directory will also store the binaries for these packages. For more information on the purpose and structure of the GOPATH variable, there's a full explanation in the documentation.
Let's create the directory and add some more environment variables to our .profile:
mkdir ~/gocode
echo "export GOPATH=\$HOME/gocode" >> ~/.profile
echo "PATH=\$PATH:\$GOPATH/bin" >> ~/.profile
source ~/.profile
We're now ready to download and install Revel.
Step 4: Installing Revel
This section serves as a great demonstration of Go's go get command:
go get github.com/revel/cmd/revel
That's it! We can now test out our Revel installation by running the example chat app that comes with the installation:
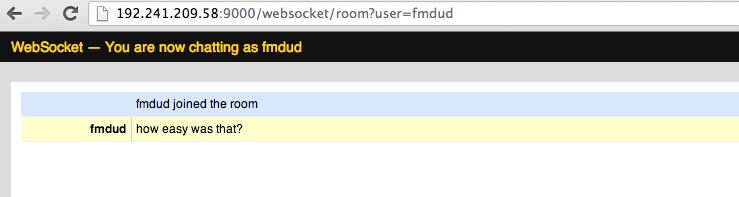
revel run github.com/revel/revel/samples/chat
After a (very) short while, it should tell you that it's Listening on :9000 and Running revel server. This means we're ready to check out our chat app in the browser. Visiting http://YOUR.VPS.IP.HERE:9000 will let you log in and start chatting away!
Addendum: Rebuilding Revel
The Revel framework changes daily, so it's important to know how to rebuild it when we need to. Firstly, pull the latest changes from the remote repository:
cd $GOPATH/src/github.com/robfig/revel
git checkout master
git pull origin master
现在我们可以重建二进制:
cd $GOPATH/bin
rm revel
go install -v github.com/robfig/revel
This will reinstall Revel from your local source, held in $GOPATH/src/github.com/robfig/.
Conclusion
The documentation has a solid collection of resources available to get you started with Revel. If you'd like to know more about how the chat app is implemented, they've got a full rundown on their website.