金钱(警告)
状态: 被剥夺
本文涵盖了不再受支持的 CentOS 版本. 如果您目前正在运行运行 CentOS 6 的服务器,我们强烈建议升级或迁移到受支持的 CentOS 版本。
** 原因** : CentOS 6于2020年11月30日到期(EOL)并且不再收到安全补丁或更新。
See Instead : 本指南可能仍然有用作为参考,但可能不会在其他 CentOS 版本上工作. 如果可用,我们强烈建议使用为您正在使用的 CentOS 版本撰写的指南。
下面的DigitalOcean教程可能立即感兴趣,因为它概述了在CentOS 7服务器上安装Diaspora:
美元
在 CentOS 6 x86 VPS 上安装 Diaspora
Diaspora是一个开源、分布式的社交网络,而不是单一的公司控制和拥有用户的内容,Diaspora的pods可以由任何人托管。
步骤1:配置
添加SWAP空间
如果您正在运行具有 2 GB 以下 RAM 的 VPS (滴滴),则需要在 VPS 上启用交换功能;如果您不这样做,则某些构建步骤可能会失败。
本教程包含有关如何为 CentOS 6 启用交换的说明。
创建本地,非根用户
大多数步骤将作为一个非 root 用户使用 sudo 访问运行。
添加 EPEL 存储库
EPEL 是 Enterprise Linux 附加包的缩写,它包含一些我们需要安装的包,这些包不属于 CentOS 基本存储库。
登录为本地用户并运行:
1sudo su -c 'rpm -Uvh http://dl.fedoraproject.org/pub/epel/6/x86_64/epel-release-6-8.noarch.rpm'
安装前提包
接下来,您需要安装 Diaspora 需要构建和运行的包。
1sudo yum install tar make automake gcc gcc-c++ git net-tools libcurl-devel libxml2-devel libffi-devel libxslt-devel tcl ImageMagick npm mysql-server mysql-devel nginx libyaml libyaml-devel patch readline-devel libtool bison
安装 Redis
Redis 是一个开源的关键值数据存储器,Diaspora 需要安装并配置以便在启动时启动:
1sudo yum install redis.x86_64
2sudo chkconfig --add redis
3sudo chkconfig --level 345 redis on
4sudo /etc/init.d/redis start
添加一个Dedicated Diaspora用户
您可以随心所欲地命名这个帐户,但本教程将假设这个用户被称为diaspora。
1sudo useradd diaspora
步骤2:启动和配置MySQL
下一步是为 Diaspora 配置 MySQL。
开始思考
MySQL 早些时候安装了,但还没有运行,请启动 MySQL 服务器。
1sudo /etc/init.d/mysqld start
创建 Diaspora 数据库和 MySQL 用户
首先,打开 MySQL 作为 root。
1sudo mysql
现在创建一个 diaspora 用户和我们将使用的数据库。
1CREATE USER 'diaspora'@'localhost' IDENTIFIED BY 'password';
2CREATE DATABASE diaspora_production;
现在允许创建的用户访问新数据库:
1GRANT ALL PRIVILEGES ON diaspora_production.* TO 'diaspora'@'localhost';
2FLUSH PRIVILEGES;
输入exit以停止 MySQL。
设置 MySQL 开始在 boot 上
设置CentOS在服务器重新启动时启动MySQL DAEMON。
1sudo chkconfig --level 345 mysqld on
步骤 3:安装和配置 Diaspora
下一步是抓住 Diaspora 源,并将其配置为在您的 VPS 上运行,这些命令应该像您之前创建的 Diaspora 用户一样运行。
1sudo su - diaspora
在 Diaspora 家庭目录中修复权限
为了满足 Diaspora 需要的一些文件,Diaspora 主目录权限需要放松,以允许开放阅读和执行访问:
1chmod ugo+rx ~diaspora
安装 rvm
确保您仍然登录为您的 Diaspora 用户,并安装 rvm 的稳定分支:
1\curl -s -S -L https://get.rvm.io | bash -s stable
rvm 会为 diaspora 用户添加一些环境设置的登录脚本;为了确保这些设置是最容易的,然后重新登录。
1exit
2sudo su - diaspora
安装 Ruby
使用 rvm 来安装 Diaspora 所要求的 Ruby 版本。
1rvm autolibs read-only
2rvm install 1.9.3-p448
查找传媒的源代码
现在克隆 Diaspora 的源代码。
1git clone git://github.com/diaspora/diaspora.git
输入 git 创建的 diaspora 文件夹。
1cd diaspora
您将看到一个警告通知,一旦您更改到diaspora目录:
 1********************************************************************************
 2* NOTICE                                                                       *
 3********************************************************************************
 4* RVM has encountered a new or modified .rvmrc file in the current directory,  *
 5* this is a shell script and therefore may contain any shell commands.         *
 6*                                                                              *
 7* Examine the contents of this file carefully to be sure the contents are      *
 8* safe before trusting it!                                                     *
 9* Do you wish to trust '/home/diaspora/diaspora/.rvmrc'?                       *
10* Choose v[iew] below to view the contents                                     *
11********************************************************************************
12y[es], n[o], v[iew], c[ancel]>
输入y以确认您希望信任.rvmrc。
配置 Diaspora 数据库
将示例数据库配置文件复制到 Diaspora 预计的位置。
1cp config/database.yml.example config/database.yml
在 database.yml 中调整设置以匹配您之前创建的数据库。
1emacs config/database.yml
第一个几个行显示了MySQL配置。更改用户名和密码为您之前在设置MySQL数据库时创建的MySQL帐户的用户名和密码。
1mysql: &mysql
2  adapter: mysql2
3  host: "localhost"
4  port: 3306
5  username: "diaspora"
6  password: "password"
7  charset: utf8
8  collation: utf8_bin
配置 Diaspora 选项
复制示例配置文件,以便Diaspora找到它。
1cp config/diaspora.yml.example config/diaspora.yml
在文本编辑器中打开此文件,以编辑某些设置。
1emacs config/diaspora.yml
你需要更新一些东西:
- 查找一个从`url:``开始的行,并用您的服务器的主机名更新,并通过删除任何领先的# 符号删除该行评论。
- 下面几行,找到一个读到
# certificate_authorities的行,然后删除领先的# ,以免评论它。
安装必要的宝石和设置数据库
Ruby 将需要收集并安装多件珠宝,Diaspora 需要。
1RAILS_ENV=production bundle install --without test development
接下来是构建数据库方案。
1RAILS_ENV=production bundle exec rake db:schema:load
最后,提前编制的分裂。
1RAILS_ENV=production bundle exec rake assets:precompile
步骤四:开始对抗
创建一个 init 脚本,使 Diaspora 轻松启动:
1sudo emacs /etc/init.d/diaspora
用下列内容填写:
  1#! /bin/sh
  2# chkconfig: - 86 30
  3# Author: FABIAN Tamas Laszlo <[email protected]>
  4# Source: https://github.com/netom/diaspora-init/blob/master/init/diaspora
  5
  6PATH=/sbin:/usr/sbin:/bin:/usr/bin
  7DESC="Diaspora application server"
  8NAME=diaspora
  9DIASPORA_HOME="/home/diaspora/diaspora"
 10STARTSCRIPT="RAILS_ENV=production ./script/server"
 11LOGFILE=$DIASPORA_HOME/log/startscript.log
 12SCRIPTNAME=$0
 13USER=diaspora
 14STARTUP_TIMEOUT=100
 15
 16check_unicorn() {
 17    pgrep -f "unicorn_rails master"
 18}
 19
 20check_sidekiq() {
 21    pgrep -f "sidekiq 2"
 22}
 23
 24do_start()
 25{
 26    if ! touch $LOGFILE; then
 27        echo "Could not touch logfile"
 28        return 2
 29    fi
 30
 31    if ! chown $USER $LOGFILE; then
 32        echo "Could not chown logfile"
 33        return 2
 34    fi
 35
 36    if check_unicorn && check_sidekiq; then
 37        echo "Diaspora is already running"
 38        return 1
 39    fi
 40
 41    if ! su -l $USER -c "cd $DIASPORA_HOME; $STARTSCRIPT >> $LOGFILE 2>&1 &"; then
 42        echo "Could not run start script"
 43        return 2
 44    fi
 45
 46    [ "$VERBOSE" != no ] && echo "Waiting for Diaspora processes... "
 47    c=0
 48    while ! check_unicorn > /dev/null || ! check_sidekiq > /dev/null; do
 49        if [ $c -gt $STARTUP_TIMEOUT ]; then
 50            echo "Timeout waiting for Diaspora processes"
 51            return 2
 52        fi
 53        c=`expr $c + 1`
 54        sleep 1
 55        [ "$VERBOSE" != no ] && echo -n "."
 56    done
 57    [ "$VERBOSE" != no ] && echo 0
 58}
 59
 60do_stop()
 61{
 62    for i in `check_unicorn`; do
 63        [ "$VERBOSE" != no ] && echo "Killing unicorn master with PID $i"
 64        kill -TERM $i
 65        [ "$VERBOSE" != no ] && echo $?
 66    done
 67
 68    for i in `check_sidekiq`; do
 69        [ "$VERBOSE" != no ] && echo "Killing sidekiq with PID $i"
 70        kill -TERM $i
 71        [ "$VERBOSE" != no ] && echo $?
 72    done
 73
 74    return 0
 75}
 76
 77case "$1" in
 78  start)
 79    [ "$VERBOSE" != no ] && echo "Starting $DESC" "$NAME"
 80    do_start
 81    case "$?" in
 82        0|1) [ "$VERBOSE" != no ] && echo 0 ;;
 83        *) [ "$VERBOSE" != no ] && echo 1 ;;
 84    esac
 85    ;;
 86  stop)
 87    [ "$VERBOSE" != no ] && echo "Stopping $DESC" "$NAME"
 88    do_stop
 89    case "$?" in
 90        0|1) [ "$VERBOSE" != no ] && echo 0 ;;
 91        2) [ "$VERBOSE" != no ] && echo 1 ;;
 92    esac
 93    ;;
 94  status)
 95    echo 'Checking for running Diaspora processes'
 96
 97    unicorn_running=false
 98    for i in `check_unicorn`; do
 99        echo "Found unicorn master qith PID $i"
100        unicorn_running=true
101    done
102
103    sidekiq_running=false
104    for i in `check_sidekiq`; do
105        echo "Found sidekiq with PID $i"
106        sidekiq_running=true
107    done
108
109    if $unicorn_running && $sidekiq_running; then
110        echo "Diaspora health is OK"
111        echo 0
112    else
113        if $unicorn_running; then
114            echo "Unicorn is RUNNING, but sidekiq is DOWN!"
115            echo 1
116            return 1
117        fi
118        if $sidekiq_running; then
119            echo "Sidekiq is RUNNING, but unicorn is DOWN!"
120            echo 1
121            return 1
122        fi
123        echo "All Diaspora processes are DOWN"
124        echo 0
125    fi
126    ;;
127  restart|force-reload)
128    [ "$VERBOSE" != no ] && echo "Restarting $DESC" "$NAME"
129    do_stop
130    case "$?" in
131      0|1)
132        do_start
133        case "$?" in
134            0) [ "$VERBOSE" != no ] && echo 0 ;;
135            1) [ "$VERBOSE" != no ] && echo "old process is still running" && echo 1 ;;
136            *) [ "$VERBOSE" != no ] && echo "failed to start" && echo 1 ;;
137        esac
138        ;;
139      *)
140        [ "$VERBOSE" != no ] && echo "failed to stop"
141        [ "$VERBOSE" != no ] && echo 1
142        ;;
143    esac
144    ;;
145  *)
146    echo "Usage: $SCRIPTNAME {start|stop|status|restart|force-reload}" >&2
147    exit 3
148    ;;
149esac
150
151:
并授予exec许可:
1sudo chmod u+x /etc/init.d/diaspora
现在配置 CentOS 以便在启动时启动此功能,然后运行以启动我们的 VPS。
1sudo chkconfig --add diaspora
2sudo chkconfig --level 345 diaspora on
3sudo /etc/init.d/diaspora start
这将启动一个Diaspora服务器在VPS的IP端口3000上聆听,并让它在背景中运行。
步骤 5:设置 nginx
nginx 将从 Web 转向 Diaspora 服务器的代理连接。
Tweak 主 nginx 配置
1sudo emacs /etc/nginx/nginx.conf
在http部分中,添加一个行:
1server_names_hash_bucket_size 128;
创建 Diaspora nginx 配置
现在打开一个新的文件,为 Diaspora 创建 nginx 配置。
1sudo emacs /etc/nginx/conf.d/diaspora.conf
您需要更新到您的主机名称的server_name路径。
 1upstream diaspora {
 2  server localhost:3000;
 3}
 4
 5server {
 6  server_name YOURSERVER.COM;
 7  listen 80;
 8  gzip on;
 9  gzip_min_length 1000;
10  gzip_types application/json text/css application/x-javascript;
11
12  root /home/diaspora/diaspora/public;
13  try_files $uri @diaspora;
14  location @diaspora {
15    proxy_set_header X-Real-IP $remote_addr;
16    proxy_set_header X-Forwarded-For $proxy_add_x_forwarded_for;
17    proxy_set_header X-Forwarded-Proto https;
18    proxy_set_header Host $http_host;
19    proxy_redirect off;
20    proxy_pass http://diaspora;
21  }
22}
重新启动 nginx
现在已经创建了配置文件,重新启动 nginx 以获取更改。
1sudo /etc/init.d/nginx stop
2sudo /etc/init.d/nginx start
如果 ngnix 目前没有运行,停止命令可能会失败,但开始命令应该成功。
设置 nginx 来启动 Boot
设置CentOS在VPS重新启动时启动 nginx DAEMON。
1sudo chkconfig --level 345 nginx on
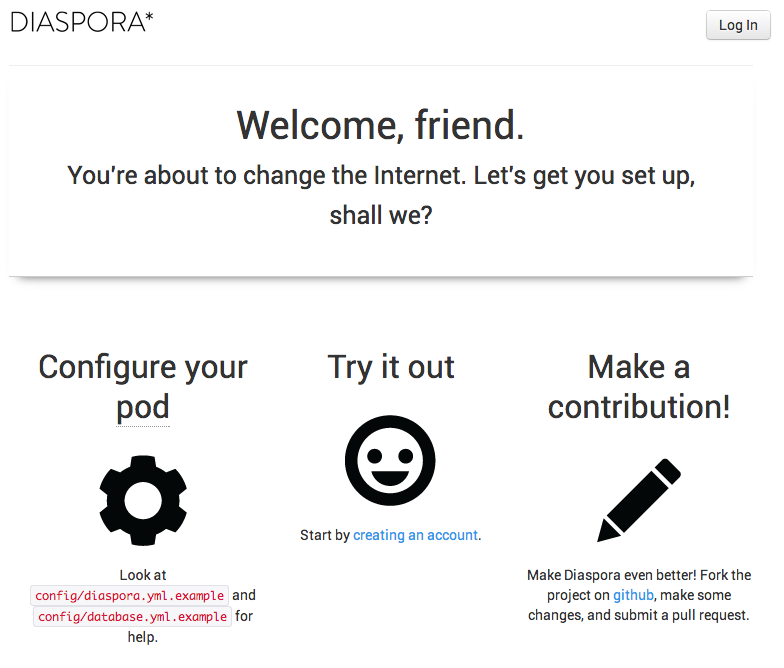
步骤六:使用传媒!
现在 nginx 和 Diaspora 既在运行,您可以导航到您的 Diaspora 实例并开始使用它. 您可以通过浏览器导航到您的主机名称来访问它. 在 Diaspora 欢迎页面中,您可以创建您的第一个本地 Diaspora 帐户。