介绍
Nextcloud是 ownCloud的,是一个文件共享服务器,允许您将您的个人内容(如文档和图片)存储在一个集中位置,就像Dropbox一样。与Nextcloud的区别在于其所有功能都是开源的。
在本教程中,我们将在 Ubuntu 16.04 服务器上安装和配置 Nextcloud 实例。
<$>[注] 注: 自本文最初撰写以来,Nextcloud 项目已显著成熟. 此处的内容已更新,以反映截至 2017 年 10 月的最新推荐的安装程序。
前提条件
为了完成本指南中的步骤,您将需要以下内容:
- 在您的服务器上配置的 sudo 用户和防火墙 :您可以创建具有
sudo特权的用户,并通过遵循 Ubuntu 16.04 初始服务器设置指南设置基本防火墙。 - (可选)指向您的服务器的域名 :我们将通过 TLS/SSL 确保连接到 Nextcloud 安装。 Nextcloud 可以从 Let's Encrypt设置和管理免费、可信的 SSL 证书,如果您的服务器有域名。
完成上述步骤后,继续学习如何在您的服务器上设置 Nextcloud。
步骤 1 – 安装 Nextcloud
我们将使用 [snappy](https://en.wikipedia.org/wiki/Snappy_(package_manager)的包装系统安装 Nextcloud. 此包装系统,默认情况下在Ubuntu 16.04上可用,允许组织在一个自动更新的自包含单元中发送软件,以及所有相关依赖和配置,这意味着而不是安装和配置Web和数据库服务器,然后配置Nextcloud应用程序在其上运行,我们可以自动安装处理底层系统的snap包。
要下载 Nextcloud snap 包并在系统上安装,请键入:
1sudo snap install nextcloud
Nextcloud 包将下载并安装在您的服务器上. 您可以通过列出与snap相关的更改来确认安装过程成功:
1snap changes nextcloud
1[secondary_label Output]
2ID Status Spawn Ready Summary
32 Done 2017-10-03T20:03:09Z 2017-10-03T20:03:26Z Install "nextcloud" snap
状态和总结表明安装没有任何问题完成。
获取有关 Nextcloud Snap 的更多信息
如果您想了解更多关于 Nextcloud 的快捷的信息,有几个可以帮助的命令。
snap info命令可以向您显示描述、可用的 Nextcloud 管理命令以及安装的版本和正在跟踪的 snap 频道:
1snap info nextcloud
Snaps 可以定义他们支持的界面,这些界面由一个插槽和插件组成,一旦连接在一起,会让 snap 访问某些功能或访问级别。例如,需要作为网络客户端的 snap 必须具有网络界面。
1snap interfaces nextcloud
1[secondary_label Output]
2Slot Plug
3:network nextcloud
4:network-bind nextcloud
5-              nextcloud:removable-media
要了解本 snap 提供的所有特定服务和应用程序,您可以通过键入查看 snap 定义文件:
1cat /snap/nextcloud/current/meta/snap.yaml
这将允许您查看插件中包含的个别组件,如果您需要调试的帮助。
创建一个行政帐户
在本指南中,而不是通过 Web 界面创建一个管理用户,我们将创建一个命令行,以避免一个小窗口,其中管理员注册页面可以访问任何访问您的服务器的 IP 地址或域名。
要将 Nextcloud 配置为新的管理员帐户,请使用nextcloud.manual-install命令,您必须输入用户名和密码作为参数:
1sudo nextcloud.manual-install sammy password
下面的消息表明 Nextcloud 已正确配置,前几行是存在的,因为 PCNTL 扩展不包括在 Nextcloud 快照中,这些可以安全地忽略:
1[secondary_label Output]
2The process control (PCNTL) extensions are required in case you want to interrupt long running commands - see http://php.net/manual/en/book.pcntl.php
3Nextcloud is not installed - only a limited number of commands are available
4Nextcloud was successfully installed
现在Nextcloud 已安装,我们需要调整受信任的域名,以便Nextcloud 使用服务器的域名或 IP 地址响应请求。
调整可信的域名
在从命令行安装时,Nextcloud 会限制实例会响应的主机名称。默认情况下,该服务只会响应对localhost主机名称的请求。
您可以通过查询 trusted_domains 数组的值来查看当前设置:
1sudo nextcloud.occ config:system:get trusted_domains
1[secondary_label Output]
2The process control (PCNTL) extensions are required in case you want to interrupt long running commands - see http://php.net/manual/en/book.pcntl.php
3localhost
目前,只有localhost作为数组中的第一个值存在,我们可以通过键入我们的服务器域名或IP地址添加一个条目:
1sudo nextcloud.occ config:system:set trusted_domains 1 --value=example.com
1[secondary_label Output]
2The process control (PCNTL) extensions are required in case you want to interrupt long running commands - see http://php.net/manual/en/book.pcntl.php
3System config value trusted_domains => 1 set to string example.com
如果我们再次查询受信任的域名,我们会看到我们现在有两个条目:
1sudo nextcloud.occ config:system:get trusted_domains
1[secondary_label Output]
2The process control (PCNTL) extensions are required in case you want to interrupt long running commands - see http://php.net/manual/en/book.pcntl.php
3localhost
4example.com
如果您需要添加另一种方法来访问 Nextcloud 实例,您可以通过重新启动config:system:set命令以增量索引号(第一个命令中的1),并调整--value来添加额外的域或地址。
使用 SSL 保护 Nextcloud Web 接口
在我们开始使用 Nextcloud 之前,我们需要保护 Web 界面。
如果您有与 Nextcloud 服务器相关联的域名,则 Nextcloud 快递可以帮助您从 Let's Encrypt获取和配置可信的 SSL 证书。
考虑到这一点,请遵循符合您的场景的下面的部分。
选项1:设置SSL与Let's Encrypt
如果您有与 Nextcloud 服务器相关联的域名,那么保护您的 Web 接口的最佳选择是获得 Let’s Encrypt SSL 证书。
首先,打开Let's Encrypt使用的防火墙中的端口来验证域所有权,这将使您的Nextcloud登录页面公开可用,但由于我们已经配置了一个管理员帐户,没有人能够劫持安装:
1sudo ufw allow 80,443/tcp
接下来,通过键入请求 Let's Encrypt 证书:
1sudo nextcloud.enable-https lets-encrypt
首先,您将被问及您的服务器是否满足要求从 Let’s Encrypt 服务获得证书所需的条件:
 1[secondary_label Output]
 2In order for Let's Encrypt to verify that you actually own the
 3domain(s) for which you're requesting a certificate, there are a
 4number of requirements of which you need to be aware:
 5
 61. In order to register with the Let's Encrypt ACME server, you must
 7   agree to the currently-in-effect Subscriber Agreement located
 8   here:
 9
10       https://letsencrypt.org/repository/
11
12   By continuing to use this tool you agree to these terms. Please
13   cancel now if otherwise.
14
152. You must have the domain name(s) for which you want certificates
16   pointing at the external IP address of this machine.
17
183. Both ports 80 and 443 on the external IP address of this machine
19   must point to this machine (e.g. port forwarding might need to be
20   setup on your router).
21
22Have you met these requirements? (y/n)
点击Y来继续。
接下来,您将被要求提供用于恢复操作的电子邮件地址:
1[secondary_label Output]
2Please enter an email address (for urgent notices or key recovery): [email protected]
最后,输入与您的 Nextcloud 服务器相关的域名:
1[secondary_label Output]
2Please enter your domain name(s) (space-separated): example.com
您的 Let’s Encrypt 证书将被要求,并且,只要一切顺利,内部 Apache 实例将重新启动,立即实施 SSL:
1[secondary_label Output]
2Attempting to obtain certificates... done
3Restarting apache... done
您现在可以跳到 首次登录Nextcloud。
选项2:使用自签证证书设置SSL
如果您的 Nextcloud 服务器没有域名,您仍然可以通过生成自签名的 SSL 证书来保护 Web 接口. 此证书将允许通过加密连接访问 Web 接口,但无法验证您的服务器的身份,因此您的浏览器可能会显示警告。
若要生成自签名的证书并配置 Nextcloud 以使用它,请键入:
1sudo nextcloud.enable-https self-signed
1[secondary_label Output]
2Generating key and self-signed certificate... done
3Restarting apache... done
上面的输出表明Nextcloud 生成并启用了自签证证书。
现在接口是安全的,打开防火墙中的 Web 端口,以允许访问 Web 接口:
1sudo ufw allow 80,443/tcp
您现在已经准备好首次登录Nextcloud。
登录到 Nextcloud Web 界面
现在Nextcloud已配置,请访问您的服务器的域名或IP地址在您的网页浏览器:
1https://example.com
<$>[注] 注: 如果您设置了自签名的SSL证书,您的浏览器可能会显示警告称连接不安全,因为服务器的证书没有被认可的证书机构签署。
由于您已经从命令行配置了一个管理员帐户,您将被带到Nextcloud登录页面。
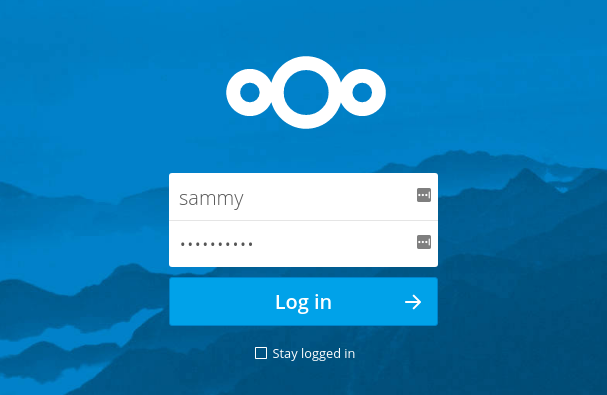
点击登录按钮来登录Nextcloud Web 界面。
第一次输入时,会显示一个窗口,包含各种Nextcloud客户端的链接,可用于与您的Nextcloud实例进行交互和管理:
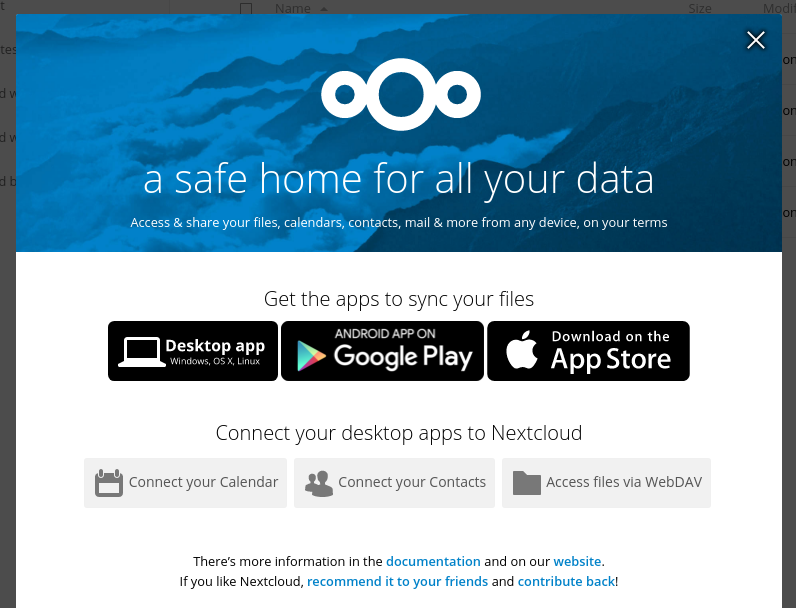
点击通过下载您感兴趣的任何客户端,或通过点击右上角的 X 离开窗口,您将被带到主Nextcloud接口,您可以开始上传和管理文件:
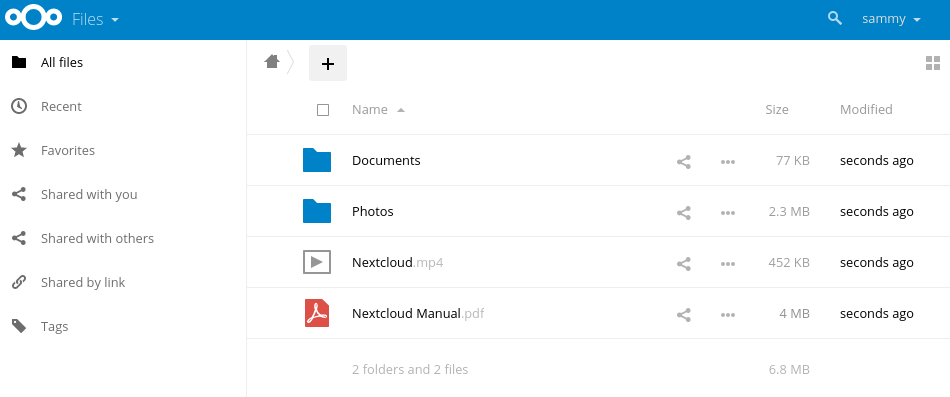
您的安装现在已经完成和安全。 您可以自由地探索接口,以便更熟悉新系统的功能和功能。
结论
Nextcloud 可以复制受欢迎的第三方云存储服务的功能. 内容可在用户之间或通过公共 URL 外部共享。 Nextcloud 的优点是信息安全地存储在您控制的位置。
探索接口,并获取额外的功能,使用 Nextcloud的应用商店安装插件。