此教程的早期版本是由Kevin Isaac撰写的(https://www.digitalocean.com/community/users/kevinisaac70)_
介绍
Ghost是一个轻量级的开源博客平台,Ghost完全可自定义,有很多主题可用。
在本教程中,您将使用官方的ghost-cli安装向导在Ubuntu 16.04上设置一个生产准备的Ghost实例,此方法将安装Ghost,配置Nginx以向Ghost发送代理请求,用Let's Encrypt证书保护它,并配置Ghost以作为系统服务在后台运行。
前提条件
要完成本教程,您将需要:
一个 1GB Ubuntu 16.04 服务器是根据 Ubuntu 16.04 初始服务器设置指南设置的,包括一个 sudo 非根用户和防火墙 *使用官方 PPA 安装的 Node.js,如在 How To Install Node.js on Ubuntu 16.04中所解释的那样。 *Nginx 安装在您的服务器上,如在 How To Install Nginx on Ubuntu 16.04]中所示。
步骤 1 – 安装 Ghost CLI 应用程序
这个程序将安装Ghost,创建MySQL用户和数据库,配置Nginx作为反向代理,并使用SSL/TLS加密来保护网站。
首先,下载使用npm的ghost-cli:
1sudo npm i -g ghost-cli
我們將 Ghost 放入「var/www/ghost」目錄,這是推薦的安裝位置。
1mkdir /var/www/ghost
然后确保您的用户拥有该目录。
1sudo chown $USER:$USER /var/www/ghost
/var/www/ghost 目录必须为您的用户提供完整的权限,并为其他人阅读和执行权限,因此使用以下命令设置权限:
1sudo chmod 775 /var/www/ghost
有了安装的 CLI 和目录,我们可以设置我们的博客。
步骤 2 – 安装和配置 Ghost
Ghost CLI 应用程序有一个安装向导,将引导您通过配置工作 Ghost 博客的所有步骤。
转到 /var/www/ghost/ 目录。
1cd /var/www/ghost/
然后使用幽灵命令来安装Ghost,它会将Ghost配置为使用MySQL作为默认数据库,而您可以使用其他数据库,但MySQL是生产设置的推荐选择。
1ghost install
安装程序首先会确保您安装了必要的先决条件,然后将下载和安装 Ghost:
 1[secondary_label Output]
 2✔ Checking system Node.js version
 3✔ Checking logged in user
 4✔ Checking current folder permissions
 5✔ Checking operating system compatibility
 6✔ Checking for a MySQL installation
 7✔ Checking memory availability
 8✔ Checking for latest Ghost version
 9✔ Setting up install directory
10✔ Downloading and installing Ghost v1.22.2
11✔ Finishing install process
一旦安装过程完成,您将被提示查看您的博客URL,以及您的MySQL数据库信息。在此步骤中提供 root用户名和密码。
1[secondary_label Output]
2? Enter your blog URL: http://example.com
3? Enter your MySQL hostname: localhost
4? Enter your MySQL username: root
5? Enter your MySQL password: [hidden]
6? Enter your Ghost database name: ghost_prod
配置向导将创建一个 ghost系统用户,并问您是否应该创建一个 ghost MySQL用户,您应该允许:
1[secondary_label Output]
2✔ Configuring Ghost
3✔ Setting up instance
4Running sudo command: useradd --system --user-group ghost
5Running sudo command: chown -R ghost:ghost /var/www/ghost/content
6✔ Setting up "ghost" system user
7? Do you wish to set up "ghost" mysql user? Yes
8✔ Setting up "ghost" mysql user
接下来,它会问你是否想要配置 Nginx. 确认此点,安装程序将为你的博客创建相应的反向代理服务器块:
1[secondary_label Output]
2? Do you wish to set up Nginx? Yes
3✔ Creating nginx config file at /var/www/ghost/system/files/example.con.conf
4Running sudo command: ln -sf /var/www/ghost/system/files/example.com.conf /etc/nginx/sites-available/example.com.conf
5Running sudo command: ln -sf /etc/nginx/sites-available/example.com.conf /etc/nginx/sites-enabled/example.com.conf
6Running sudo command: nginx -s reload
7✔ Setting up Nginx
接下来,您将被要求设置SSL支持. 如果您正在使用注册的完全合格域名,并已配置您的DNS设置以指向您的服务器的IP地址,然后按Y继续。
1[secondary_label Output]
2? Do you wish to set up SSL? Yes
您将被要求提供您的电子邮件地址,然后将安装证书。
 1[secondary_label Output]
 2? Enter your email (used for Let's Encrypt notifications) [email protected]
 3Running sudo command: mkdir -p /etc/letsencrypt
 4Running sudo command: ./acme.sh --install --home /etc/letsencrypt
 5Running sudo command: /etc/letsencrypt/acme.sh --issue --home /etc/letsencrypt --domain example.com --webroot /var/www/ghost/system/nginx-root --reloadcmd "nginx -s reload" --accountemail you@example.com
 6Running sudo command: openssl dhparam -out /etc/nginx/snippets/dhparam.pem 2048
 7Running sudo command: openssl dhparam -out /etc/nginx/snippets/dhparam.pem 2048
 8Running sudo command: mv /tmp/ssl-params.conf /etc/nginx/snippets/ssl-params.conf
 9✔ Creating ssl config file at /var/www/ghost/system/files/example.com-ssl.conf
10Running sudo command: ln -sf /var/www/ghost/system/files/example.com-ssl.conf /etc/nginx/sites-available/example.com-ssl.conf
11Running sudo command: ln -sf /etc/nginx/sites-available/example.com-ssl.conf /etc/nginx/sites-enabled/example.com-ssl.conf
12Running sudo command: nginx -s reload
13✔ Setting up SSL
接下来,配置向导将提示您设置系统d服务. 按Y继续,并将创建一个名为ghost_example-com的新系统d服务,并允许它启动:
1[secondary_label Output]
2? Do you wish to set up Systemd? Yes
3✔ Creating systemd service file at /var/www/ghost/system/files/ghost_example-com.service
4Running sudo command: ln -sf /var/www/ghost/system/files/ghost_example-com.service /lib/systemd/system/ghost_example-com.service
5Running sudo command: systemctl daemon-reload
6✔ Setting up Systemd
最后,向导将配置您的数据库并询问是否应该启动 Ghost,您应该通过按Y来允许:
 1[secondary_label Output]
 2Running sudo command: /var/www/ghost/current/node_modules/.bin/knex-migrator-migrate --init --mgpath /var/www/ghost/current
 3✔ Running database migrations
 4? Do you want to start Ghost? Yes
 5Running sudo command: systemctl is-active ghost_example-com
 6✔ Ensuring user is not logged in as ghost user
 7✔ Checking if logged in user is directory owner
 8✔ Checking current folder permissions
 9Running sudo command: systemctl is-active ghost_example-com
10✔ Validating config
11✔ Checking folder permissions
12✔ Checking file permissions
13✔ Checking content folder ownership
14✔ Checking memory availability
15Running sudo command: systemctl start ghost_example-com
16✔ Starting Ghost
17Running sudo command: systemctl is-enabled ghost_example-com
18Running sudo command: systemctl enable ghost_example-com --quiet
19✔ Starting Ghost
你的Ghost博客现在已安装并准备好使用. 你可以访问你的博客在http://example.com`. 现在让我们创建一个帐户,这样你就可以创建你的第一个帖子。
步骤 3 – 创建一个帐户和配置你的博客
要登录并配置您的博客,请访问http://example.com/login`. 您将收到以下屏幕的欢迎:

点击创建你的帐户按钮开始。
您将看到创建您的帐户屏幕,它会询问您的博客标题,以及您的姓名,电子邮件地址和密码:
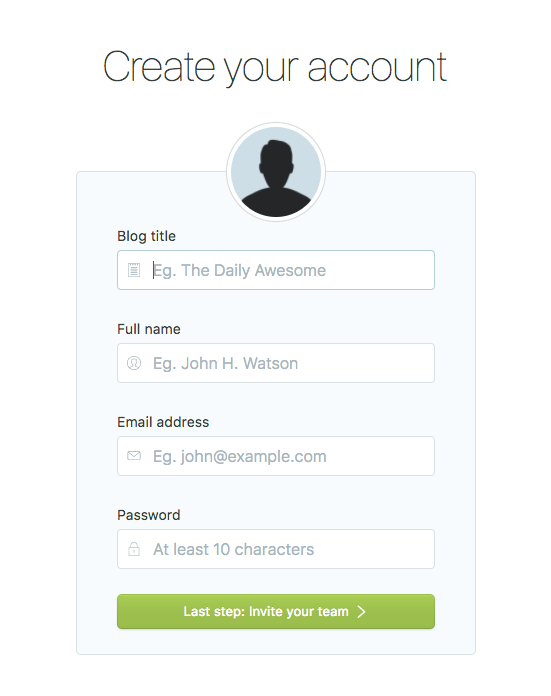
填写详细信息并按下 ** 最后一步:邀请您的团队 ** 按钮。
该向导将要求您输入其他合作者的电子邮件地址,但您可以在屏幕底部选择链接 **我会这样做。
然后你会看到一个帖子列表,Ghost称之为故事:
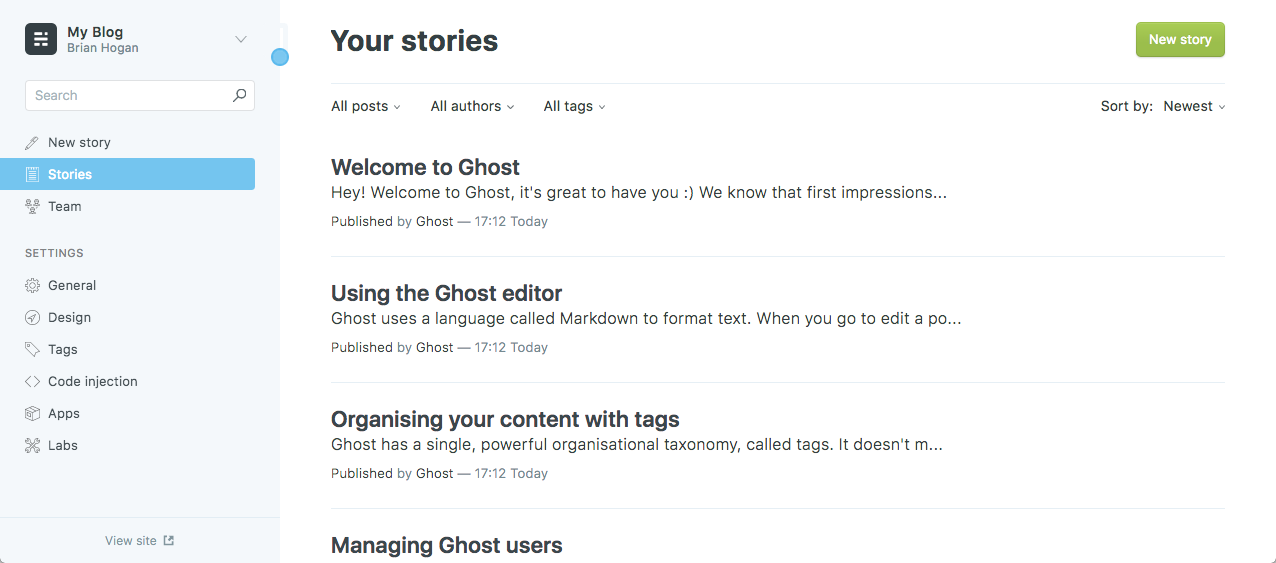
左侧的菜单允许你创建一个新故事或管理你的博客的其他设置。
结论
在本教程中,您安装了Ghost,将Nginx配置为Ghost的代理请求,并确保Ghost作为系统服务运行。