作者选择了 Girls Who Code以作为 Write for Donations计划的一部分获得捐款。
介绍
[JavaScript] (https://www.javascript.com/)被通称为单行本语言,因为你的网络应用代码在一个单行本中逐一执行. 如果您正在访问一个具有多个核心的设备上的网络应用程序,JavaScript只使用一个核心. 当一个任务正在主线上执行时,所有后续的任务都必须等任务完成后再进行. 当任务需要很长的时间,它会阻断主线程,使剩余的任务无法被执行. 阻塞任务大多是CPU密集型任务,也叫CPU捆绑任务,有处理图形,数学计算,视频或图像压缩等实例.
除了CPU捆绑的任务之外,您还将有I/O捆绑的任务,这些任务是非屏蔽的. 这些I/O范围的任务将大部分时间用于向操作系统(OS)发出请求并等待回应. 一个例子是Fetch API向服务器提出的网络请求. 当使用获取API从服务器获取资源时,操作系统会接管任务,获取API会等待OS响应. 在此期间,Fraft API的回调被卸载到一个[队列] (https://andsky.com/tech/tutorials/understanding-the-event-loop-callbacks-promises-and-async-await-in-javascript# queue),在那里等待OS响应,释放出主线程并允许它执行其他后续任务. 一旦收到回复,与Frief API呼叫相联的回调会执行主线. 由于I/O绑定任务的性能取决于操作系统完成任务需要多长时间,所以大多数I/O绑定任务,如Freach,执行保证,定义在承诺解决时应该运行的功能;即操作系统完成任务并返回响应时.
相比之下,CPU绑定的任务不会像等待操作系统的I/O绑定的任务一样空闲。CPU绑定的任务将控制CPU,直到任务完成,阻止该过程中的主要线程。
为了解决这个问题,浏览器引入了 Web Workers API以在浏览器中提供多线路支持。 使用 Web Workers,您可以将 CPU 密集的任务卸载到另一个线程,从而释放主线程。
在本教程中,您将创建一个 CPU 绑定的任务,该任务会阻止浏览器中的主要线程,并观察它如何影响 Web 应用程序. 然后,您将尝试无效地使用承诺进行 CPU 绑定的任务非阻止。
前提条件
要遵循本教程,您将需要:
- 有两个或两个以上核心并安装了现代网页浏览器的机器.
- 您系统中的本地节点. js 环境, 您可以在 Ubuntu 22.04 上安装节点. js( https://andsky.com/tech/tutorials/how-to-install-node-js-on-ubuntu-22-04) 。 关于其他操作系统,请遵循关于[如何安装节点和创建本地开发环境]的适当指南(https://www.digitalocean.com/community/tutorial_series/how-to-install-node-js-and-create-a-local-development-environment)。
- 了解事件循环、召回和允诺,您可以通过阅读了解事件循环、召回、允诺和Async/Await in JavaScript来学习。
- 联合国 您还需要对 HTML、 CSS 和 JavaScript 的基本知识, 您可以在我们 [如何用 HTML (https://www.digitalocean.com/community/tutorial_series/how-to-build-a-website-with-html) 系列、 [如何用 CSS (https://www.digitalocean.com/community/tutorial_series/how-to-build-a-website-with-css) 系列 和 [JavaScript 中找到这些知识 。 .
步骤 1 — 创建没有 Web 工作者的 CPU-Bound 任务
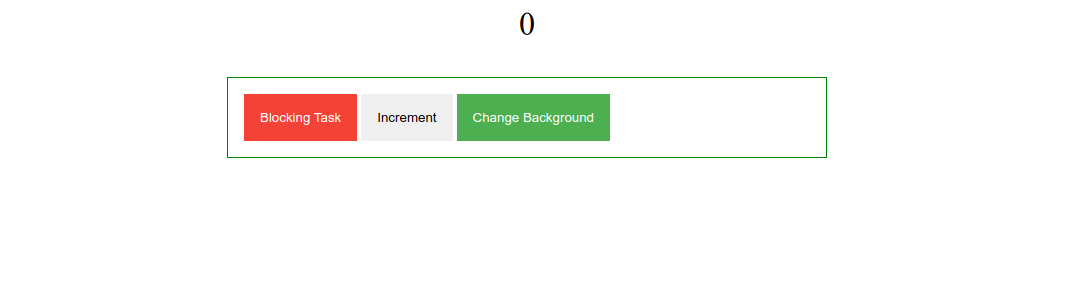
在此步骤中,您将创建一个具有阻止CPU相关任务的Web应用程序,以及非阻止任务。应用程序将有三个按钮。第一个按钮将启动阻止任务,这是一个为循环,它重复约五十亿次。第二个按钮将增加网页上的值,第三个按钮将改变Web应用程序的背景颜色。
首先,使用mkdir命令创建项目目录:
1mkdir workers_demo
通过cd命令进入目录:
1cd workers_demo
使用nano或您最喜欢的文本编辑器,创建一个index.html文件:
1nano index.html
在您的 index.html 文件中,添加以下代码来创建显示输出的按钮和div 元素:
 1[label workers_demo/index.html]
 2<!DOCTYPE html>
 3<html lang="en">
 4  <head>
 5    <meta charset="UTF-8" />
 6    <meta name="viewport" content="width=device-width, initial-scale=1.0" />
 7    <title>Web Workers</title>
 8    <link rel="stylesheet" href="main.css" />
 9  </head>
10  <body>
11    <div class="wrapper">
12      <div class="total-count"></div>
13      <div class="buttons">
14        <button class="btn btn-blocking" id="blockbtn">Blocking Task</button>
15        <button class="btn btn-nonblocking" id="incrementbtn">Increment</button>
16        <button class="btn btn-nonblocking" id="changebtn">
17          Change Background
18        </button>
19      </div>
20      <div class="output"></div>
21    </div>
22    <script src="main.js"></script>
23  </body>
24</html>
在 " 头 " 部分,您可参考 " Main.css " 样式表,其中将包含应用程序样式。 在 " 机构 " 标记中,您创建一个带有 " 总计数 " 的 " div " 元素,其中将包含一个值,当单击一个按钮时,该值将递增。 接下来,你创建了另一个带有三个 " 按钮 " 元素的分解元素。 第一个按钮将启动一个CPU密集型任务,它正在被屏蔽. 第二个按钮会用"总计"的类别来递增"div"元素中的值,第三个按钮会触发JavaScript代码来改变背景颜色. 这两项任务无阻.
下一个div元素将包含 CPU 密集任务的输出,最后,在body标签的结束之前,您将引用main.js文件,其中将包含所有 JavaScript 代码。
您可能会注意到元素有ID和类,您将在此步骤中稍后使用它们来引用JavaScript中的元素。
现在保存并退出您的文件。
创建并打开 main.css 文件:
1nano main.css
在你的「main.css」文件中,添加以下内容来格式化元素:
 1[label workers_demo/main.css]
 2body {
 3  background: #fff;
 4  font-size: 16px;
 5}
 6
 7.wrapper {
 8  max-width: 600px;
 9  margin: 0 auto;
10}
11.total-count {
12  margin-bottom: 34px;
13  font-size: 32px;
14  text-align: center;
15}
16
17.buttons {
18  border: 1px solid green;
19  padding: 1rem;
20  margin-bottom: 16px;
21}
22
23.btn {
24  border: 0;
25  padding: 1rem;
26}
27
28.btn-blocking {
29  background-color: #f44336;
30  color: #fff;
31}
32
33#changebtn {
34  background-color: #4caf50;
35  color: #fff;
36}
.btn 按钮被定义为坚固的绿色边界和轻型插头,但阻断任务进一步由使用不同的背景颜色的 .btn-blocking 风格定义。
保存并关闭文件。
现在你已经定义了CSS风格,你会写JavaScript代码,使HTML元素互动。
在您的编辑器中创建并打开main.js文件:
1nano main.js
在您的 main.js 文件中,添加以下代码来引用 DOM 元素:
1[label workers_demo/main.js]
2const blockingBtn = document.getElementById("blockbtn");
3const incrementBtn = document.getElementById("incrementbtn");
4const changeColorBtn = document.getElementById("changebtn");
5const output = document.querySelector(".output");
6const totalCountEl = document.querySelector(".total-count");
在前三行中,您将按钮与它们的ID进行参考,使用文档对象的getElementByID()方法;在最后两行中,您将div元素与它们的类名称进行参考,使用document对象的querySelector()方法。
接下来,定义一个事件倾听器,在点击incrementBtn按钮时将增加一个div元素值:
1[label workers_demo/main.js]
2...
3totalCountEl.textContent = 0;
4
5incrementBtn.addEventListener("click", function incrementValue() {
6  let counter = totalCountEl.textContent;
7  counter++;
8  totalCountEl.textContent = counter;
9});
首先,您将totalCountEl元素的文本内容设置为0。然后使用 DOM 的addEventListener()方法将事件倾听器附加到incrementBtn按钮中。
在incrementValue()回调中,您从 DOM 获取totalCountEl文本内容值,并将其设置为counter变量,然后将值增加为1,并将totalCountEl元素文本内容设置为增加值。
接下来,添加以下代码,将点击事件附加到changeColorBtn按钮,以便在点击按钮时随机改变背景颜色:
1[label workers_demo/main.js]
2...
3changeColorBtn.addEventListener("click", function changeBackgroundColor() {
4  colors = ["#009688", "#ffc107", "#dadada"];
5  const randomIndex = Math.floor(Math.random() * colors.length)
6  const randomColor = colors[randomIndex];
7  document.body.style.background = randomColor;
8});
在上一个代码中,当用户点击changeColorBtn按钮时,您会附加一个点击事件监听器来运行changeBackgroundCol调用。 在回调中,您将 颜色 变量设置为由三个HEX 颜色值组成的数组。 然后将Math.random()方法称为Math.random()方法,并将其结果与数组长度值相乘,以便在0'和数组长度3'之间产生随机数字。 随机值再用 " Math.Floor () " 方法四舍五入到最接近的整数,并储存在 " RandomIndex " 变量中.
之后,您使用随机索引从数组中选择一个值,然后将文档对象的body.style.background属性设置为该颜色。
现在你已经实现了两个触发非阻止任务的按钮,你将连接一个事件倾听器到剩余的按钮开始一个CPU密集的任务。
仍然在你的main.js文件中,添加以下代码来附加一个点击事件倾听器,以启动阻止任务的按钮:
1[label workers_demo/main.js]
2...
3blockingBtn.addEventListener("click", function blockMainThread() {
4  let counter = 0;
5  for (let i = 0; i < 5_000_000_000; i++) {
6    counter++;
7  }
8  output.textContent = `Result: ${counter}`;
9});
在之前的代码中,你附上一个点击事件听器,运行blockMainThread()调用。在函数中,你将计数设置为值0,然后创建一个循环,该循环重复五十亿次。
完整的文件现在将匹配如下:
 1[label workers_demo/main.js]
 2const blockingBtn = document.getElementById("blockbtn");
 3const incrementBtn = document.getElementById("incrementbtn");
 4const changeColorBtn = document.getElementById("changebtn");
 5const output = document.querySelector(".output");
 6const totalCountEl = document.querySelector(".total-count");
 7totalCountEl.textContent = 0;
 8
 9incrementBtn.addEventListener("click", function incrementValue() {
10  let counter = totalCountEl.textContent;
11  counter++;
12  totalCountEl.textContent = counter;
13});
14
15changeColorBtn.addEventListener("click", function changeBackgroundColor() {
16  colors = ["#009688", "#ffc107", "#dadada"];
17  const randomIndex = Math.floor(Math.random() * colors.length)
18  const randomColor = colors[randomIndex];
19  document.body.style.background = randomColor;
20});
21
22blockingBtn.addEventListener("click", function blockMainThread() {
23  let counter = 0;
24  for (let i = 0; i < 5_000_000_000; i++) {
25    counter++;
26  }
27  output.textContent = `Result: ${counter}`;
28});
一旦你完成了输入你的代码,保存和退出你的文件。
要避免在步骤 3 中开始使用 Web 工作者时出现 Cross-Origin Resource Sharing (CORS) 错误,您需要为该应用创建 Web 服务器。
1npx serve .
输入y来确认,并且控制台将输出一个服务!消息,以确认服务器正在运行:
 1[secondary_label Output]
 2   ┌─────────────────────────────────────────────────────┐
 3   │                                                     │
 4   │   Serving!                                          │
 5   │                                                     │
 6   │   - Local:            http://localhost:3000         │
 7   │   - On Your Network:  http://your_ip_address:3000   │
 8   │                                                     │
 9   │   Copied local address to clipboard!                │
10   │                                                     │
11   └─────────────────────────────────────────────────────┘
打开您喜爱的网页浏览器并访问http://localhost:3000/index.html。
注意: 如果您正在远程服务器上遵循教程,您可以使用端口转发在浏览器中查看 index.html 文件。
在当前终端中,使用以下命令启动 Web 服务器:
1npx serve .
当被提示时,输入y以继续。
您的控制台可能会加载以下错误,但不应影响您访问 Web 服务器的能力:
 1[secondary_label Output]
 2ERROR: Cannot copy server address to clipboard: Couldn't find the `xsel` binary and fallback didn't work. On Debian/Ubuntu you can install xsel with : sudo apt install xsel.
 3
 4   ┌─────────────────────────────────────────────────────┐
 5   │                                                     │
 6   │   Serving!                                          │
 7   │                                                     │
 8   │   - Local:            http://localhost:3000         │
 9   │   - On Your Network:  http://your_ip_address:3000   │
10   │                                                     │
11   │   Copied local address to clipboard!                │
12   │                                                     │
13   └─────────────────────────────────────────────────────┘
在本地计算机上打开第二台终端,然后输入以下命令:
1ssh -L 3000:localhost:3000 your_non_root_user@your_server_ip
回到您的浏览器并导航到http://localhost:3000/index.html访问您的应用程序的首页。
当页面加载时,它会显示一个主页带有 阻止任务 、 ** 增加** 和 ** 更改背景** 按钮。
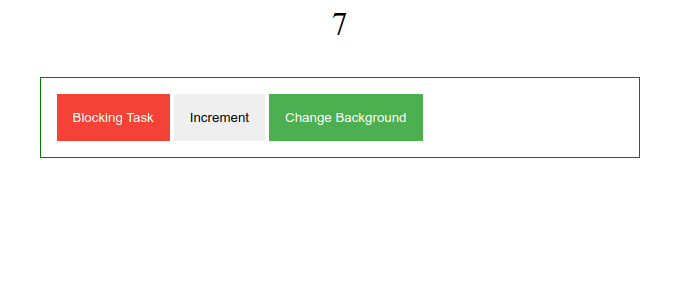
首先,点击增加按钮几次来更新页面上的号码,每次点击:
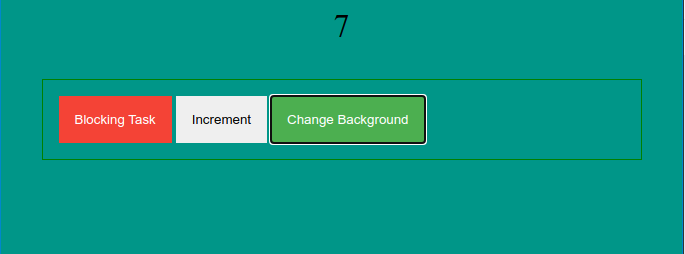
其次,点击更改背景按钮几次,以更改页面背景颜色:
最后,按下Blocking Task 按钮,再随机点击** Increment** 和** Cchange背景** 按钮. 页面会变得无响应,而按钮也没用. 之所以出现这种冻结,是因为** Blocking Task** 按钮启动了一个已封锁了主线程的CPU密集任务,在主线程自由之前,其他代码都不会执行. 在经过一段时间后,CPU密集型任务完成后,页面将显示结果:50000000。 此时,如果你点击其他按钮,它们就会重新开始工作.
正如您所经历的那样,阻止任务对用户是立即可见的,并可能损害您的应用程序的用户体验。
现在你已经创建了一个具有阻止任务的应用程序,通过主线将应用程序冻结,你将使用承诺将CPU相关的任务转换为非阻止任务。
步骤 2 — 使用承诺卸载CPU绑定的任务
使用Frief API或其他以承诺为基础的方法处理 I/O 任务有时会给人错误的印象,即将一个 CPU 绑定的任务包裹在一个承诺中可以使它不设阻. 如导言所提到,I/O任务是非阻断的,因为它们是由操作系统处理的,操作系统在JavaScript引擎完成任务后通知了它. 在操作系统执行I/O任务的同时,与I/O任务相关的回调会等待OS在队列中的反应. 当他们在队列中等待时,主线程可以自由处理所有后续的任务. 当来自OS的响应时,回调在主线程中执行,并且没有并行执行回调.
要证明承诺不会阻止CPU相关任务,您将在此步骤中将CPU密集型任务包装成承诺。
在文本编辑器中,打开main.js文件:
1nano main.js
在你的main.js文件中,添加突出的代码来创建一个calculateCount()函数,将 CPU 密集的任务包装成一个承诺:
 1[label workers_demo/main.js]
 2...
 3function calculateCount() {
 4  return new Promise((resolve, reject) => {
 5    let counter = 0;
 6    for (let i = 0; i < 5_000_000_000; i++) {
 7      counter++;
 8    }
 9    resolve(counter);
10  });
11}
12
13blockingBtn.addEventListener("click", function blockMainThread(){
14  ....
15})
CalculateCount()函数返回一个承诺. 在该函数中,您使用新承诺语法初始化一个承诺,该语法采用接受解决和拒绝参数的回调。 参数处理回调中操作的成功或失败。 回调包含 CPU 密集型循环,该循环重复五十亿次。 完成循环后,您与结果呼叫解决方法。
现在您在 calculateCount() 函数中有一个 CPU 相关的任务,请删除突出的代码:
1[label workers_demo/main.js]
2...
3blockingBtn.addEventListener("click", function blockMainThread() {
4  let counter = 0;
5  for (let i = 0; i < 5_000_000_000; i++) {
6    counter++;
7  }
8  output.textContent = `Result: ${counter}`;
9});
随着代码被删除,您将在blockMainThread()函数中调用calculateCount()函数. 由于该函数返回一个承诺,您需要 async/await]语法来消耗承诺。
添加突出的代码以使blockMainThread()函数无同步,并调用calculateCount()函数:
1[label workers_demo/main.js]
2...
3blockingBtn.addEventListener("click", async function blockMainThread() {
4  const counter = await calculateCount();
5  output.textContent = `Result: ${counter}`;
6});
在之前的代码中,您将blockMainThread()函数先定为async关键字,以使其不同步。在该函数中,您将calculateCount()函数先定为await关键字,并召唤该函数。await操作员等待承诺解决。一旦解决,将counter变量设置为返回值,并将output div 元素设置为CPU相关任务的结果。
您的完整文件现在将匹配如下:
 1[label workers_demo/main.js]
 2const blockingBtn = document.getElementById("blockbtn");
 3const incrementBtn = document.getElementById("incrementbtn");
 4const changeColorBtn = document.getElementById("changebtn");
 5const output = document.querySelector(".output");
 6const totalCountEl = document.querySelector(".total-count");
 7totalCountEl.textContent = 0;
 8
 9incrementBtn.addEventListener("click", function incrementValue() {
10  let counter = totalCountEl.textContent;
11  counter++;
12  totalCountEl.textContent = counter;
13});
14
15changeColorBtn.addEventListener("click", function changeBackgroundColor() {
16  colors = ["#009688", "#ffc107", "#dadada"];
17  const randomIndex = Math.floor(Math.random() * colors.length)
18  const randomColor = colors[randomIndex];
19  document.body.style.background = randomColor;
20});
21
22function calculateCount() {
23  return new Promise((resolve, reject) => {
24    let counter = 0;
25    for (let i = 0; i < 5_000_000_000; i++) {
26      counter++;
27    }
28    resolve(counter);
29  });
30}
31
32blockingBtn.addEventListener("click", async function blockMainThread() {
33  const counter = await calculateCount();
34  output.textContent = `Result: ${counter}`;
35});
一旦你完成了更改,保存和退出你的文件。
如果您的服务器仍在运行,请在浏览器中更新 http://localhost:3000/index.html。 点击 Increment 和 ** Change Background** 按钮之后,点击 ** Blocking Task** 按钮,然后点击其他按钮。 其他按钮在运行 CPU 相关任务时仍然不响应,这证明将 CPU 相关任务包装成一个承诺不会使任务不受阻挡。
现在,您已经尝试使用承诺卸载CPU绑定并注意到其失败,您将使用Web Workers来使CPU密集任务不受阻止。
步骤 3 — 使用 Web 工作者卸载一个 CPU 绑定任务
在此步骤中,您将创建一个专用工人来卸载CPU绑定的任务,将CPU绑定的任务移动到一个worker.js文件中。在main.js文件中,您将实时化一个专用Web Worker与通往worker.js文件的路径。
首先,创建一个worker.js文件:
1nano worker.js
在您的worker.js文件中,添加以下代码,将CPU相关的任务添加到文件中:
1[label workers_demo/worker.js]
2let counter = 0;
3for (let i = 0; i < 5_000_000_000; i++) {
4  counter++;
5}
之前的代码块包含您迄今为止使用的CPU相关任务,此代码现在将运行在一个单独的线程中。
要确保主线可以访问计算结果,您需要使用 Worker 接口的postMessage()方法发送包含数据的消息。
在worker.js文件中,添加突出的行,以将数据发送到主线:
1[label workers_demo/worker.js]
2let counter = 0;
3for (let i = 0; i < 5_000_000_000; i++) {
4  counter++;
5}
6postMessage(counter);
在本行中,您使用包含CPU相关任务计算结果的计数变量调用postMessage()方法。
保存并关闭文件。
现在你已经将 CPU 相关的任务移动到worker.js,打开main.js文件:
1nano main.js
在 main.js 文件中删除包含 CPU 相关任务的突出行:
 1[label workers_demo/main.js]
 2...
 3function calculateCount() {
 4  return new Promise((resolve, reject) => {
 5    let counter = 0;
 6    for (let i = 0; i < 5_000_000_000; i++) {
 7      counter++;
 8    }
 9    resolve(counter);
10  });
11}
12
13blockingBtn.addEventListener("click", async function blockMainThread() {
14  const counter = await calculateCount();
15  output.textContent = `Result: ${counter}`;
16});
在blockMainThread回调中,添加突出的代码来初始化工人并听取工人线条的消息:
1[label workers_demo/main.js]
2blockingBtn.addEventListener("click", function blockMainThread() {
3  const worker = new Worker("worker.js");
4  worker.onmessage = (msg) => {
5    output.textContent = `Result: ${msg.data}`;
6  };
7});
首先,您将创建一个Worker实例,其中包含您之前创建的worker.js文件的路径。 其次,您将 Worker 接口的onmessage属性附加到worker线程中,该线程将收听来自 worker 线程的任何消息。
完整的文件现在将匹配以下代码块:
 1[label workers_demo/main.js]
 2const blockingBtn = document.getElementById("blockbtn");
 3const incrementBtn = document.getElementById("incrementbtn");
 4const changeColorBtn = document.getElementById("changebtn");
 5const output = document.querySelector(".output");
 6const totalCountEl = document.querySelector(".total-count");
 7totalCountEl.textContent = 0;
 8
 9incrementBtn.addEventListener("click", function incrementValue() {
10  let counter = totalCountEl.textContent;
11  counter++;
12  totalCountEl.textContent = counter;
13});
14
15changeColorBtn.addEventListener("click", function changeBackgroundColor() {
16  colors = ["#009688", "#ffc107", "#dadada"];
17  const randomIndex = Math.floor(Math.random() * colors.length)
18  const randomColor = colors[randomIndex];
19  document.body.style.background = randomColor;
20});
21
22blockingBtn.addEventListener("click", function blockMainThread() {
23  const worker = new Worker("worker.js");
24  worker.onmessage = (msg) => {
25    output.textContent = `Result: ${msg.data}`;
26  };
27});
保存和退出文件。
当服务器运行时,返回您的网页浏览器并访问http://localhost:3000/index.html。
首先,点击 Increment 和 ** Change Background** 按钮几次。第二,点击 ** Blocking Task** 按钮启动 CPU 密集任务,然后继续点击其他按钮。
现在,您可以使用专用 Web Worker 卸载一个 CPU 密集的任务,以使其不受阻挡。
结论
在本教程中,您创建了一个应用程序,该应用程序启动了阻止主要线程的CPU相关任务,然后您尝试使用承诺以使CPU相关任务不受阻挡,最后,您使用了一个专用的Web Worker将CPU相关任务卸载到另一个线程,以使其不受阻挡。
作为下一步,您可以访问 Web Workers API以全面覆盖 Dedicated Web Workers。 除了专用 Web Workers,Web Workers API 还附有 Shared Workers和 Service Workers,可用于提供离线访问和提高性能。
如果您使用的是 Node.js,则可以在 如何在 Node.js 中使用多线路中学习如何使用工人线程。