作者选择了 女性工程师协会作为 写给捐赠计划的一部分接受捐赠。
介绍
网络应用程序有请求/答复周期。 当你访问一个URL时,浏览器会向运行在数据库中处理数据或运行查询的应用程序的服务器发送请求. 随着这种情况的发生,用户一直等待着应用程序返回回复. 对于一些任务,用户可以迅速得到响应;对于时间密集型的任务,如处理图像,分析数据,生成报告,或发送电子邮件,这些任务需要很长的时间才能完成,并且可以减缓请求/响应周期. 例如,假设你有用户上传图像的应用程序. 在这种情况下,您可能需要在向用户显示图像之前调整大小,压缩,或将图像转换为另一种格式来保存您的服务器的磁盘空间. 处理一个图像是一个CPU密集型的任务,它可以屏蔽一个[Node.js shele (https://andsky.com/tech/tutorials/how-to-use-multithreading-in-node-js# understanding-processes-and-threads),直到任务完成. 这可能需要几秒钟或几分钟。 用户必须等待任务完成才能得到服务器的响应.
为了避免请求/响应 cyrcle 减慢,您可以使用 bullmq,一个分布式任务 (job) 队列,允许您从您的 [Node.js] (https://nodejs.org/en/) 应用程序中卸下耗时的任务来"bullmq",从而释放请求/响应周期. 此工具允许您的应用程序快速向用户发送回复, 而 bullmq' 在背景中同步执行任务, 并且独立于您的应用程序 。 为了追踪工作,bullmq使用[Redis](https://redis.io/)在队列中存储每个工作的简短描述。 A[bullmq' worker] (https://docs.bullmq.io/guide/workers)然后排出队列并完成每一项工作,并在完成后标出完成的标记.
在本文中,您将使用bullmq将耗时的任务卸载到背景,这将使应用程序能够快速响应用户。 首先,您将创建一个具有耗时的任务的应用程序,而不使用bullmq。
前提条件
要遵循本教程,您将需要以下内容:
*节点js开发环境建立. 对于Ubuntu 22.04,请遵循我们关于[如何在Ubuntu 22.04上安装节点.js]的教程(https://andsky.com/tech/tutorials/how-to-install-node-js-on-ubuntu-22-04)。 其他系统见如何安装节点.js并创建本地开发环境。
- Redis安装在您的系统中。 在Ubuntu 22上,在我们关于[如何在Ubuntu 22.04上安装和保证Redis的安全]的辅导中遵循步骤1至步骤3(https://andsky.com/tech/tutorials/how-to-install-and-secure-redis-on-ubuntu-22-04)。 关于其他系统,请参看我们关于[如何安装和保证Redis]的教程(https://www.digitalocean.com/community/tutorial_collections/how-to-install-and-secure-redis)。
- 熟悉承诺和sync/await,可在我们的教程中加以发展了解事件循环、召回、承诺和JavaScript中的Async/Await。 *如何使用的基本知识[Express] (https://expressjs.com/). 参见我们关于[如何从节点.js和快递开始]的教程(https://andsky.com/tech/tutorials/nodejs-express-basics)。
- 熟悉Embed JavaScript (EJS)。 请检查access-date=中的日期值 (帮助) [如何使用 EJS 来模板您的节点应用程序] (https://andsky.com/tech/tutorials/how-to-use-ejs-to-template-your-node-application) 上的教程详情 。
- 如何用[`sharp' (https://sharp.pixelplumbing.com/)处理图像的基本理解,可在我们关于如何用Sharp处理节点.js的图像的辅导中学习。 .
步骤 1 - 设置项目目录
在此步骤中,您将创建一个目录并为您的应用程序安装必要的依赖性。您将在本教程中构建的应用程序将允许用户上传图像,然后使用尖锐包进行处理。图像处理耗时,可以减慢请求/响应周期,使任务成为bullmq下载到背景的良好候选人。
首先,创建一个名为image_processor的目录,然后导航到目录:
1mkdir image_processor && cd image_processor
然后,将目录初始化为 npm 包:
1npm init -y
命令会创建一个 package.json 文件. -y 选项会告诉 npm 接受所有默认值。
运行命令后,您的输出将匹配如下:
 1[secondary_label Output]
 2Wrote to /home/sammy/image_processor/package.json:
 3
 4{
 5  "name": "image_processor",
 6  "version": "1.0.0",
 7  "description": "",
 8  "main": "index.js",
 9  "scripts": {
10    "test": "echo \"Error: no test specified\" && exit 1"
11  },
12  "keywords": [],
13  "author": "",
14  "license": "ISC"
15}
输出确认已创建了package.json文件. 重要属性包括您的应用程序名称(名称),应用程序版本号码(版本)和项目的起点(主要)。
您将在本教程中构建的应用程序将需要以下依赖:
express:用于构建 Web 应用程序的 Web 框架. *express-fileupload:允许您的表单上传文件的中间软件. *sharp:图像处理库. *ejs:允许您使用 Node.js 生成 HTML 标记的模板语言. *bullmq:分布式任务队列。
要安装所有这些依赖,运行以下命令:
1npm install express express-fileupload sharp ejs bullmq @bull-board/express
除了您安装的依赖之外,您将在本教程中稍后使用以下图像:

使用弯曲下载图像到您在本地计算机上选择的位置
1curl -O others/c43746f60d5451f5e4e3461a45e50b85_underwater.png
您有必要的依赖性来构建一个没有bullmq的Node.js应用程序,下一步您将这样做。
步骤 2 — 实施无bullmq的时间密集的任务
在此步骤中,您将使用 Express 构建一个应用程序,允许用户上传图像. 该应用程序将使用sharp启动耗时的任务,将图像调整大小为多个大小,然后在发送响应后向用户显示。
使用nano或您喜爱的文本编辑器,创建index.js文件:
1nano index.js
在您的 index.js 文件中,添加以下代码来导入依赖:
1[label image_processor/index.js]
2const path = require("path");
3const fs = require("fs");
4const express = require("express");
5const bodyParser = require("body-parser");
6const sharp = require("sharp");
7const fileUpload = require("express-fileupload");
在第一行中,你导入了路径模块,用Node来计算文件路径。在第二行中,你导入了fs模块,以便与目录进行交互。然后,你导入了express网页框架。你导入了body-parser模块,以添加中间软件来分析HTTP请求中的数据。随后,你导入了sharp模块,用于图像处理。最后,你导入了express-fileupload来处理HTML表格上的上传。
接下来,添加以下代码来在您的应用程序中部署中间件:
 1[label image_processor/index.js]
 2...
 3const app = express();
 4app.set("view engine", "ejs");
 5app.use(bodyParser.json());
 6app.use(
 7  bodyParser.urlencoded({
 8    extended: true,
 9  })
10);
首先,您将app变量设置为Express的实例,其次,使用app变量,set()方法将Express配置为使用ejs模板语言,然后使用use()方法添加body-parser模块中间软件,将HTTP请求中的JSON数据转换为可通过JavaScript访问的变量。
接下来,添加以下行以添加更多的中间软件来处理文件上传和服务静态文件:
1[label image_processor/index.js]
2...
3app.use(fileUpload());
4app.use(express.static("public"));
您通过调用fileUpload()方法添加中间软件来解析上传的文件,并设置一个目录,Express 将查看并服务静态文件,如图像和CSS。
使用中间件集,创建一个路径,显示一个 HTML 表单上传图像:
1[label image_processor/index.js]
2...
3app.get("/", function (req, res) {
4  res.render("form");
5});
在这里,您使用 Express 模块的 get() 方法来指定当用户访问主页或 / 路线时应该运行的 / 路线和调用。 在调用中,您调用 res.render() 来将 form.ejs' 文件放到 views' 目录中. 您还没有创建 form.ejs' 文件或 views' 目录。
要创建它,首先保存并关闭您的文件. 在您的终端中,输入以下命令,在您的项目根目录中创建视图目录:
1mkdir views
进入视图目录:
1cd views
在您的编辑器中创建form.ejs文件:
1nano form.ejs
在form.ejs文件中,添加以下代码来创建表单:
 1[label image_processor/views/form.ejs]
 2<!DOCTYPE html>
 3<html lang="en">
 4  <%- include('./head'); %>
 5  <body>
 6    <div class="home-wrapper">
 7      <h1>Image Processor</h1>
 8      <p>
 9        Resizes an image to multiple sizes and converts it to a
10        <a href="https://en.wikipedia.org/wiki/WebP">webp</a> format.
11      </p>
12      <form action="/upload" method="POST" enctype="multipart/form-data">
13        <input
14          type="file"
15          name="image"
16          placeholder="Select image from your computer"
17        />
18        <button type="submit">Upload Image</button>
19      </form>
20    </div>
21  </body>
22</html>
首先,您将引用您尚未创建的 head.ejs 文件. head.ejs 文件将包含您可以在其他 HTML 页面中引用的 HTML head 元素。
在身体标签中,您创建具有以下属性的表单:
action指明在提交表单时应该发送表单数据的路径。 *method指明发送数据的 HTTP 方法.POST方法将数据嵌入到 HTTP 请求中。
在表单元素中,您创建一个输入标签来上传文件,然后您将按钮元素与类型属性设置为提交,允许您提交表单。
一旦完成,保存并关闭您的文件。
然后创建一个head.ejs文件:
1nano head.ejs
在您的head.ejs文件中,添加以下代码来创建应用程序的头部部分:
1[label image_processor/views/head.ejs]
2<head>
3  <meta charset="UTF-8" />
4  <meta http-equiv="X-UA-Compatible" content="IE=edge" />
5  <meta name="viewport" content="width=device-width, initial-scale=1.0" />
6  <title>Image Processor</title>
7  <link rel="stylesheet" href="css/main.css" />
8</head>
在这里,您将引用main.css文件,您将在此步骤中稍后在公共目录中创建该文件. 该文件将包含此应用程序的样式。
保存并关闭文件。
要处理从表单中提交的数据,您必须在 Express 中定义一个发布方法. 要做到这一点,请返回项目的根目录:
1cd ..
再次打开 index.js 文件:
1nano index.js
在index.js文件中,添加突出的行,以定义在路径/upload上处理表单提交的方法:
 1[label image_processor/index.js]
 2app.get("/", function (req, res) {
 3  ...
 4});
 5
 6app.post("/upload", async function (req, res) {
 7  const { image } = req.files;
 8
 9  if (!image) return res.sendStatus(400);
10
11});
您使用app变量来调用post()方法,该方法将在/upload路径上处理提交的表单。接下来,您将从HTTP请求中提取的图像数据提取到image变量中。
要为上传的图像设置流程,请添加以下突出代码:
 1[label image_processor/index.js]
 2...
 3app.post("/upload", async function (req, res) {
 4  const { image } = req.files;
 5
 6  if (!image) return res.sendStatus(400);
 7  const imageName = path.parse(image.name).name;
 8  const processImage = (size) =>
 9    sharp(image.data)
10      .resize(size, size)
11      .webp({ lossless: true })
12      .toFile(`./public/images/${imageName}-${size}.webp`);
13
14  sizes = [90, 96, 120, 144, 160, 180, 240, 288, 360, 480, 720, 1440];
15  Promise.all(sizes.map(processImage));
16});
这些行表示您的应用程序将如何处理图像 。 首先,从上传的图像中删除图像扩展名,并将名称保存在图像Name变量中。 下一步,您定义进程图像()函数。 此函数取出"大小"参数,其值将被用于在再调整大小时确定图像维度. 在函数中,您用image.data'引用sharp()',这是含有上传图像二进制数据的 [buffer] (https://andsky.com/tech/tutorials/using-buffers-in-node-js). sharp'根据大小参数中的值调整图像大小。 您使用 wapp () 方法将图像转换为 [webp (https://en.wikipedia.org/wiki/WebP ) 图像格式。 然后,将图像保存在公共/图像/`目录中.
下列数字列表定义了将用于更大上传的图像的大小,然后您使用JavaScript的 map()方法为大小数组中的每个元素调用processImage(),然后它将返回一个新的数组。
计算机处理速度会有所不同,用户可以上传的图像大小也会有所不同,这可能会影响图像处理速度. 为了延迟此代码用于演示目的,请插入突出的行,以添加 CPU 密集的增量循环,并重定向到一个页面,该页面将显示重大的图像与突出的行:
 1[label image_processor/index.js]
 2...
 3app.post("/upload", async function (req, res) {
 4  ...
 5  let counter = 0;
 6  for (let i = 0; i < 10_000_000_000; i++) {
 7    counter++;
 8  }
 9
10  res.redirect("/result");
11});
循环将运行10亿次,以增加反对变量。您召唤res.redirect()函数,将应用程序重定向到/result路线。
路线 /result 尚不存在. 要创建它,请在您的 index.js 文件中添加突出的代码:
 1[label image_processor/index.js]
 2...
 3
 4app.get("/", function (req, res) {
 5 ...
 6});
 7
 8app.get("/result", (req, res) => {
 9  const imgDirPath = path.join(__dirname, "./public/images");
10  let imgFiles = fs.readdirSync(imgDirPath).map((image) => {
11    return `images/${image}`;
12  });
13  res.render("result", { imgFiles });
14});
15
16app.post("/upload", async function (req, res) {
17  ...
18});
在函数中,你定义了imgDirPath变量与public/images目录的完整路径,你使用readdirSync()模块(https://nodejs.org/dist/latest-v10.x/docs/api/fs.html# fs_fs_readdirsync_path_options)的方法读取给定的目录中的所有文件,从那里,你链接到map()方法以返回一个新的阵列,以images/为前缀的图像路径。
最后,您呼叫res.render()来渲染尚不存在的result.ejs文件,您将包含图像所有相对路径的imgFiles变量传递到result.ejs文件中。
保存并关闭您的文件。
要创建result.ejs文件,返回Views目录:
1cd views
在您的编辑器中创建并打开 result.ejs 文件:
1nano result.ejs
在result.ejs文件中,添加以下行以显示图像:
1[label image_processor/views/result.ejs]
2<!DOCTYPE html>
3<html lang="en">
4 <%- include('./head'); %>
5 <body>
6 <div class="gallery-wrapper">
7 <% if (imgFiles.length > 0){%>
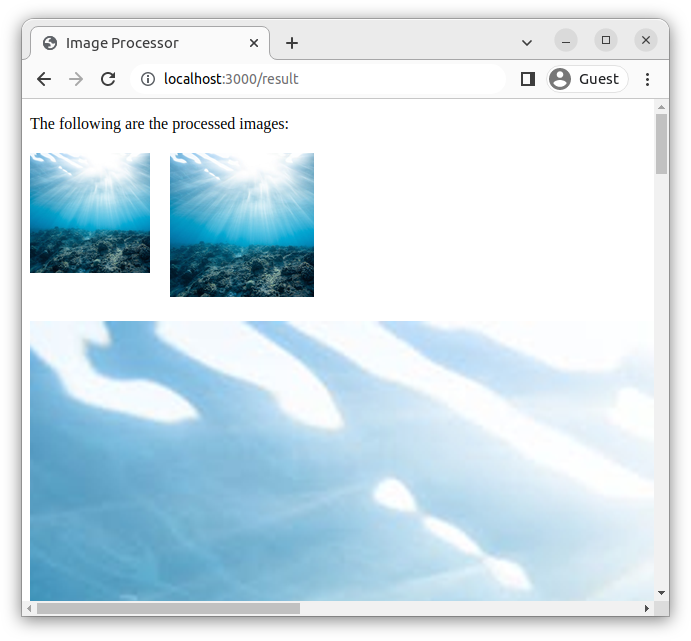
8 <p>The following are the processed images:</p>
9 <ul>
10 <% for (let imgFile of imgFiles){ %>
11 <li><img src=<%= imgFile %> /></li>
12 <% } %>
13 </ul>
14 <% } else{ %>
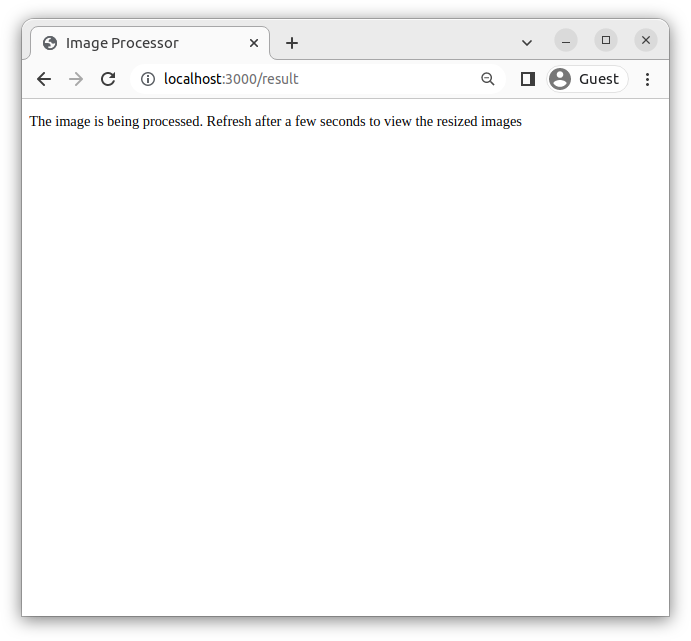
15 <p>
16 The image is being processed. Refresh after a few seconds to view the
17 resized images.
18 </p>
19 <% } %>
20 </div>
21 </body>
22</html>
首先,你引用了head.ejs文件,在body标签中,你检查了imgFiles变量是否空,如果它有数据,你会重复每个文件,并为每个数组元素创建一个图像。
保存并关闭您的文件。
接下来,回到根目录,创建包含您的静态资产的公共目录:
1cd .. && mkdir public
进入公共目录:
1cd public
创建一个图片目录,将保留上传的图像:
1mkdir images
接下来,创建css目录并导航到它:
1mkdir css && cd css
在您的编辑器中,创建并打开您在head.ejs文件中提到的main.css文件:
1nano main.css
在您的 main.css 文件中,添加以下风格:
 1[label image_processor/public/css/main.css]
 2body {
 3  background: #f8f8f8;
 4}
 5
 6h1 {
 7  text-align: center;
 8}
 9
10p {
11  margin-bottom: 20px;
12}
13
14a:link,
15a:visited {
16  color: #00bcd4;
17}
18
19/** Styles for the "Choose File"  button **/
20button[type="submit"] {
21  background: none;
22  border: 1px solid orange;
23  padding: 10px 30px;
24  border-radius: 30px;
25  transition: all 1s;
26}
27
28button[type="submit"]:hover {
29  background: orange;
30}
31
32/** Styles for the "Upload Image"  button **/
33input[type="file"]::file-selector-button {
34  border: 2px solid #2196f3;
35  padding: 10px 20px;
36  border-radius: 0.2em;
37  background-color: #2196f3;
38}
39
40ul {
41  list-style: none;
42  padding: 0;
43  display: flex;
44  flex-wrap: wrap;
45  gap: 20px;
46}
47
48.home-wrapper {
49  max-width: 500px;
50  margin: 0 auto;
51  padding-top: 100px;
52}
53
54.gallery-wrapper {
55  max-width: 1200px;
56  margin: 0 auto;
57}
使用 HTML 属性,您将用六色代码 # 2196f3(蓝色)和 Upload Image 按钮边界为 orange 来格式化 ** Choose File** 按钮的背景。
一旦完成,保存并关闭您的文件。
返回项目 root 目录:
1cd ../..
在您的编辑器中打开index.js:
1nano index.js
在您的 index.js 中,添加以下代码,该代码将启动服务器:
1[label image_processor/index.js]
2...
3app.listen(3000, function () {
4  console.log("Server running on port 3000");
5});
完整的 index.js 文件现在将匹配如下:
 1[label image_processor/index.js]
 2const path = require("path");
 3const fs = require("fs");
 4const express = require("express");
 5const bodyParser = require("body-parser");
 6const sharp = require("sharp");
 7const fileUpload = require("express-fileupload");
 8
 9const app = express();
10app.set("view engine", "ejs");
11app.use(bodyParser.json());
12app.use(
13  bodyParser.urlencoded({
14    extended: true,
15  })
16);
17
18app.use(fileUpload());
19
20app.use(express.static("public"));
21
22app.get("/", function (req, res) {
23  res.render("form");
24});
25
26app.get("/result", (req, res) => {
27  const imgDirPath = path.join(__dirname, "./public/images");
28  let imgFiles = fs.readdirSync(imgDirPath).map((image) => {
29    return `images/${image}`;
30  });
31  res.render("result", { imgFiles });
32});
33
34app.post("/upload", async function (req, res) {
35  const { image } = req.files;
36
37  if (!image) return res.sendStatus(400);
38  const imageName = path.parse(image.name).name;
39  const processImage = (size) =>
40    sharp(image.data)
41      .resize(size, size)
42      .webp({ lossless: true })
43      .toFile(`./public/images/${imageName}-${size}.webp`);
44
45  sizes = [90, 96, 120, 144, 160, 180, 240, 288, 360, 480, 720, 1440];
46  Promise.all(sizes.map(processImage));
47  let counter = 0;
48  for (let i = 0; i < 10_000_000_000; i++) {
49    counter++;
50  }
51
52  res.redirect("/result");
53});
54
55app.listen(3000, function () {
56  console.log("Server running on port 3000");
57});
一旦你完成了更改,保存和关闭你的文件。
使用node命令运行应用程序:
1node index.js
你会得到这样的输出:
1[secondary_label Output]
2Server running on port 3000
此输出确认服务器在没有任何问题的情况下运行。
打开您喜爱的浏览器,然后访问http://localhost:3000/`。
<$>[注] 注: 如果您在远程服务器上遵循教程,则可以使用端口转发在本地浏览器中访问该应用程序。
当 Node.js 服务器运行时,打开另一个终端并输入以下命令:
1[environment third]
2ssh -L 3000:localhost:3000 your-non-root-user@yourserver-ip
一旦连接到服务器,运行node index.js,然后在本地计算机的Web浏览器上导航到http://localhost:3000/。
当页面加载时,它将匹配如下:
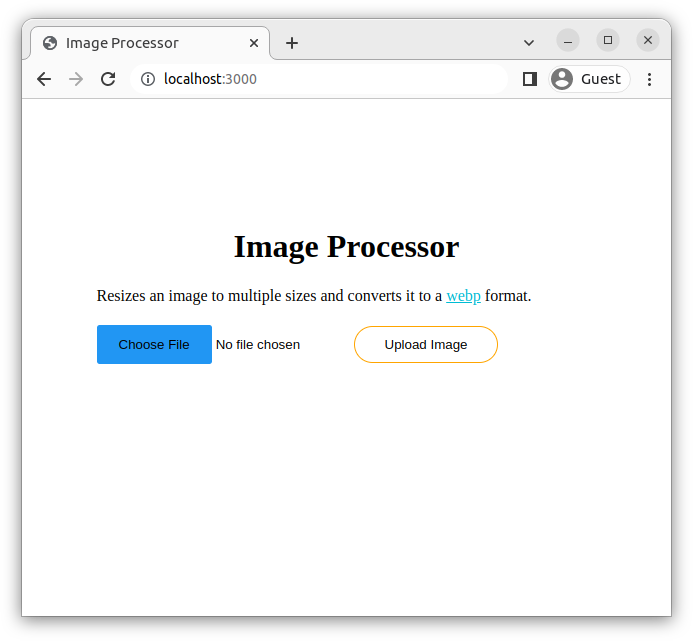
接下来,点击选择文件按钮,并在本地机器上选择underwater.png图像。显示器将从没有选定的文件切换到underwater.png按钮。
一旦任务完成,‘/result’路径将加载重大的图像:
Node.js 不会在文件更改时自动重新加载服务器,因此您需要每次更新文件时停止和重新启动服务器。
现在您知道一个耗时的任务如何影响应用程序的请求/响应周期,然后您将以无同步的方式执行该任务。
步骤 3 — 使用bullmq无同步执行密集时间的任务
在此步骤中,您将使用bullmq将耗时的任务卸载到背景,此调整将释放请求/响应循环,并允许您的应用程序在处理图像时立即响应用户。
为此,你需要制作一份工作简洁的描述并加入bullmq排队。 A [queue] (https://docs.bullmq.io/guide/queues)是一个数据结构,它与队列在现实生活中的工作原理类似. 当人们排队进入一个空间时,线上的第一个人将是第一个进入空间的人. 任何后来的人会在行尾排出一行,并在排出行前的每个人后进入空间,直到最后的人进入空间. 由于队列数据结构的First-In, First-Out (FIFO)过程,队列中添加的第一个项目是被删除的第一个项目 (dequeue). 使用 billmq 时, 出品人 会在队列中添加一个工作, _ 消费者_( 或 _ 工人_ ) 将从队列中移除一个工作并执行 .
bullmq中的队列位于Redis。 当描述一个任务并添加到队列中时,该任务的条目会在Redis队列中创建. 工作描述可以是字符串或对象,其属性包含最少的数据或数据引用,允许"bullmq"日后执行任务. 一旦定义了将任务添加到队列中的功能,就会将时间密集的代码移动到单独的函数中去. 稍后, bullmq 将使用您在队列中存储的数据调用此函数 。 一旦任务完成,`bullmq'将标出完成的标记,从队列中取出另一项任务并执行.
在您的编辑器中打开index.js:
1nano index.js
在index.js文件中,添加突出的行,以在bullmq中创建Redis的队列:
 1[label image_processor/index.js]
 2...
 3const fileUpload = require("express-fileupload");
 4const { Queue } = require("bullmq");
 5
 6const redisOptions = { host: "localhost", port: 6379 };
 7
 8const imageJobQueue = new Queue("imageJobQueue", {
 9  connection: redisOptions,
10});
11
12async function addJob(job) {
13  await imageJobQueue.add(job.type, job);
14}
15...
您首先从bullmq中提取Queue类,用于在 Redis 中创建队列,然后将redisOptions变量设置为具有Queue类实例将使用的属性对象,以建立与 Redis 的连接。
注意: 如果 Redis 运行在与您的应用程序分开的远程服务器上,您将更新主机属性值到远程服务器的 IP 地址,您还将端口属性值设置为6379,这是 Redis 使用的默认端口来收听连接。
如果您已设置端口转发到运行 Redis 和应用程序的远程服务器,则不需要更新主机属性,但您需要每次登录到您的服务器时使用端口转发连接来运行应用程序。
接下来,您将imageJobQueue变量设置为Queue类的实例,将队列的名称作为第一个参数和对象作为第二个参数。
最后,您定义了将用于在imageJobQueue中添加工作的addJob()函数,该函数采用包含有关工作信息的job参数(您将呼叫addJob()函数,并将您想要在排序中保存的数据)。
添加突出的代码来调用addJob()函数以在排序中添加工作:
 1[label image_processor/index.js]
 2...
 3app.post("/upload", async function (req, res) {
 4  const { image } = req.files;
 5
 6  if (!image) return res.sendStatus(400);
 7  const imageName = path.parse(image.name).name;
 8  ...
 9  await addJob({
10    type: "processUploadedImages",
11    image: {
12      data: image.data.toString("base64"),
13      name: image.name,
14    },
15  });
16
17  res.redirect("/result");
18});
19...
在此,您将addJob () 函数称为addJob () , 其对象描述此任务 。 对象具有"类型"属性并有任务名称的值. 第二个属性 " 图像 " 设定为包含用户上传的图像数据的对象。 由于"image.data"中的图像数据处于缓冲(二进制形式)中,因此您引用了JavaScript's toString ()方法将其转换为可以存储在Redis中的字符串,从而设定了"数据"属性. " 图像 " 属性被设定为上传图像的名称(包括图像扩展名).
您现在已经定义了 bullmq 以后执行此任务所需的信息. 根据您的工作,您可以添加更多或更少的工作信息。
<$>[警告] 警告: Redis 是内存数据库,请避免为队列中的任务存储大量数据. 如果您有一个工作需要处理的大型文件,请将该文件保存到磁盘或云,然后将链接保存为队列中的字符串。
保存并关闭您的文件。
接下来,创建并打开包含图像处理代码的 utils.js 文件:
1nano utils.js
在utils.js文件中,添加以下代码来定义处理图像的函数:
1[label image_processor/utils.js]
2const path = require("path");
3const sharp = require("sharp");
4
5function processUploadedImages(job) {
6}
7
8module.exports = { processUploadedImages };
你在前两行中导入处理图像和计算路径所需的模块,然后定义了processUploadedImages()函数,该函数将包含耗时的图像处理任务。这个函数采用一个job参数,当工人从队列中提取工作数据,然后与队列数据呼吁processUploadedImages()函数,然后导出processUploadedImages()函数,以便你可以在其他文件中引用它。
保存并关闭您的文件。
返回index.js文件:
1nano index.js
從「index.js」檔案中複製顯示的行,然後從該檔案中刪除它們. 您將需要暫時複製的代碼,所以將其儲存到剪辑板上. 如果您使用「nano」,您可以顯示這些行,並用鼠標右擊以複製行:
 1[label image_processor/index.js]
 2...
 3app.post("/upload", async function (req, res) {
 4  const { image } = req.files;
 5
 6  if (!image) return res.sendStatus(400);
 7  const imageName = path.parse(image.name).name;
 8  const processImage = (size) =>
 9    sharp(image.data)
10      .resize(size, size)
11      .webp({ lossless: true })
12      .toFile(`./public/images/${imageName}-${size}.webp`);
13
14  sizes = [90, 96, 120, 144, 160, 180, 240, 288, 360, 480, 720, 1440];
15  Promise.all(sizes.map(processImage))
16  let counter = 0;
17  for (let i = 0; i < 10_000_000_000; i++) {
18    counter++;
19  };
20...
21  res.redirect("/result");
22});
上传路径的后续方法现在将匹配如下:
 1[label image_processor/index.js]
 2...
 3app.post("/upload", async function (req, res) {
 4  const { image } = req.files;
 5
 6  if (!image) return res.sendStatus(400);
 7
 8  await addJob({
 9    type: "processUploadedImages",
10    image: {
11      data: image.data.toString("base64"),
12      name: image.name,
13    },
14  });
15
16  res.redirect("/result");
17});
18...
保存并关闭此文件,然后打开 utils.js 文件:
1nano utils.js
在utils.js文件中,将您刚刚复制的/upload路径回调的行粘贴到processUploadedImages函数中:
 1[label image_processor/utils.js]
 2...
 3function processUploadedImages(job) {
 4  const imageName = path.parse(image.name).name;
 5  const processImage = (size) =>
 6    sharp(image.data)
 7      .resize(size, size)
 8      .webp({ lossless: true })
 9      .toFile(`./public/images/${imageName}-${size}.webp`);
10
11  sizes = [90, 96, 120, 144, 160, 180, 240, 288, 360, 480, 720, 1440];
12  Promise.all(sizes.map(processImage));
13  let counter = 0;
14  for (let i = 0; i < 10_000_000_000; i++) {
15    counter++;
16  };
17}
18...
现在您已经移动了处理图像的代码,您需要更新它以使用您之前定义的processUploadedImages()函数的工作参数中的图像数据。
要做到这一点,添加并更新下面的突出线条:
 1[label image_processor/utils.js]
 2
 3function processUploadedImages(job) {
 4  const imageFileData = Buffer.from(job.image.data, "base64");
 5  const imageName = path.parse(job.image.name).name;
 6  const processImage = (size) =>
 7    sharp(imageFileData)
 8      .resize(size, size)
 9      .webp({ lossless: true })
10      .toFile(`./public/images/${imageName}-${size}.webp`);
11  ...
12}
您使用「Buffer.from()」方法将图像数据的串行版本重新转换为二进制,然后更新「path.parse()」以参考排列中保存的图像名称,然后更新「sharp()」方法以获取存储在「imageFileData」变量中的图像二进制数据。
完整的 utils.js 文件现在将匹配如下:
 1[label image_processor/utils.js]
 2const path = require("path");
 3const sharp = require("sharp");
 4
 5function processUploadedImages(job) {
 6  const imageFileData = Buffer.from(job.image.data, "base64");
 7  const imageName = path.parse(job.image.name).name;
 8  const processImage = (size) =>
 9    sharp(imageFileData)
10      .resize(size, size)
11      .webp({ lossless: true })
12      .toFile(`./public/images/${imageName}-${size}.webp`);
13
14  sizes = [90, 96, 120, 144, 160, 180, 240, 288, 360, 480, 720, 1440];
15  Promise.all(sizes.map(processImage));
16  let counter = 0;
17  for (let i = 0; i < 10_000_000_000; i++) {
18    counter++;
19  };
20}
21
22module.exports = { processUploadedImages };
保存并关闭您的文件,然后返回index.js:
1nano index.js
尖锐变量不再需要作为依赖,因为图像现在被处理在utils.js文件中。
1[label image_processor/index.js]
2const bodyParser = require("body-parser");
3const sharp = require("sharp");
4const fileUpload = require("express-fileupload");
5const { Queue } = require("bullmq");
6...
保存并关闭您的文件。
您现在已经定义了在 Redis 中创建排队并添加工作的功能,您还定义了processUploadedImages()函数来处理上传的图像。
剩下的任务是创建一个 consumer (或 worker) 来将工作从队列中拉出并与工作数据一起调用 processUploadedImages() 函数。
在您的编辑器中创建一个worker.js文件:
1nano worker.js
在worker.js文件中,添加以下代码:
 1[label image_processor/worker.js]
 2const { Worker } = require("bullmq");
 3
 4const { processUploadedImages } = require("./utils");
 5
 6const workerHandler = (job) => {
 7  console.log("Starting job:", job.name);
 8  processUploadedImages(job.data);
 9  console.log("Finished job:", job.name);
10  return;
11};
在第一行中,您将从bullmq导入Worker类;当实例化时,这将启动一个在Redis中排队的工人,并执行这些任务;接下来,您将从utils.js文件中引用processUploadedImages()函数,以便工人可以调用排队中的数据。
您定义了一个workerHandler()函数,该函数采用一个工作参数,该参数包含在排序中的工作数据。 在该函数中,您登录了工作已经开始,然后与工作数据一起调用processUploadedImages()。
要允许工人连接到 Redis,将任务从排队列中解除,并与工作数据一起调用workerHandler(),向文件添加下列行:
 1[label image_processor/worker.js]
 2...
 3const workerOptions = {
 4  connection: {
 5    host: "localhost",
 6    port: 6379,
 7  },
 8};
 9
10const worker = new Worker("imageJobQueue", workerHandler, workerOptions);
11
12console.log("Worker started!");
在这里,您将workerOptions变量设置为包含 Redis 连接设置的对象,您将worker变量设置为具有以下参数的Worker类的实例:
imageJobQueue:工作队列的名称. *workerHandler:在工作队列被解除后运行的函数. *workerOptions: Redis 配置设置,由工人使用以与 Redis 建立连接。
最后,你会记录一个成功消息。
添加行后,保存并关闭您的文件。
您现在已经定义了bullmq工人功能,以从排队中解除任务并执行它们。
在您的终端中,删除公共/图像目录中的图像,以便您可以重新开始测试您的应用程序:
1rm public/images/*
然后运行index.js文件:
1node index.js
应用程序将启动:
1[secondary_label Output]
2Server running on port 3000
打开第二个终端会话并直接导航到项目:
1[environment second]
2cd image_processor/
用以下命令启动工人:
1[environment second]
2node worker.js
工人将开始:
1[environment second]
2[secondary_label Output]
3Worker started!
在您的浏览器中,点击选择文件按钮,从您的计算机中选择underwater.png,然后点击上传图像按钮。
您可能会收到即时响应,告诉您在几秒钟后刷新页面:
或者,您可能会收到一份即时响应,其中包含页面上的一些处理图像,而其他图像仍在处理:

您可以更新页面几次,以加载所有重大的图像。
返回您的员工正在运行的终端. 该终端将有一个与以下相符的消息:
1[environment second]
2[secondary_label Output]
3Worker started!
4Starting job: processUploadedImages
5Finished job: processUploadedImages
结果证实‘bullmq’成功完成了这项工作。
你的应用程序仍然可以卸载耗时的任务,即使工人没有运行. 要证明这一点,请用CTRL+C阻止第二终端的工人。
在您的初始终端会话中,停止 Express 服务器并删除公共/图像中的图像:
1rm public/images/*
然后,重新启动服务器:
1node index.js
在您的浏览器中,访问http://localhost:3000/并再次上传underwater.png图像。当您被重定向到/result路径时,图像不会出现在页面上,因为工作者没有运行:
回到您运行工人的终端,然后重新启动工人:
1[environment second]
2node worker.js
输出将匹配以下,这会让你知道工作已经开始:
1[environment second]
2[secondary_label Output]
3Worker started!
4Starting job: processUploadedImages
工作完成后,输出包含一行完成工作:进程UploadedImages,请刷新浏览器。
停止服务器和工人。
您现在可以将耗时的任务卸载到背景,并使用bullmq无同步执行。
步骤4 — 添加仪表板到监控bullmq队列
在此步骤中,您将使用 bull-board包从视觉仪表板监控 Redis 队列中的任务。 此套件将自动创建一个用户界面 (UI) 仪表板,显示并组织有关 Redis 队列中存储的 'bullmq' 任务的信息。
在文本编辑器中打开index.js文件:
1nano index.js
添加突出的代码来导入bull-board:
1[label image_processor/index.js]
2...
3const { Queue } = require("bullmq");
4const { createBullBoard } = require("@bull-board/api");
5const { BullMQAdapter } = require("@bull-board/api/bullMQAdapter");
6const { ExpressAdapter } = require("@bull-board/express");
7...
在前面的代码中,您从bull-board导入createBullBoard()方法;您还导入BullMQAdapter,允许bull-board访问bullmq队列,以及ExpressAdapter,为Express提供显示仪表板的功能。
接下来,添加突出的代码来连接bull-board到bullmq:
 1[label image_processor/index.js]
 2...
 3async function addJob(job) {
 4  ...
 5}
 6
 7const serverAdapter = new ExpressAdapter();
 8const bullBoard = createBullBoard({
 9  queues: [new BullMQAdapter(imageJobQueue)],
10  serverAdapter: serverAdapter,
11});
12serverAdapter.setBasePath("/admin");
13
14const app = express();
15...
首先,你将服务器Adapter'设定为ExpressAdapter'的实例。 接下来,您引用创建 BullBoard () 来初始化 bullmq 队列数据。 您将函数通过 queues 和 serverAdapter 属性的对象参数。 第一个属性 " queues " 接受你用 " ballmq " 定义的队列,这就是这里的 " image Job Quue " 。 第二个属性serverAdapter'包含一个接受Express服务器适配器实例的对象。 之后,您用setBasePath()方法设定了进入仪表板的/admin'路径.
接下来,为/admin路径添加serverAdapter中间件:
1[label image_processor/index.js]
2app.use(express.static("public"))
3
4app.use("/admin", serverAdapter.getRouter());
5
6app.get("/", function (req, res) {
7  ...
8});
完整的 index.js 文件将匹配如下:
 1[label image_processor/index.js]
 2const path = require("path");
 3const fs = require("fs");
 4const express = require("express");
 5const bodyParser = require("body-parser");
 6const fileUpload = require("express-fileupload");
 7const { Queue } = require("bullmq");
 8const { createBullBoard } = require("@bull-board/api");
 9const { BullMQAdapter } = require("@bull-board/api/bullMQAdapter");
10const { ExpressAdapter } = require("@bull-board/express");
11
12const redisOptions = { host: "localhost", port: 6379 };
13
14const imageJobQueue = new Queue("imageJobQueue", {
15  connection: redisOptions,
16});
17
18async function addJob(job) {
19  await imageJobQueue.add(job.type, job);
20}
21
22const serverAdapter = new ExpressAdapter();
23const bullBoard = createBullBoard({
24  queues: [new BullMQAdapter(imageJobQueue)],
25  serverAdapter: serverAdapter,
26});
27serverAdapter.setBasePath("/admin");
28
29const app = express();
30app.set("view engine", "ejs");
31app.use(bodyParser.json());
32app.use(
33  bodyParser.urlencoded({
34    extended: true,
35  })
36);
37app.use(fileUpload());
38
39app.use(express.static("public"));
40
41app.use("/admin", serverAdapter.getRouter());
42
43app.get("/", function (req, res) {
44  res.render("form");
45});
46
47app.get("/result", (req, res) => {
48  const imgDirPath = path.join(__dirname, "./public/images");
49  let imgFiles = fs.readdirSync(imgDirPath).map((image) => {
50    return `images/${image}`;
51  });
52  res.render("result", { imgFiles });
53});
54
55app.post("/upload", async function (req, res) {
56  const { image } = req.files;
57
58  if (!image) return res.sendStatus(400);
59
60  await addJob({
61    type: "processUploadedImages",
62    image: {
63      data: Buffer.from(image.data).toString("base64"),
64      name: image.name,
65    },
66  });
67
68  res.redirect("/result");
69});
70
71app.listen(3000, function () {
72  console.log("Server running on port 3000");
73});
完成更改后,保存并关闭您的文件。
运行index.js文件:
1node index.js
返回您的浏览器并访问http://localhost:3000/admin`. 仪表板将加载:
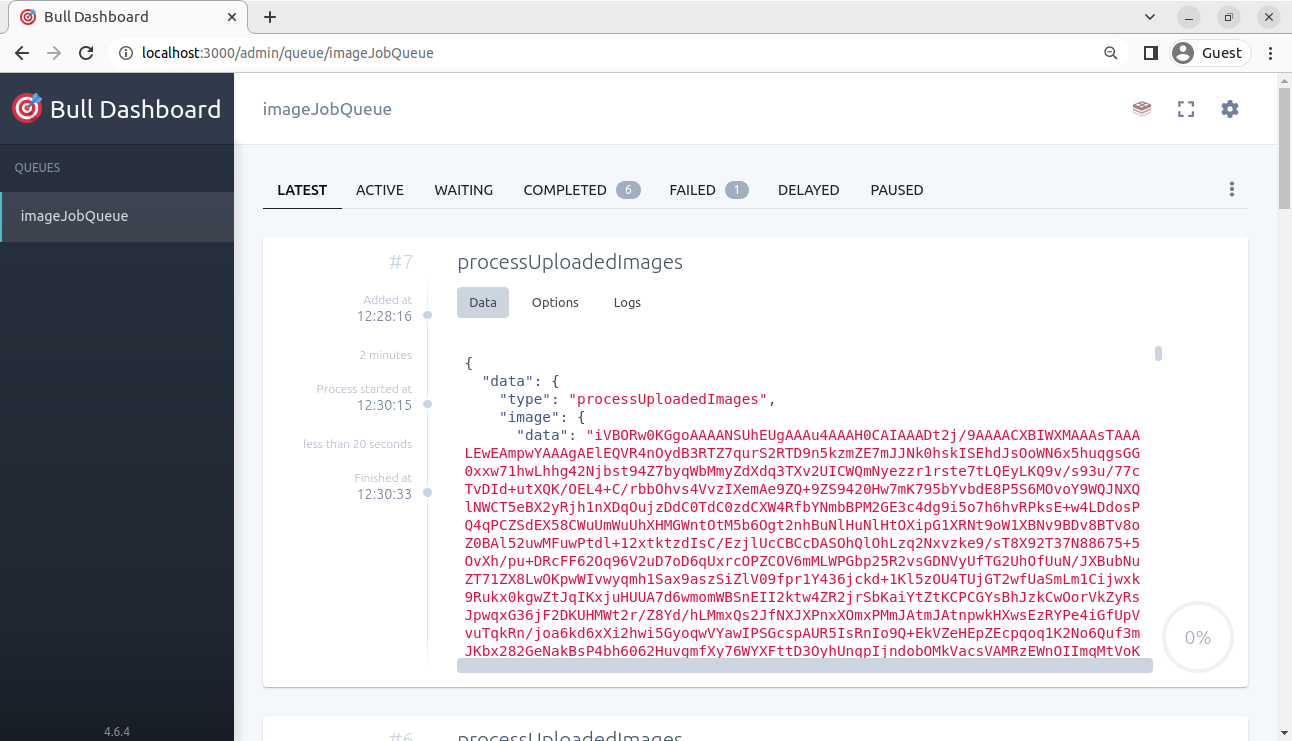
在仪表板中,您可以查看任务类型,它消耗的数据,以及有关任务的更多信息. 您还可以切换到其他选项卡,例如完成选项卡以获取有关完成的工作的信息,失败选项卡以获取有关失败的工作的更多信息,以及暂停选项卡以获取有关已暂停的工作的更多信息。
您现在可以使用bull-board仪表板来监控队列。
结论
在本文中,您使用bullmq下载了一项耗时的任务到任务排列中。 首先,没有使用bullmq,您创建了一个具有耗时任务的应用程序,该应用程序具有缓慢的请求/响应周期。 然后,您使用bullmq下载了耗时的任务并非同步执行,从而增加了请求/响应周期。
您可以访问 bullmq 文档,以了解本教程未涵盖的 bullmq 功能,如计划、优先级或重置任务,以及为工人配置同步设置。