介绍
Silex 是一个基于 Symfony2 组件构建的 PHP 微框架,可用于构建小型网站和大型应用程序。
在本教程中,我们将从下载和配置Silex开始,然后您将学习如何制作一个基本的Silex应用程序。
我们将使用 Composer 来安装 Silex,这是一个流行的 PHP 包管理器. 有关 Composer 的更多信息可以在 本教程中找到。
注: 本教程是在Ubuntu上测试的,但应该在其他Linux发行版上同样有效。链接指的是Ubuntu教程,但请自由找到设置您的服务器和安装LAMP堆栈和Git的适当指南。
前提条件
请满足这些前提条件。
第1步:安装Silex
在本节中,我们将使用 Composer 安装 Silex. 首先,将您的工作目录更改为 Apache 文档根, /var/www/html:
1cd /var/www/html
接下来,删除此文件夹的默认内容:
1sudo rm /var/www/html/index.html
然后,移动到 /var/www 目录,以免将您的所有文件暴露给公众:
1cd /var/www
下载作曲家:
1sudo curl -sS https://getcomposer.org/installer | sudo php
接下来,我们将创建和编辑 Composer 文件 composer.json:
1sudo nano composer.json
在此文件中,添加以下内容:
1{
2    "require": {
3        "silex/silex": "~1.2"
4    }
5}
现在我们已经告诉Composer下载Silex版本 1.2作为依赖性。
1sudo php composer.phar update
现在,Composer将下载Silex及其依赖;这可能需要几秒钟。
第2步:启动Silex
在本节中,我们将通过添加所需的文件和创建应用程序来启动Silex,开始编辑文件 /var/www/html/index.php:
1sudo nano /var/www/html/index.php
在此文件中,添加以下基本内容:
 1<?php
 2require_once __DIR__.'/../vendor/autoload.php'; // Add the autoloading mechanism of Composer
 3
 4$app = new Silex\Application(); // Create the Silex application, in which all configuration is going to go
 5
 6// Section A
 7// We will later add the configuration, etc. here
 8
 9// This should be the last line
10$app->run(); // Start the application, i.e. handle the request
11?>
在本教程中,我们将为此文件添加更多配置信息和其他数据,我们添加的所有新行都将进入A部分,在$app = new Silex\Application();和$app->run();之间。
在相同的文件中, /var/www/html/index.php 启用调试,这在开发您的应用程序时很有用。
’$app[‘debug’] = 真;`
第3步:创建一个博客应用程序
在本节中,我们将创建一个样本博客应用程序. 如果您想专注于自己的应用程序,请查看 Silex 文档。
我们将创建一个示例博客应用程序. 它不会使用数据库,但它可以通过查看 DoctrineServiceProvider 文档相对容易地转换。
添加 Twig 模板引擎
首先,先添加另一个依赖性: Twig。 Twig 是 Symfony 框架也使用的模板引擎,它将为我们的应用程序提供模板。
1sudo nano /var/www/composer.json
然后,添加twig的新依赖线,以下面的红色显示。
1{
2    "require": {
3        "silex/silex": "~1.2",
4        "twig/twig": ">=1.8,<2.0-dev"
5    }
6}
接下来,更新 Composer 依赖:
1sudo php composer.phar update
允许 mod_rewrite
现在,您需要配置 Web 服务器,在这种情况下是 Apache。
首先,請確保您已啟用「mod_rewrite」並且已允許「.htaccess」檔案的變更,此過程在 本教程中描述,但請記住,Ubuntu 14.04 的默認虛擬主機是在「/var/www/html」而不是「/var/www」。
启用模块后(如链接的教程中所解释的那样),将下列行添加到您的 /etc/apache2/sites-available/000-default.conf 文件中:
1sudo vim /etc/apache2/sites-available/000-default.conf
1<Directory /var/www/html/>
2                Options Indexes FollowSymLinks MultiViews
3                AllowOverride All
4                Order allow,deny
5                allow from all
6</Directory>
然后,创建和编辑.htaccess 文件:
1sudo nano /var/www/html/.htaccess
在此文件中,添加以下内容:
1<IfModule mod_rewrite.c>
2    Options -MultiViews
3
4    RewriteEngine On
5    RewriteCond %{REQUEST_FILENAME} !-f
6    RewriteRule ^ index.php [QSA,L]
7</IfModule>
这将确保任何对不存在的文件的请求都指向我们的应用程序,这允许应用程序进行路由。
创建博客内容
要添加一些文章,我们将创建一个包含标题,内容,作者和发布日期的数组。我们可以通过扩展的容器对象将其存储在我们的应用程序对象中。
1sudo nano /var/www/html/index.php
添加以下内容:
 1$app['articles'] = array(
 2    array(
 3        'title'    => 'Lorem ipsum dolor sit amet',
 4        'contents' => 'Lorem ipsum dolor sit amet, consectetur adipiscing elit. Aenean mollis vestibulum ultricies. Sed sit amet sagittis nisl. Nulla leo metus, efficitur non risus ut, tempus convallis sem. Mauris pharetra sagittis ligula pharetra accumsan. Cras auctor porta enim, a eleifend enim volutpat vel. Nam volutpat maximus luctus. Phasellus interdum elementum nulla, nec mollis justo imperdiet ac. Duis arcu dolor, ultrices eu libero a, luctus sollicitudin diam. Phasellus finibus dictum turpis, nec tincidunt lacus ullamcorper et. Praesent laoreet odio lacus, nec lobortis est ultrices in. Etiam facilisis elementum lorem ut blandit. Nunc faucibus rutrum nulla quis convallis. Fusce molestie odio eu mauris molestie, a tempus lorem volutpat. Sed eu lacus eu velit tincidunt sodales nec et felis. Nullam velit ex, pharetra non lorem in, fringilla tristique dolor. Mauris vel erat nibh.',
 5        'author'   => 'Sammy',
 6        'date'     => '2014-12-18',
 7    ),
 8    array(
 9        'title'    => 'Duis ornare',
10        'contents' => 'Duis ornare, odio sit amet euismod vulputate, purus dui fringilla neque, quis eleifend purus felis ut odio. Cum sociis natoque penatibus et magnis dis parturient montes, nascetur ridiculus mus. Pellentesque bibendum pretium ante, eu aliquet dolor feugiat et. Pellentesque laoreet est lectus, vitae vulputate libero sollicitudin consequat. Vivamus finibus interdum egestas. Nam sagittis vulputate lacus, non condimentum sapien lobortis a. Sed ligula ante, ultrices ut ullamcorper nec, facilisis ac mi. Nam in vehicula justo. In hac habitasse platea dictumst. Duis accumsan pellentesque turpis, nec eleifend ex suscipit commodo.',
11        'author'   => 'Sammy',
12        'date'     => '2014-11-08',
13    ),
14);
这些文章现在可以在我们的应用程序中的任何地方重复使用,你甚至可以自己添加更多。
路由
基本上,路由会将类似http://www.example.com/的 URL 绘制到/并执行与之相关的函数。 若要添加一个基本路线,请在/var/www/html/index.php的A部分中添加下列内容:
1sudo nano /var/www/html/index.php
内容:
1$app->get('/', function (Silex\Application $app) { // Match the root route (/) and supply the application as argument
2 $output = '';
3 foreach ($app['articles'] as $article) { // Create a basic list of article titles
4 $output .= $article['title'];
5 $output .= '<br />';
6 }
7
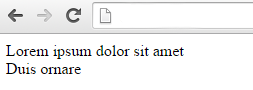
8 return $output; // Return it to so it gets displayed by the browser
9});
现在,当你访问http://your_server_ip,它应该显示文章标题的列表:
寺庙
虽然我们的网站现在显示正确的输出,但它看起来不太好。
首先,Silex要求我们将Twig注册为服务提供商,这基本上是一种在另一个应用程序中重复使用某些应用程序部分的方式。
1sudo nano /var/www/html/index.php
内容:
1$app->register(new Silex\Provider\TwigServiceProvider(), array(
2    'twig.path' => __DIR__.'/../templates', // The path to the templates, which is in our case points to /var/www/templates
3));
现在我们可以使用TWIG模板引擎来完成此操作,编辑$app->get('/',函数(Silex\Application $app) { });块,该块定义了/的路线,以匹配这里所示的内容。
1$app->get('/', function (Silex\Application $app)  { // Match the root route (/) and supply the application as argument
2    return $app['twig']->render( // Render the page index.html.twig
3        'index.html.twig',
4        array(
5            'articles' => $app['articles'], // Supply arguments to be used in the template
6        )
7    );
8});
保存您的更改并关闭文件。
现在,让我们创建index.html.twig模板,创建目录,然后创建并打开文件base.html.twig:
1sudo mkdir /var/www/templates
2sudo nano /var/www/templates/base.html.twig
这个文件将是我们的基础模板,这意味着所有其他模板将继承它,所以我们不必在每个模板中添加基本内容。
 1<!doctype html>
 2<html>
 3<head>
 4    <title>{% block title %}Blog{% endblock %}</title>
 5</head>
 6<body>
 7{% block body %}
 8
 9{% endblock body %}
10</body>
11</html>
此檔案包含兩個 blocks. Blocks 可在子模板中重置以提供內容. 被稱為「標題」的區塊將用於為單一文章頁面提供一個標題。
保存你的变化
现在我们将创建和编辑文件 /var/www/templates/index.html.twig:
1sudo nano /var/www/templates/index.html.twig
添加以下内容:
 1{% extends 'base.html.twig' %}
 2{% block body %}
 3    <h1>
 4        Blog index
 5    </h1>
 6
 7    {% for article in articles %}
 8        <article>
 9            <h1>{{ article.title }}</h1>
10            <p>{{ article.contents }}</p>
11            <p><small>On {{ article.date }} by {{ article.author }}</small></p>
12        </article>
13    {% endfor %}
14{% endblock %}
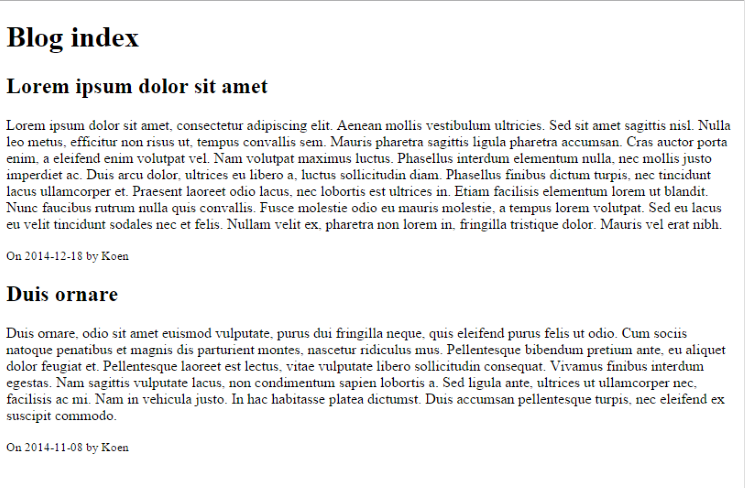
首先,我们指定我们要扩展模板 base.html.twig. 之后,我们可以开始对母模板中定义的块进行排列。
现在访问http://your_server_ip;它应该显示您的所有帖子的索引:
单个帖子的另一个控制器
接下来,我们将添加另一个控制器,显示单个帖子. 帖子将被匹配他们的数组索引. 再次打开 /var/www/html/index.php:
1sudo nano /var/www/html/index.php
将此添加到A部分,这将使我们能够显示单个文章的页面:
 1$app->get('/{id}', function (Silex\Application $app, $id)  { // Add a parameter for an ID in the route, and it will be supplied as argument in the function
 2    if (!array_key_exists($id, $app['articles'])) {
 3        $app->abort(404, 'The article could not be found');
 4    }
 5    $article = $app['articles'][$id];
 6    return $app['twig']->render(
 7        'single.html.twig',
 8        array(
 9            'article' => $article,
10        )
11    );
12})
13    ->assert('id', '\d+') // specify that the ID should be an integer
14    ->bind('single'); // name the route so it can be referred to later in the section 'Generating routes'
然后,创建和编辑文件 /var/www/templates/single.html.twig:
1sudo nano /var/www/templates/single.html.twig
添加以下内容:
1{% extends 'base.html.twig' %}
2{% block title %}{{ article.title }}{% endblock %}
3{% block body %}
4    <h1>
5        {{ article.title }}
6    </h1>
7    <p>{{ article.contents }}</p>
8    <p><small>On {{ article.date }} by {{ article.author }}</small></p>
9{% endblock %}
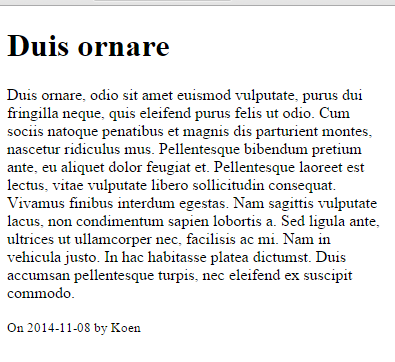
在这个模板中,我们还使用标题块来显示文章标题.身体块看起来几乎与以前的身体块相同,所以它应该是相当自我解释的。
如果您现在访问http://your_server_ip/0或http://your_server_ip/1,它应该显示一篇文章:
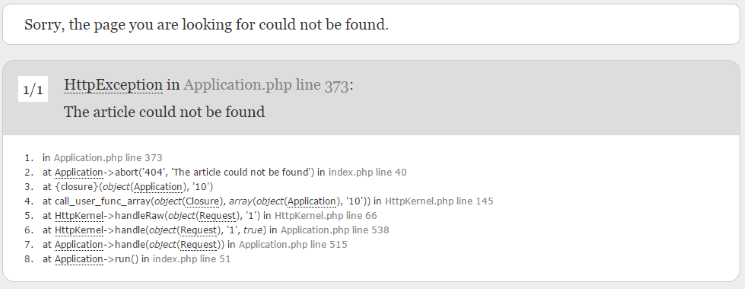
但是,如果您在本示例中访问一个不存在的ID,例如http://your_server_ip/2,则会显示错误页面:
创建路线
接下来,我们将从主页添加链接到单个文章视图,然后从文章返回主页。Silex有能力使用Symfony组件生成路线。它作为服务提供商提供,所以你应该先添加到A部分。
1sudo nano /var/www/html/index.php
将下列内容添加到A部分:
1$app->register(new Silex\Provider\UrlGeneratorServiceProvider());
这将允许我们使用URL生成器服务。当我们创建单一视图控制器时,我们已经添加了一个命名的路线。
1->bind('single'); // name the route so it can be referred to later in the section 'Generating routes'
现在,我们还需要将路线绑定到主页。 要做到这一点,在这个块的末尾添加‘->bind('index')`路线,就在最后的半图之前。
1$app->get('/', function (Silex\Application $app)  { // Match the root route (/) and supply the application as argument
2    return $app['twig']->render(
3        'index.html.twig',
4        array(
5            'articles' => $app['articles'],
6        )
7    );
8})->bind('index');
接下来,我们将需要实际地生成URL。打开 /var/www/templates/index.html.twig:
1sudo nano /var/www/templates/index.html.twig
然后,如下所示,更改下面的<h1>行:
 1{% extends 'base.html.twig' %}
 2{% block body %}
 3    <h1>
 4        Blog index
 5    </h1>
 6
 7    {% for article in articles %}
 8        <article>
 9            <h1><a href="{{ app.url_generator.generate('single', { id: loop.index0 }) }}">{{ article.title }}</a></h1>
10            <p>{{ article.contents }}</p>
11            <p><small>On {{ article.date }} by {{ article.author }}</small></p>
12        </article>
13    {% endfor %}
14{% endblock %}
这将从文章标题创建一个链接到单个文章页面。app.url_generator 指的是我们注册的服务。生成函数需要两个参数:路由名称,在这种情况下是单一,以及路由参数,在这种情况下仅仅是ID。loop.index0指循环中的0索引。因此,当第一个项目被环绕时,它是0;当第二个项目被环绕时,它是1等。
同樣可以做來引用單頁模板中的索引頁面:
1sudo nano /var/www/templates/single.html.twig
添加以下<p>行来创建链接:
 1{% extends 'base.html.twig' %}
 2{% block title %}{{ article.title }}{% endblock %}
 3{% block body %}
 4    <h1>
 5        {{ article.title }}
 6    </h1>
 7    <p>{{ article.contents }}</p>
 8    <p><small>On {{ article.date }} by {{ article.author }}</small></p>
 9
10    <p><a href="{{ app.url_generator.generate('index') }}">Back to homepage</a></p>
11{% endblock %}
这应该是相当自我解释的。
您应该能够点击文章标题访问该文章的页面,然后使用文章底部的链接返回主页。
完整的 index.php 文件
对于您的参考,这里是最终的 /var/www/html/index.php 文件应该是什么样子。
 1<?php
 2require_once __DIR__.'/../vendor/autoload.php'; // Add the autoloading mechanism of Composer
 3
 4$app = new Silex\Application(); // Create the Silex application, in which all configuration is going to go
 5
 6// Section A
 7// We will later add the configuration, etc. here
 8
 9$app['debug'] = true;
10$app['articles'] = array(
11    array(
12        'title'    => 'Lorem ipsum dolor sit amet',
13        'contents' => 'Lorem ipsum dolor sit amet, consectetur adipiscing elit. Aenean mollis vestibulum ultricies. Sed sit amet sagittis nisl. Nulla leo metus, efficitur non risus ut, tempus convallis sem. Mauris pharetra sagittis ligula pharetra accumsan. Cras auctor porta enim, a eleifend enim volutpat vel. Nam volutpat maximus luctus. Phasellus interdum elementum nulla, nec mollis justo imperdiet ac. Duis arcu dolor, ultrices eu libero a, luctus sollicitudin diam. Phasellus finibus dictum turpis, nec tincidunt lacus ullamcorper et. Praesent laoreet odio lacus, nec lobortis est ultrices in. Etiam facilisis elementum lorem ut blandit. Nunc faucibus rutrum nulla quis convallis. Fusce molestie odio eu mauris molestie, a tempus lorem volutpat. Sed eu lacus eu velit tincidunt sodales nec et felis. Nullam velit ex, pharetra non lorem in, fringilla tristique dolor. Mauris vel erat nibh.',
14        'author'   => 'Sammy',
15        'date'     => '2014-12-18',
16    ),
17    array(
18        'title'    => 'Duis ornare',
19        'contents' => 'Duis ornare, odio sit amet euismod vulputate, purus dui fringilla neque, quis eleifend purus felis ut odio. Cum sociis natoque penatibus et magnis dis parturient montes, nascetur ridiculus mus. Pellentesque bibendum pretium ante, eu aliquet dolor feugiat et. Pellentesque laoreet est lectus, vitae vulputate libero sollicitudin consequat. Vivamus finibus interdum egestas. Nam sagittis vulputate lacus, non condimentum sapien lobortis a. Sed ligula ante, ultrices ut ullamcorper nec, facilisis ac mi. Nam in vehicula justo. In hac habitasse platea dictumst. Duis accumsan pellentesque turpis, nec eleifend ex suscipit commodo.',
20        'author'   => 'Sammy',
21        'date'     => '2014-11-08',
22    ),
23);
24
25$app->get('/', function (Silex\Application $app)  { // Match the root route (/) and supply the application as argument
26    return $app['twig']->render( // Render the page index.html.twig
27        'index.html.twig',
28        array(
29            'articles' => $app['articles'], // Supply arguments to be used in the template
30        )
31    );
32})->bind('index');
33
34$app->register(new Silex\Provider\TwigServiceProvider(), array(
35    'twig.path' => __DIR__.'/../templates', // The path to the templates, which is in our case points to /var/www/templates
36));
37
38$app->get('/{id}', function (Silex\Application $app, $id)  { // Add a parameter for an ID in the route, and it will be supplied as argument in the function
39    if (!array_key_exists($id, $app['articles'])) {
40        $app->abort(404, 'The article could not be found');
41    }
42    $article = $app['articles'][$id];
43    return $app['twig']->render(
44        'single.html.twig',
45        array(
46            'article' => $article,
47        )
48    );
49})
50    ->assert('id', '\d+') // specify that the ID should be an integer
51    ->bind('single'); // name the route so it can be referred to later in the section 'Generating routes'
52
53$app->register(new Silex\Provider\UrlGeneratorServiceProvider());
54
55// This should be the last line
56$app->run(); // Start the application, i.e. handle the request
57?>
结论
您已经使用Silex创建了一个简单的博客应用程序,可以进一步扩展,从与数据库相结合开始。 然而,这不在本教程的范围内。 官方文档可以非常有帮助,如果您想继续使用Silex,它绝对是必读的。
如果 Silex 对你来说太微型,你应该考虑使用 Symfony 框架,其中可以找到教程 在这里。