Introduction
Perl is a popular programming language that allows you to quickly create scripts and install additional libraries.
We have previously covered how to install Nagios monitoring server on Ubuntu 12.10 x64. This time, we will expand on this idea and create Nagios plugins using Perl. These plugins will be running on client VPS, and be executed via NRPE.
Step 1 - Install NRPE on client VPS
apt-get install -y perl nagios-nrpe-server
useradd nrpe && update-rc.d nagios-nrpe-server defaults
Step 2 - Create your Perl Script
It would be a good idea to keep your plugins in same directory as other Nagios plugins (/usr/lib/nagios/plugins/ for example).
For our example, we will create a script that checks current disk usage by calling "df" from shell, and throw an alert if it is over 85% used:
# !/usr/bin/perl
use strict;
use warnings;
use feature qw(switch say);

my $used_space = `df -h / \|awk 'FNR == 2 {print \$5}'`;

given ($used_space) {
    chomp($used_space);
    when ($used_space lt '85%') { print "OK - $used_space of disk space used."; exit(0);      }
    when ($used_space eq '85%') { print "WARNING - $used_space of disk space used."; exit(1);      }
    when ($used_space gt '85%') { print "CRITICAL - $used_space of disk space used."; exit(2); }
    default { print "UNKNOWN - $used_space of disk space used."; exit(3); }
}
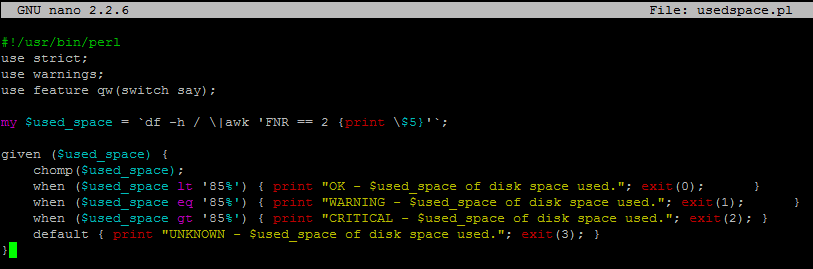
We will save this script in /usr/lib/nagios/plugins/usedspace.pl and make it executable:
chmod +x /usr/lib/nagios/plugins/usedspace.pl
The entire Nagios NRPE plugin boils down to using exit codes to trigger alerts.
You introduce your level of logic to the script, and if you want to trigger an alert (whether it is OK, WARNING, CRITICAL, or UNKNOWN) - you specify an exit code.
Refer to the following Nagios Exit Codes:
Nagios Exit Codes
| Exit Code | Status |
| 0 | OK |
| 1 | WARNING |
| 2 | CRITICAL |
| 3 | UNKNOWN |
Step 3 - Add Your Script to NRPE configuration on client host
Delete original /etc/nagios/nrpe.cfg and add the following lines to it:
log_facility=daemon
pid_file=/var/run/nagios/nrpe.pid
server_port=5666
nrpe_user=nrpe
nrpe_group=nrpe
allowed_hosts=198.211.117.251
dont_blame_nrpe=1
debug=0
command_timeout=60
connection_timeout=300
include_dir=/etc/nagios/nrpe.d/

command[usedspace_perl]=/usr/lib/nagios/plugins/usedspace.perl
Where 198.211.117.251 is our monitoring server from previous articles. Change these to your own values.
Make sure to restart Nagios NRPE service:
service nagios-nrpe-server restart
Step 4 - Add Your New Command to Nagios Checks on Nagios Monitoring Server
Define new command in /etc/nagios/objects/commands.cfg
define command{
        command_name usedspace_perl
        command_line    $USER1$/check_nrpe -H $HOSTADDRESS$ -c usedspace_perl
        }
As you can see, it uses NRPE to make TCP connections to port 5666 and run command 'usedspace_perl', which we defined in /etc/nagios/nrpe.cfg on that remote host.
Add this check to your Nagios configuration file for client VPS.
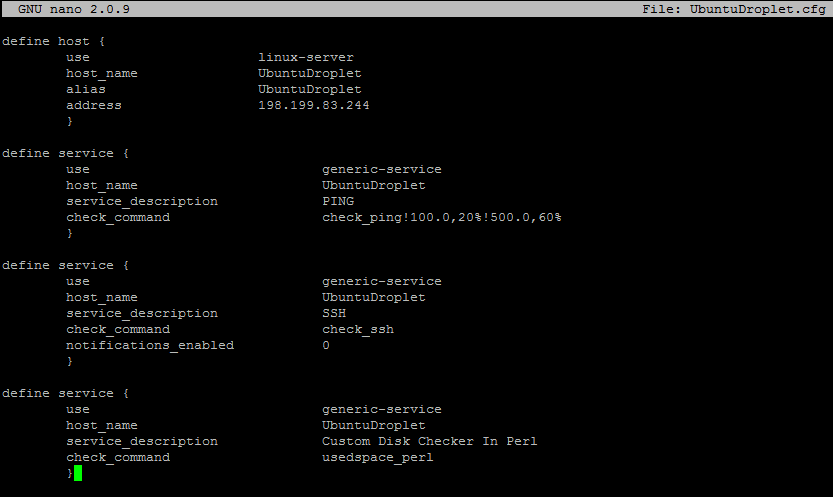
For our example, we will monitor a server called UbuntuDroplet and edit /etc/nagios/servers/UbuntuDroplet.cfg
define service {
        use generic-service
        host_name UbuntuDroplet
        service_description Custom Disk Checker In Perl
        check_command usedspace_perl
        }
Restart Nagios:
service nagios restart
Verify that the new check is working:
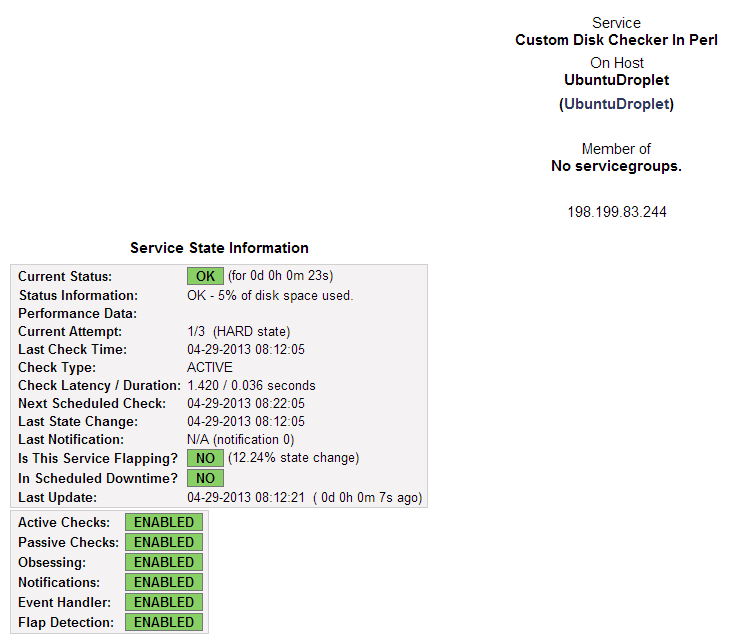
And you are all done!