作者选择了 COVID-19 救援基金作为 Write for Donations计划的一部分,接受捐款。
介绍
在此教程中, 您将使用 [OpenAPI 规格 (v3)] (https://swagger.io/specification/) 来记录您的 API 。 OpenAPI文件是遵循OpenAPI规格的JSON或YAML文件. 此规格定义了您的 JSON/ YAML 文件必须包含的字段, 以及它将如何在您用来主机的文档服务中反映 。 许多服务支持OpenAPI,因此可以选择,甚至使用多种服务,而无需更改你的API文档格式.
要创建文档,您将使用 Insomnia,一个免费的和 开源应用程序,允许您测试您的API,并设计文档与实时旁观预览。Insomnia不支持JSON,但它使它很容易写YAML。YAML是API文档的良好选择,因为这些文档可以变得非常大,一个JSON文档会变得混乱和难以阅读。
最后,您将使用 Redoc托管 API 文档,这是许多公司使用的 open-source应用程序。 Redoc 使用您生成的 OpenAPI 文档,并为您提供一个 HTML 页面,显示出您文档的漂亮和交互式版本。您还将部署您的 Redoc 生成的网站到 GitHub 页面,这是由 GitHub提供的免费网站托管解决方案。
在本教程中,您将了解更多关于OpenAPI的信息,根据Insomnia的OpenAPI Spec来记录您的API,并在GitHub页面上使用Redoc托管此文档。
前提条件
要遵循本教程,您将需要:
- 需要文件的REST API。 请访问digitalOcean社区网站获取一些 [touristics] (https://www.digitalocean.com/community/search?q=rest+api). 此教程将使用 [JSON 占位符] (https://jsonplaceholder.typicode.com/) API 。
- Insomnia下载并安装在您的本地机器上.
- [NodeJS v12或上 (https://nodejs.org)安装在您的本地机上.
- 熟悉YAML,可从文件中获益。
- 后端Web Development的以往经验,您可以从MDNWeb Docs获得.
- 为这一项目设立的GitHub帐户和一个新的寄存器。 您可以按照 GitHub 的快速启动指南创建新寄存器 [创建新的 GitHub Repository] (https://docs.github.com/en/get-started/quickstart/create-a-repo). 您还需要安装[git cli工具] (https://git-scm.com),以便您可以推向GitHub. .
第1步:了解你的API
在此步骤中,您将记住您的 API 接受的路径及其相关参数和响应,因为您将为其他人记录 API,并且因为您可能在未来还会参考此文档,所以重要的是要记住您需要记录的一切。
本教程将使用 JSON Placeholder API,这是一个免费的模仿 API. 由于这个 API 是相当大的,你只会在本教程中记录 /posts部分。
下表显示了你将在本教程中记录的五条路径中的每条路径的方法、路径路径和描述,创建一个表或类似的东西是有帮助的,这样你就不会忘记任何路径(如果API大,这可能会发生)。
| Method | Route | Description |
|---|---|---|
| GET | /posts | Get all posts |
| GET | /posts/:id | Get a single post |
| POST | /posts | Create a post |
| PUT/PATCH | /posts/:id | Update a post |
| DELETE | /posts/:id | Delete a post |
现在你知道你的 API 能做什么,是时候开始用 Insomnia 记录它了。
步骤2 - 创建一个失眠项目
在此步骤中,您将创建一个 Insomnia 项目. 一个 Insomnia 项目包含 OpenAPI 文档,您为您的 API 编写的任何测试,以及您创建的任何请求。
打开 Insomnia 应用程序并进入您的仪表板。 通过点击 Insomnia 窗口右上方的 Create 按钮创建新的** Design 文档** ,并给它一个名字。 对于本教程,您可以使用 json-placeholder-docs.yaml。
<$>[注] 注: YAML by design only accepts spaces as indentation. Insomnia, however, indents with tabs by default. This will be fixed in a later update, but for now, open your** Preferences** by clicking the cogwheel icon on the top right, or by pressing Ctrl/Cmd +,. 在** Font** 部分,卸载** Indent with Tabs** 并关闭** Preferences** 窗口。
下面的截图显示,你现在应该看到三个面板。 第一个窗格显示您文档的概况, 如您的 API 的路径和您定义的组件( 您稍后会更多地了解这些) 。 中间的相框包含您将用来以YAML写出OpenAPI文档的代码编辑器. 此编辑器也会自动检测出错误, 并在底部通知您 。 最后,右侧最后一个面板是文档的实时预览. 你会看到一个错误,因为你仍然需要告诉Insomnia你会使用的OpenAPI哪个版本.
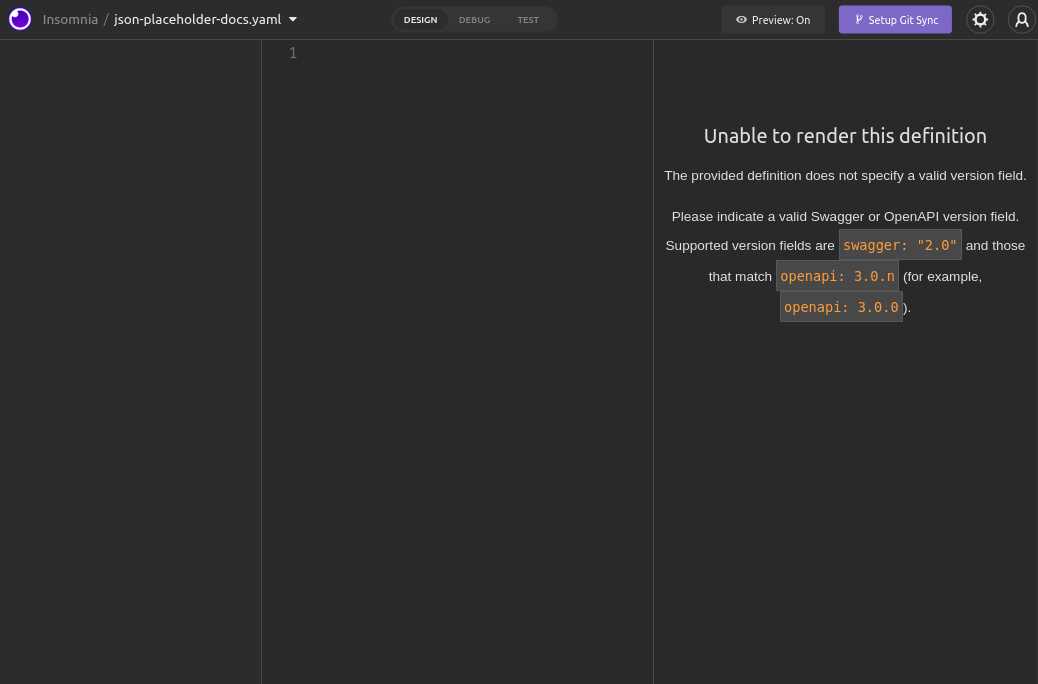
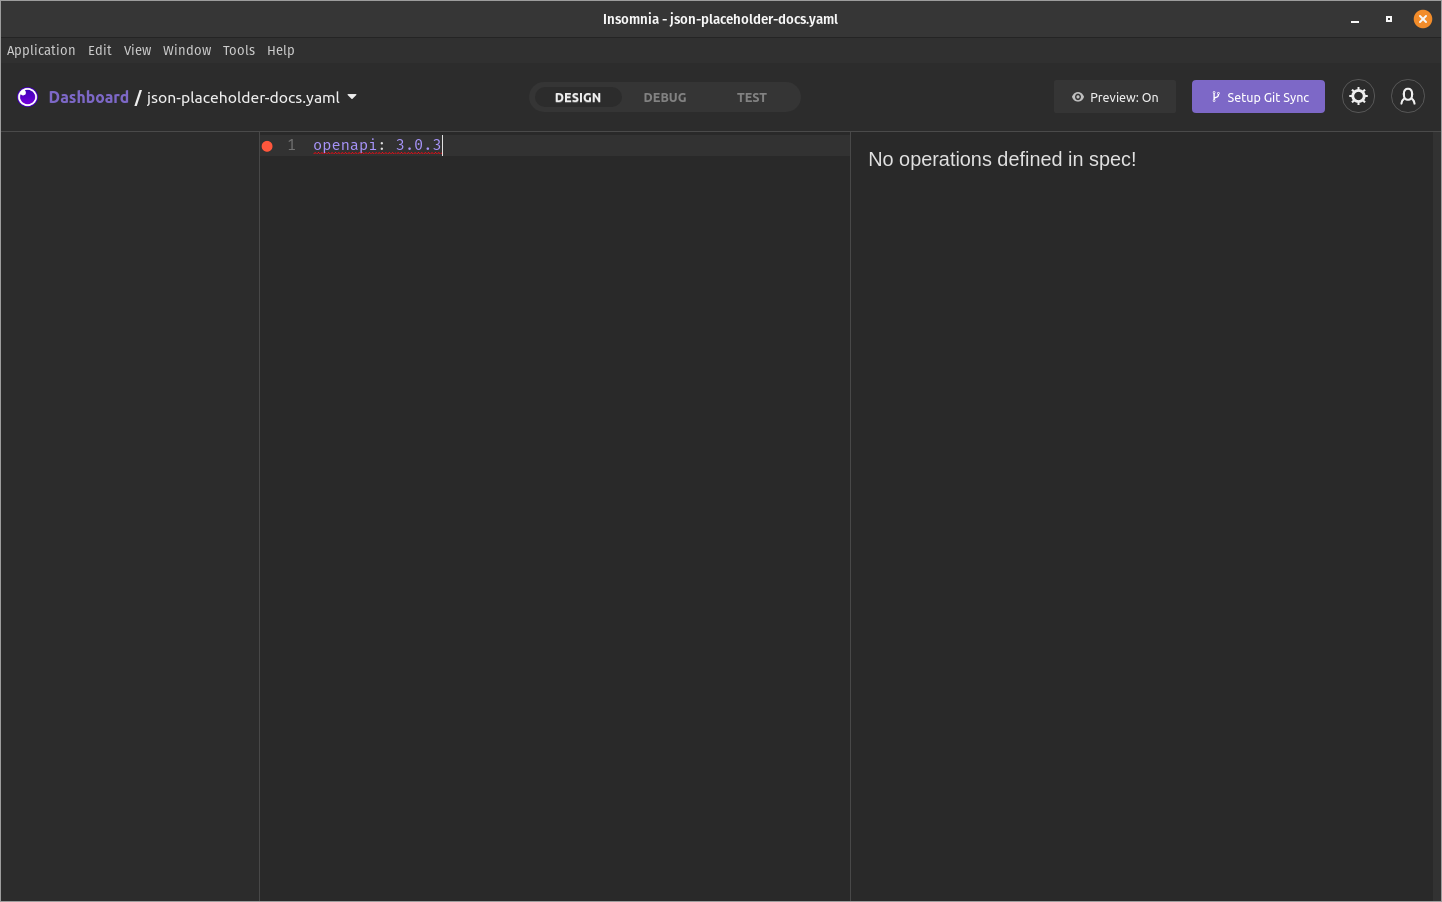
在设计选项卡的代码编辑器中,添加一个行:openapi: 3.0.3。这表示你将使用的OpenAPI规格的版本。在编写时,最新的版本是3.0.3。
你的屏幕应该看起来像这样:
现在你已经熟悉了Insomnia界面,你可以开始编写你的文档。
步骤 3 – 开始使用 OpenAPI 规格
在此步骤中,您将了解更多关于 OpenAPI 规格的信息。API 规格可以是 JSON 或 YAML 文件,但 Insomnia 只支持 YAML。
根据 规格,以下是文档根部可能存在的字段:
名称 名称 类型 名称 名称 | ----------------- -- -------------------------------------------------------------- ---------------------------------------------------------------------------------------------------------------------------------------------------------------------------------------------------------------------- -- -- -- -- -- -- -- -- -- -- -- -- -- -- -- -- -- -- -- -- -- -- -- -- -- -- -- -- -- -- -- -- -- -- -- -- -- -- -- -- -- -- -- |
openapi'string' * REQUIRED. OpenAPI 计划版本。 | ________________________________________________________________________________________________________________________________________________________________________________________________________________________________________________________________________________________________________________________________________________________________________________________________________________________________________________________________________________________________________________________________________________________________________________________________________________________________________________________________________________________________________________________________________________________________________________________________________________________________________________________________________________________________________________________________________________________________________________________________________________________________________________________________________________________________________________________________________________________________________________________________________________________________________________________________________________________________________________________ 包含 API 信息的对象。 | QQ服务器 ' QQ 阵列 [Server Objects] (https://swagger.io/specification/# server-object) QQ 包含为 API 服务器提供连接选项的对象的阵列. | QQ 路径 [路径对象] (https://swagger.io/specification/# paths-object) _REQUIRED_. 一个包含由API提供的路径,方法,请求-机构,参数和响应的对象. 这是文件最重要的部分。 |组件 ' [组件对象] (https://swagger.io/specification/# components-object) 含有可重复使用的组件,意在缩小文件大小并保持文件干净。 | [安全对象]的`安全 ' 阵列(https://swagger.io/specification/# security-requirement-object) 载有API认证机制清单。 此教程范围外. | [外部文档对象] (https://swagger.io/specification/# external-documentation-object) ***** ** ** ** ** **
不要担心如果这太多了,你会深入到每个属性,除了),或 oauth)路线,但JSONPlaceholder没有任何身份验证功能。
步骤 4 — 添加信息对象
在此步骤中,您将使用步骤 1 的表格开始使用 Insomnia 编写您的 API 文档。
),以及其服务条款().
根据规格,这是一个 info 对象应该是什么样子:
名称 名称 类型 名称 名称 | ——————————————————————————. -- -------------------------------------------------------------- ---------------------------------------------------------------------------------------------------------------------------------------------------------------------------------------------------------------------- -- -- -- -- -- -- -- -- -- -- -- -- -- -- -- -- -- -- -- -- -- -- -- -- -- -- -- -- -- -- -- -- -- -- -- -- -- -- -- -- -- -- -- |
- 标题:
弦' _REQUIRD_。 API名称. |描述'弦'对API的简短描述。 这里可以使用Markdown. |服务术语 '字符串 ' 适用于API服务术语的URL。 | 联系对象 暴露的API的联系信息。 | https://swagger.io/specification/# license-object 暴露的API的许可证信息。 | (原始内容存档于2019-09-26) (中文(中国大陆) ). QQ"版本" 出自"弦". 文档的版本,而非OpenAPI spec. |
info字段有两个必需的属性:文档的标题和文档的版本,这应该等同于您的API应用程序的版本。
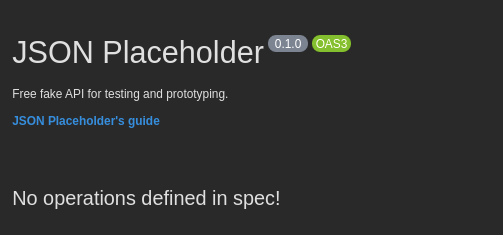
现在,您将使用三个最常用的字段将一个info对象添加到您的文档中:标题、描述和版本。
1info:
2  title: JSONPlaceholder
3  description: Free fake API for testing and prototyping.
4  version: 0.1.0
这是一个随机版本号,因为JSONPlaceholder不暴露版本号. 请随时添加任何其他字段到info对象,按照上一步的规格。
<$>[警告] 警告: YAML 对其插入非常挑剔. 它必须用空格插入,插入尺寸必须在整个文档中一致。
现在你已经添加了有关 API 的基本信息的info对象,你将添加下一个对象:externalDocs。
步骤 5 — 添加externalDocs对象
在此步骤中,您将添加)。
根据规格,这里是 externalDocs 对象应该是什么样子:
| Field Name | Type | Description |
|---|---|---|
description | string | A short description of the target documentation. Markdown can be used. |
url | string | REQUIRED. The URL for the target documentation. |
在 YAML 文档中,添加一个指向 JSONPlaceholder 指南的 externalDocs 对象:
1externalDocs:
2  description: "JSONPlaceholder's guide"
3  url: https://jsonplaceholder.typicode.com/guide
您应该看到 Insomnia 右侧的预览窗格中反映的更改。
您现在已链接到您的API的外部文档,接下来,您将添加服务器数组。
步骤 6 — 添加服务器阵列
在此步骤中,您将添加)。
要修复此问题,OpenAPI 提供一个服务器字段,将以下行添加到您的 YAML 文档中:
1servers:
2- url: https://jsonplaceholder.typicode.com
3  description: JSONPlaceholder
有了这一点,你现在有办法调用 API。
步骤 7 — 添加路径对象
在此步骤中,您将添加路径对象,这是您的文档的核心。该对象包含了API提供的所有路径,还包含了任何参数、方法、请求体和路径的所有响应。
路径对象的每个密钥将是一个路径(/posts)和值将是 Path Item对象。
根据OpenAPI规格,这就是 Path Item 对象的样子:
名称 名称 类型 名称 名称
| ————————————————————————————. -- -------------------------------------------------------------- ---------------------------------------------------------------------------------------------------------------------------------------------------------------------------------------------------------------------- -- -- -- -- -- -- -- -- -- -- -- -- -- -- -- -- -- -- -- -- -- -- -- -- -- -- -- -- -- -- -- -- -- -- -- -- -- -- -- -- -- -- -- |
摘要 ' 弦 ' 此路由的可选摘要 。 |
说明 ' 弦'路由的可选描述. |获得'/后'/产出'/patch'/delete'/etc[行动对象](https://swagger.io/specification/#operation-object) |此路线上的作业(方法)的定义。 | QQ 服务对象的) QQ 用于服务此路径中的所有操作的替代 服务器` 阵列。 |
适用于该路径上所有操作的参数参数。 这些参数可以在查询字符串,信头,饼干上,或者路径本身上. |
" Path 项目 " 对象有多个字段。 " 概述 " 和 " 描述 " 字段,如其名称所示,对路径作了简短和较长的描述。 )对象。 操作对象记录一种HTTP方法,可用于此API路由.
),但对于本教程,你将专注于一个较小的集:
名称 名称 类型 名称 名称
| ----------------- -- -------------------------------------------------------------- ---------------------------------------------------------------------------------------------------------------------------------------------------------------------------------------------------------------------- -- -- -- -- -- -- -- -- -- -- -- -- -- -- -- -- -- -- -- -- -- -- -- -- -- -- -- -- -- -- -- -- -- -- -- -- -- -- -- -- -- -- -- |
tags' tags' ' string's ' a list of tags for API 文件控制。 标记可用于类似路线的分组. | 摘要 ' 弦 ' 业务的简短摘要。 |
说明 ' 弦' 行动说明。 这里可以使用Markdown. |
[外部文档对象] (https://swagger.io/specification/# external-documentation-object) *** 用于此操作的补充外部文档。 与主体上的 " 外部Docs " 相同。 |
- 路径项目中的
参数 ' 等同于参数'。 | - 请求正文。 这在 " GET " 或 " DELETE " 方法时不能使用。 | ______________________________________________________________________________________________________________________________________________________ API为这次行动退回的可能答复清单. |
标签属性组类似的路径.具有相同标签的路径将最终组成一个组。总结和描述字段与路径对象中的相同。它们允许您分别添加短总结和更长的描述。
)所定义。
The /posts 路线
现在,您将通过在路径对象中创建一个对象来文档化 API 路径. 首先,您将文档化/posts路径。
1paths:
2  "/posts":
<$>[注] 注: /posts在引文中,因为它包含特殊符号(/)。
接下来,您需要添加一个字段,其密钥将是HTTP方法,其值将是路径项目对象。
1paths:
2  "/posts":
3    get:
4      tags: ["posts"]
5      summary: Returns all posts.
标签字段将类似操作组合在一起(注意预览中的符号是如何被称为帖子。
接下来,记录一个可以得到回复的答案. 您从这个API中获得的唯一答案是包含所有帖子的数组的200答案。
可以由 JSONPlaceholder 返回的示例帖子将看起来如下:
1{
2  "userId": 1,
3  "id": 1,
4  "title": "A post's title",
5  "body": "The post's content"
6}
您可以使用 components 对象来创建一个可重复使用的组件,您可以将post定义为schemas对象中的一个方案,该方案将位于components对象内部。
请注意),而不是在路径对象中。
 1components:
 2  schemas:
 3    post:
 4      type: object
 5      properties:
 6        id:
 7          type: number
 8          description: ID of the post
 9        title:
10          type: string
11          description: Title of the post
12        body:
13          type: string
14          description: Body of the post
15        userId:
16          type: number
17          description: ID of the user who created the post
上面的方案是一个)。
既然你有了这个计划,你就可以加入)。 此对象包含答复的说明'、返回的任何[标题](https://swagger.io/specification/ header-object)和[答复正文](https://swagger.io/specification/#media-type-object),以及内容'对象中的`内容-Type'.
将响应对象添加到收到路径的/posts操作中,复制所突出的行:
 1paths:
 2  "/posts":
 3    get:
 4      tags: ["posts"]
 5      summary: Returns all posts.
 6      <$>responses:<$>
 7        <$>"200":<$> # 200 Status Code
 8          <$>description:<$> All went well
 9          <$>content:<$>
10            <$>application/json:<$> # Reponse is returned in JSON
11              <$>schema:<$>
请确保在引文中包含200,使其成为一个字符串,而不是一个数字。
在这里,你正在定义一个返回的响应与200状态代码,并具有应用程序/json的内容类型标题。 在这个方案对象中,你需要传递一个参考你刚刚创建的帖子方案。
除了方案,应用程序/json对象还可以包含您想要提供的任何示例。
目前,请在schema中添加post schema的引用。
1$ref: "#/components/schemas/post"
# 指的是文档的根源,因为post方案位于components/schemas/post中,所以你应该这样写它,并且因为 是YAML中的保留符号,所以你需要在引文中添加ref。
您的 Insomnia 设计卡应该看起来像这样:
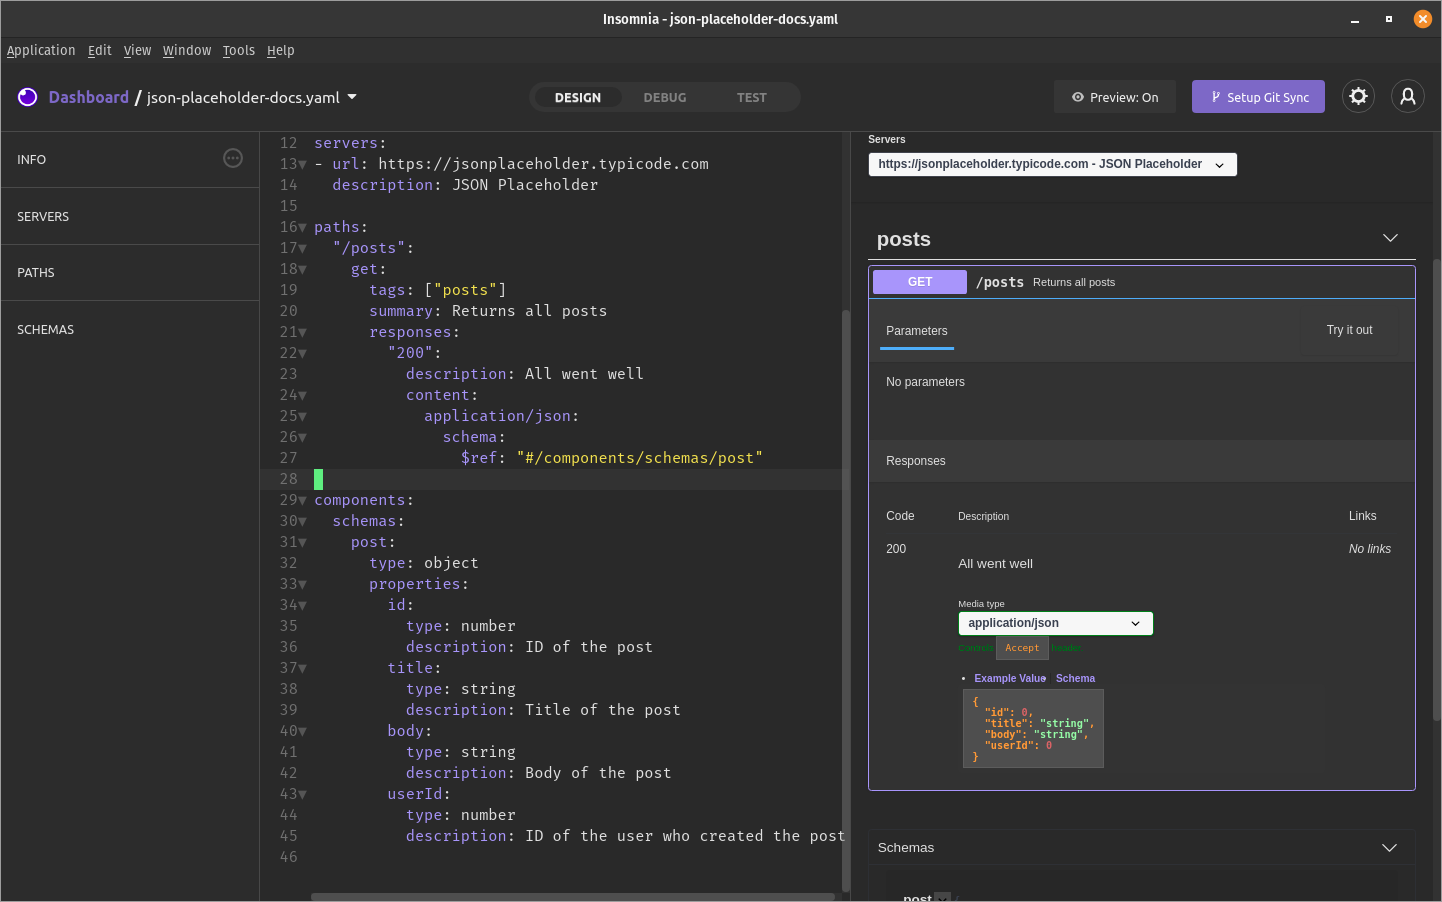
您可以看到,Insomnia已经对您的文档进行了预览。/posts路径已被分组成一个帖子部分,由于标签,并且正确的响应也显示,正如您在方案中定义的那样。
您可以尝试更改某些东西,例如路径的标签或响应,并在实时查看更新。
注意:在预览中,按下 Path 操作中的 Try It Out 按钮,然后按下 ** Execute** 按钮,拨打 JSONPlaceholder API 并收到响应。
随着)。
 1paths:
 2  "/posts":
 3    # ...
 4    <$>post<$>:
 5      tags: ["posts"]
 6      summary: Create a new post
 7      responses:
 8        "200":
 9          description: A post was created
10          content:
11            application/json:
12              schema:
13                $ref: "#/components/schemas/post"
您刚刚定义了另一个操作. 这次,它是一个 POST 请求,具有相同的标签,所以它会与您之前定义的 GET 请求一起组合。
仍然缺少一件事:后'方法也接受请求体。 它尚未记录在案,因此,在 " 事后 " 行动中加上请求Body ' 。 请求机构类似于答复 ' 对象。 有一个说明'和内容'字段,与答复'对象相同,还有一个需要'字段,这是一个布尔字段。 这个领域决定是否需要一个机构来提出这一要求。 在这种情况下,在你的作业中加上requestBody'的反对.
 1paths:
 2  "/posts":
 3    # ...
 4    <$>post<$>:
 5      tags: ["posts"]
 6      summary: Create a new post
 7      <$>requestBody:<$>
 8    <$>content:<$>
 9      <$>application/json:<$>
10        <$>schema:<$>
11          <$>$ref: "#/components/schemas/post"<$>
12    <$>required: true<$>
13      responses:
14        "200":
15          description: A post was created
16          content:
17            application/json:
18              schema:
19                $ref: "#/components/schemas/post"
在此时,你的路径对象应该是这样的:
 1paths:
 2  "/posts":
 3    get:
 4      tags: ["posts"]
 5      summary: Returns all posts
 6      responses:
 7        "200":
 8          description: All went well
 9          content:
10            application/json:
11              schema:
12                $ref: "#/components/schemas/post"
13    post:
14      tags: ["posts"]
15      summary: Create a new post
16      requestBody:
17        content:
18          application/json:
19            schema:
20              $ref: "#/components/schemas/post"
21        required: true
22      responses:
23        "200":
24          description: A post was created
25          content:
26            application/json:
27              schema:
28                $ref: "#/components/schemas/post"
在本节中,您记录了在/posts路径中可用的GET和POST操作,接下来,您将记录/posts/:id路径,用于阅读,修改或删除单个帖子。
The /posts/:id 路线
接下来,你会记录 /posts/:id 路径. 这个路径有三个操作: GET, PUT 和 DELETE. 他们得到一个单一的帖子,更新一个帖子,并删除一个帖子. :id 是一个动态参数,可以是一个数字(例如: /posts/1, /posts/2,等等)。
1paths:
2  "/posts":
3  # ...
4  "/posts/{id}":
5  # TODO
在属性定义了参数将被放置的位置。这可能是查询字符串、cookie字符串、标题字符串或路径本身的一部分。描述是参数的描述。必需字段是指参数是否需要。在路径参数的情况下,必需必须是真,因为参数是路径本身的一部分。
路径参数是特殊的,所以它们在路径中使用轴承({})来定义。参数名在轴承中包含,并且必须匹配名称字段中的名称。
 1paths:
 2  "/posts/{id}":
 3    parameters:
 4    - name: id # Must be same as the value in the {}.
 5      in: path
 6      description: ID of the post
 7      # Since this is in the path, the parameter HAS to be required
 8      required: true
 9      # Defining the type of the parameter
10      schema:
11        # In this case, it is just a string
12        type: string
请确保包括字符串(-),否则参数数组将成为一个对象
最后要记录的是操作及其响应和请求机构,如果有的话,这是类似于你在上一节所做的。
首先,添加GET /posts/:id操作,该操作获得单个帖子。
 1get:
 2  tags: ["post"]
 3  summary: Get a single post
 4  responses:
 5    "200":
 6      description: All went well
 7      content:
 8        application/json:
 9          schema:
10            $ref: "#/components/schemas/post"
11    "404":
12      description: Post not found
13      content:
14        application/json:
15          schema:
16            type: object
17            properties: {}
请注意,这一次,有一个404响应,这是因为GET请求可以返回一个404错误,如果没有找到该帖子。
接下来,添加PUT /posts/:id操作,此方法结合了上述GET和POST方法,因为它既有requestBody和404响应。
 1put:
 2  tags: ["post"]
 3  summary: Update a post
 4  requestBody:
 5    content:
 6      application/json:
 7        schema:
 8          $ref: "#/components/schemas/post"
 9    required: true
10  responses:
11    "200":
12      description: All went well
13      content:
14        application/json:
15          schema:
16            $ref: "#/components/schemas/post"
17    "404":
18      description: Post not found
19      content:
20        application/json:
21          schema:
22            type: object
23            properties: {}
JSONPlaceholder 不会真正验证您发送的数据,所以没有),请确保您也记录了这些响应。
最后,添加DELETE /posts/:id操作,这与GET方法相同,因为它返回了404,但这一次,操作是删除。
 1delete:
 2  tags: ["post"]
 3  summary: Delete a post
 4  responses:
 5    "200":
 6      description: All went well
 7      content:
 8        application/json:
 9          schema:
10            type: object
11            properties: {}
12    "404":
13      description: Post not found
14      content:
15        application/json:
16          schema:
17            type: object
18            properties: {}
请注意,),即使在一个200响应。
有了这个,你已经成功地记录了JSONPlaceholder的/posts路径,这里是完整的YAML文档。
  1openapi: 3.0.3
  2
  3info:
  4  title: JSONPlaceholder
  5  description: Free fake API for testing and prototyping.
  6  version: 0.1.0
  7
  8externalDocs:
  9  description: "JSONPlaceholder's guide"
 10  url: https://jsonplaceholder.typicode.com/guide
 11
 12servers:
 13- url: https://jsonplaceholder.typicode.com
 14  description: JSONPlaceholder
 15
 16paths:
 17  "/posts":
 18    get:
 19      tags: ["posts"]
 20      summary: Returns all posts
 21      responses:
 22        "200":
 23          description: All went well
 24          content:
 25            application/json:
 26              schema:
 27                $ref: "#/components/schemas/post"
 28    post:
 29      tags: ["posts"]
 30      summary: Create a new post
 31      requestBody:
 32        content:
 33          application/json:
 34            schema:
 35              $ref: "#/components/schemas/post"
 36        required: true
 37      responses:
 38        "200":
 39          description: A post was created
 40          content:
 41            application/json:
 42              schema:
 43                $ref: "#/components/schemas/post"
 44  "/posts/{id}":
 45    parameters:
 46    - name: id # Must be same as the value in the {}.
 47      # Location of the parameter.
 48      # Can be `path`, `cookie`, `query` or `header`
 49      in: path
 50      description: ID of the post
 51      # Since this is in the path, the parameter HAS to be required
 52      required: true
 53      # Defining the type of the parameter
 54      schema:
 55        # In this case, it is just a string
 56        type: string
 57    get:
 58      tags: ["post"]
 59      summary: Get a single post
 60      responses:
 61        "200":
 62          description: All went well
 63          content:
 64            application/json:
 65              schema:
 66                $ref: "#/components/schemas/post"
 67        # But this time, you can also get a 404 response,
 68        # which is an empty JSON object.
 69        "404":
 70          description: Post not found
 71          content:
 72            application/json:
 73              schema:
 74                type: object
 75                properties: {}
 76    put:
 77      tags: ["post"]
 78      summary: Update a post
 79      requestBody:
 80        content:
 81          application/json:
 82            schema:
 83              $ref: "#/components/schemas/post"
 84        required: true
 85      responses:
 86        "200":
 87          description: All went well
 88          content:
 89            application/json:
 90              schema:
 91                $ref: "#/components/schemas/post"
 92        "404":
 93          description: Post not found
 94          content:
 95            application/json:
 96              schema:
 97                type: object
 98                properties: {}
 99    delete:
100      tags: ["post"]
101      summary: Delete a post
102      responses:
103        "200":
104          description: All went well
105          content:
106            application/json:
107              schema:
108                type: object
109                properties: {}
110        # But this time, you can also get a 404 response,
111        # which is an empty JSON object.
112        "404":
113          description: Post not found
114          content:
115            application/json:
116              schema:
117                type: object
118                properties: {}
119
120components:
121  schemas:
122    post:
123      type: object
124      properties:
125        id:
126          type: number
127          description: ID of the post
128        title:
129          type: string
130          description: Title of the post
131        body:
132          type: string
133          description: Body of the post
134        userId:
135          type: number
136          description: ID of the user who created the post
在上述文档中,您已经记录了 JSONPlaceholder 提供的所有 /posts 路径,您还涵盖了所有受支持的 HTTP 方法;您还了解了参数、请求器官和不同的响应。
完成 OpenAPI 文档后,下一步是向用户提供。
步骤8 — 使用 Redoc 显示 API 文档
虽然Insomnia有一个漂亮的预览面板,但你不能期望所有的用户都安装了Insomnia,所以你会使用 Redoc以可读的方式显示OpenAPI YAML文件。
要构建 Redoc,您需要安装 NodeJS。
在您的计算机上任何地方创建一个新文件夹. 您将在这个文件夹中构建Redoc,并将其部署到GitHub。
首先,您需要将当前的 OpenAPI 文档保存到这个文件夹中。在当前的文件夹中创建一个名为openapi.yaml 的新文件,并将 Insomnia’s Design 卡中的内容复制到这个文件中。
接下来,打开该文件夹中的终端,并运行下面的命令来构建Redoc。
1npx redoc-cli --output index.html bundle openapi.yaml
) 的 CLI 工具,可获取可安装的 CLI 包,然后运行它. 这样你就可以运行 redoc-cli 而不会真正安装到你的全球 $PATH。 相反,它将通过 npx 可用。 如果被要求安装 redoc-cli 或不,请确保键入 y。 接下来,你会告诉 Redoc 将你刚刚创建的 openapi.yaml 文件组合成一个零依赖的 HTML 文件,在这种情况下,它将是 index.html,因为你已经通过了 --output 标志。
这应该在该目录中创建一个名为index.html的新文件. 该文件是由 Redoc 提供的文档。 在您的浏览器中打开该文件,并检查它,以确保您定义的每个路径都被覆盖。
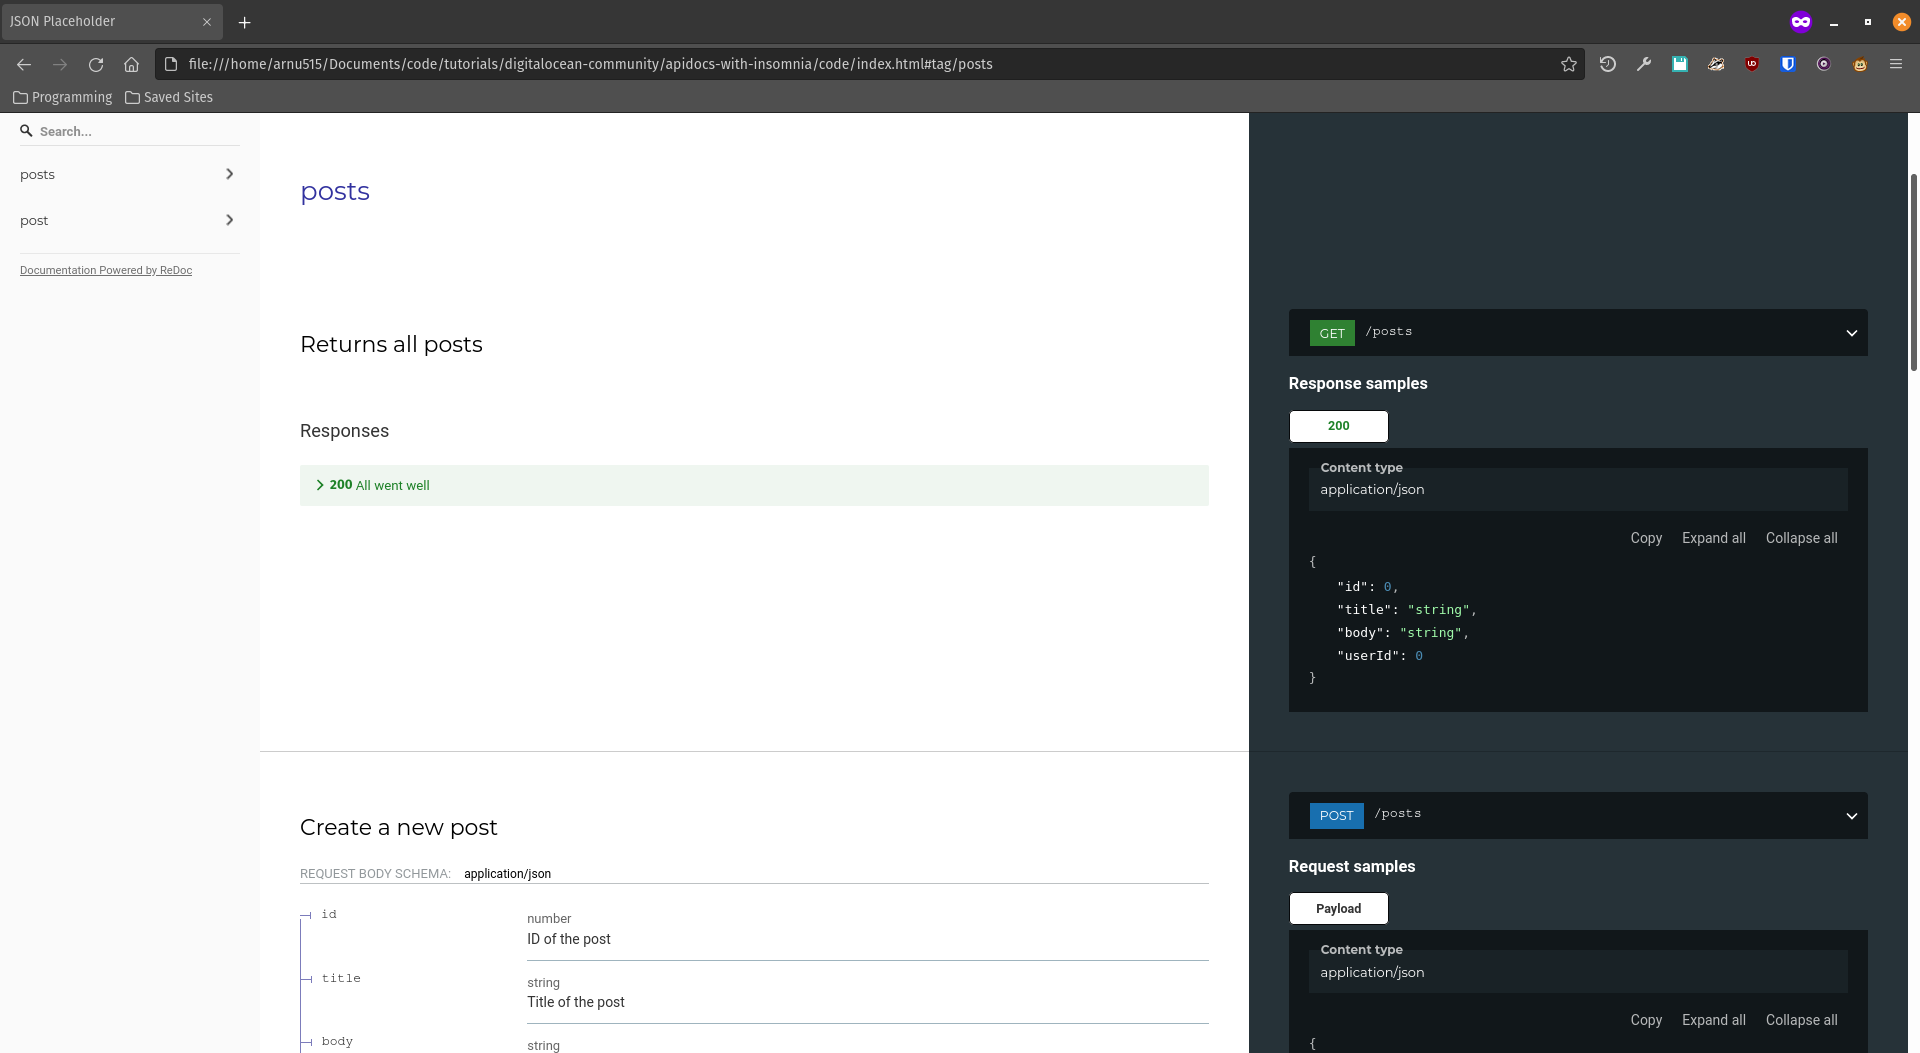
现在你已经生成了你的文档网站,是时候让其他人使用GitHub页面使用它。
第9步:部署到GitHub页面
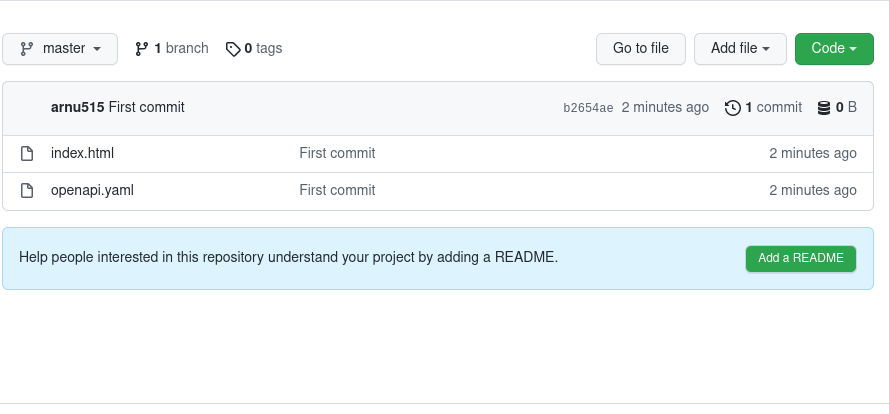
现在你有一个文档网站,你可以使用GitHub页面来部署它,让世界看到。作为前提的一部分,你创建了一个 新的GitHub存储库。 复制在 Quick Setup 中显示的克隆URL。 您将使用 git 命令将您的 openapi.yaml 和 index.html 文件推到GitHub。 请确保在包含这两个文件的文件夹中运行下面的命令。
首先,您将初始化 git 存储库,并委托所有文件:
1git init
2git add .
3git commit -m "First commit" # Feel free to change this message
接下来,你将部署你的更改到GitHub。首先,你需要告诉git你的GitHub存储库应该是远程存储库。
1git remote add origin YOUR_GITHUB_REPO_URL
最后,用这个命令将更改推到 GitHub:
1git push origin main
注意:Git已将默认分支的名称从master更改为main,因此在上面的命令中使用main。
更新GitHub,你应该看到你的两个文件在那里。
现在你需要启用 GitHub 页面。 转到你的存储库的设置,然后点击 页面 按钮在** 页面栏上。 更改源分支到默认分支(通常是)和文件夹到/ (根),然后点击保存 。
最后,请访问 https://your_username.github.io/your_repo_name,您应该看到您刚刚创建的 Redoc 页面。您可以查看 我的版本在这里发布到 GitHub 页面。
有了这一点,您的API现在可供任何人使用上面的URL查看。
结论
在本教程中,您记录了 JSONPlaceholder API 的 /posts 路径. 您记录了路径参数以及请求器官和可能的响应。 您还学会了如何使用可重复使用的组件减少 boilerplate。 请自由检查 源代码和 现场版本。
作为下一步,尝试记录JSONPlacehiers提供的其他路线(例如`/用户 ' ),或者用自己的API来尝试. 您可以通过使用像 [Docasaurus] (https://www.docasaurus.com/] 这样的工具来添加解释和引导用户的文档,从这里向前走. 记住要保留你的API spec[DRY] (https://en.wikipedia.org/wiki/Don%27t_repeat_yourself)并方便地阅读,这样你就可以在未来对其进行修改. 失眠也有其他特征,比如测试和调试你的API的能力,所以通过读取文档来确认这些功能.