介绍
默认情况下, Jenkins配备了内置的Winstone Web 服务器,可在端口 8080上收听,方便开始使用。 但是,使用 SSL 保护 Jenkins 以保护通过 Web 界面传输的密码和敏感数据也是一个好主意。
在本教程中,您将将 Nginx 配置为反向代理,以将客户端请求导向 Jenkins。
前提条件
首先,你需要以下几点:
- 1个Ubuntu 20.04服务器,配置了一个非root sudo启用的用户和防火墙,遵循Ubuntu 20.04初始服务器设置指南.
- Jenkins已安装,遵循如何在Ubuntu 20.04上安装Jenkins的步骤。
- Nginx 已安装,遵循 [如何在 Ubuntu 20.04 上安装 Nginx (https://andsky.com/tech/tutorials/how-to-install-nginx-on-ubuntu-20-04 )
- 联合国 由让我们加密提供的一个域的SSL证书. 跟 [如何用Ubuntu 20.04 加密方式保护 Nginx (https://andsky.com/tech/tutorials/how-to-secure-nginx-with-let-s-encrypt-on-ubuntu-20-04) 以获取此证书 。 注意您需要拥有或控制的 [注册域名] (https://www.digitalocean.com/docs/networking/dns/) 。 此教程将使用域名 ** example.com 通通. .
第1步:配置 Nginx
在前提教程中(https://andsky.com/tech/tutorials/how-to-secure-nginx-with-let-s-encrypt-on-ubuntu-20-04),您配置了 Nginx 以在 /etc/nginx/sites-available/example.com 文件中使用 SSL。 打开此文件以添加反向代理设置:
1sudo nano /etc/nginx/sites-available/example.com
在 SSL 配置设置的服务器块中,添加 Jenkins 特定的访问和错误日志:
 1[label /etc/nginx/sites-available/example.com]
 2. . .
 3server {
 4        . . .
 5        # SSL Configuration
 6        #
 7        listen [::]:443 ssl ipv6only=on; # managed by Certbot
 8        listen 443 ssl; # managed by Certbot
 9        access_log            /var/log/nginx/jenkins.access.log;
10        error_log             /var/log/nginx/jenkins.error.log;
11        . . .
12        }
由于我们正在向Jenkins发送所有请求,我们将评论默认的‘try_files’行,否则在请求到达Jenkins之前会返回404错误:
1[label /etc/nginx/sites-available/example.com]
2. . .
3           location / {
4                # First attempt to serve request as file, then
5                # as directory, then fall back to displaying a 404.
6                # try_files $uri $uri/ =404;        }
7. . .
现在让我们添加代理设置,其中包括:
- " 代用-参数 " : `/etc/nginx/proxy_params'文件由Nginx提供,并确保重要信息,包括主机名,客户端请求的协议,以及客户端IP地址,在日志文件中保留和提供.
- `代理通过 ' : 这确定了代理服务器的协议和地址,在这种情况下,代理服务器将是Jenkins服务器,通过 " 8080 " 端口的 " localhost " 访问。
- `代理_读_时出': 这使得Nginx的60秒默认值增加到Jenkins推荐的90秒值.
- `代理-直接 ' : 这保证了答复正确重写,以包括正本主机名. .
请确保在下面的proxy_redirect行中代替您的 SSL 安全域名为example.com:
 1[label /etc/nginx/sites-available/example.com]
 2Location /
 3. . .
 4           location / {
 5                # First attempt to serve request as file, then
 6                # as directory, then fall back to displaying a 404.
 7                # try_files $uri $uri/ =404;
 8                include /etc/nginx/proxy_params;
 9                proxy_pass http://localhost:8080;
10                proxy_read_timeout 90s;
11                # Fix potential "It appears that your reverse proxy setup is broken" error.
12                proxy_redirect http://localhost:8080 https://example.com;
一旦你做了这些更改,保存文件并离开编辑器,我们会暂停重新启动 Nginx 直到我们配置了 Jenkins,但我们现在可以测试我们的配置:
1sudo nginx -t
如果一切顺利,命令将返回:
1[secondary_label Output]
2nginx: the configuration file /etc/nginx/nginx.conf syntax is ok
3nginx: configuration file /etc/nginx/nginx.conf test is successful
否则,修复报告的任何错误,直到测试通过。
注意: 如果您错误地配置),您将在您的 Jenkins Configuration 页面中看到类似的内容。

如果您看到此错误,请在 Nginx 配置中双重检查proxy_pass和proxy_redirect设置。
第2步:配置Jenkins
要让 Jenkins 与 Nginx 合作,您需要更新 Jenkins 配置,以便 Jenkins 服务器只在)。
让我们修改/etc/default/jenkins配置文件以进行这些调整:
1sudo nano /etc/default/jenkins
查找JENKINS_ARGS行,并将--httpListenAddress=127.0.0.1添加到现有参数中:
1[label /etc/default/jenkins]
2. . .
3JENKINS_ARGS="--webroot=/var/cache/$NAME/war --httpPort=$HTTP_PORT --httpListenAddress=127.0.0.1"
保存和退出文件。
若要使用新的配置设置,请重新启动 Jenkins:
1sudo systemctl restart jenkins
由于systemctl没有显示输出,请检查状态:
1sudo systemctl status jenkins
您应该在活跃行中看到活跃状态:
1[secondary_label Output]
2● jenkins.service - LSB: Start Jenkins at boot time
3   Loaded: loaded (/etc/init.d/jenkins; generated)
4   Active: active (exited) since Mon 2018-07-09 20:26:25 UTC; 11s ago
5     Docs: man:systemd-sysv-generator(8)
6  Process: 29766 ExecStop=/etc/init.d/jenkins stop (code=exited, status=0/SUCCESS)
7  Process: 29812 ExecStart=/etc/init.d/jenkins start (code=exited, status=0/SUCCESS)
重新启动 Nginx:
1sudo systemctl restart nginx
查看状态:
1sudo systemctl status nginx
1[secondary_label Output]
2● nginx.service - A high performance web server and a reverse proxy server
3   Loaded: loaded (/lib/systemd/system/nginx.service; enabled; vendor preset: enabled)
4   Active: active (running) since Mon 2018-07-09 20:27:23 UTC; 31s ago
5     Docs: man:nginx(8)
6  Process: 29951 ExecStop=/sbin/start-stop-daemon --quiet --stop --retry QUIT/5 --pidfile /run/nginx.pid (code=exited, status=0/SUCCESS)
7  Process: 29963 ExecStart=/usr/sbin/nginx -g daemon on; master_process on; (code=exited, status=0/SUCCESS)
8  Process: 29952 ExecStartPre=/usr/sbin/nginx -t -q -g daemon on; master_process on; (code=exited, status=0/SUCCESS)
9 Main PID: 29967 (nginx)
当两个服务器重新启动时,您应该能够使用 HTTP 或 HTTPS 访问该域,HTTP 请求将自动重定向到 HTTPS,Jenkins 网站将安全地服务。
步骤 3 – 测试配置
现在你已启用加密,你可以通过重置管理密码来测试配置. 让我们开始通过访问网站通过HTTP来验证你可以到达Jenkins并被重定向到HTTPS。
在您的 Web 浏览器中,输入 http://example.com,将您的域名替换为 example.com. 按下 ENTER 后,URL 应以 https 开始,位置栏应表示连接是安全的。
您可以在)中输入用户字段,并在密码字段中选择的密码。
一旦登录,您可以更改密码,以确保它是安全的。
在屏幕的右上角点击您的用户名. 在主个人资料页面上,从页面左侧的列表中选择 配置 :
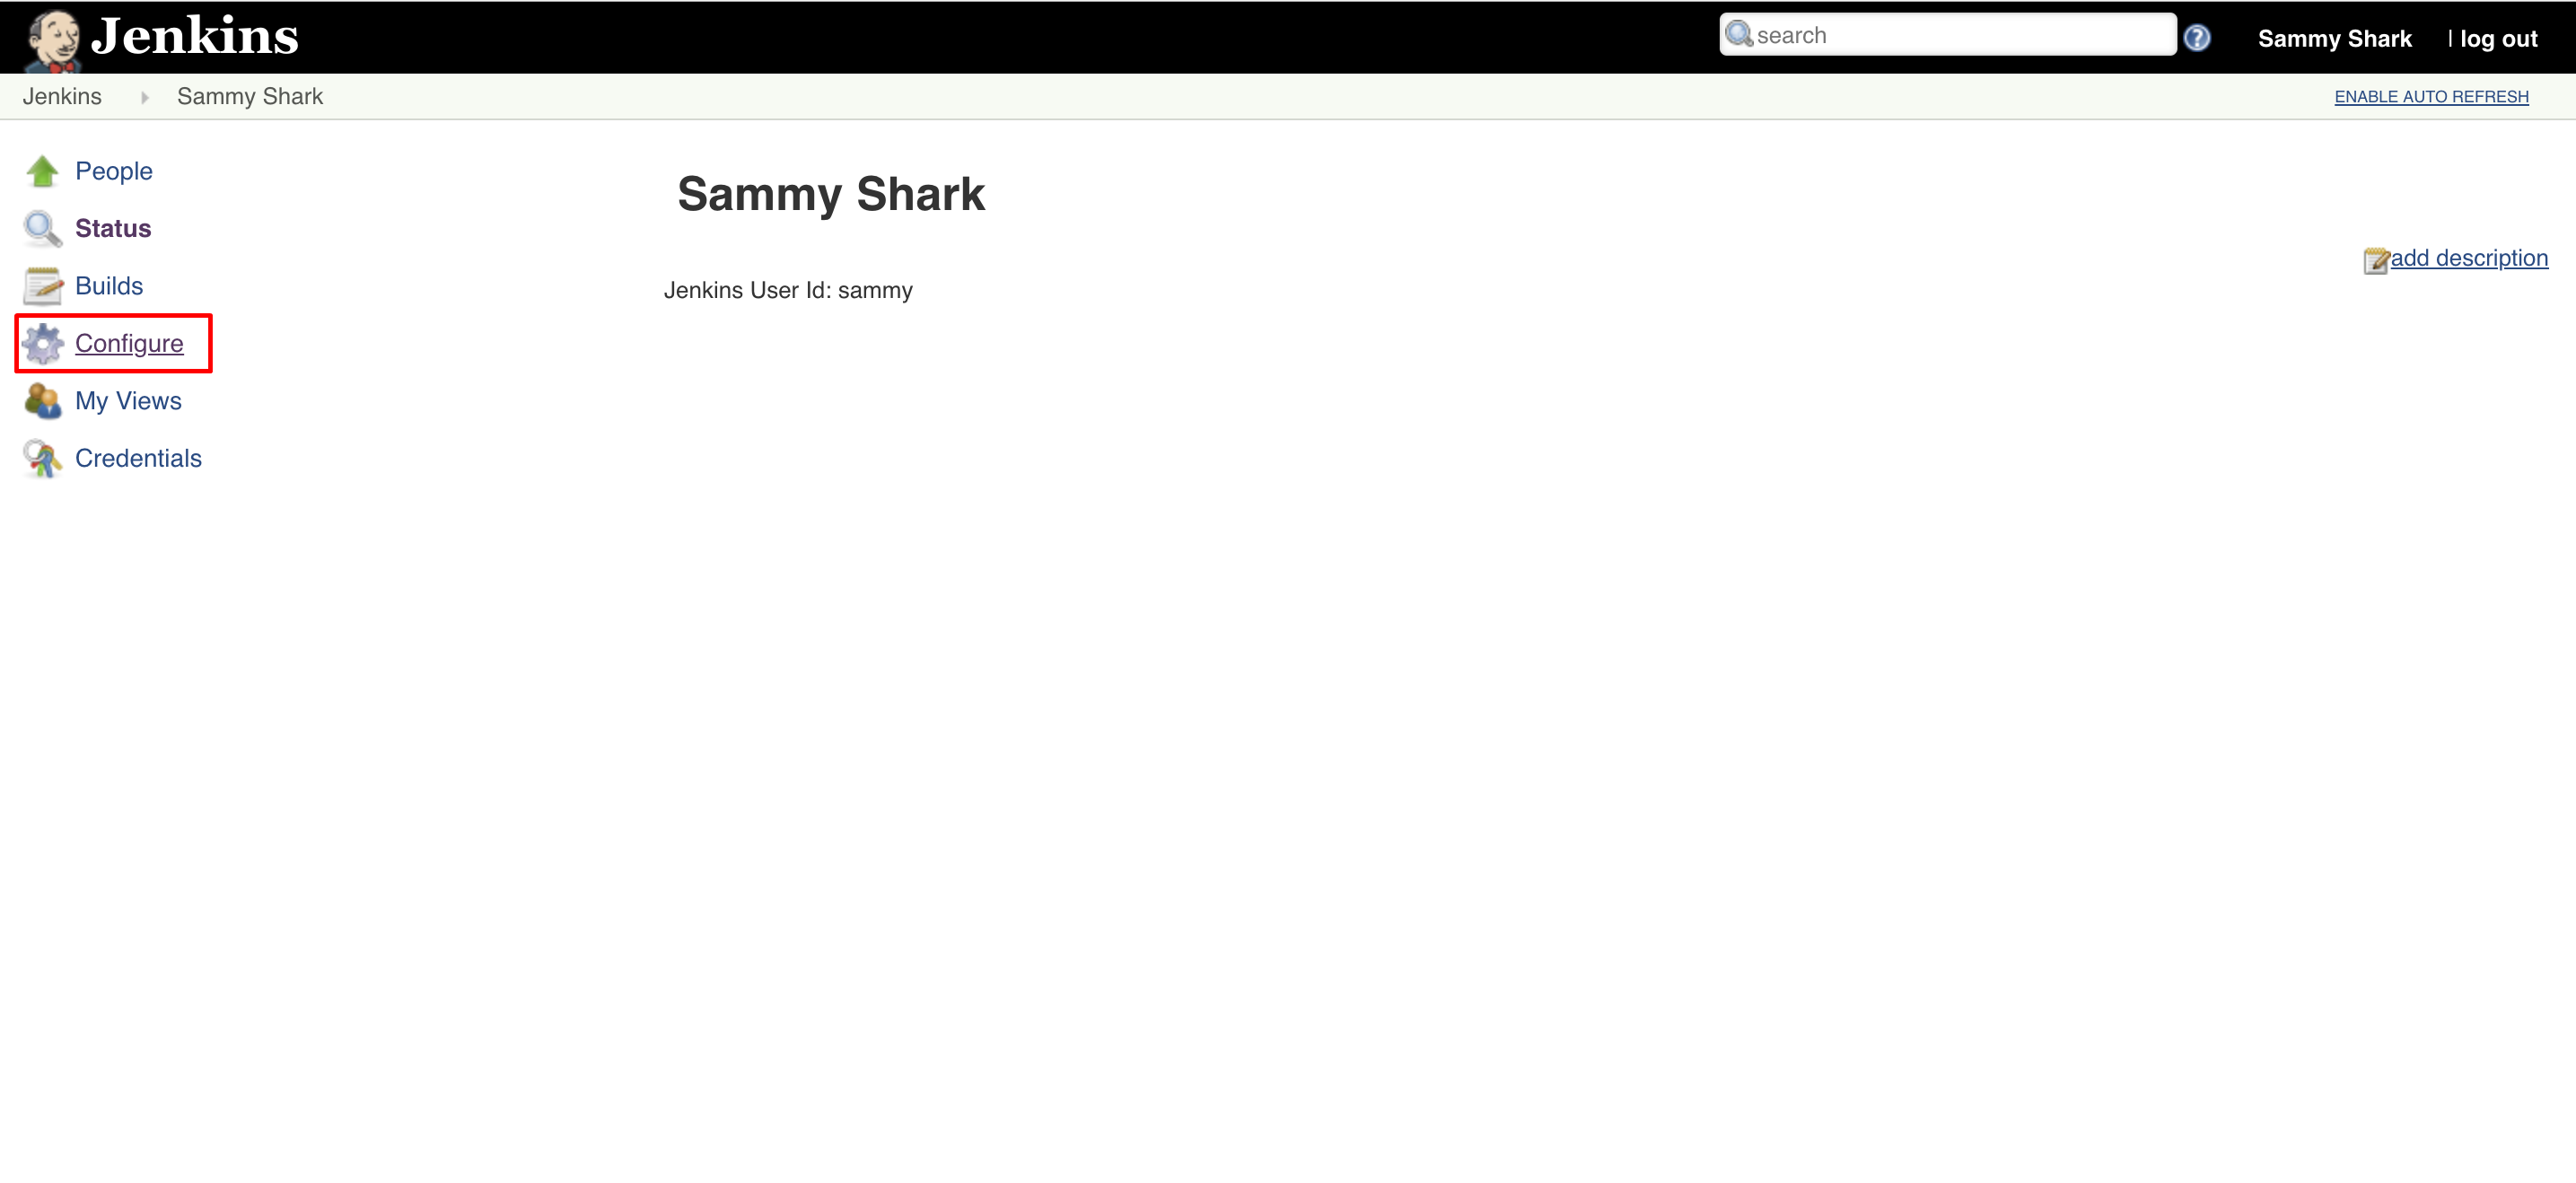
这会带你到一个新的页面,在那里你可以输入并确认一个新的密码:
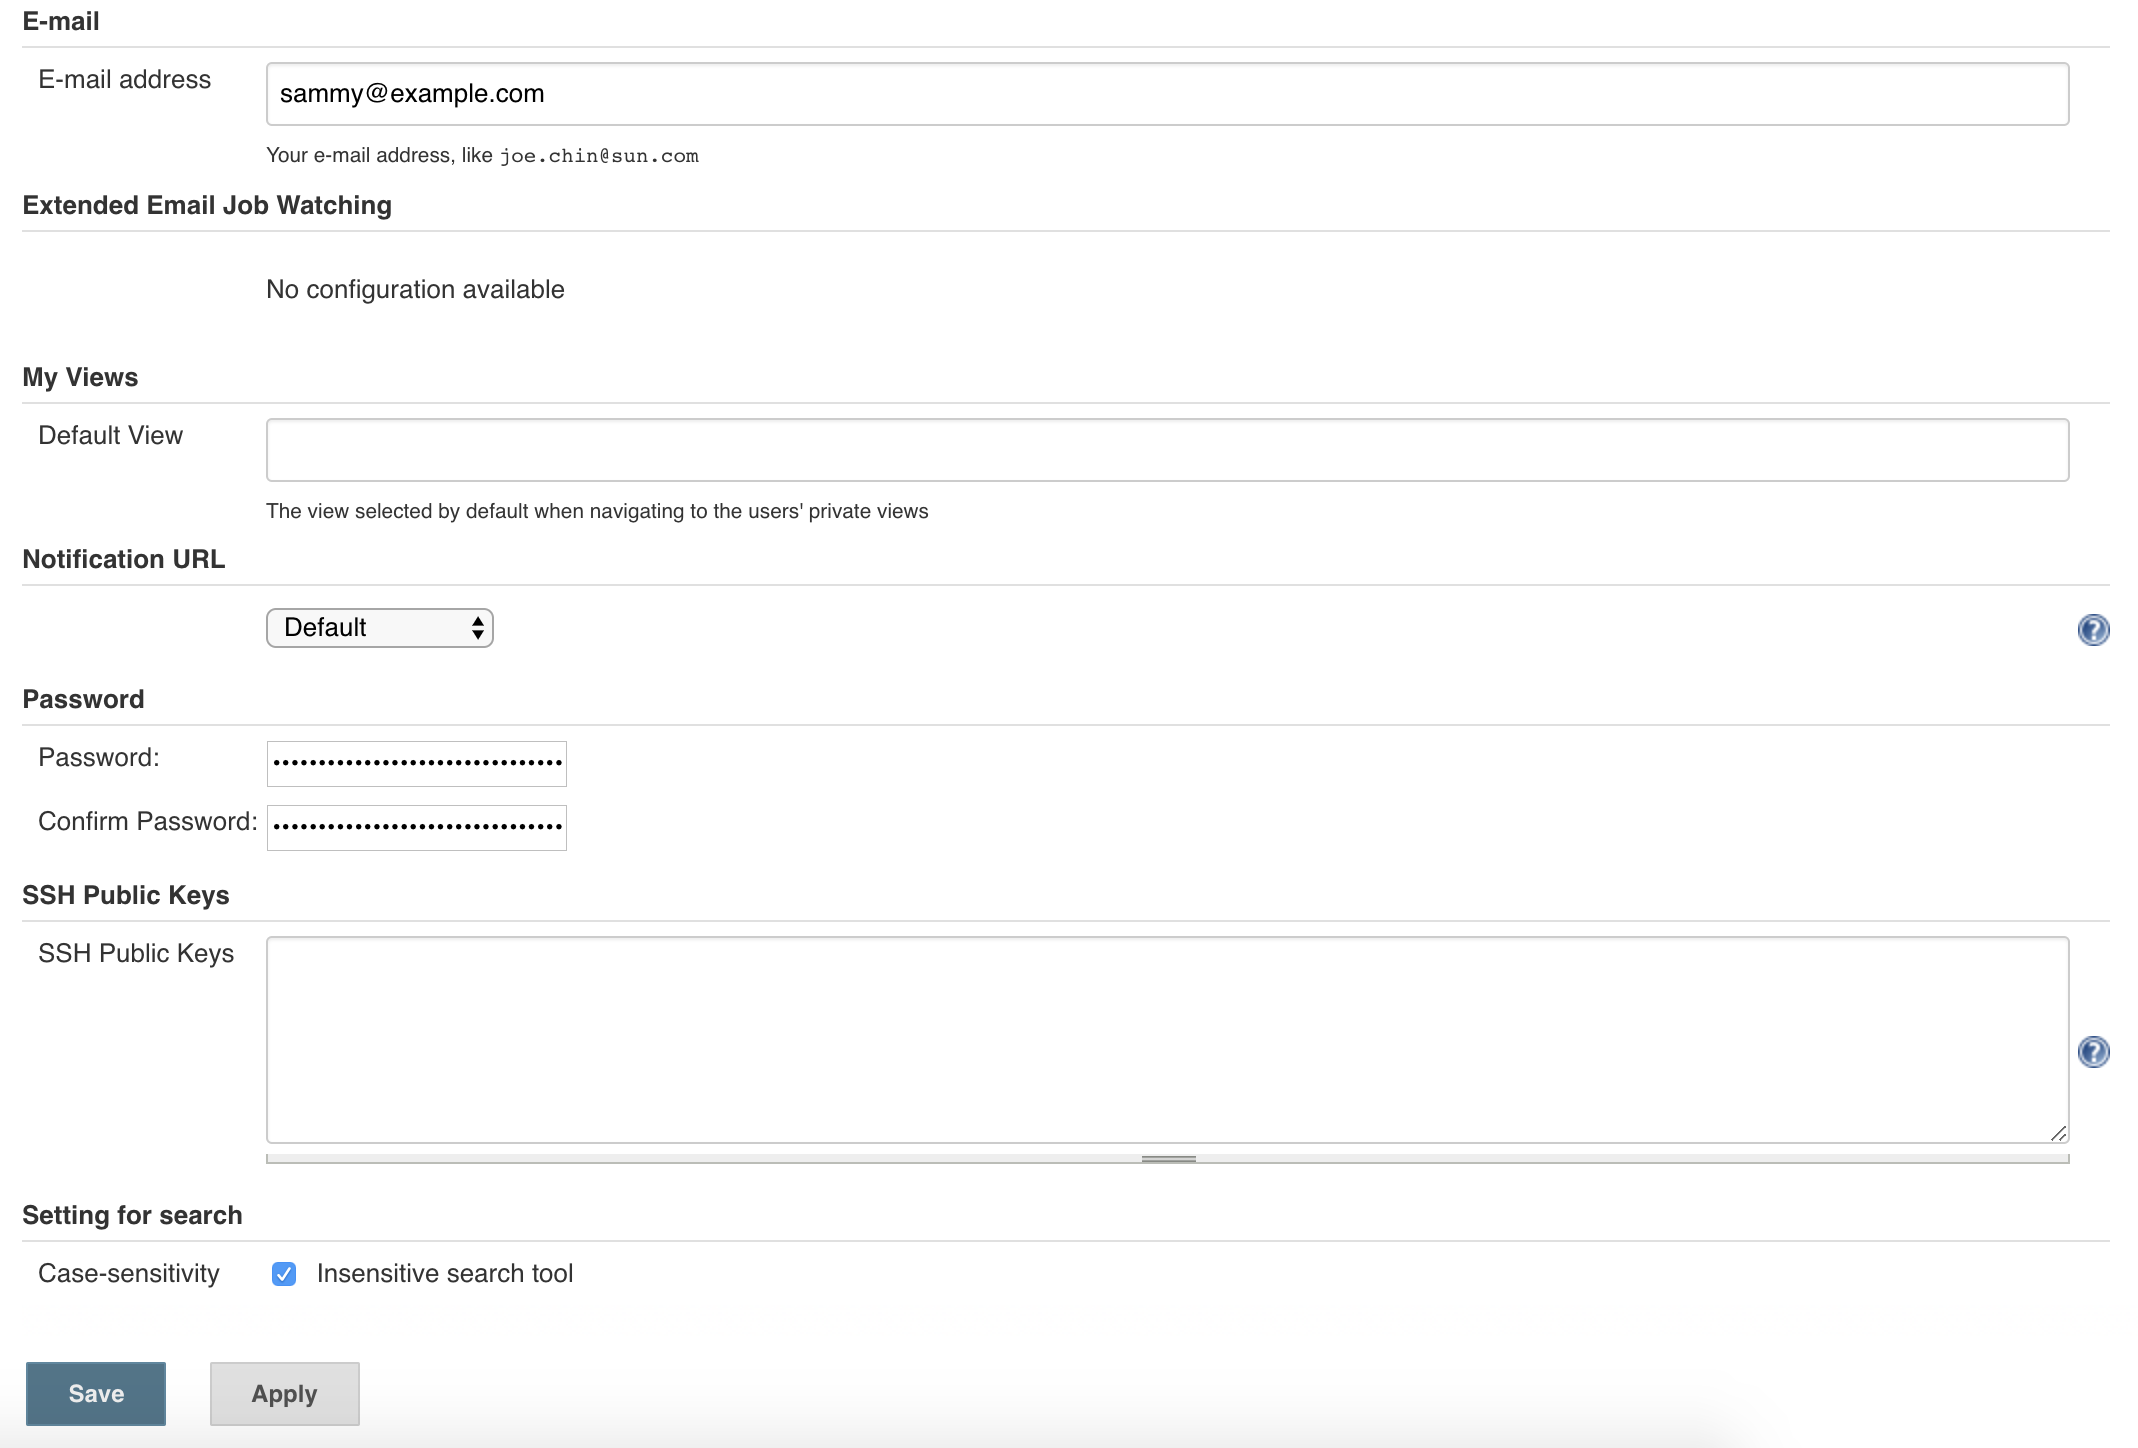
通过点击保存来确认新密码,您现在可以安全地使用Jenkins Web接口。
结论
在这个教程中,你配置了Nginx作为Jenkins内置的网络服务器的倒置代用,以保障您通过网络界面传输的证书和其他信息. 现在Jenkins安全了,你可以学会如何设置连续集成管道自动测试代码更改. 考虑你是否对Jenkins来说是新手的其他资源是[Jenkins项目"创建你的第一个管道"(https://jenkins.io/doc/pipeline/tour/hello-world/)教程或社区贡献插件库.