作者选择了 维基媒体基金会作为 写给捐赠计划的一部分接受捐赠。
介绍
GraphQL 是 Facebook 于 2015 年发布的一种 API 查询语言,可以轻松查询和突变来自不同数据收集的数据。从单个终端中,您可以通过单个 POST 请求查询和突变多个数据源。 GraphQL 解决了 REST API 架构中一些常见的设计缺陷,例如终端返回比您实际需要更多的信息的情况。
这些问题不适用于 GraphQL,因为它只有一个端点,可以返回来自多个集合的数据。它返回的数据取决于您发送到该端点的 _ Query_。 在此查询中,您定义了您想要接收的数据的结构,包括任何嵌入式数据收集。 除了查询,您还可以使用 mutation 更改 GraphQL 服务器上的数据,以及 subscription 监控数据的变化。 有关 GraphQL 及其概念的更多信息,您可以访问官方网站上的 文档。
由于 GraphQL 是一个具有很大的灵活性的查询语言,因此它特别适合像 MongoDB这样的基于文档的数据库。这两种技术都是基于等级的、编写的方案,并且在 JavaScript 社区中很受欢迎。
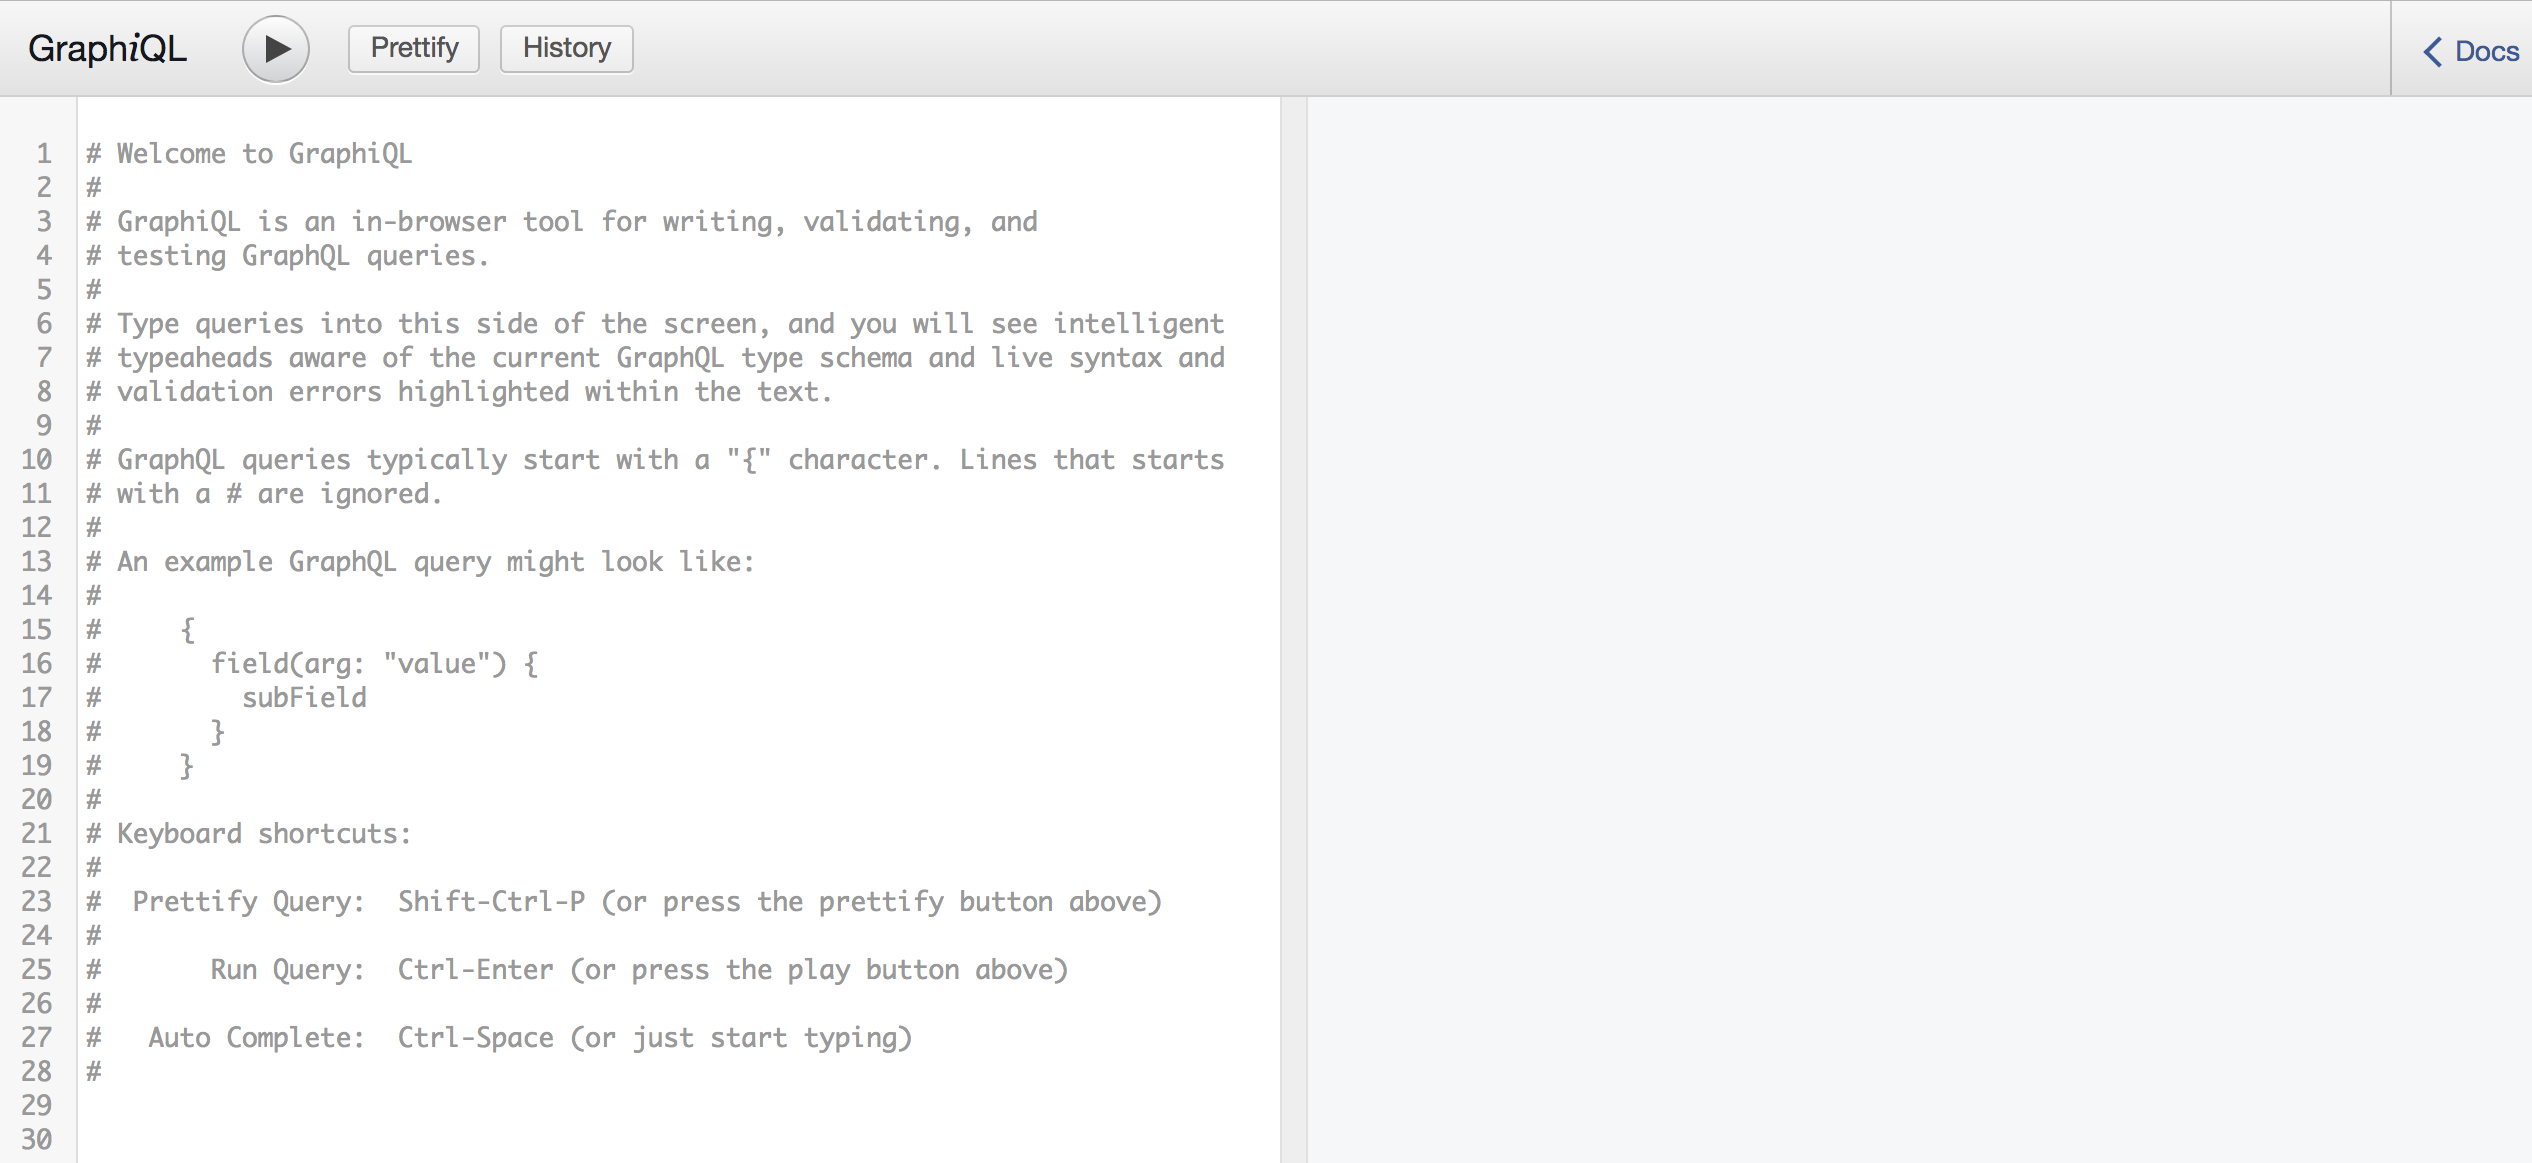
在本教程中,您将使用 Node.js 构建和部署一个 GraphQL 服务器,该服务器可以查询和改变在 Ubuntu 18.04 上运行的 MongoDB 数据库中的数据。本教程结束时,您将能够使用单个终端访问数据库中的数据,无论是通过直接通过终端发送请求到服务器,还是使用预先制作的 GraphiQL 游戏界面。
在本教程结束时,您将使用 GraphiQL 游戏场地快速与您的 GraphQL 服务器进行交互:
前提条件
在您开始本指南之前,您将需要以下内容:
一个运行在 Ubuntu 18.04 的 MongoDB 服务器,可以通过遵循 Ubuntu 18.04 初始服务器安装指南设置,包括一个 sudo 非根用户和防火墙.
- 一个运行在 Ubuntu 18.04 上运行的 MongoDB 安装,您可以通过遵循我们的教程 How to Install MongoDB on Ubuntu 18.04设置。
- Nginx 安装,如在 How to install Nginx on Ubuntu 18.04中所见,包括 ** Step 4 – Setting Up Server Blocks** .
- 为了允许远程访问您的 GraphQL 服务器,您需要一个合格的域名_ (FQDN) 和一个记录,指向
步骤 1 – 设置 MongoDB 数据库
在创建 GraphQL 服务器之前,请确保您的数据库正确配置,已启用身份验证,并且充满了样本数据. 为此,您需要从您的命令提示连接到运行 MongoDB 数据库的 Ubuntu 18.04 服务器。
建立连接后,运行以下命令来检查 MongoDB 是否活跃并在您的服务器上运行:
1sudo systemctl status mongodb
您将在终端中看到以下输出,表示 MongoDB 数据库正在积极运行:
1[secondary_label Output]
2● mongodb.service - An object/document-oriented database
3   Loaded: loaded (/lib/systemd/system/mongodb.service; enabled; vendor preset: enabled)
4   Active: active (running) since Sat 2019-02-23 12:23:03 UTC; 1 months 13 days ago
5     Docs: man:mongod(1)
6 Main PID: 2388 (mongod)
7    Tasks: 25 (limit: 1152)
8   CGroup: /system.slice/mongodb.service
9           └─2388 /usr/bin/mongod --unixSocketPrefix=/run/mongodb --config /etc/mongodb.conf
在创建您将存储样本数据的数据库之前,您需要先创建一个 admin 用户,因为常规用户是针对特定数据库的。
1mongo
使用 MongoDB 壳,您将直接访问 MongoDB 数据库,并可以创建用户或数据库和查询数据. 在这个壳中,执行以下命令,将新用户添加到 MongoDB. 您可以用自己的用户名和密码组合代替突出的关键字,但不要忘记在某个地方写下它们。
1use admin
2db.createUser({
3    user: "admin_username",
4    pwd: "admin_password",
5    roles: [{ role: "root", db: "admin"}]
6})
上一行命令的第一行选择了名为admin的数据库,这是存储所有管理员角色的数据库. 使用方法db.createUser()可以创建实际用户并定义其用户名、密码和角色。
执行此命令将返回:
 1[secondary_label Output]
 2Successfully added user: {
 3    "user" : "admin_username",
 4    "roles" : [
 5    	{
 6    		"role" : "root",
 7    		"db" : "admin"
 8    	}
 9    ]
10}
现在您可以通过键入exit来关闭 MongoDB 壳。
接下来,再次登录 MongoDB 壳,但这次使用新创建的 admin 用户:
1mongo -u "admin_username" -p "admin_password" --authenticationDatabase "admin"
此命令将打开 MongoDB 壳作为特定用户,其中-u旗指定用户名和-p旗指定该用户的密码。
接下来,您将切换到一个新的数据库,然后使用db.createUser()方法创建一个新的用户,具有对该数据库进行更改的权限。
在 MongoDB 壳中运行以下命令:
1use database_name
2db.createUser({
3    user: "username",
4    pwd: "password",
5    roles: ["readWrite"]
6})
这将返回如下:
1[secondary_label Output]
2Successfully added user: { "user" : "username", "roles" : ["readWrite"] }
在创建数据库和用户后,请填写此数据库的样本数据,该数据库可以在本教程中稍后由 GraphQL 服务器查询。 为此,您可以使用来自 MongoDB 网站的 bios collection样本。通过执行下面的代码片段中的命令,您将将这个bios集数据集的较小的版本插入您的数据库。您可以用自己的信息代替所突出的部分,但为本教程的目的,请将集合命名为bios:
 1db.bios.insertMany([
 2   {
 3       "_id" : 1,
 4       "name" : {
 5           "first" : "John",
 6           "last" : "Backus"
 7       },
 8       "birth" : ISODate("1924-12-03T05:00:00Z"),
 9       "death" : ISODate("2007-03-17T04:00:00Z"),
10       "contribs" : [
11           "Fortran",
12           "ALGOL",
13           "Backus-Naur Form",
14           "FP"
15       ],
16       "awards" : [
17           {
18               "award" : "W.W. McDowell Award",
19               "year" : 1967,
20               "by" : "IEEE Computer Society"
21           },
22           {
23               "award" : "National Medal of Science",
24               "year" : 1975,
25               "by" : "National Science Foundation"
26           },
27           {
28               "award" : "Turing Award",
29               "year" : 1977,
30               "by" : "ACM"
31           },
32           {
33               "award" : "Draper Prize",
34               "year" : 1993,
35               "by" : "National Academy of Engineering"
36           }
37       ]
38   },
39   {
40       "_id" : ObjectId("51df07b094c6acd67e492f41"),
41       "name" : {
42           "first" : "John",
43           "last" : "McCarthy"
44       },
45       "birth" : ISODate("1927-09-04T04:00:00Z"),
46       "death" : ISODate("2011-12-24T05:00:00Z"),
47       "contribs" : [
48           "Lisp",
49           "Artificial Intelligence",
50           "ALGOL"
51       ],
52       "awards" : [
53           {
54               "award" : "Turing Award",
55               "year" : 1971,
56               "by" : "ACM"
57           },
58           {
59               "award" : "Kyoto Prize",
60               "year" : 1988,
61               "by" : "Inamori Foundation"
62           },
63           {
64               "award" : "National Medal of Science",
65               "year" : 1990,
66               "by" : "National Science Foundation"
67           }
68       ]
69   }
70]);
此代码块是一个由多个对象组成的数组,包含有关过去成功科学家的信息. 运行这些命令后,您将收到以下消息,说明数据已被添加:
1[secondary_label Output]
2{
3    "acknowledged" : true,
4    "insertedIds" : [
5    	1,
6    	ObjectId("51df07b094c6acd67e492f41")
7    ]
8}
看到成功消息后,您可以通过键入退出来关闭 MongoDB 壳。接下来,配置 MongoDB 安装以启用授权,以便只有经过身份验证的用户才能访问数据。
1sudo nano /etc/mongodb.conf
对下列代码中突出列出的行进行排除,以允许授权:
1[label /etc/mongodb.conf]
2...
3# Turn on/off security. Off is currently the default
4#noauth = true
5auth = true
6...
若要激活这些更改,请通过运行以下方式重新启动 MongoDB:
1sudo systemctl restart mongodb
通过执行命令,确保数据库再次运行:
1sudo systemctl status mongodb
这将产生类似于以下的输出:
1[secondary_label Output]
2● mongodb.service - An object/document-oriented database
3   Loaded: loaded (/lib/systemd/system/mongodb.service; enabled; vendor preset: enabled)
4   Active: active (running) since Sat 2019-02-23 12:23:03 UTC; 1 months 13 days ago
5     Docs: man:mongod(1)
6 Main PID: 2388 (mongod)
7    Tasks: 25 (limit: 1152)
8   CGroup: /system.slice/mongodb.service
9           └─2388 /usr/bin/mongod --unixSocketPrefix=/run/mongodb --config /etc/mongodb.conf
若要确保您的用户可以连接到您刚刚创建的数据库,请尝试以以下命令作为身份验证的用户打开 MongoDB 壳:
1mongo -u "username" -p "password" --authenticationDatabase "database_name"
此操作使用与以前相同的旗帜,仅此时将--authenticationDatabase设置为您创建并填写样本数据的数据库。
现在你已经成功地添加了一个 admin 用户和另一个用户,谁有阅读 / 写入访问数据库与样本数据. 此外,数据库已启用授权,这意味着你需要一个用户名和密码来访问它. 在下一步,你将创建的GraphQL服务器,将连接到这个数据库后在教程。
步骤 2:创建 GraphQL 服务器
有了数据库配置并填充了样本数据,现在是时候创建一个可以查询和突变这些数据的 GraphQL 服务器了。 为此,您将使用 Express和 express-graphql,这两个都是在 Node.js 上运行的。
第一步是确保您的机器是最新的:
1sudo apt update
接下来,通过运行以下命令在您的服务器上安装 Node.js. 与 Node.js 一起,您还将安装 npm,一个在 Node.js 上运行的 JavaScript 包管理器。
1sudo apt install nodejs npm
遵循安装过程后,请检查您刚刚安装的 Node.js 版本是否为 v8.10.0 或更高版本:
1node -v
这将返回如下:
1[secondary_label Output]
2v8.10.0
要初始化一个新的JavaScript项目,请在服务器上作为sudo用户运行以下命令,并用项目的名称替换突出的关键字。
首先进入您的服务器的 root 目录:
1cd
一旦有,创建一个新的目录,以您的项目命名:
1mkdir project_name
转到这个目录:
1cd project_name
最后,用以下命令初始化一个新的 npm 包:
1sudo npm init -y
在运行 npm init -y 后,您将收到一个成功消息,即创建了以下 package.json 文件:
 1[secondary_label Output]
 2Wrote to /home/username/project_name/package.json:
 3
 4{
 5  "name": "project_name",
 6  "version": "1.0.0",
 7  "description": "",
 8  "main": "index.js",
 9  "scripts": {
10    "test": "echo \"Error: no test specified\" && exit 1"
11  },
12  "keywords": [],
13  "author": "",
14  "license": "ISC"
15}
<$>[note]
注: 您也可以在没有-y旗帜的情况下执行npm init,然后您会回答多个问题来设置项目名称、作者等。
现在您已经初始化了项目,安装您需要设置 GraphQL 服务器的软件包:
1sudo npm install --save express express-graphql graphql
创建一个名为index.js的新文件,然后通过运行来打开该文件:
1sudo nano index.js
接下来,将以下代码块添加到新创建的文件中,以设置 GraphQL 服务器:
 1[label index.js]
 2const express = require('express');
 3const graphqlHTTP = require('express-graphql');
 4const { buildSchema } = require('graphql');
 5
 6// Construct a schema, using GraphQL schema language
 7const schema = buildSchema(`
 8  type Query {
 9    hello: String
10  }
11`);
12
13// Provide resolver functions for your schema fields
14const resolvers = {
15  hello: () => 'Hello world!'
16};
17
18const app = express();
19app.use('/graphql', graphqlHTTP({
20  schema,
21  rootValue: resolvers
22}));
23app.listen(4000);
24
25console.log(`🚀 Server ready at http://localhost:4000/graphql`);
这个代码块由几个部分组成,这些部分都很重要,首先你描述了由 GraphQL API 返回的数据的方案:
1[label index.js]
2...
3// Construct a schema, using GraphQL schema language
4const schema = buildSchema(`
5  type Query {
6    hello: String
7  }
8`);
9...
Query类型定义了哪些查询可以执行,以及它将以何种格式返回结果,正如您所看到的,唯一定义的查询是Hello,该查询以String格式返回数据。
下一节设置了 resolvers,其中数据与您可以查询的方案相匹配:
1[label index.js]
2...
3// Provide resolver functions for your schema fields
4const resolvers = {
5  hello: () => 'Hello world!'
6};
7...
这些解决方案直接链接到方案,并返回与这些方案匹配的数据。
此代码块的最后部分初始化了 GraphQL 服务器,用 Express 创建了 API 终端,并描述了运行 GraphQL 终端的端口:
 1[label index.js]
 2...
 3const app = express();
 4app.use('/graphql', graphqlHTTP({
 5  schema,
 6  rootValue: resolvers
 7}));
 8app.listen(4000);
 9
10console.log(`🚀 Server ready at http://localhost:4000/graphql`);
添加这些行后,保存并退出index.js。
接下来,要实际运行 GraphQL 服务器,您需要使用 Node.js 运行文件 index.js. 这可以从命令行手动执行,但为您设置 package.json` 文件是常见的做法。
打开package.json文件:
1sudo nano package.json
添加以下突出的行到此文件:
 1[label package.json]
 2{
 3  "name": "project_name",
 4  "version": "1.0.0",
 5  "description": "",
 6  "main": "index.js",
 7  "scripts": {
 8    "start": "node index.js",
 9    "test": "echo \"Error: no test specified\" && exit 1"
10  },
11  "keywords": [],
12  "author": "",
13  "license": "ISC"
14}
保存和退出文件。
要启动 GraphQL 服务器,请在终端中执行以下命令:
1npm start
一旦运行此操作,终端提示将消失,并出现一个消息,确认 GraphQL 服务器正在运行:
1[secondary_label Output]
2🚀 Server ready at http://localhost:4000/graphql
如果您现在打开另一个终端会话,您可以通过执行以下命令来测试 GraphQL 服务器是否正在运行。
1curl -X POST -H "Content-Type: application/json" --data '{ "query": "{ hello }" }' http://localhost:4000/graphql
这将执行查询,如在您的代码中的 GraphQL 方案中所描述,并以可预测的 JSON 格式返回数据,该格式等于在解析器中返回的数据:
1[secondary_label Output]
2{ "data": { "hello": "Hello world!" } }
<$>[note]
注: 如果Express服务器崩溃或被困,您需要手动杀死在服务器上运行的节点过程。
1killall node
之后,您可以通过运行以下方式重新启动 GraphQL 服务器:
1npm start
美元
在此步骤中,您已经创建了第一个版本的 GraphQL 服务器,该服务器现在运行在可在您的服务器上访问的本地终端上。
步骤 3 – 连接到 MongoDB 数据库
有了 GraphQL 服务器,您现在可以设置与您之前配置和填充数据的 MongoDB 数据库的连接,并创建一个与这些数据匹配的新方案。
要从 GraphQL 服务器连接到 MongoDB,请从 npm 安装 MongoDB 的 JavaScript 包:
1sudo npm install --save mongodb
一旦安装,请在文本编辑器中打开index.js:
1sudo nano index.js
接下来,在导入的依赖性之后,添加以下突出代码到index.js,并用您自己的连接详细信息填写突出值到本地MongoDB数据库中。
1[label index.js]
2const express = require('express');
3const graphqlHTTP = require('express-graphql');
4const { buildSchema } = require('graphql');
5const { MongoClient } = require('mongodb');
6
7const context = () => MongoClient.connect('mongodb://username:password@localhost:27017/database_name', { useNewUrlParser: true }).then(client => client.db('database_name'));
8...
这些行将连接到本地 MongoDB 数据库的函数,名为 context。
接下来,在您的 index.js 文件中,通过插入以下突出的行,将文本函数添加到 GraphQL 服务器的初始化中:
 1[label index.js]
 2...
 3const app = express();
 4app.use('/graphql', graphqlHTTP({
 5  schema,
 6  rootValue: resolvers,
 7  context
 8}));
 9app.listen(4000);
10
11console.log(`🚀 Server ready at http://localhost:4000/graphql`);
现在你可以从你的解析器中调用这个背景函数,从而从MongoDB数据库中读取变量。如果你回头看本教程的第一步,你可以看到数据库中存在的值。从这里开始,定义一个新的GraphQL方案,匹配这个数据结构。 用以下突出线条重写常数的上一个值:
 1[label index.js]
 2...
 3// Construct a schema, using GrahQL schema language
 4const schema = buildSchema(`
 5  type Query {
 6    bios: [Bio]
 7  }
 8  type Bio {
 9    name: Name,
10    title: String,
11    birth: String,
12    death: String,
13    awards: [Award]
14  }
15  type Name {
16    first: String,
17    last: String
18  },
19  type Award {
20    award: String,
21    year: Float,
22    by: String
23  }
24`);
25...
此新类型由几个类型组成,包括其他两个非规模类型Name和Awards,这意味着这些类型不匹配预定义的格式,如String或Float。
此外,由于解析器将数据从数据库绑定到图表中,当您对图表进行更改时,请更新解析器的代码。创建一个名为bios的新解析器,该解析器等于图表中的Query和数据库中的集合名称。
将以下突出的行添加到 index.js 中:
1[label index.js]
2...
3// Provide resolver functions for your schema fields
4const resolvers = {
5  bios: (args, context) => context().then(db => db.collection('bios').find().toArray())
6};
7...
此函数将使用语境函数,您可以使用它从 MongoDB 数据库中获取变量。一旦您对代码进行了这些更改,请保存并退出 index.js。
要激活这些更改,您需要重新启动 GraphQL 服务器. 您可以通过使用键盘组合 CTRL + C 停止当前的流程,并通过运行开始 GraphQL 服务器:
1npm start
现在你可以使用更新的方案来查询数据库内部的数据. 如果你查看该方案,你会看到bios的Query返回Bio类型;这种类型也可以返回Name类型。
要返回数据库中所有 BIOS 的所有第一名和最后名称,请在新的终端窗口中向 GraphQL 服务器发送以下请求:
1curl -X POST -H "Content-Type: application/json" --data '{ "query": "{ bios { name { first, last } } }" }' http://localhost:4000/graphql
这会再次返回一个匹配方案结构的 JSON 对象:
1[secondary_label Output]
2{"data":{"bios":[{"name":{"first":"John","last":"Backus"}},{"name":{"first":"John","last":"McCarthy"}}]}}
您可以通过将查询扩展到Bio类型中描述的任何类型来轻松地从生物系统中获取更多变量。
此外,您可以通过指定一个id来获取一个生物。 要做到这一点,您需要将另一个类型添加到Query类型并扩展解析器。
1sudo nano index.js
添加以下突出的代码行:
 1[label index.js]
 2...
 3// Construct a schema, using GrahQL schema language
 4const schema = buildSchema(`
 5  type Query {
 6    bios: [Bio]
 7    bio(id: Int): Bio
 8  }
 9
10  ...
11
12  // Provide resolver functions for your schema fields
13  const resolvers = {
14    bios: (args, context) => context().then(db => db.collection('bios').find().toArray()),
15    bio: (args, context) => context().then(db => db.collection('bios').findOne({ _id: args.id }))
16  };
17  ...
保存和退出文件。
在运行 GraphQL 服务器的终端中,按CTRL +C,以阻止其运行,然后执行以下操作来重新启动它:
1npm start
在另一个终端窗口中,执行以下 GraphQL 请求:
1curl -X POST -H "Content-Type: application/json" --data '{ "query": "{ bio(id: 1) { name { first, last } } }" }' http://localhost:4000/graphql
这会返回具有等于1的id的生物的输入:
1[secondary_label Output]
2{ "data": { "bio": { "name": { "first": "John", "last": "Backus" } } } }
能够从数据库查询数据并非 GraphQL 的唯一功能;您也可以更改数据库中的数据。
1sudo nano index.js
除了Query类型,您还可以使用Mutation类型,允许您突变数据库。 若要使用此类型,请将其添加到方案中,并通过插入这些突出的行创建输入类型:
 1[label index.js]
 2...
 3// Construct a schema, using GraphQL schema language
 4const schema = buildSchema(`
 5  type Query {
 6    bios: [Bio]
 7    bio(id: Int): Bio
 8  }
 9  type Mutation {
10    addBio(input: BioInput) : Bio
11  }
12  input BioInput {
13    name: NameInput
14    title: String
15    birth: String
16    death: String
17  }
18  input NameInput {
19    first: String
20    last: String
21  }
22...
这些输入类型定义哪些变量可以用作输入,您可以在解析器中访问这些变量,并使用它们将新文档插入数据库。
1[label index.js]
2...
3// Provide resolver functions for your schema fields
4const resolvers = {
5  bios: (args, context) => context().then(db => db.collection('bios').find().toArray()),
6  bio: (args, context) => context().then(db => db.collection('bios').findOne({ _id: args.id })),
7  addBio: (args, context) => context().then(db => db.collection('bios').insertOne({ name: args.input.name, title: args.input.title, death: args.input.death, birth: args.input.birth})).then(response => response.ops[0])
8};
9...
与常规查询的解析器一样,你需要返回 index.js 中的解析器的值,在突变中,突变类型Bio时,你会返回突变生物的值。
在此时,您的 index.js 文件将包含以下行:
 1[label index.js]
 2iconst express = require('express');
 3const graphqlHTTP = require('express-graphql');
 4const { buildSchema } = require('graphql');
 5const { MongoClient } = require('mongodb');
 6
 7const context = () => MongoClient.connect('mongodb://username:password@localhost:27017/database_name', { useNewUrlParser: true })
 8  .then(client => client.db('GraphQL_Test'));
 9
10// Construct a schema, using GraphQL schema language
11const schema = buildSchema(`
12  type Query {
13    bios: [Bio]
14    bio(id: Int): Bio
15  }
16  type Mutation {
17    addBio(input: BioInput) : Bio
18  }
19  input BioInput {
20    name: NameInput
21    title: String
22    birth: String
23    death: String
24  }
25  input NameInput {
26    first: String
27    last: String
28  }
29  type Bio {
30    name: Name,
31    title: String,
32    birth: String,
33    death: String,
34    awards: [Award]
35  }
36  type Name {
37    first: String,
38    last: String
39  },
40  type Award {
41    award: String,
42    year: Float,
43    by: String
44  }
45`);
46
47// Provide resolver functions for your schema fields
48const resolvers = {
49  bios: (args, context) =>context().then(db => db.collection('Sample_Data').find().toArray()),
50  bio: (args, context) =>context().then(db => db.collection('Sample_Data').findOne({ _id: args.id })),
51  addBio: (args, context) => context().then(db => db.collection('Sample_Data').insertOne({ name: args.input.name, title: args.input.title, death: args.input.death, birth: args.input.birth})).then(response => response.ops[0])
52};
53
54const app = express();
55app.use('/graphql', graphqlHTTP({
56  schema,
57  rootValue: resolvers,
58  context
59}));
60app.listen(4000);
61
62console.log(`🚀 Server ready at http://localhost:4000/graphql`);
保存和退出index.js。
要检查您的新突变是否正在工作,请通过按CTRL +c并在运行您的 GraphQL 服务器的终端中运行npm start来重新启动 GraphQL 服务器,然后打开另一个终端会话来执行以下curl请求。
1curl -X POST -H "Content-Type: application/json" --data '{ "query": "mutation { addBio(input: { name: { first: \"test\", last: \"user\" } }) { name { first, last } } }" }' http://localhost:4000/graphql
这会返回以下结果,这意味着您刚刚将新生物插入到数据库中:
1[secondary_label Output]
2{ "data": { "addBio": { "name": { "first": "test", "last": "user" } } } }
在此步骤中,您创建了与 MongoDB 和 GraphQL 服务器的连接,允许您通过执行 GraphQL 查询从该数据库中获取和突变数据。
步骤 4 – 允许远程访问
设置了数据库和 GraphQL 服务器后,您现在可以配置 GraphQL 服务器以允许远程访问. 为此,您将使用 Nginx,您将其设置在先决条件教程中 如何在 Ubuntu 18.04 上安装 Nginx.此 Nginx 配置可以在 /etc/nginx/sites-available/example.com 文件中找到,其中 example.com 是您在先决条件教程中添加的服务器名称。
打开此文件进行编辑,将您的域名替换为 example.com:
1sudo nano /etc/nginx/sites-available/example.com
在此文件中,你可以找到一个服务器块,听到端口 80,你已经设置了一个值为 server_name 在先决条件的教程中. 在这个服务器块内,改变值为 root 是您创建的代码为 GraphQL 服务器的目录,并添加 index.js 作为索引。
 1[label /etc/nginx/sites-available/example.com]
 2server {
 3  listen 80;
 4  listen [::]:80;
 5
 6  root /project_name;
 7  index index.js;
 8
 9  server_name example.com;
10
11  location / {
12    proxy_pass http://localhost:4000/graphql;
13  }
14}
请通过运行此配置文件中没有 Nginx 语法错误:
1sudo nginx -t
您将获得以下输出:
1[secondary_label Output]
2nginx: the configuration file /etc/nginx/nginx.conf syntax is ok
3nginx: configuration file /etc/nginx/nginx.conf test is successful
当对配置文件没有发现错误时,请重新启动 Nginx:
1sudo systemctl restart nginx
现在,您将能够从任何终端会话卡访问您的 GraphQL 服务器,通过执行并用您的服务器的 IP 或自定义域名替换example.com:
1curl -X POST -H "Content-Type: application/json" --data '{ "query": "{ bios { name { first, last } } }" }' http://example.com
这将返回与前一步相同的 JSON 对象,包括您可能使用突变添加的任何额外数据:
1[secondary_label Output]
2{"data":{"bios":[{"name":{"first":"John","last":"Backus"}},{"name":{"first":"John","last":"McCarthy"}},{"name":{"first":"test","last":"user"}}]}}
现在你已经让你的 GraphQL 服务器可以远程访问,确保你的 GraphQL 服务器在关闭终端或重新启动服务器时不会停机。
要做到这一点,请使用 npm 包 forever,一个 CLI 工具,以确保您的命令行脚本连续运行,或者在出现任何故障时重新启动。
使用 npm 安裝「永遠」:
1sudo npm install forever -g
一旦安装完成,请将其添加到package.json文件中:
 1[label package.json]
 2{
 3  "name": "project_name",
 4  "version": "1.0.0",
 5  "description": "",
 6  "main": "index.js",
 7  "scripts": {
 8    "start": "node index.js",
 9    "deploy": "forever start --minUptime 2000 --spinSleepTime 5 index.js",
10    "test": "echo \"Error: no test specified\" && exit 1"
11  },
12  ...
若要啟動「永遠」的 GraphQL 伺服器,請執行以下命令:
1npm run deploy
这将启动包含 GraphQL 服务器的 index.js 文件,并确保它在每次重新启动之间至少运行 2000 毫秒和 5 毫秒。
您现在已经创建了一个 GraphQL 服务器,该服务器使用 MongoDB 来存储数据,并设置为允许从远程服务器访问。
步骤 5 – 启用 GraphiQL 游戏场地
能够将cURL请求发送到GraphQL服务器是很好的,但如果有一个可以立即执行GraphQL请求的用户界面会更快,尤其是在开发过程中。
要啟用 GraphiQL,請編輯「index.js」檔案:
1sudo nano index.js
添加以下突出的线条:
 1[label index.js]
 2const app = express();
 3app.use('/graphql', graphqlHTTP({
 4  schema,
 5  rootValue: resolvers,
 6  context,
 7  graphiql: true
 8}));
 9app.listen(4000);
10
11console.log(`🚀 Server ready at http://localhost:4000/graphql`);
保存和退出文件。
为了使这些变化变得明显,请确保通过执行永远停止:
1forever stop index.js
接下来,重新启动永远,以便运行您的 GraphQL 服务器的最新版本:
1npm run deploy
打开一个浏览器在URL http://example.com,以您的域名或服务器IP代替 `example.com。
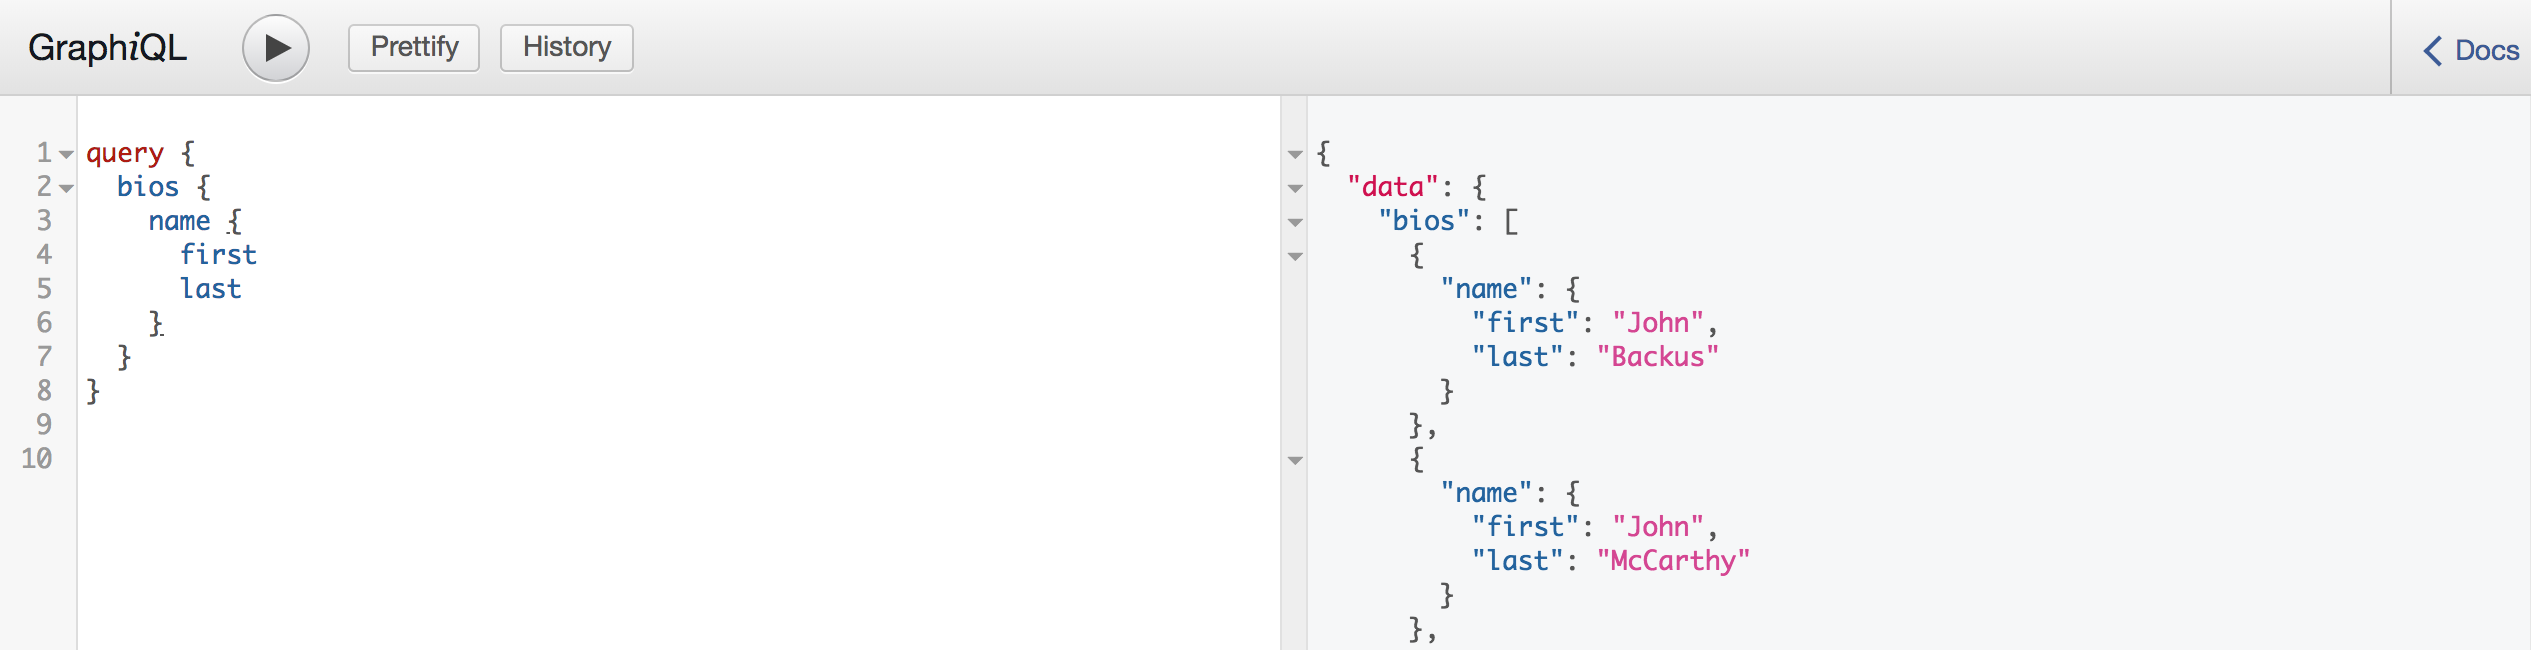
在这个游乐场的左侧,您可以输入 GraphQL 查询和突变,而输出将显示在游乐场的右侧。
1query {
2  bios {
3    name {
4      first
5      last
6    }
7  }
8}
这将在游戏场的右侧输出相同的结果,再次以JSON格式:

现在,您可以使用终端和 GraphiQL 玩场发送 GraphQL 请求。
结论
在本教程中,您已经设置了一个MongoDB数据库,并从该数据库中获取并转换了数据,使用GraphQL,Node.js和Express为服务器。此外,您配置了Nginx以允许远程访问该服务器。
如果你想了解 GraphQL,你可以观看我的 GraphQL 演示文稿(https://www.youtube.com/watch?v=Pmm12LtcPWs)在 NDC {London}或访问网站 howtographql.com关于 GraphQL 的教程。