作者选择了 NPower作为 写给捐款计划的一部分,以接收捐款。
介绍
[Angular] (https://angular.io)是谷歌所建的前端网络框架. 它允许开发者围绕_model-view-controller_(MVC)或_model-view-viewmodel_(MVVM)软件建筑模式来构建单页应用程序. 这种架构将应用分成不同的,但连接的部分,允许平行发展. 遵循这一模式,Angular将其不同组件分解为一个网页应用程序的相应部分. 它的组件管理与该组件相关的数据和逻辑,在它各自的视角中显示数据,并基于从其他应用程序收到的不同消息来调整或控制视图.
Bootstrap是一个前端库,帮助开发人员快速有效地构建响应式网站(适应不同设备的网站)。
APIXU通过其API向用户提供全球天气数据,使用APIXU,用户可以获取世界上任何地点的最新天气以及未来天气预报。
在本教程中,您将使用 Angular, Bootstrap 和 APIXU API 创建一个天气应用程序. 您将能够在搜索表格中输入一个位置,并在提交该表单后,查看应用程序中显示的该位置的当前天气细节。
前提条件
在您开始本教程之前,您将需要以下内容:
- 安装在本地机器上的节点.js和npm。 您可以在 [Node.js swebsite] (https://nodejs.org.en/) 上安装这两套设备, 或者, 您可以在 [stalling node.js并设置本地开发环境] (https://andsky.com/tech/tutorials/how-to-install-node-js-and-create-a-local-development-environment-on-macos) 上遵循此教程 。
- APIXU API 键。 注册免费 APIXU 账户并获得免费 API 密钥 [这里] (https://www.apixu.com/signup.aspx).
- 安装了文本编辑器,例如视频工作室代码,Atom,或Sublime Text.
- 熟悉JSON及其形式。 您可以在 [Javascript中如何与JSON合作] (https://andsky.com/tech/tutorials/how-to-work-with-json-in-javascript) 中更多地了解这一点.
- 联合国 对 Javascript 中的数组和对象的理解,您可以在 [Javascript 中的数组(https://andsky.com/tech/tutorials/understanding-arrays-in-javascript) 和 [Javascript 中(https://andsky.com/tech/tutorials/understanding-data-types-in-javascript# objects) 中学习到更多。 .
步骤 1 - 安装 Angular
在您开始创建应用程序之前,您需要安装 Angular。打开终端并运行以下命令,在您的机器上全球安装 Angular CLI:
1npm install -g @angular/cli
Angular CLI是 Angular 的命令行接口. 它是创建新的 Angular 项目以及构成 Angular 项目的不同子元素的主要途径。
过了一会儿,你会看到以下结果:
1[label Output from installing Angular]
2...
3+ @angular/[email protected]
4...
您现在已经在本地机器上安装了 Angular。接下来,您将创建您的 Angular 应用程序。
步骤2 - 创建您的角度应用程序
在此步骤中,您将创建和配置新的 Angular 应用程序,安装所有依赖,如 Bootstrap 和 jQuery,然后最终检查默认应用程序是否按预期工作。
首先,使用ng命令创建一个 Angular 应用程序,您可以从终端运行它。
<$>[注] 注: 如果您在 Windows 上,您可能会遇到尝试从命令提示单运行一个 ng 命令的问题,即使您正确安装了 Node.js 和 npm。
ng ' 命令是从命令行运行Angular行动的先决条件。 例如,无论是构建新工程,创建组件,还是创建测试,你都会用"ng"命令前缀每个想要的功能. 在此教程中, 您将想要创建一个新的应用程序; 您将通过执行 g new命令来实现 。ng new'命令创建了新的Angular应用程序,导入了必要的库,并创建了应用程序所需的所有默认代码脚手架.
开始创建一个新的应用程序,在本教程中它将被称为天气应用程序,但您可以随意更改名称:
1ng new weather-app
ng new命令会提示您有关您想要添加到新应用程序的功能的额外信息。
1[secondary_label Output]
2Would you like to add Angular routing? (y/N)
Angular路由允许您使用路径和组件构建单页应用程序,使用不同的视图。
1[secondary_label Output]
2Which stylesheet format would you like to use? (Use arrow keys)
点击ENTER,以接受默认的CSS选项。
应用程序将继续创建过程,短时间后,您将看到以下消息:
1[secondary_label Output]
2...
3CREATE weather-app/e2e/src/app.e2e-spec.ts (623 bytes)
4CREATE weather-app/e2e/src/app.po.ts (204 bytes)
5...
6Successfully initialized git.
接下来,在文本编辑器中,打开天气应用文件夹。
看看你的目录的结构,你会看到几个不同的文件和文件. 你可以阅读所有这些文件做什么的完整解释 这里,但为本教程的目的,这些是最重要的文件来理解:
- 联合国 " package.json " 文件。 它位于根
天平应用文件夹中, 运行时与其他任何节点. js 应用程序一样, 保存您应用程序将使用的所有库、 应用程序名称、 测试时运行的命令等 。 主要是,这个文件保存了您Angular应用程序需要的外部库的细节,以便正常运行. - 联合国 " app.module.ts " 文件。 此文件位于
天候- app/ src文件夹中的app文件夹中, 显示 解析应用程序的组装,并保存应用程序中组件、模块和提供者的细节。 您的进口阵列内已经有一个浏览器模块。 " 浏览器模块 " 为您的应用提供基本服务和指令,并始终是您的 " 进口 " 阵列中的第一个输入模块。 - 联合国 `angular.json'文件。 位于您的应用程序的根)中找到更多关于这些选项的信息. .
您可以暂时单独留下所有这些文件,因为您将下次安装 Bootstrap。
Bootstrap 有两种依赖性,您需要安装才能在 Angular 中正常工作 - jQuery和 popper.js。
在您的终端中,移动到您的天气应用根目录:
1cd weather-app
然后执行以下命令来安装所有依赖,并保存对 package.json 文件的引用:
1npm install --save jquery popper.js bootstrap
--保存选项会自动将您的参考文档导入到package.json文件中,以便您在安装后不必手动添加它们。
您将看到输出显示已安装的版本号,如下:
1[secondary_label Output]
2+ [email protected]
3+ [email protected]
4+ [email protected]
5...
您现在已经成功安装了 Bootstrap 及其依赖程序,但您还需要在您的应用程序中包含这些库。 您的天气应用程序还不知道它需要这些库,因此您需要将路径添加到jquery,popper.js,bootstrap.js和bootstrap.css到您的angular.json文件中。
對於「popper.js」,你需要包含的檔案是「node_modules/popper.js/dist/umd/popper.js」。 jQuery 需要「node_modules/jquery/dist/jquery.slim.js」檔案。 最後,對於 Bootstrap,你需要兩個檔案(JavaScript 檔案和 CSS 檔案)。 這些檔案為「node_modules/bootstrap/dist/js/bootstrap.js」和「node_modules/bootstrap/dist/css/bootstrap.css」。
现在你有所有所需的文件路径,在文本编辑器中打开angular.json文件. 您将添加参照到 CSS 文件的风格数组,而脚本数组将引用所有脚本。
 1[label angular.json]
 2...
 3"options:" {
 4...
 5"styles": [
 6    "node_modules/bootstrap/dist/css/bootstrap.css",
 7     "src/styles.css"
 8],
 9"scripts": [
10    "node_modules/jquery/dist/jquery.slim.js",
11    "node_modules/popper.js/dist/umd/popper.js",
12    "node_modules/bootstrap/dist/js/bootstrap.js"
13]},
14...
您现在已经导入了主要 .js 和 .css 文件,您需要 Bootstrap 才能正常工作. 您已经从您的 angular.json 文件中指定了这些文件的相对路径:将您的 .css 文件添加到风格数组和 .js 文件到 angular.json 的脚本数组。 确保您在添加此内容后保存了 angular.json 文件。
现在,用ng serve命令启动您的应用程序,以确保一切正常工作. 从您的终端中的天气应用程序目录中运行:
1ng serve --o
--o 参数将自动打开一个浏览器窗口,显示您的应用程序. 该应用程序需要几秒钟才能构建,然后在您的浏览器中显示。
您将在您的终端中看到以下输出:
1[secondary_label Output]
2** Angular Live Development Server is listening on localhost:4200, open your browser on http://localhost:4200/ **
3...
一旦浏览器打开,您将看到默认的 Angular app 页面。
如果您看不到这些输出,请再次执行此步骤并确保一切都是正确的. 如果您看到一个错误,例如: `Port 4200 已经在使用中. 使用 '--port' 来指定不同的端口',那么您可以通过键入更改端口号:
1ng serve --o --port <different-port-number>
此潜在错误消息的原因是,您的计算机上的端口 4200 正在被其他程序或流程使用. 如果您知道该流程是什么,您可以终止它,或者您可以按照上面的步骤指定不同的端口号码。
接下来,您将创建一个天气组件,该组件将包含搜索位置的主要表单和相关的天气细节。
第3步:创建您的天气组件
一个角度应用主要由 components 组成,这些是具有应用程序内部特定功能的逻辑部分,该组件由某些 logic 组成,该组件在应用程序中管理屏幕的一部分 - 这称为 view。
例如,在本教程中,您将创建一个天气组件,负责处理两个任务:
- 搜索位置 * 显示该位置的相关天气数据
要实现第一个目标,您将创建一个表单,允许您搜索一个位置. 当您点击表单上的搜索按钮时,它将触发一个函数,该函数将搜索该位置。
为了实现第二个目标,您将有一个<div>标签,其中嵌入的<p>标签将优雅地显示您获取的数据。
当您的应用程序从终端窗口运行时,您无法在该特定窗口中输入任何其他内容,因此,如果您想要执行其他ng命令,请在新终端窗口打开天气应用程序目录。
执行以下命令将创建您的天气组件,并自动导入到您的app.module.ts文件中,请记住您的app.module.ts文件包含您应用程序中的所有组件、模块和提供商的详细信息。
1ng generate component weather
你会看到这样的输出(准确的字节大小可能会有所不同):
1[secondary_label Output]
2CREATE src/app/weather/weather.component.css (0 bytes)
3CREATE src/app/weather/weather.component.html (26 bytes)
4CREATE src/app/weather/weather.component.spec.ts (635bytes)
5CREATE src/app/weather/weather.component.ts (273 bytes)
6UPDATE src/app/app.module.ts (400 bytes)
7...
此输出显示 Angular 已创建一个组件所需的四个文件:
- 您的视图的
.css和.html文件 * A.spec.ts文件来测试您的组件 * A.component.ts文件来保持您的组件的功能
Angular 还更新了 src/app/app.module.ts 文件,以添加对新创建的组件的引用. 在 `src/app/name-of-component' 目录中,您将始终找到组件文件。
现在您已经安装了新组件,请返回浏览器以查看应用程序. 如果您停止运行该应用程序来安装新组件,请通过键入重新启动该新组件:
1ng serve --o
你会注意到你仍然可以看到)显示在页面上. 你无法看到你新创建的组件. 在下一节中,你会更改这一点,以便每当你进入Localhost:4200,你就会访问你新创建的天气组件而不是 Angular的默认组件。
步骤4 - 访问您的天气组件
在标准的HTML中,每当你想要创建一个新页面时,你就会创建一个新的.html文件,例如,如果你已经有了一个现有的HTML页面,你想从那里导航到新创建的页面,你会有一个href属性,具有一个``标签,指向那个新页面。
1[label preexisting.html]
2<a href="/newpage.html">Go to New Page</a>
然而,在 Angular 中,这种方法略有不同. 您不能使用href属性以此方式导航到新组件. 当您想要链接到组件时,您需要使用 Angular 的路由器库并在文件中声明所需的 URL 路径,该路径将直接地图到组件。
在 Angular 中,您将此文件命名为)的所有细节。 为了使此文件正常工作,您将从@angular/router库中导入Routes类型,并列出您想要的链接为Routes类型。
在文本编辑器中创建routes.ts文件并将其保存到src/app目录中,然后将以下内容添加到routes.ts文件中:
1[label src/app/routes.ts]
2import { Routes } from '@angular/router'
现在,在)能够访问您新创建的天气组件。
1[label src/app/routes.ts]
2import { Routes } from '@angular/router'
3import { WeatherComponent } from './weather/weather.component';
4
5export const allAppRoutes: Routes = [
6  { path: '', component: WeatherComponent }
7];
您已导入您的WeatherComponent,然后创建了一个变量allAppRoutes,这是一个类型的Routes的数组。allAppRoutes数组包含每个包含 URL 路径和要绘制的组件的路径定义对象。
您的最终routes.ts文件将看起来像这样:
1[label src/app/routes.ts]
2import { Routes } from "@angular/router";
3import { WeatherComponent } from "./weather/weather.component";
4
5export const allAppRoutes: Routes = [
6  { path: '', component: WeatherComponent }
7];
您现在需要将这些路由添加到您的主要app.module.ts文件中。您需要将您刚刚创建的数组allAppRoutes传输到一个名为RouterModule的角度模块中。
 1[label src/app/app.module.ts]
 2...
 3import {WeatherComponent} from './weather/weather.component';
 4import {RouterModule} from '@angular/router';
 5import {allAppRoutes} from './routes';
 6...
 7@NgModule({
 8    declarations:[
 9      ...
10    ],
11    imports: [
12        BrowserModule,
13        RouterModule.forRoot(allAppRoutes)
14    ]
15    ...
16})
17...
在此文件中,您已经导入了路由对象的RouterModule和allAppRoutes。
最后,你需要启用路由本身。打开app.component.ts文件.有一个templateUrl属性,指定该特定组件的HTML:./app.component.html 打开这个文件,src/app/app.component.html,你会看到它包含你的localhost:4200页面的所有HTML。
删除app.component.html中包含的所有HTML,并用以下代替:
1[label src/app/app.component.html]
2<router-outlet></router-outlet>
router-outlet标签激活路由并将用户类型的URL匹配到您在allAppRoutes变量下创建的routes.ts文件中之前创建的路由定义的浏览器中。
现在,如果你导航到http://localhost:4200,你会看到 天气工作! 在你的页面上。
您已在应用程序中设置路由,接下来,您将创建您的表单和详细信息部分,允许您搜索位置并显示相关细节。
第5步:定义用户界面
你会用"靴子"作为你的应用视图的脚手架. Bootstrap对创建适应任何设备(移动、平板或桌面)的现成、反应迅速的网站有用。 它通过把网页上的每行都当作12个栏来达到这个目的. 在网页上,一行只是从一端到另一端的一行. 这意味着每一页的内容必须包含在该行内,并且必须等于十二行. 如果它不等于十二个柱子,就会被推倒到另一行. 例如,在"Bootstrap"的网格系统中,会有一个"十二行"分出一行为"六行"的"两行",接下来的"十二行"分出"四行"的"三行".
在 Bootstrap 文档(https://getbootstrap.com/docs/4.2/layout/grid/)中,您可以阅读更多关于这个网格系统的信息。
您将您的页面分为六个列的两个部分,左列持有您的搜索表格,右列显示天气细节。
打开src/app/weather/weather.component.html以访问您的WeatherComponentHTML代码. 删除当前在文件中的段落,然后添加以下代码:
1[label src/app/weather/weather.component.html]
2<div class="container">
3  <div class="row">
4    <div class="col-md-6"><h3 class="text-center">Search for Weather:</h3></div>
5    <div class="col-md-6"><h3 class="text-center">Weather Details:</h3></div>
6  </div>
7</div>
你创建了一个<div>与类容器来包含你的所有内容,然后你创建了一个行,你分成两个六个列的部分,每一个左侧将保持你的搜索表格,右侧,你的天气数据。
接下来,为了构建您的表单,您将工作在第一个col-md-6列中。您还将添加一个按钮,将您在您的表单中输入的内容提交给APIXU,然后返回所需的天气细节。
 1[label src/app/weather/weather.component.html]
 2...
 3<div class="col-md-6">
 4  <h3 class="text-center">Search for Weather:</h3>
 5  <form>
 6    <div class="form-group">
 7      <input
 8        class="form-control"
 9        type="text"
10        id="weatherLocation"
11        aria-describedby="weatherLocation"
12        placeholder="Please input a Location"
13      />
14     </div>
15     <div class="text-center">
16      <button type="submit" class="btn btn-success btn-md">
17        Search for the weather</button>
18     </div>
19   </form>
20</div>
21...
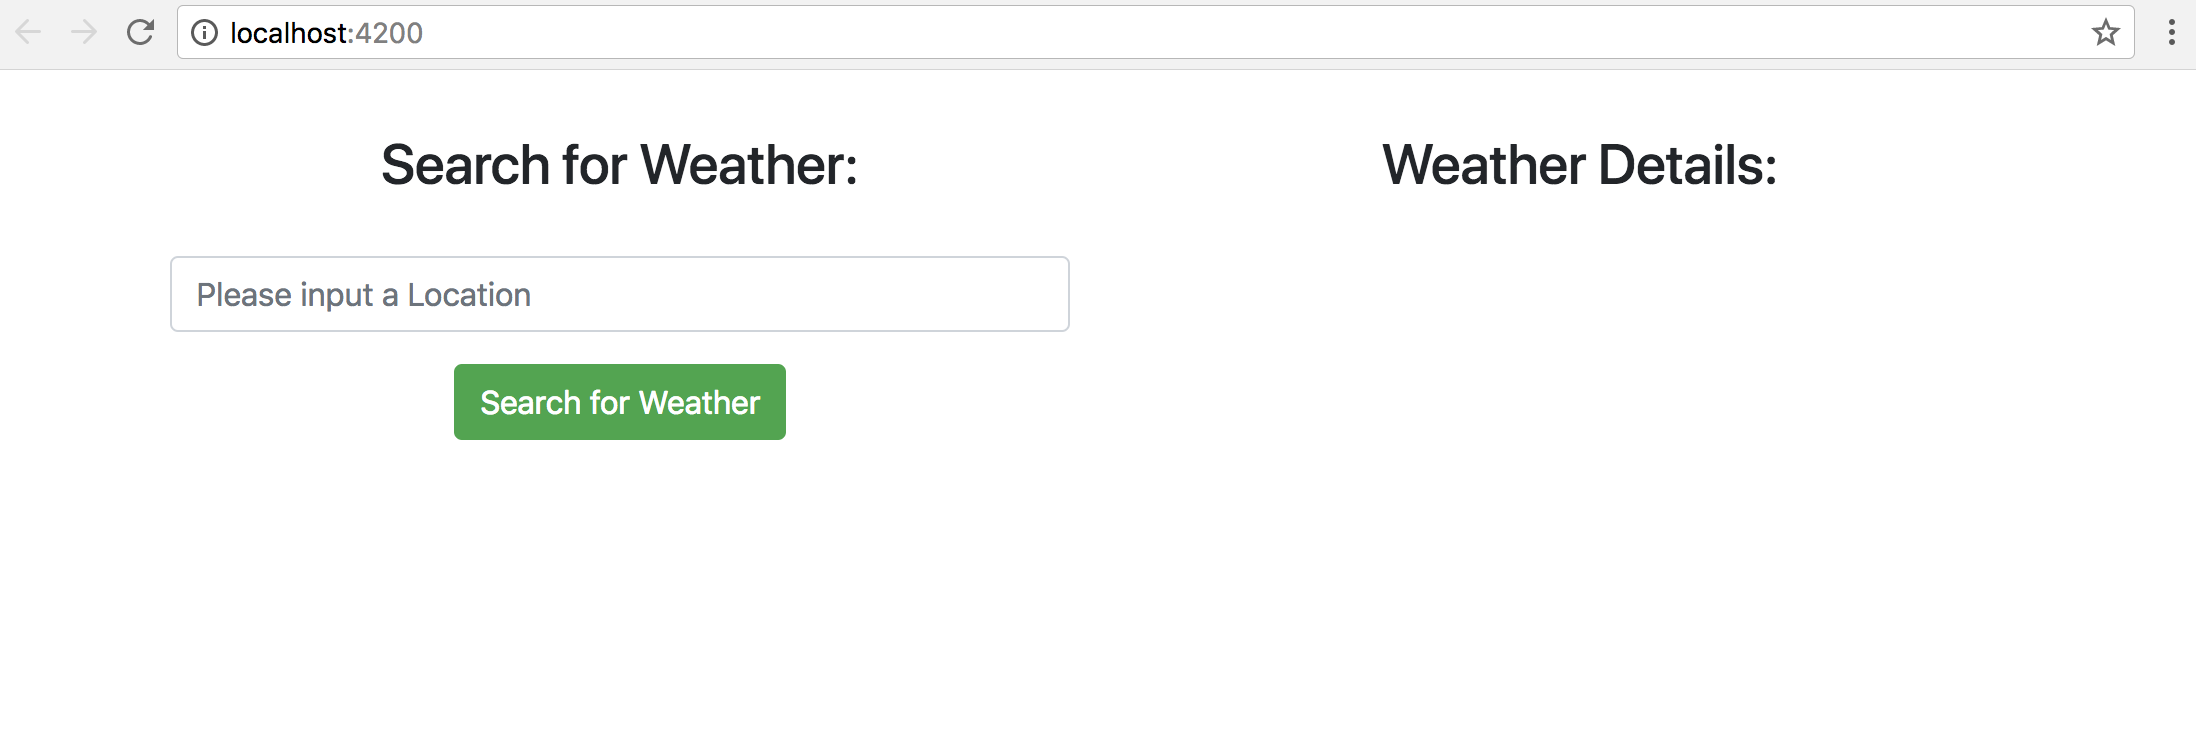
您已添加表单并添加一个表单组类别,其中包含您的搜索栏。您还创建了搜索天气的按钮。
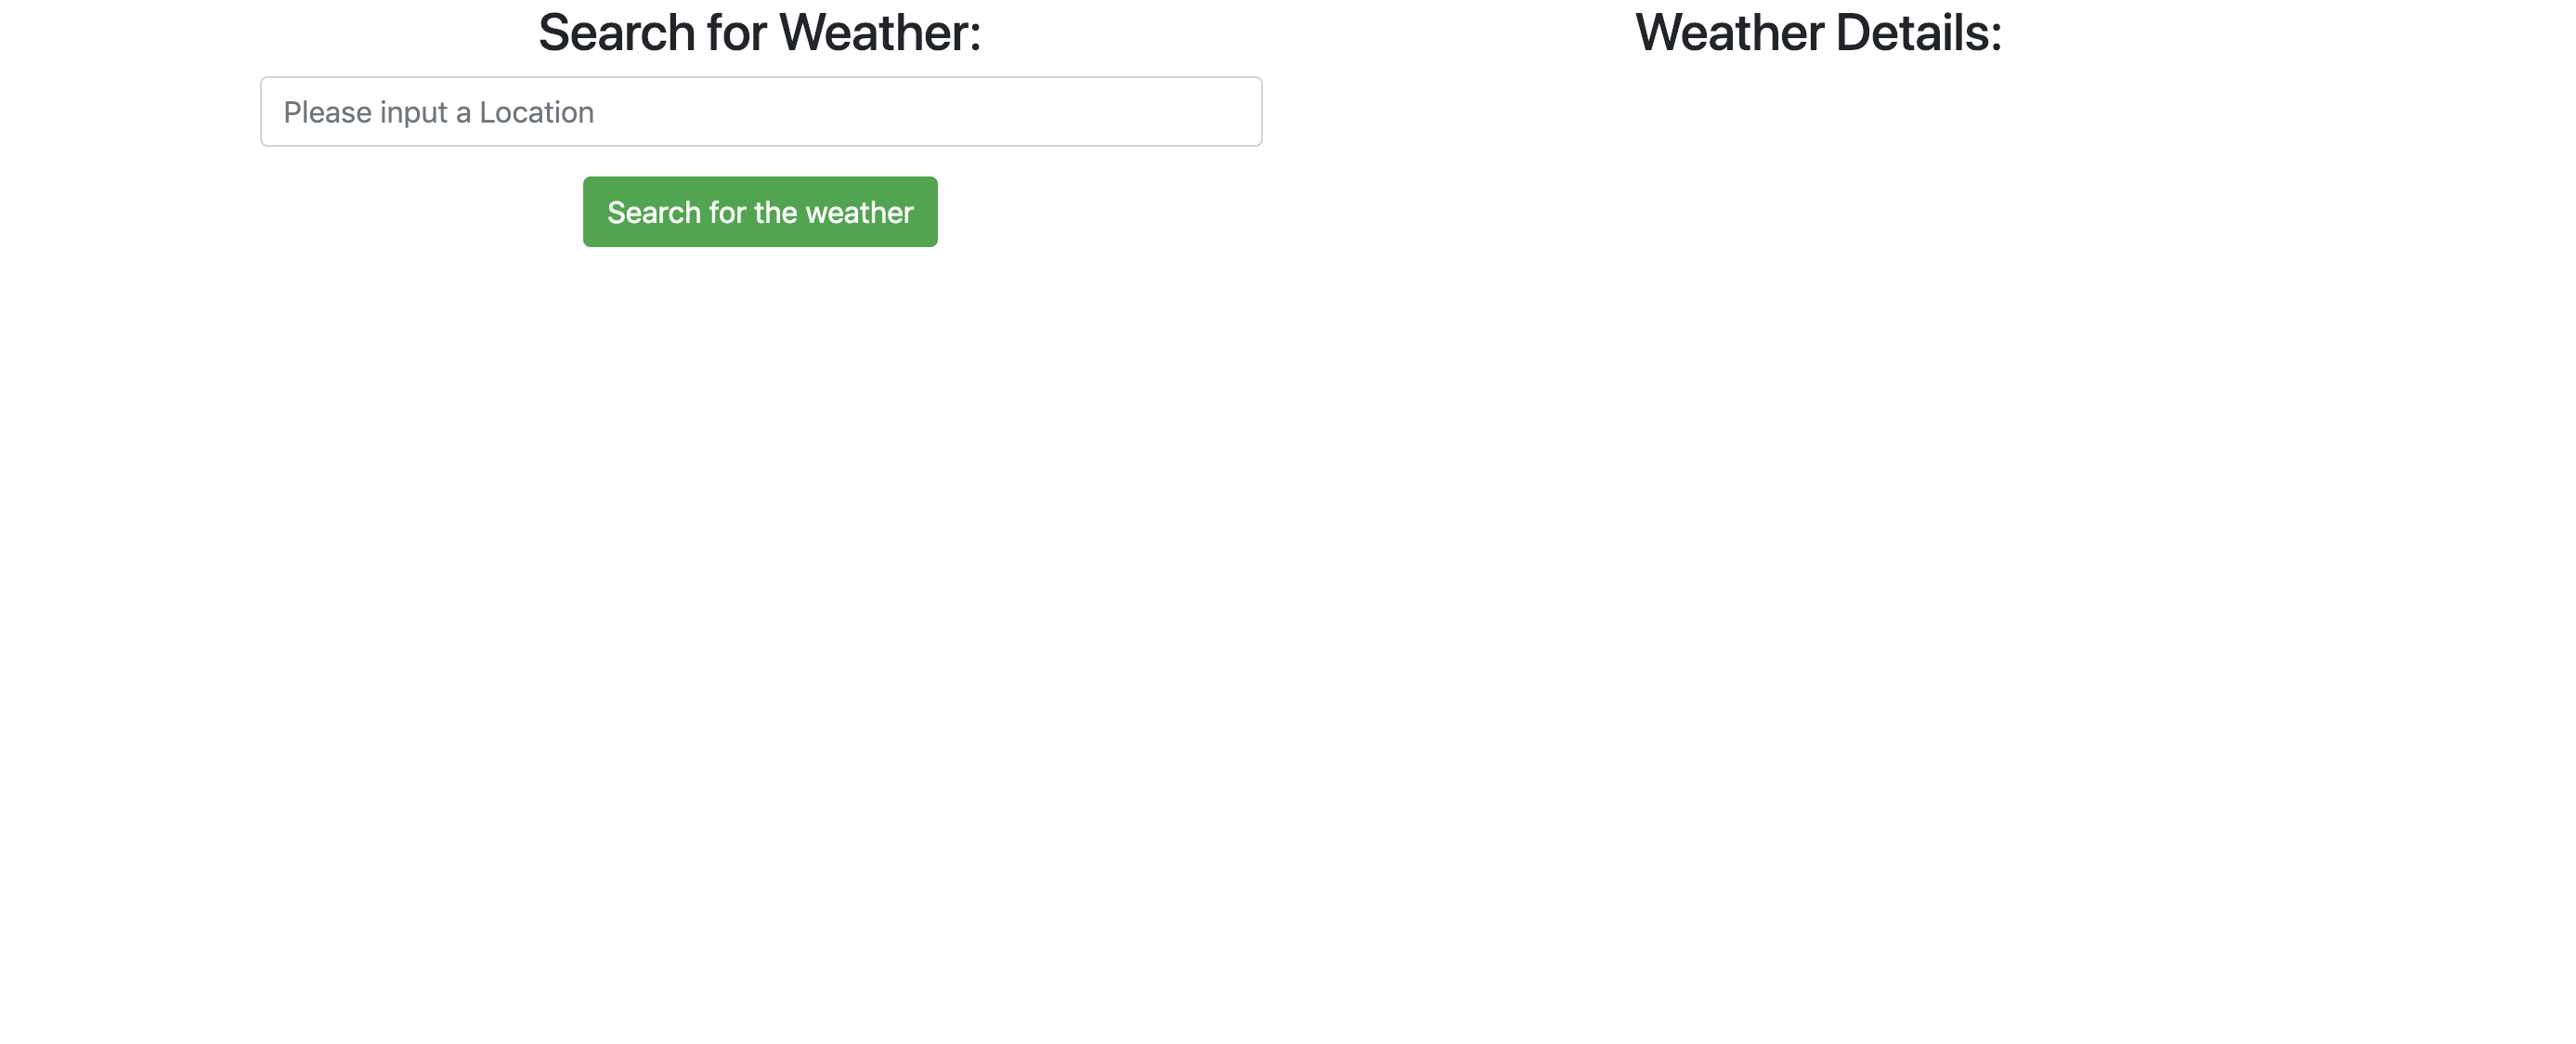
这看起来有点紧凑,所以你可以添加一些CSS以便用一些更好的间隔来格式化页面。 Bootstrap的主要优点是,它配有间隔类,你可以添加到你的HTML中,而不需要自己写任何额外的CSS。
对于每个 <h3> 标签,你会添加 .my-4 Boostrap CSS 类. m 会设置对元素的边缘, y 会设置对元素的 margin-top 和 margin-bottom,最后 4 会指定要添加的边缘数量。 您可以了解有关不同间隔类型和大小的更多细节(https://getbootstrap.com/docs/4.1/utilities/spacing/)。 在您的 weather.component.html 文件中,添加以下突出内容来替代当前的 <h3> 标签:
 1[label src/app/weather/weather.component.html]
 2<div class="col-md-6">
 3  <h3 class="text-center my-4">Search for Weather:</h3>
 4  <form>
 5    <div class="form-group">
 6      <input
 7        class="form-control"
 8        type="text"
 9        id="weatherLocation"
10        aria-describedby="weatherLocation"
11        placeholder="Please input a Location"
12      />
13    </div>
14    <div class="text-center">
15      <button type="submit" class="btn btn-success btn-md">
16        Search for the weather
17      </button>
18    </div>
19  </form>
20</div>
21<div class="col-md-6">
22  <h3 class="text-center my-4">Weather Details:</h3>
23</div>
在你的浏览器中重新加载页面,你会看到你有更多的间隔。
您已经创建了表单以及您将显示从 APIXU API 获得的信息的部分,接下来,您将连接表单,以便正确输入您的位置。
步骤6 - 连接您的形式
在 Angular 中,您可以在应用程序中创建用于用户输入的表单有两种方法: reactive 或 template-driven. 虽然它们实现了相同的结果,但每个表单类型处理用户输入数据的不同。
使用反应式表单,您在您的.component.ts 文件中创建一个表单中的不同元素列表,然后将它们连接到您创建的.component.html 文件中的 HTML 表单中。
使用模板驱动的表单,您可以像在正常的HTML中一样创建表单,然后使用‘ngModel’等指令,您可以从HTML中创建单向或双向的数据连接,回到组件中的数据模型,反之亦然。
每个方法都有优势和弱点,但一般来说,反应形式更受欢迎,因为:
- 创建不同复杂性格式的灵活性 * 通过检查组件的 `.component.ts' 文件中的每个表单控件的状态来简化单元测试 * 能够 subscribe 到表单中的值。
尽管这些优势,反应式表格有时可以更复杂地实施,这可能会导致开发人员编写比模板驱动的表单更多的代码. 要查看表单类型和最佳用例的综合概述,Angular的官方指南(https://angular.io/guide/reactive-forms)提供了一个很好的起点。
要使用反应式表格,打开文件 app.module.ts. 然后,通过向文件的顶部声明导入 ReactiveFormsModule`。
1[label src/app/app.module.ts]
2...
3import { ReactiveFormsModule } from '@angular/forms';
4@NgModule({
5    ...
6})
7...
最后,将ReactiveFormsModule添加到您的导入列表中。
 1[label src/app/app.module.ts]
 2...
 3@NgModule({
 4    ...
 5    imports: [
 6        BrowserModule,
 7        RouterModule.forRoot(allAppRoutes),
 8        ReactiveFormsModule
 9    ]
10    ...
11})
12...
按照这些代码添加,您的app.module.ts将看起来像这样:
 1[label src/app/app.module.ts]
 2import { BrowserModule } from "@angular/platform-browser";
 3import { NgModule } from "@angular/core";
 4
 5import { AppComponent } from "./app.component";
 6import { WeatherComponent } from "./weather/weather.component";
 7import { RouterModule } from "@angular/router";
 8import { allAppRoutes } from "./routes";
 9import { ReactiveFormsModule } from "@angular/forms";
10
11@NgModule({
12  declarations: [AppComponent, WeatherComponent],
13  imports: [
14    BrowserModule,
15    RouterModule.forRoot(allAppRoutes),
16    ReactiveFormsModule
17  ],
18  providers: [],
19  bootstrap: [AppComponent]
20})
21export class AppModule {}
一旦添加了这两个行,打开weather.component.ts文件,然后导入FormBuilder和FormGroup类。
1[label src/app/weather/weather.component.ts]
2import { Component, OnInit } from '@angular/core';
3import { FormBuilder, FormGroup } from '@angular/forms';
现在,在您的weather.component.ts文件中创建一个变量,该变量将引用您的FormGroup:
1[label weather.component.ts]
2export class WeatherComponent implements OnInit {
3   public weatherSearchForm: FormGroup;
4   constructor() { }
5...
每次你要在表单上执行一个操作,你会通过weatherSearchForm变量引用它. 现在你将添加FormBuilder导入到你的构建器,这样你就可以在你的组件中使用它。
1[label weather.component.ts]
2...
3public weatherSearchForm: FormGroup;
4constructor(private formBuilder: FormBuilder) {}
5...
通过将formBuilder添加到constructor,它会创建一个FormBuilder类的实例,允许您在组件中使用它。
您现在已经准备好在weather.component.ts文件中创建您的FormGroup及其相应值了. 如果您在您的表单中有多个输入选项,则最好将其包含在FormGroup中。
要做到这一点,您需要确保在WeatherComponent内部创建ngOnInit链接中的表单元素。ngOnInit方法在组件初始化时运行一次,执行您指定的任何逻辑需要在组件准备使用之前运行。
因此,您必须在完成对HTML的绑定过程之前创建表单。
在您的WeatherComponent中,您将在ngOnInit链接中初始化表单:
1[label src/app/weather/weather.component.ts]
2...
3constructor(private formBuilder: FormBuilder) {}
4ngOnInit() {
5    this.weatherSearchForm = this.formBuilder.group({
6      location: ['']
7    });
8  }
您已按照反应形式样式创建了表格的第一部分: 在). `['''阵列允许您为窗体输入指定一些额外的选项,例如: 预先将窗体输入与一些数据并使用验证器验证您的输入。 你不需要这些来做这个教程, 所以你可以把它留空。 您可以更多地了解您可以传递到元素属性 [这里] (https://angular.io/api/forms/FormBuilder) .
在您的表单完成之前,您还需要做两件事。 首先打开您的)绑定到您的HTML。 在weather.component.html中,添加以下突出内容:
 1[label src/app/weather/weather.component.html]
 2...
 3<form
 4  [formGroup]="weatherSearchForm" >
 5  <div class="form-group">
 6    <input
 7      class="form-control"
 8      type="text"
 9      id="weatherLocation"
10      aria-describedby="weatherLocation"
11      placeholder="Please input a Location"
12    />formControlName="location" />
13  </div>
14  <div class="text-center">
15    <button type="submit" class="btn btn-success btn-md">
16      Search for the weather
17    </button>
18  </div>
19</form>
20...
您已添加了[formGroup]属性,将您的表单绑定到 HTML. 您还添加了formControlName属性,该属性声明该特定的输入元素与您的weather.component.ts文件中的位置元素绑定。
保存你的文件并返回你的浏览器,你会看到你的应用程序看起来完全相同. 这意味着你的表单是正确的连接. 如果你看到任何错误在这个阶段,那么请回到之前的步骤,以确保一切都是正确的在你的文件。
接下来,您将连接按钮,以便能够接受输入数据到您的表单中。
第7步:连接你的按钮
在此步骤中,您将将搜索按钮连接到您的表单,以便能够接受用户的输入数据。
如果你回顾一下weather.component.html中的代码,你可以看到你的按钮有一个类型的提交:
1[label src/app/weather/weather.component.html]
2<form>
3...
4<div class="text-center">
5    <button type="submit" class="btn btn-success btn-md">Search for the weather</button>
6</div>
7</form>
这是一个标准的 HTML 值,将您的表单值提交给某个函数以采取行动。
在 Angular 中,您在)`事件,然后将呼叫您分配给它的任何方法。
在您的 weather.component.ts 中,创建一个方法 sendToAPIXU() 将需要一个参数:您在表单中输入的值。
 1[label src/app/weather/weather.component.ts]
 2...
 3ngOnInit() {
 4    this.weatherSearchForm = this.formBuilder.group({
 5      location: [""]
 6    });
 7  }
 8
 9sendToAPIXU(formValues) {
10
11}
12...
接下来,将)`方法中:
1[label weather.component.html]
2...
3<form [formGroup]="weatherSearchForm" (ngSubmit)="sendToAPIXU(weatherSearchForm.value)">
4  ...
5</form>
6...
您已将).您现在可以通过使用)方法中,将以下突出内容添加到weather.component.ts`:
1[label weather.component.ts]
2...
3sendToAPIXU(formValues){
4    console.log(formValues);
5}
进入您的浏览器并打开您的控制台,右键点击您的网站页面上的任何地方,然后点击 Inspect Element . 窗口中将出现一个名为** Console** 的选项卡。

您的控制台输出是一个 JSON 对象 {位置: "London"}. 如果您想访问您的位置值,您可以通过访问 formValues.location 来做到这一点。
注意: **反应形式的所有值都存储在一个对象中 - 其中密钥是您输入的 formBuilder.group({}) 值的名称。
按钮现在已连接起来,可以正确接收输入,接下来,您将使用sendToAPIXU()方法将HTTP请求发送到APIXU API。
第8步:调用APIXU API
APIXU API 接受位置信息,搜索该位置的当前天气细节,然后将其返回客户端. 您现在将修改您的应用程序,以便将位置数据发送到 API,获取响应,然后在您的页面上显示结果。
要在 Angular 中创建 HTTP 请求,您必须导入 HttpClientModule. 打开您的 src/app/app.module.ts 并添加以下突出的行:
 1[label src/app/app.module.ts]
 2...
 3import { ReactiveFormsModule } from '@angular/forms';
 4import { HttpClientModule } from '@angular/common/http';
 5@NgModule({
 6    ...
 7    imports: [
 8        BrowserModule,
 9        RouterModule.forRoot(allAppRoutes),
10        ReactiveFormsModule,
11        HttpClientModule
12    ]
13    ...
14})
15...
接下来,您需要写入代码,使HTTP呼叫APIXU API. 创建 Angular _ service_以制作HTTP请求是最佳做法. 分离关注是您所构建的任何应用程序的关键。 一个服务允许您将所有的 HTTP 应用程序请求移入一个文件, 然后您可以在您创建的任何 . 组件. ts 文件中调用 。 您可以在 . 组件. ts 文件里写 合法 的 HTTP 请求, 但这不是最佳做法 。 例如,您可能会发现您的一些请求很复杂,需要您在收到数据后进行一些后处理操作。 您的应用程序中有几个不同的组件可能使用您的一些 HTTP 请求, 您不想多次写入相同的方法 .
从新的终端窗口中或在当前终端会话中停止服务器,执行以下命令创建名为apixu的服务:
1ng g service apixu
您将看到类似于以下的输出:
1[secondary_label Output]
2create src/app/apixu.service.spec.ts (328 bytes)
3create src/app/apixu.service.ts (134 bytes)
4...
该命令创建了服务文件(apixu.service.ts)和测试文件(apixu.service.spec.ts)。
现在您需要将此服务作为提供商添加到您的 app.module.ts 文件中,从而使其可在您的应用中使用。
1[label src/app/app.module.ts]
2...
3import { HttpClientModule } "@angular/common/http";
4import { ApixuService } from "./apixu.service";
5...
接下来,将新进口的ApixuService作为供应商添加到供应商块中:
1[label src/app/app.module.ts file]
2...
3@NgModule({
4    ...
5    providers: [ApixuService],
6    ...
7})
8...
在 Angular 中,如果您想使用您创建的服务,则需要在module.ts文件中将该服务指定为提供商,在这种情况下,您在app.module.ts中将其指定为整个应用程序中的提供商。
最后,打开);然后 decorating (这实际上意味着指定)您的服务为@注射。
 1[label src/app/apixu.service.ts]
 2import { Injectable } from '@angular/core';
 3
 4@Injectable({
 5  providedIn: 'root'
 6})
 7export class ApixuService {
 8
 9  constructor() { }
10}
将服务装饰为@Injectable允许您将该服务注入到weather.component.ts内,以便您可以在您的组件中使用。
如果您停止了应用程序,请通过运行重新启动它:
1ng serve --o
如上所述,您的服务需要向 APIXU API 提交 HTTP 请求,并在 app.module.ts 文件中导入 HttpClientModule,以便在整个应用程序中提交 HTTP 请求。
1[label src/app/apixu.service.ts]
2...
3import { HttpClient } from '@angular/common/http';
4...
现在你需要写一个方法,getWeather(),其中包括一个参数:位置. 这个方法将向APIXU发送API请求,并返回所获取的位置数据。
要做到这一点,您在注册 APIXU API 时需要提供的 API 密钥. 如果您登录到 APIXU,您将进入仪表板:
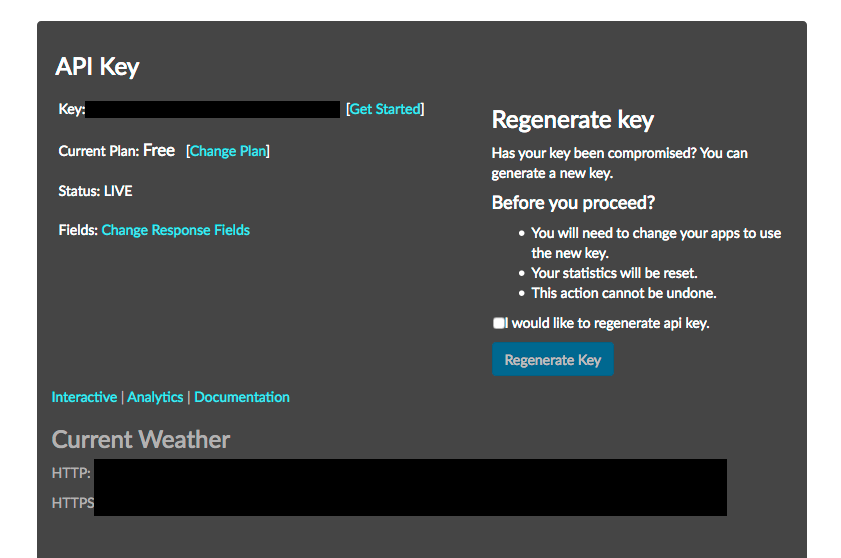
您将看到您的密钥,并在其下方,链接到API URL,您的密钥已经预先填写为 当前天气 和** 预测天气** 。
‧‧‧‧‧‧‧‧‧‧‧‧‧‧‧‧‧‧‧‧‧‧‧‧‧‧‧‧‧‧‧‧‧‧‧‧‧‧‧‧‧‧‧‧
此URL将为您提供巴黎的当前天气细节。您希望能够从您的表单中将位置传输到&q=参数。因此,当您将其添加到您的apixu.service.ts文件时,请从URL中删除巴黎:
 1[label src/app/apixu.service.ts]
 2...
 3export class ApixuService {
 4
 5  constructor(private http: HttpClient) {}
 6
 7  getWeather(location){
 8      return this.http.get(
 9          'https://api.apixu.com/v1/current.json?key=YOUR_API_KEY&q=' + location
10      );
11  }
12}
注意:您已经在代码中直接使用了 API 密钥。在生产情况下,您应该将此密钥安全地存储在服务器端,并以安全的方式获取此密钥并在应用程序中使用。
您现在已经导入并注入了),该方法采用了位置参数,并向您提供的 URL 提出了GET`请求。
您的服务现在已经完成. 您需要将您的服务导入您的)`方法以将您的位置发送到新创建的服务。
 1[label src/app/weather.component.ts]
 2...
 3import { FormBuilder, FormGroup } from "@angular/forms";
 4import { ApixuService } from "../apixu.service";
 5...
 6constructor(
 7    private formBuilder: FormBuilder,
 8    private apixuService: ApixuService
 9  ) {}
10...
11ngOnInit(){...}
12sendToAPIXU(formValues){
13    this.apixuService
14      .getWeather(formValues.location)
15      .subscribe(data => console.log(data));
16}
您删除了您)'方法,后者随后向该位置的API提出了HTTP请求。 然后,你加入了你回的回复, 并且,在这个例子中,将数据记录到控制台。 您总是要在 HTTP 请求中调用订阅方法, 因为要读取您返回的 可见 响应, 请求才会开始 。 _Obsubables_是发布者和订阅者之间发送消息的一种方式,允许您前后传递任何类型的数据. 在订阅者订阅之前, 您无法接收可观测到的数据, 因为它不会在此点之前执行 .
在浏览器中再次打开控制台. 现在,键入 伦敦,英国 ,然后单击** 搜索天气 ** . 如果您点击标签箭头,您将在控制台中看到天气细节的列表。
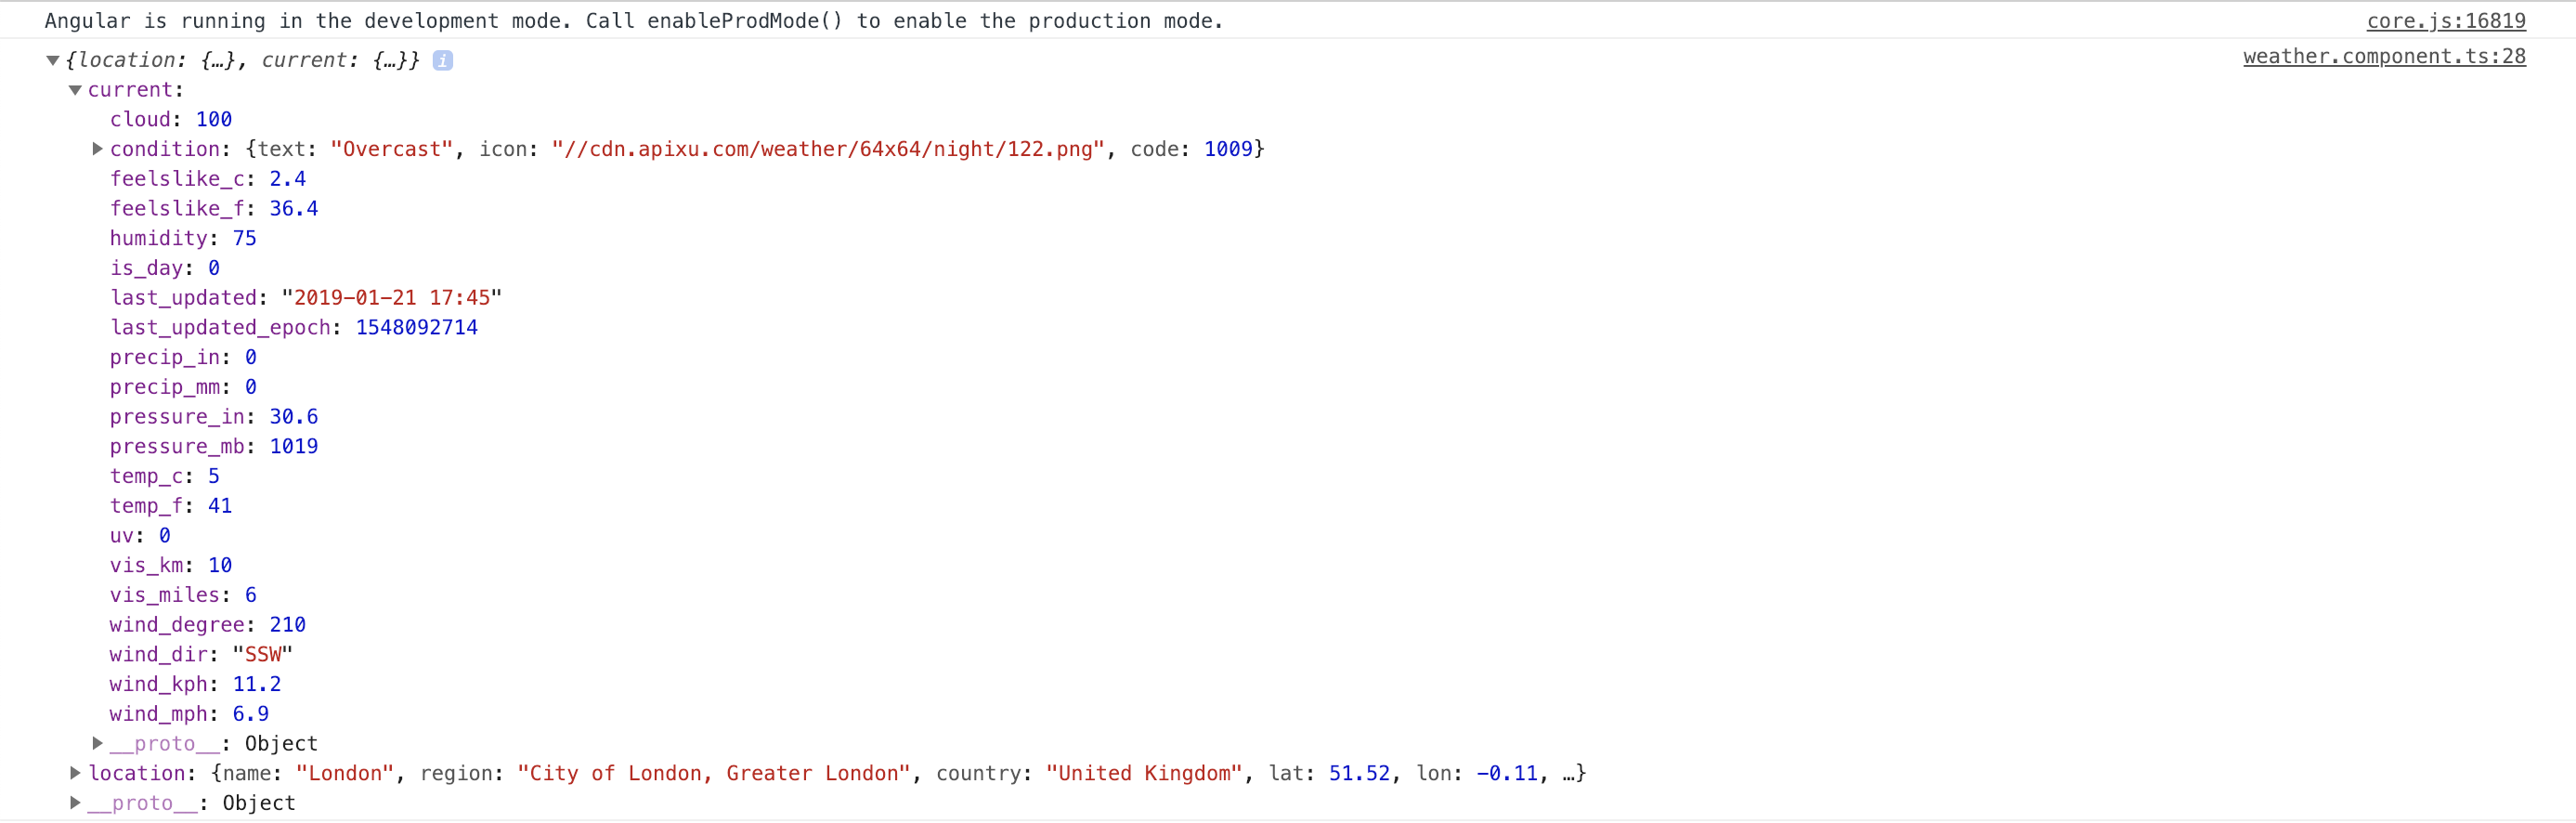
输出显示 JSON 对象,其中包含所需的所有天气信息. 你有两个对象返回:一个当前对象和一个位置对象。
您现在已经在控制台中成功显示了您的天气数据。 为了完成本教程,您将在您的HTML中显示这些天气细节。
步骤9 – 在您的应用程序中显示您的天气数据
在控制台中顯示結果是一個很好的初步步步驟來檢查一切是否正常工作,但是,您希望最終向您的使用者顯示HTML中的天氣數據。
Interpolation 允许您在视图中显示数据. 要做到这一点,它要求您通过{{ }}风格将属性绑定,以便在 HTML 中显示该属性。
打开weather.component.ts文件,创建一个名为weatherData的变量,您将从API中分配获取的JSON数据。
 1[label src/app/weather/weather.component.ts]
 2...
 3export class WeatherComponent implements OnInit {
 4public weatherSearchForm: FormGroup;
 5public weatherData: any;
 6...
 7sendToAPIXU(formValues){
 8    this.apixuService
 9    .getWeather(formValues.location)
10    .subscribe(data => this.weatherData = data)
11      console.log(this.weatherData);
12    }
13}
您创建了)声明,以双重检查weatherData`是否包含您获取的所有信息。
您的「weather.component.ts」檔案在這個階段應該是這樣的:
 1[label src/app/weather/weather.component.ts]
 2import { Component, OnInit } from "@angular/core";
 3import { FormBuilder, FormGroup } from "@angular/forms";
 4import { ApixuService } from "../apixu.service";
 5
 6@Component({
 7  selector: "app-weather",
 8  templateUrl: "./weather.component.html",
 9  styleUrls: ["./weather.component.css"]
10})
11export class WeatherComponent implements OnInit {
12  public weatherSearchForm: FormGroup;
13  public weatherData: any;
14
15  constructor(
16    private formBuilder: FormBuilder,
17    private apixuService: ApixuService
18  ) {}
19
20  ngOnInit() {
21    this.weatherSearchForm = this.formBuilder.group({
22      location: [""]
23    });
24  }
25
26  sendToAPIXU(formValues) {
27    this.apixuService.getWeather(formValues.location).subscribe(data => {
28      this.weatherData = data;
29      console.log(this.weatherData);
30    });
31  }
32}
如果您返回并再次搜索 London, UK,您将看到您的对象以正常的方式打印到控制台. 现在,您希望在您的HTML中显示这些数据. 如果您从控制台中获取的天气数据中检查当前对象,您将看到条件、feelslike_c、feelslike_f、temp_c、temp_f等值。
再次打开您的weather.component.html文件,并在您想要显示的数据中添加字幕,您将在第二个col-md-6中添加这些<p>标签:
 1[label src/app/weather/weather.component.html]
 2...
 3<div class="col-md-6">
 4  <h3 class="text-center my-4">Weather Details:</h3>
 5  <p class="text-center">Current weather conditions:</p>
 6  <p class="text-center">Temperature in Degrees Celsius:</p>
 7  <p class="text-center">Temperature in Degrees Farenheit:</p>
 8  <p class="text-center">Feels like in Degrees Celsius:</p>
 9  <p class="text-center">Feels like in Degrees Farenheit:</p>
10  <p class="text-center">Location Searched:</p>
11</div>
接下来,您将从您的 JSON 对象中获得的数据添加到您的 HTML:
 1[label weather.component.html]
 2...
 3<h3 class="text-center my-4 ">Weather Details:</h3>
 4<p class="text-center">
 5  Current weather conditions: {{this.weatherData?.current.condition.text}}
 6</p>
 7<p class="text-center">
 8  Temperature in Degrees Celsius: {{this.weatherData?.current.temp_c}}
 9</p>
10<p class="text-center">
11  Temperature in Degrees Farenheit: {{this.weatherData?.current.temp_f}}
12</p>
13<p class="text-center">
14  Feels like in Degrees Celsius: {{this.weatherData?.current.feelslike_c}}
15</p>
16<p class="text-center">
17  Feels like in Degrees Farenheit:
18  {{this.weatherData?.current.feelslike_f}}
19</p>
20<p class="text-center">
21  Location Searched: {{this.weatherData?.location.name}},
22  {{this.weatherData?.location.country}}
23</p>
您已经使用了运算符 ? 当您从您的 HTML 中的天气数据变量中获取数据时,该运算符被称为 _Elvis 运算符。
因为你正在打HTTP电话,所以你正在提出_同步_请求. 你会在某个时间得到数据 但不会是立即的反应 然而,Angular将继续用您从天候数据变量中指定的数据填写您的 HTML。 如果在Angular开始填充您段落时还没有收到数据,就会出现一个错误,说明Angular找不到这些数据. 例如,.current'或.location'将显示为未定义.
厄尔维斯操作员是一个安全的导航器,并防止这种情况发生,它告诉 Angular 等待并检查天气数据是否首先被定义,然后继续在HTML中显示这些数据。
您的最终 weather.component.ts 文件将看起来如下:
 1[label weather.component.html]
 2<div class="container">
 3  <div class="row">
 4    <div class="col-md-6">
 5      <h3 class="text-center my-4">Search for Weather:</h3>
 6      <form
 7        [formGroup]="weatherSearchForm"
 8        (ngSubmit)="sendToAPIXU(weatherSearchForm.value)"
 9      >
10        <div class="form-group">
11          <input
12            class="form-control"
13            type="text"
14            id="weatherLocation"
15            aria-describedby="weatherLocation"
16            placeholder="Please input a Location"
17            formControlName="location"
18          />
19        </div>
20        <div class="text-center">
21          <button type="submit" class="btn btn-success btn-md">
22            Search for the weather
23          </button>
24        </div>
25      </form>
26    </div>
27    <div class="col-md-6">
28      <h3 class="text-center my-4">Weather Details:</h3>
29      <p class="text-center">
30        Current weather conditions: {{ this.weatherData?.current.condition.text
31        }}.
32      </p>
33      <p class="text-center">
34        Temperature in Degrees Celsius: {{ this.weatherData?.current.temp_c }}
35      </p>
36      <p class="text-center">
37        Temperature in Degrees Farenheit: {{ this.weatherData?.current.temp_f }}
38      </p>
39      <p class="text-center">
40        Feels like in Degrees Celsius: {{ this.weatherData?.current.feelslike_c
41        }}
42      </p>
43      <p class="text-center">
44        Feels like in Degrees Farenheit: {{
45        this.weatherData?.current.feelslike_f }}
46      </p>
47      <p class="text-center">
48        Location Searched: {{ this.weatherData?.location.name }}, {{
49        this.weatherData?.location.country }}.
50      </p>
51    </div>
52  </div>
53</div>
您已按照返回的 JSON 天气对象的模式输出所需的数据. 保存您的文件,返回浏览器,然后键入 London, UK ,您将看到您的天气数据显示在右侧。
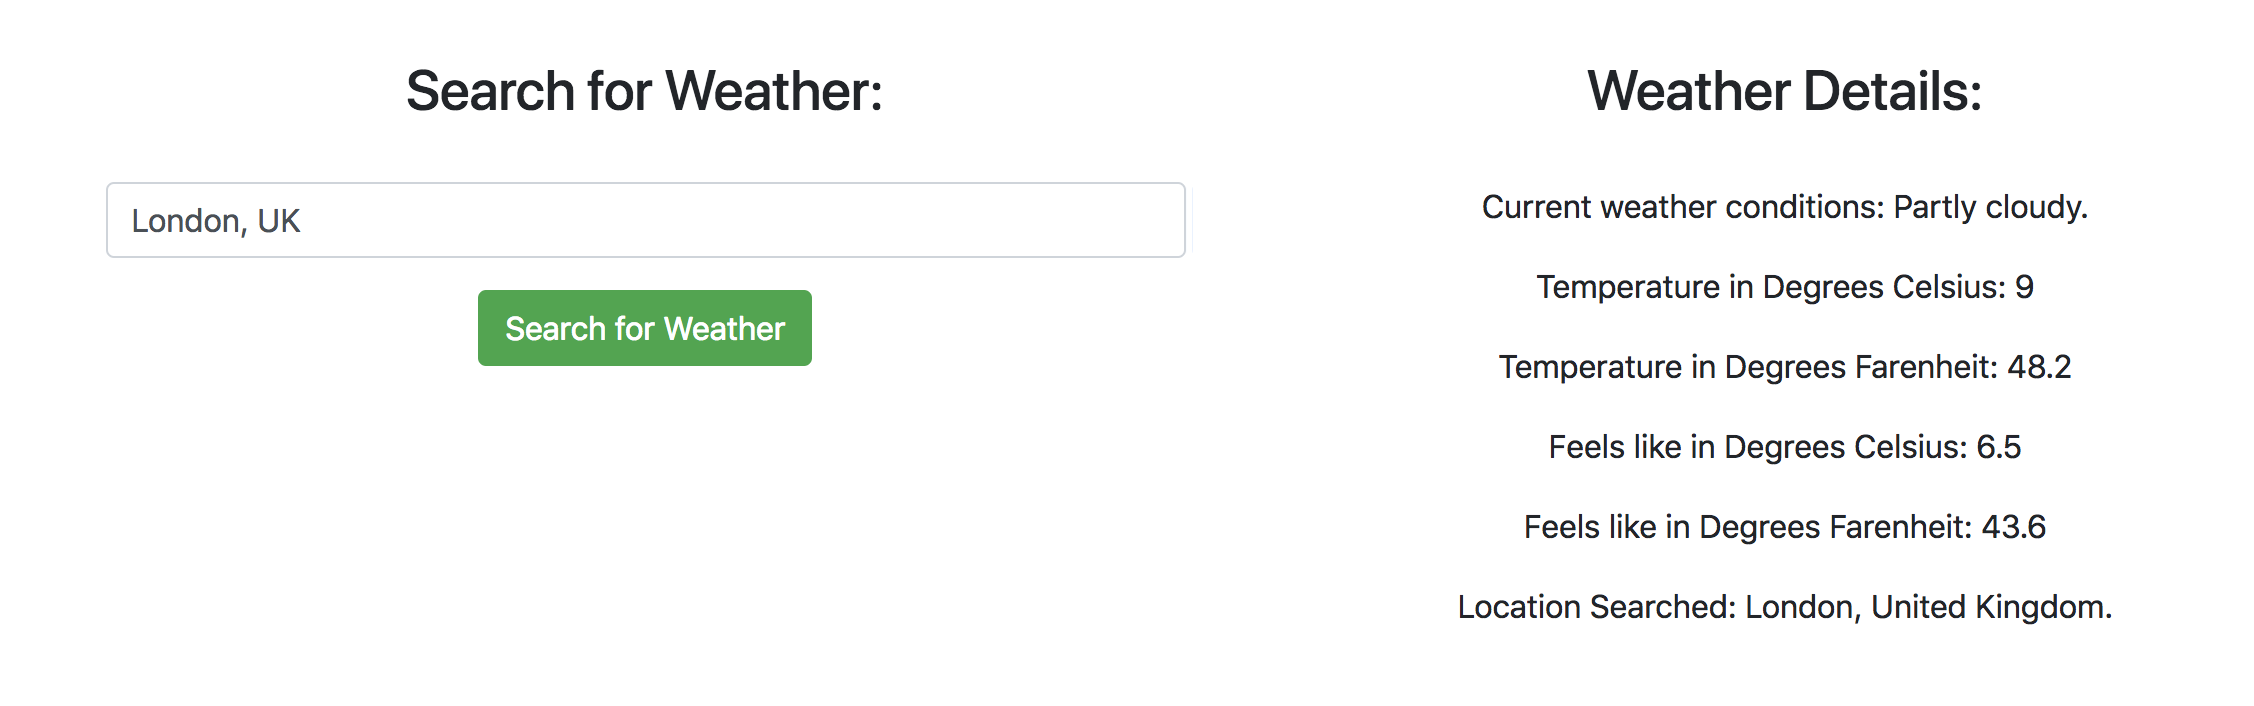
尝试使用不同的地点,如: 巴黎, 美国 ,** 巴黎, 塞内加尔** , 和** 巴黎, 夏威夷** . 您将看到所有这些地点的相应天气数据。
结论
您使用 Angular、Bootstrap 和 APIXU API 创建了一个天气应用程序,您从头开始设置了一个 Angular 项目,并遵循 Angular 最佳实践,同时确保您的应用程序设计和设置良好。
Angular是一个先进的框架,允许您轻松创建从小型Web应用程序到大型、复杂的应用程序,与任何框架一样,Angular确实具有学习曲线,但像这样的小项目可以帮助您快速学习并开始有效地使用它。
另一个值得考虑的功能是从您的 HTTP 请求中添加 处理错误,例如,如果您要键入一个无效的位置。
您可能还想使用 NgBootstrap,这是一种专门为 Angular 构建的 Bootstrap 类型,这允许您使用所有标准的 Bootstrap JavaScript 工具,以及一些特殊的工具,这些工具不包括在 Angular 标准安装中。
本教程的完整代码可在 GitHub上找到。