介绍
React.js 和 Vue.js 等现代 JavaScript 库的出现改变了前端 Web 开发,这些库具有包括 SPA(单页应用程序)在内的功能,即在没有完全重新加载到浏览器的情况下在网页中动态地加载内容。
在客户端渲染中,大部分内容在使用JavaScript的浏览器中渲染;在页面加载时,内容不会最初加载,直到JavaScript完全下载,并渲染了网站的其余部分。
客户端渲染是一个相对较近的概念,并且与其使用有关的妥协,一个显着的负面方面是,因为在页面使用JavaScript进行更新之前内容不准确渲染,因此网站的SEO(搜索引擎优化)将受到影响,因为搜索引擎几乎没有任何数据可搜索。
另一方面,服务器侧渲染是通过浏览器渲染HTML页面的常规方式,在较旧的服务器侧渲染应用程序中,Web应用程序是使用PHP等服务器侧语言构建的。
正如客户端渲染有缺点一样,服务器端渲染会使浏览器发送服务器请求太频繁,并对相似数据进行全页重新加载的重复。
总之,一个通用应用程序被用来描述可在客户端和服务器端执行的JavaScript代码. 在本文中,我们将使用Nuxt.js构建一个通用食谱应用程序。
Nuxt.js 是开发通用 Vue.js 应用程序的高级框架,其创作受 React 的 Next.js的启发,有助于抽象化在设置服务器侧 rendered Vue.js 应用程序时所产生的困难(服务器配置和客户端代码分布)。
注:我们可以将我们构建的应用程序称为服务器侧渲染(SSR),因为当我们创建单页应用程序时,Vue.js 默认情况下已经实现了客户端渲染。
在本文中,我们将看到如何使用Django和Nuxt.js创建一个通用应用程序Django将处理后端操作并使用DRF(Django Rest Framework)提供API,而Nuxt.js将创建前端。
以下是最终应用程序的演示:

我们看到,最终的应用程序是执行CRUD操作的食谱应用程序。
前提条件
要跟随这个教程,你需要以下安装在你的机器上:
- Node.js 本地安装,您可以按照 如何安装 Node.js 和创建本地开发环境进行操作。 * 此项目将需要 Python 安装在本地环境中。 * 此项目将使用 Pipenv。
教程假设读者有如下:
(二) 基本工作知识(二) 基本工作知识(二) 基本工作知识(二) 基本工作知识(二)
本教程已通过 Python v3.7.7, Django v3.0.7, Node v14.4.0, npm v6.14.5 和 nuxt v2.13.0 进行验证。
步骤1 - 设置后端
在本节中,我们将设置后端并创建我们需要完成操作的所有目录,因此启动一个终端的新实例并通过运行此命令创建项目目录:
1mkdir recipes_app
接下来,我们将导航到目录:
1cd recipes_app
现在,我们将使用Pip安装Pipenv:
1pip install pipenv
并激活新的虚拟环境:
1pipenv shell
注意:如果您已经在计算机上安装了 Pipenv,您应该跳过第一个命令。
让我们使用Pipenv安装Django和其他依赖:
1pipenv install django django-rest-framework django-cors-headers
注意: 在使用 Pipenv 激活新的虚拟环境后,终端中的每个命令行都将先注明当前工作目录的名称。
现在,我们将创建一个名为api的新 Django 项目:
1django-admin startproject api
导航到项目目录:
1cd api
创建一个名为core的 Django 应用程序:
1python manage.py startapp core
让我们注册核心应用程序,以及rest_framework和cors-headers,以便Django项目识别它。
 1[label api/api/settings.py]
 2# ...
 3
 4# Application definition
 5INSTALLED_APPS = [
 6    'django.contrib.admin',
 7    'django.contrib.auth',
 8    'django.contrib.contenttypes',
 9    'django.contrib.sessions',
10    'django.contrib.messages',
11    'django.contrib.staticfiles',
12    'rest_framework', # add this
13    'corsheaders', # add this
14    'core' # add this
15  ]
16
17MIDDLEWARE = [
18    'corsheaders.middleware.CorsMiddleware', # add this
19    'django.middleware.security.SecurityMiddleware',
20    'django.contrib.sessions.middleware.SessionMiddleware',
21    'django.middleware.common.CommonMiddleware',
22    'django.middleware.csrf.CsrfViewMiddleware',
23    'django.contrib.auth.middleware.AuthenticationMiddleware',
24    'django.contrib.messages.middleware.MessageMiddleware',
25    'django.middleware.clickjacking.XFrameOptionsMiddleware',
26]
27
28# add this block below MIDDLEWARE
29CORS_ORIGIN_WHITELIST = (
30    'http://localhost:3000',
31)
32
33# ...
34
35# add the following just below STATIC_URL
36MEDIA_URL = '/media/' # add this
37MEDIA_ROOT = os.path.join(BASE_DIR, 'media') # add this
我們將「http://localhost:3000」添加到白名單中,因為客戶端應用程式將在該端口提供服務,我們希望防止 CORS (Cross-Origin Resource Sharing)]錯誤。
定义食谱模型
让我们创建一个模型来定义如何在数据库中存储 Recipe 项目,打开 core/models.py 文件,并用下面的片段完全取代它:
 1[label api/core/models.py]
 2from django.db import models
 3# Create your models here.
 4
 5class Recipe(models.Model):
 6    DIFFICULTY_LEVELS = (
 7        ('Easy', 'Easy'),
 8        ('Medium', 'Medium'),
 9        ('Hard', 'Hard'),
10    )
11    name = models.CharField(max_length=120)
12    ingredients = models.CharField(max_length=400)
13    picture = models.FileField()
14    difficulty = models.CharField(choices=DIFFICULTY_LEVELS, max_length=10)
15    prep_time = models.PositiveIntegerField()
16    prep_guide = models.TextField()
17
18    def __str_(self):
19        return "Recipe for {}".format(self.name)
上面的代码片段描述了食谱模型的六个属性:
- 「名稱」 * 「成分」 * 「圖片」 * 「難度」 * 「prep_time」 * 「prep_guide」
为食谱模型创建序列化器
我们需要 serializers 来将模型实例转换为 JSON,以便前端可以与收到的数据工作. 我们将创建一个 core/serializers.py 文件,并更新它以以下方式:
1[label api/core/serializers.py]
2from rest_framework import serializers
3from .models import Recipe
4class RecipeSerializer(serializers.ModelSerializer):
5
6    class Meta:
7        model = Recipe
8        fields = ("id", "name", "ingredients", "picture", "difficulty", "prep_time", "prep_guide")
在上面的代码片段中,我们指定了要使用的模型和我们想要转换为JSON的字段。
设置管理面板
Django为我们提供了一个管理界面,该界面将使我们很容易在我们刚刚创建的食谱模型上测试CRUD操作,但首先,我们会做一些配置。
打开core/admin.py文件,并用下面的片段完全取代它:
1[label api/core/admin.py]
2from django.contrib import admin
3from .models import Recipe  # add this
4# Register your models here.
5
6admin.site.register(Recipe) # add this
创建观点
让我们在core/views.py文件中创建一个RecipeViewSet类,完全用下面的片段取代它:
1[label api/core/views.py]
2from rest_framework import viewsets
3from .serializers import RecipeSerializer
4from .models import Recipe
5
6class RecipeViewSet(viewsets.ModelViewSet):
7    serializer_class = RecipeSerializer
8    queryset = Recipe.objects.all()
viewsets.ModelViewSet提供了默认处理CRUD操作的方法,我们只需要指定序列化类和查询类别。
设置 URL
转到「api/urls.py」文件,并用下面的代码完全取代它。
 1[label api/api/urls.py]
 2from django.contrib import admin
 3from django.urls import path, include        # add this
 4from django.conf import settings             # add this
 5from django.conf.urls.static import static   # add this
 6
 7urlpatterns = [
 8    path('admin/', admin.site.urls),
 9    path("api/", include('core.urls'))       # add this
10]
11
12# add this
13if settings.DEBUG:
14    urlpatterns += static(settings.MEDIA_URL, document_root=settings.MEDIA_ROOT)
现在,在核心目录中创建一个urls.py文件,并粘贴下面的片段:
 1[label api/core/urls.py]
 2from django.urls import path, include
 3from rest_framework.routers import DefaultRouter
 4from .views import RecipeViewSet
 5
 6router = DefaultRouter()
 7router.register(r'recipes', RecipeViewSet)
 8
 9urlpatterns = [
10    path("", include(router.urls))
11]
在上面的代码中,路由器类会生成以下URL模式:
/recipes/- 在此路径上可以执行 CREATE 和 READ 操作. */recipes/{id}- 在此路径上可以执行 READ, UPDATE 和 DELETE 操作。
流动的移民
由于我们最近创建了 Recipe 模型并定义了其结构,所以我们需要创建一个迁移文件并将模型上的更改应用到数据库中,所以让我们运行以下命令:
1python manage.py makemigrations
2python manage.py migrate
现在,我们将创建一个超级用户帐户来访问 admin 界面:
1python manage.py createsuperuser
您将被要求为超级用户输入用户名、电子邮件和密码. 请确保输入您能记住的详细信息,因为您将需要它们才能快速登录管理仪表板。
我们现在可以测试我们创建的API,所以让我们开始Django服务器:
1python manage.py runserver
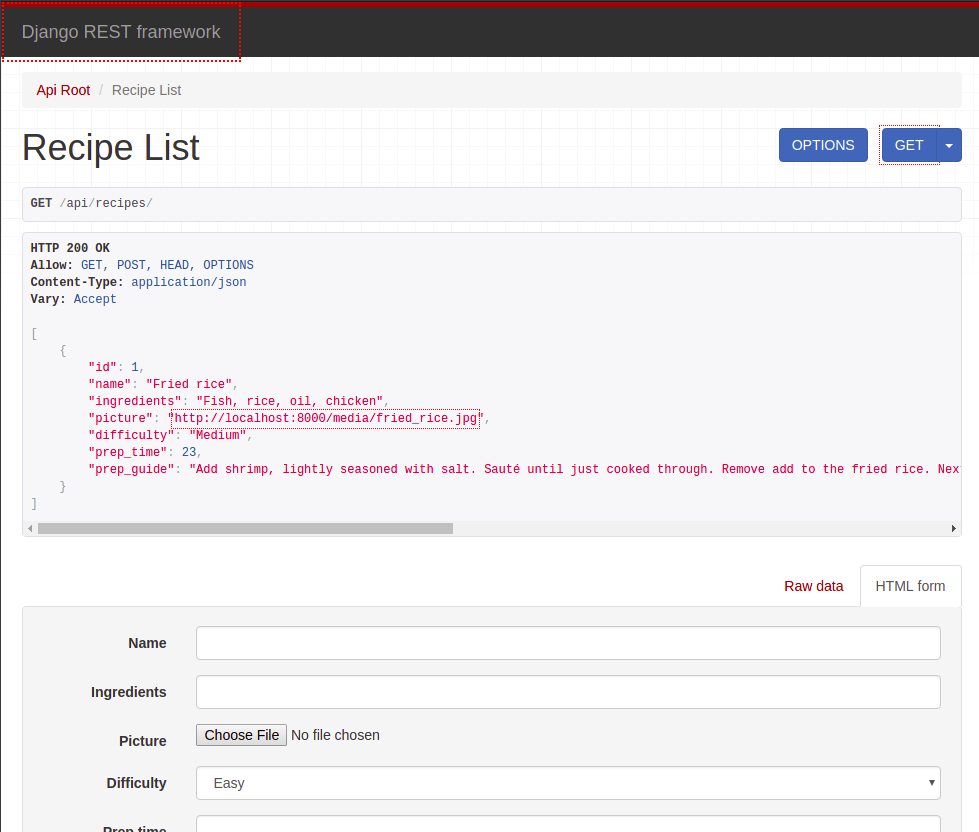
一旦服务器运行,请转到localhost:8000/api/recipes/以确保它工作:
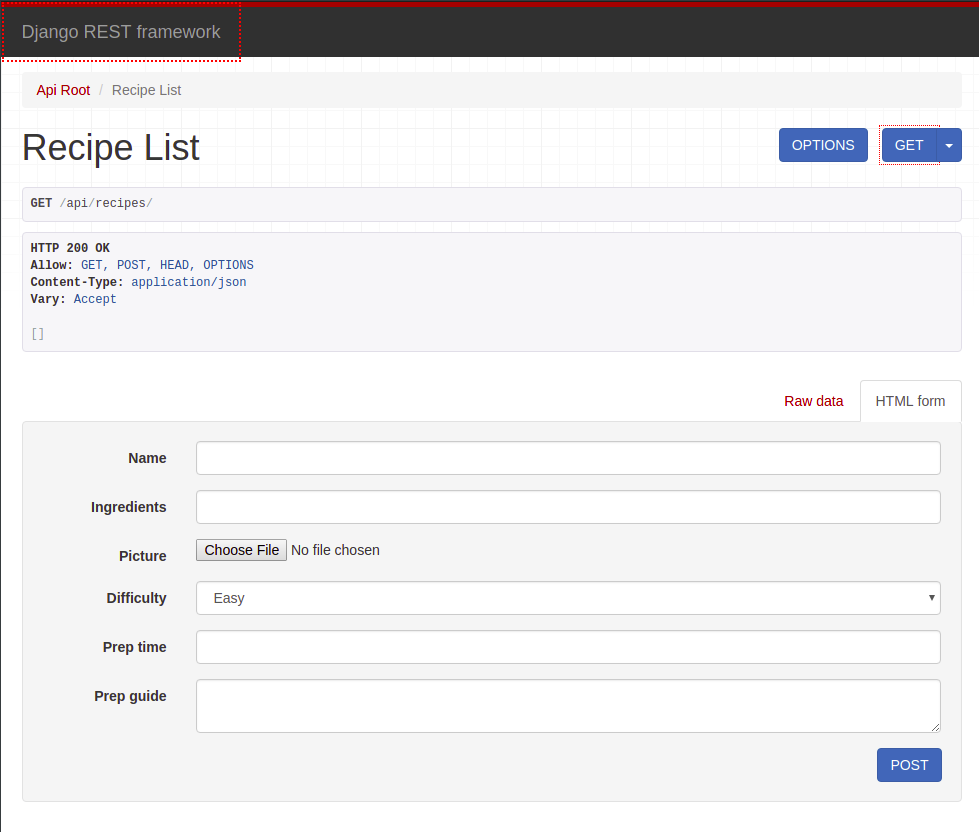
我们可以使用接口创建一个新的食谱项目:
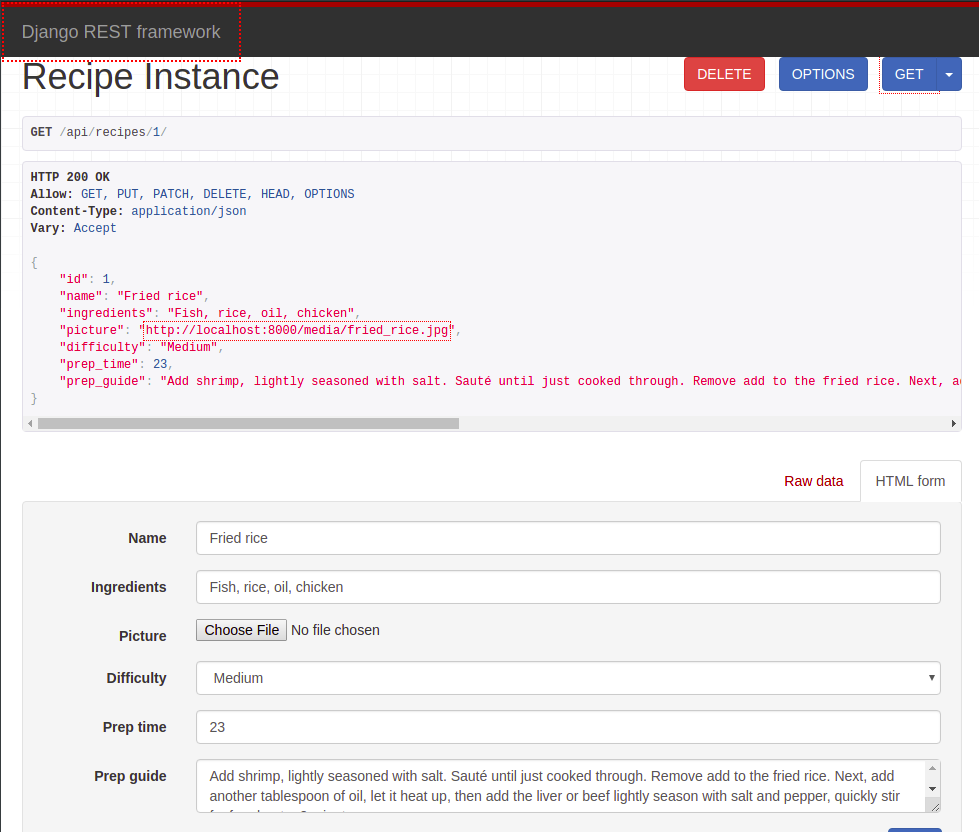
我们还可以使用它们的id主要密钥对特定的食谱项目执行DELETE、PUT和PATCH操作。 为了做到这一点,我们将访问一个具有此结构的地址/api/recipe/{id}。
这就是应用程序的后端,现在我们可以移动到前端。
步骤2 - 设置前端
在本教程的本节中,我们将构建应用程序的前端. 我们希望将前端代码的目录放置在)。
让我们用这个命令创建一个名为client的nuxt应用程序:
1npx create-nuxt-app client
<$>[注] 注: 前面的「create-nuxt-app」与「npx」将安装该包,如果它尚未在您的计算机上安装。
一旦安装完毕,‘create-nuxt-app’ 将询问有关要添加的额外工具的几个问题。
 1? Project name: client
 2? Programming language: JavaScript
 3? Package manager: Npm
 4? UI framework: Bootstrap Vue
 5? Nuxt.js modules: Axios
 6? Linting tools:
 7? Testing framework: None
 8? Rendering mode: Universal (SSR / SSG)
 9? Deployment target: Server (Node.js hosting)
10? Development tools:
这将触发使用所选包管理器的依赖性安装。
导航到客户目录:
1cd client
让我们运行以下命令以在开发模式下启动应用程序:
1npm run dev
开发服务器启动后,转到localhost:3000,查看应用程序:
现在,让我们看看客户端目录的目录结构:
 1├── client
 2  ├── assets/
 3  ├── components/
 4  ├── layouts/
 5  ├── middleware/
 6  ├── node_modules/
 7  ├── pages/
 8  ├── plugins/
 9  ├── static/
10  └── store/
以下是这些目录用于什么的分布:
*资产 - 包含图像, CSS, Sass, 和 JavaScript 文件等未编译的文件. *组件 -- -- 包含Vue.js组件。 *Layouts - 包含应用程序的布局;布局用于改变一页的外观并可用于多页. *Middleware - 包含应用程序的Middleware;Middleware是自定义功能,在提供一页前运行. *页 - 载有申请的意见和路线。 Nuxt.js 读取此目录中所有 `.vue' 文件,并使用该信息创建应用程序的路由器. *Plugins - 包含在root Vue.js 应用程序被即时化前要运行的 JavaScript 插件. *Static - 包含静态文件(文件不可能更改),所有这些文件都被映射到应用程序的根上,即 " / " . *Store - 如果我们打算用 Nuxt.js 使用 Vuex ,则包含存储文件。 .
在客户端目录中还有一个nuxt.config.js文件,这个文件包含了 Nuxt.js 应用程序的自定义配置。
在我们继续之前,下载此 zip 文件的图像资产,提取它,并将图像目录放入静态目录中。
页面结构
在本节中,我们会将一些.vue 文件添加到页面目录中,使我们的应用程序有五个页面:
- 主页 * 所有食谱列表页面 * 单一食谱查看页面 * 单一食谱编辑页面 * 添加食谱页面
让我们将以下.vue 文件和文件夹添加到 页面 目录中,以便我们有这个精确的结构:
1├── pages/
2   ├── recipes/
3     ├── _id/
4       └── edit.vue
5       └── index.vue
6     └── add.vue
7     └── index.vue
8  └── index.vue
上面的文件结构将生成以下路径:
/→由pages/index.vue*/recipes/add→由pages/recipes/add.vue*/recipes/→由pages/recipes/index.vue*/recipes/{id}/→由pages/recipes/_id/index.vue*/recipes/{id}/edit→由pages/recipes/_id/edit.vue
一个)。
创建主页
在 Nuxt.js 中,布局是一个很好的帮助,当你想改变你的应用程序的外观和感觉时。现在,每一个 Nuxt.js 应用程序的实例都有默认布局,我们想要删除所有的风格,以便它们不会干扰我们的应用程序。
打开layouts/default.vue文件,并用下面的短片取代它:
1[label client/layouts/default.vue]
2<template>
3  <div>
4    <nuxt/>
5  </div>
6</template>
7
8<style>
9</style>
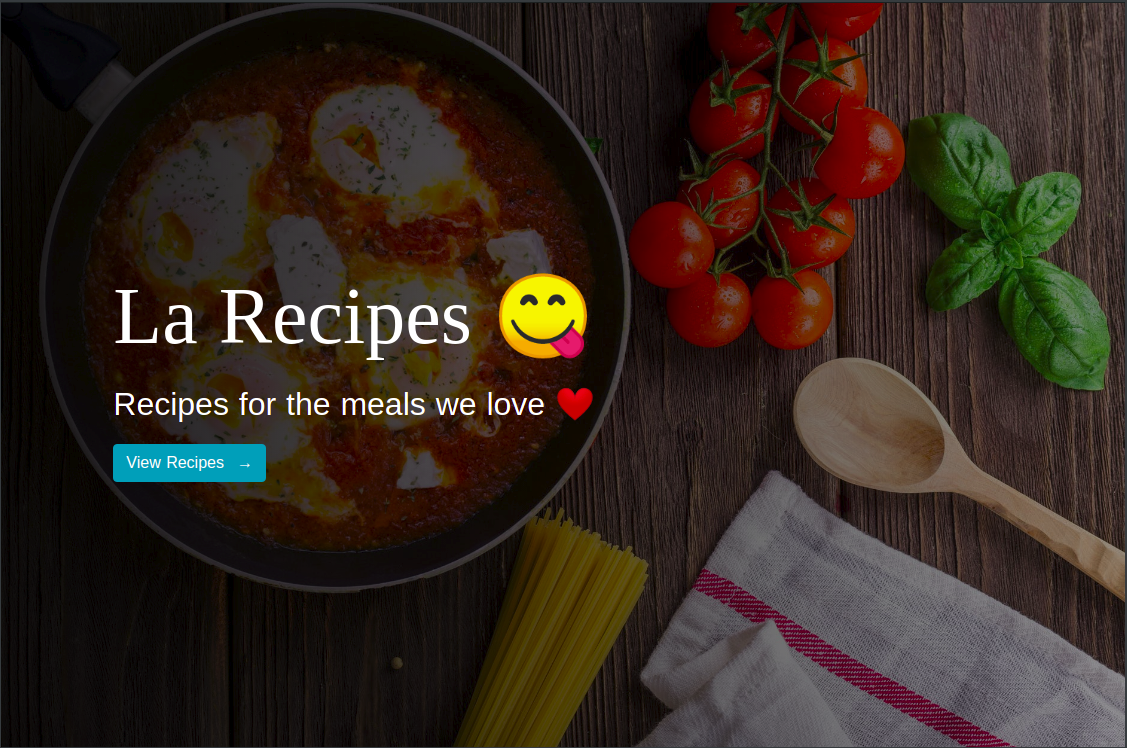
让我们用下面的代码更新「pages/index.vue」文件:
1[label client/pages/index.vue]
2<template>
3 <header>
4 <div class="text-box">
5 <h1>La Recipes ?</h1>
6 <p class="mt-3">Recipes for the meals we love ❤️</p>
7 <nuxt-link class="btn btn-outline btn-large btn-info" to="/recipes">
8 View Recipes <span class="ml-2">→</span>
9 </nuxt-link>
10 </div>
11 </header>
12</template>
13
14<script>
15export default {
16 head() {
17 return {
18 title: "Home page"
19 };
20 },
21};
22</script>
23
24<style>
25header {
26 min-height: 100vh;
27 background-image: linear-gradient(
28 to right,
29 rgba(0, 0, 0, 0.9),
30 rgba(0, 0, 0, 0.4)
31 ),
32 url("/images/banner.jpg");
33 background-position: center;
34 background-size: cover;
35 position: relative;
36}
37.text-box {
38 position: absolute;
39 top: 50%;
40 left: 10%;
41 transform: translateY(-50%);
42 color: #fff;
43}
44.text-box h1 {
45 font-family: cursive;
46 font-size: 5rem;
47}
48.text-box p {
49 font-size: 2rem;
50 font-weight: lighter;
51}
52</style>
从上面的代码中, <nuxt-link> 是一个 Nuxt.js 组件,可以用来在页面之间导航. 它与 Vue Router的 <router-link> 组件非常相似。
让我们开始前端开发服务器(如果它还没有运行):
1npm run dev
然后访问Localhost:3000并观察主页:
始终确保 Django 后端服务器始终在终端的另一个实例中运行,因为前端将很快开始与其通信以获取数据。
此应用程序中的每个页面都将是一个Vue组件,而 Nuxt.js 提供了特殊的属性和功能,使应用程序的开发无缝。
为了这个教程,我们将使用这两个功能:
head()- 此方法用于为当前页面设置特定的<meta>标签。 *asyncData()- 此方法用于在页面组件加载之前获取数据。
创建食谱列表页面
让我们在组件目录中创建一个名为RecipeCard.vue的 Vue.js 组件,并使用下面的片段更新它:
 1[label client/components/RecipeCard.vue]
 2<template>
 3  <div class="card recipe-card">
 4    <img :src="https://cdn.jsdelivr.net/gh/andsky/tutorials-images/recipe.picture" class="card-img-top" >
 5    <div class="card-body">
 6      <h5 class="card-title">{{ recipe.name }}</h5>
 7      <p class="card-text">
 8        <strong>Ingredients:</strong> {{ recipe.ingredients }}
 9      </p>
10      <div class="action-buttons">
11        <nuxt-link :to="`/recipes/${recipe.id}/`" class="btn btn-sm btn-success">View</nuxt-link>
12        <nuxt-link :to="`/recipes/${recipe.id}/edit/`" class="btn btn-sm btn-primary">Edit</nuxt-link>
13        <button @click="onDelete(recipe.id)" class="btn btn-sm btn-danger">Delete</button>
14      </div>
15    </div>
16  </div>
17</template>
18
19<script>
20export default {
21    props: ["recipe", "onDelete"]
22};
23</script>
24
25<style>
26.recipe-card {
27    box-shadow: 0 1rem 1.5rem rgba(0,0,0,.6);
28}
29</style>
上面的组件接受两项优惠:
- 包含有关特定食谱的信息的
食谱对象 2. 每当用户点击删除食谱的按钮时,就会触发删除方法。
接下来,打开「pages/recipes/index.vue」并用下面的片段更新它:
 1[label client/pages/recipes/index.vue]
 2<template>
 3  <main class="container mt-5">
 4    <div class="row">
 5      <div class="col-12 text-right mb-4">
 6        <div class="d-flex justify-content-between">
 7          <h3>La Recipes</h3>
 8          <nuxt-link to="/recipes/add" class="btn btn-info">Add Recipe</nuxt-link>
 9        </div>
10      </div>
11      <template v-for="recipe in recipes">
12        <div :key="recipe.id" class="col-lg-3 col-md-4 col-sm-6 mb-4">
13          <recipe-card :onDelete="deleteRecipe" :recipe="recipe"></recipe-card>
14        </div>
15      </template>
16    </div>
17  </main>
18</template>
19
20<script>
21import RecipeCard from "~/components/RecipeCard.vue";
22
23const sampleData = [
24  {
25    id: 1,
26    name: "Jollof Rice",
27    picture: "/images/food-1.jpeg",
28    ingredients: "Beef, Tomato, Spinach",
29    difficulty: "easy",
30    prep_time: 15,
31    prep_guide:
32      "Lorem ipsum dolor sit amet consectetur adipisicing elit. Omnis, porro. Dignissimos ducimus ratione totam fugit officiis blanditiis exercitationem, nisi vero architecto quibusdam impedit, earum "
33  },
34  {
35    id: 2,
36    name: "Macaroni",
37    picture: "/images/food-2.jpeg",
38    ingredients: "Beef, Tomato, Spinach",
39    difficulty: "easy",
40    prep_time: 15,
41    prep_guide:
42      "Lorem ipsum dolor sit amet consectetur adipisicing elit. Omnis, porro. Dignissimos ducimus ratione totam fugit officiis blanditiis exercitationem, nisi vero architecto quibusdam impedit, earum "
43  },
44  {
45    id: 3,
46    name: "Fried Rice",
47    picture: "/images/banner.jpg",
48    ingredients: "Beef, Tomato, Spinach",
49    difficulty: "easy",
50    prep_time: 15,
51    prep_guide:
52      "Lorem ipsum dolor sit amet consectetur adipisicing elit. Omnis, porro. Dignissimos ducimus ratione totam fugit officiis blanditiis exercitationem, nisi vero architecto quibusdam impedit, earum "
53  }
54];
55
56export default {
57  head() {
58    return {
59      title: "Recipes list"
60    };
61  },
62  components: {
63    RecipeCard
64  },
65  asyncData(context) {
66    let data = sampleData;
67    return {
68      recipes: data
69    };
70  },
71  data() {
72    return {
73      recipes: []
74    };
75  },
76  methods: {
77    deleteRecipe(recipe_id) {
78      console.log(deleted `${recipe.id}`)
79    }
80  }
81};
82</script>
83
84<style scoped>
85</style>
让我们开始前端开发服务器(如果它还没有运行):
1npm run dev
然后,访问本地食客:3000/食谱,并观察食谱列表页面:
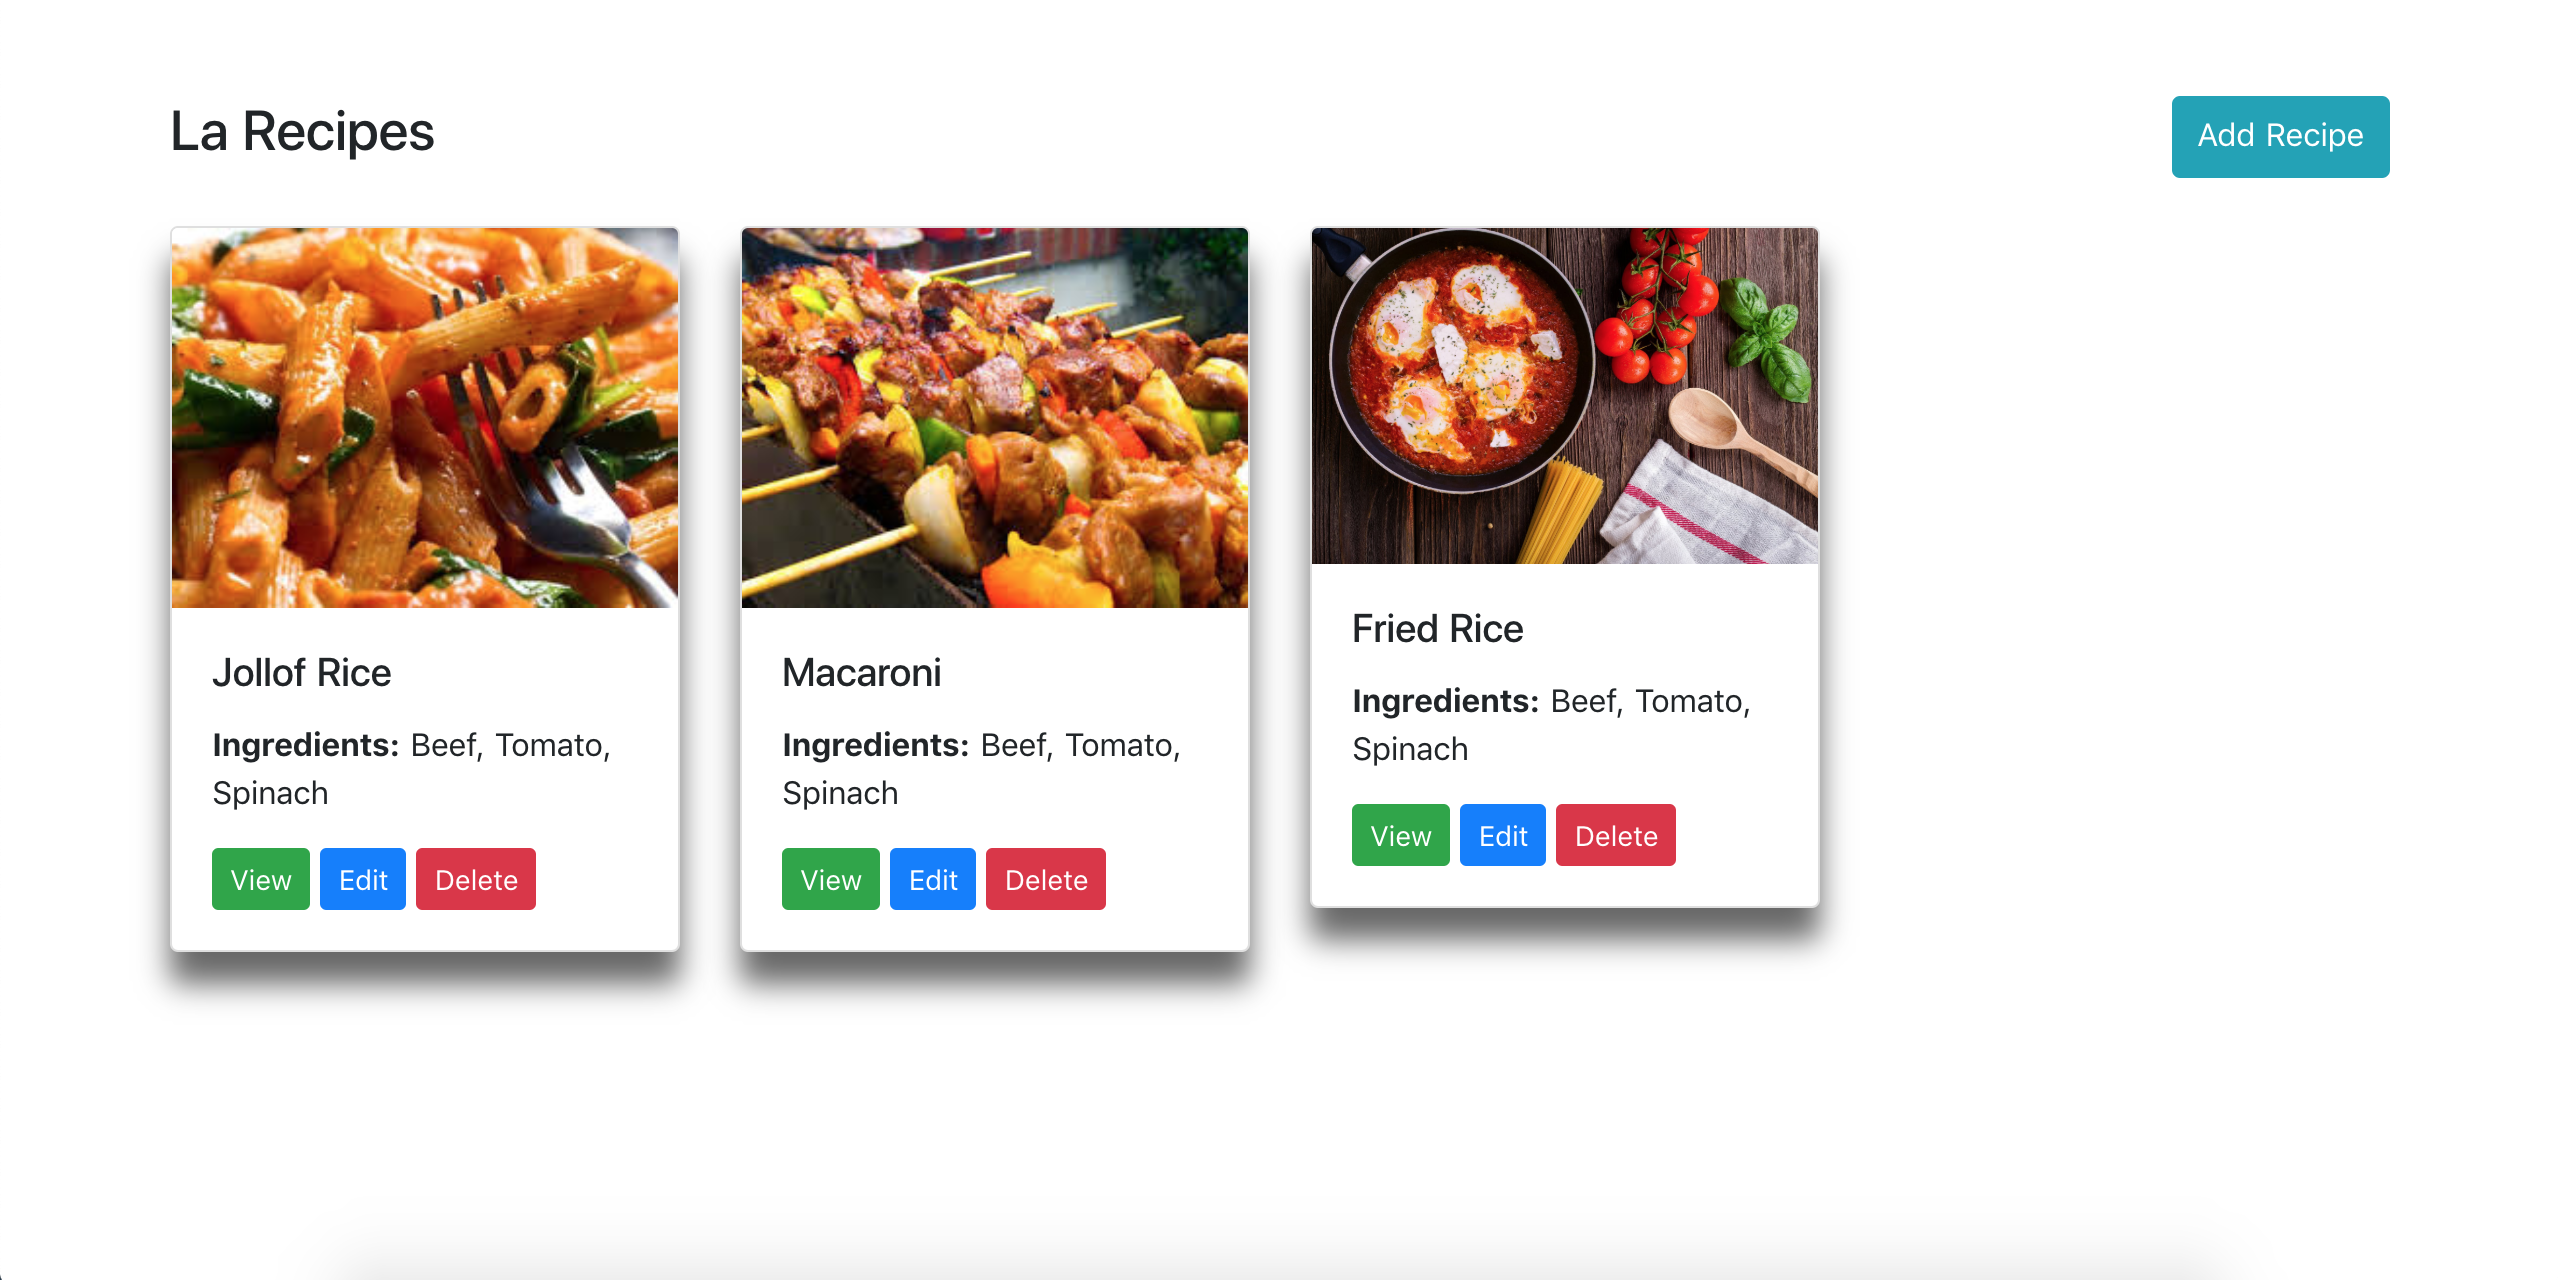
从上面的图像中,我们可以看到,即使我们在组件的数据部分中将食谱设置为空数组,但出现了三个食谱卡,原因是在页面加载之前执行方法asyncData,并返回一个更新组件数据的对象。
现在,我们需要做的就是修改asyncData方法,向Django后端发出api请求,并与结果更新组件的数据。
在我们这样做之前,我们必须配置Axios。打开nuxt.config.js文件并相应地更新它:
1[label client/nuxt.config.js]
2// add this Axios object
3axios: {
4  baseURL: "http://localhost:8000/api"
5},
<$>[注] 注: 这假定您在使用create-nuxt-app时选择了Axios。
现在,打开pages/recipes/index.vue文件,并将<script>部分替换为下面的部分:
 1[label client/pages/recipes/index.vue]
 2[...]
 3
 4<script>
 5import RecipeCard from "~/components/RecipeCard.vue";
 6
 7export default {
 8  head() {
 9    return {
10      title: "Recipes list"
11    };
12  },
13  components: {
14    RecipeCard
15  },
16  async asyncData({ $axios, params }) {
17    try {
18      let recipes = await $axios.$get(`/recipes/`);
19      return { recipes };
20    } catch (e) {
21      return { recipes: [] };
22    }
23  },
24  data() {
25    return {
26      recipes: []
27    };
28  },
29  methods: {
30    async deleteRecipe(recipe_id) {
31      try {
32        await this.$axios.$delete(`/recipes/${recipe_id}/`); // delete recipe
33        let newRecipes = await this.$axios.$get("/recipes/"); // get new list of recipes
34        this.recipes = newRecipes; // update list of recipes
35      } catch (e) {
36        console.log(e);
37      }
38    }
39  }
40};
41</script>
42
43[...]
在上面的代码中,‘asyncData()’收到一个名为‘context’的对象,我们将其摧毁以获得‘$axios’。
我们将asyncData()包装到一个试...捕块中,因为我们希望防止如果后端服务器不运行并且Axios无法获取数据,就会发生错误。
这个代码的行:
1let recipes = await $axios.$get("/recipes/")
这是一个更短的版本:
1let response = await $axios.get("/recipes")
2let recipes = response.data
「deleteRecipe()」方法删除特定的食谱,从Django后端获取最新的食谱列表,并最终更新组件的数据。
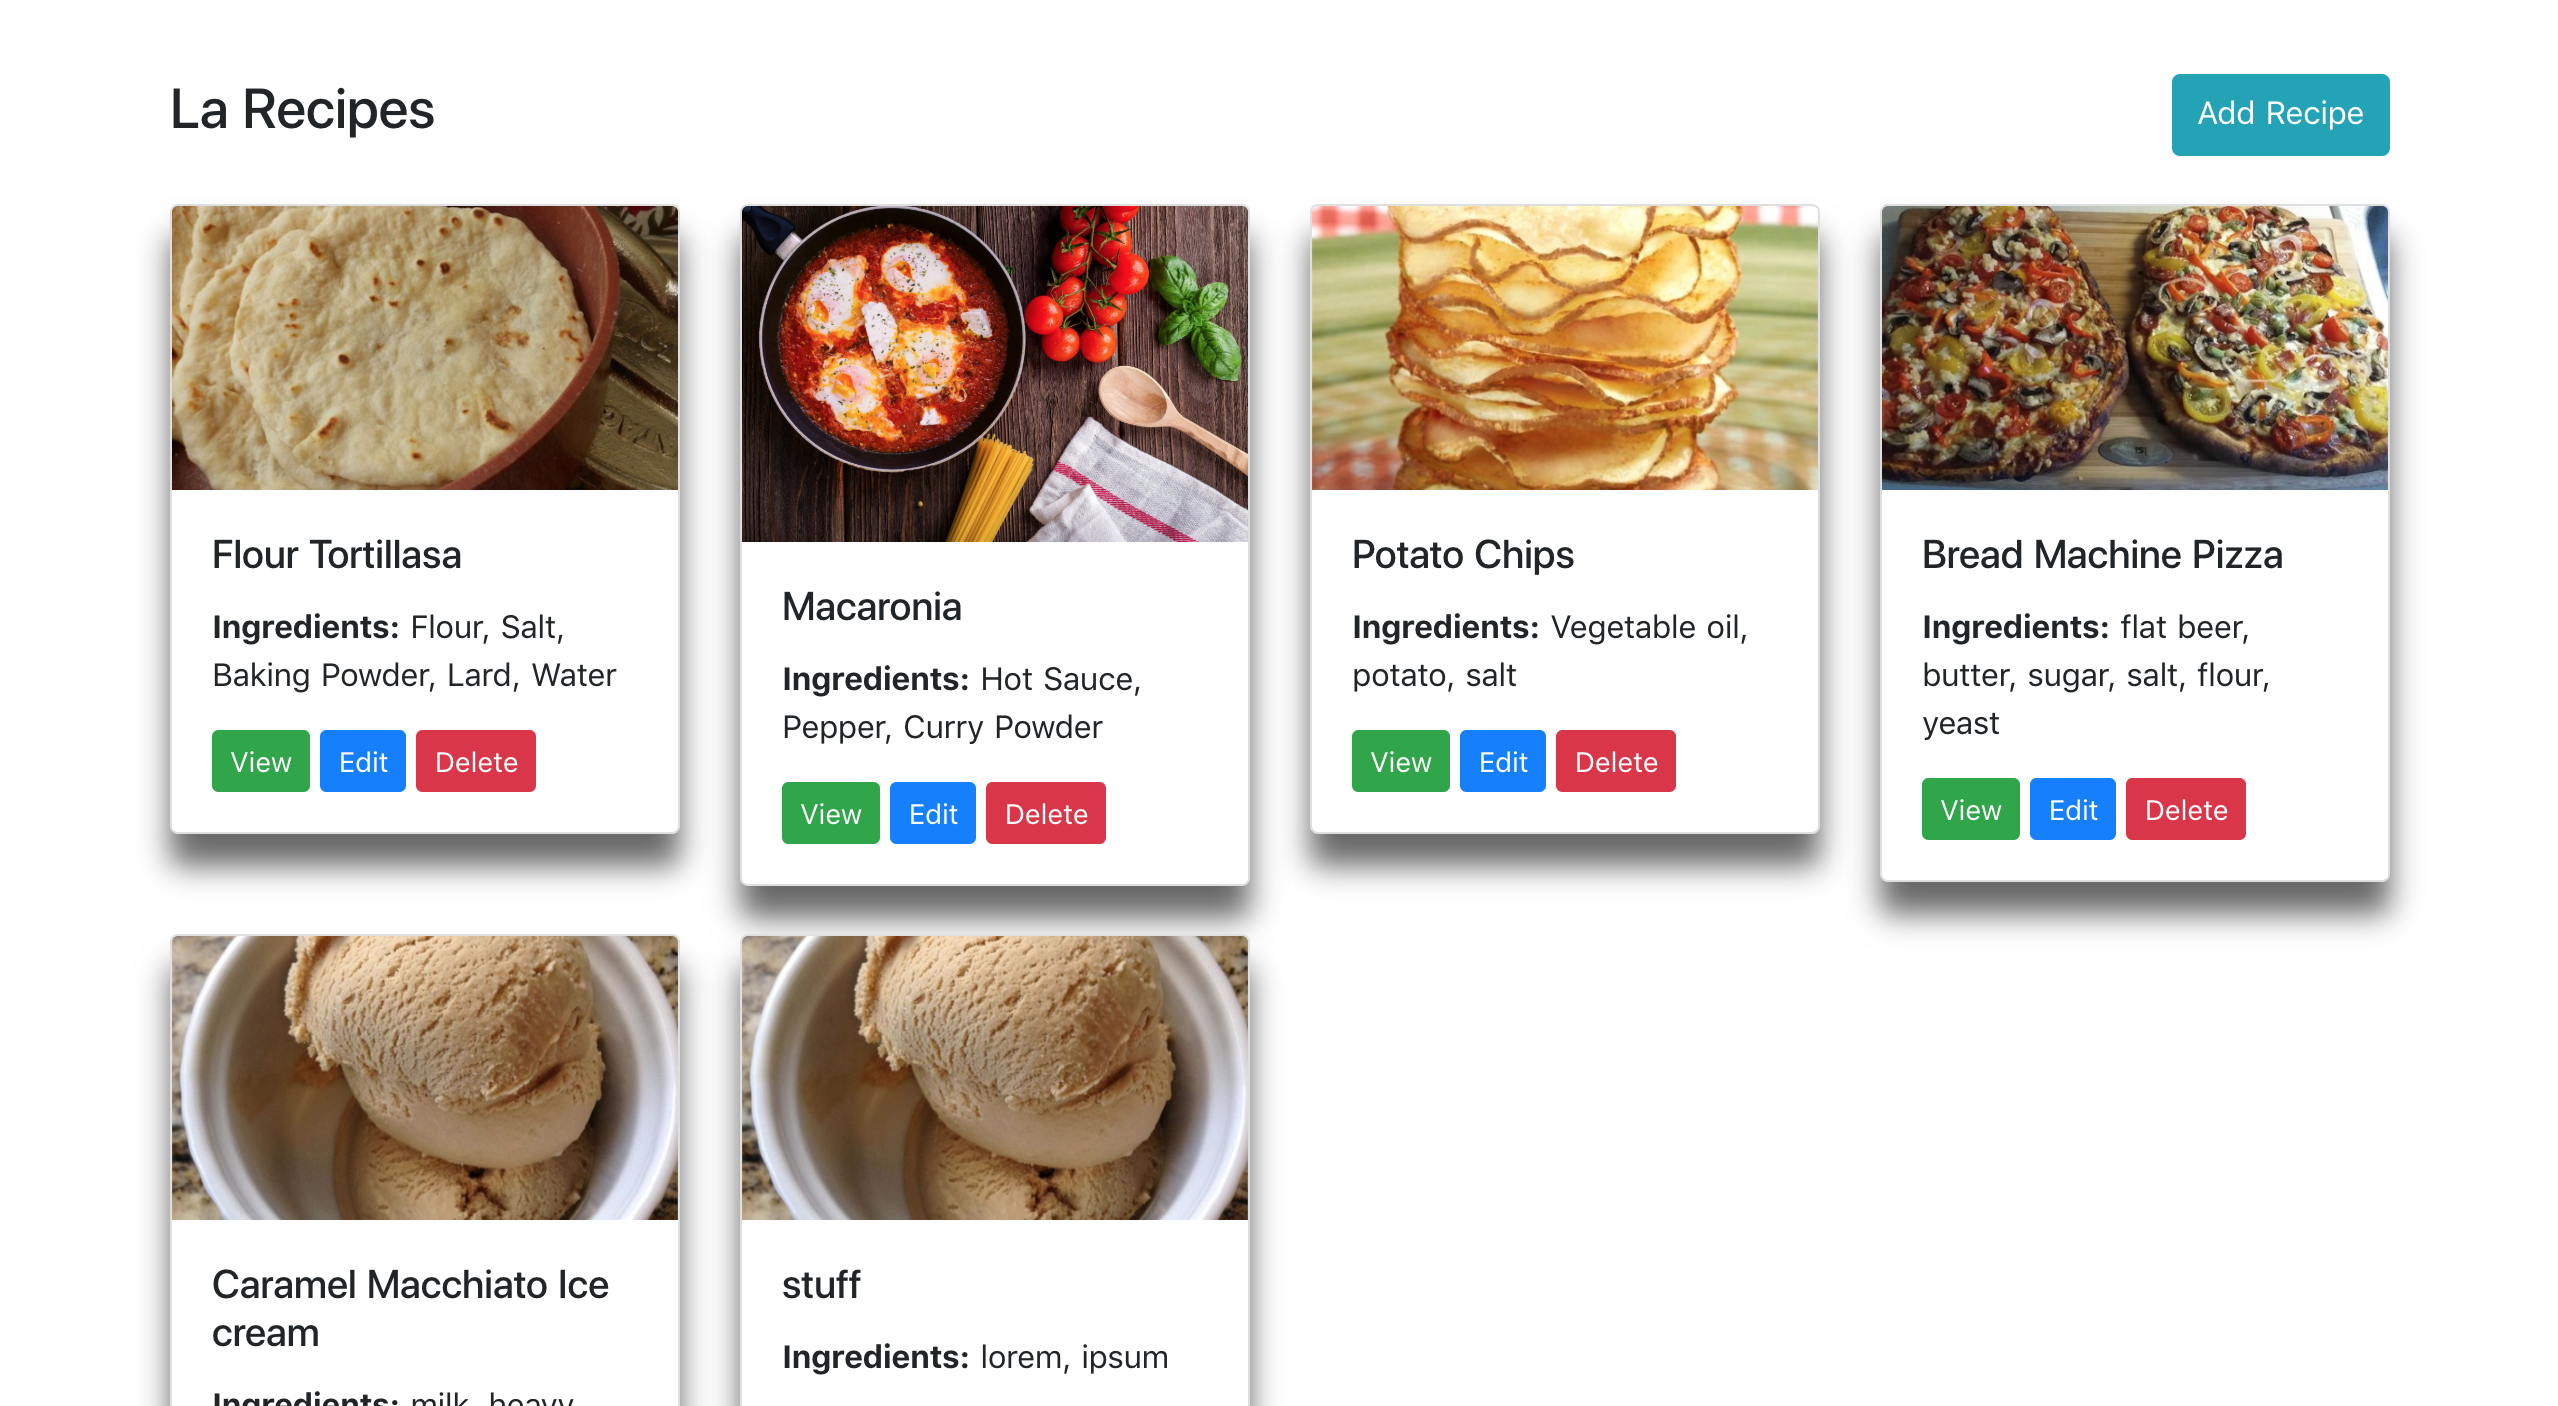
我们现在可以启动前端开发服务器(如果它还没有运行),我们会看到食谱卡现在挤满了Django后端的数据。
要做到这一点,Django 后端服务器必须运行,并且必须为 Recipe 项目提供一些数据(从管理器界面输入)。
1npm run dev
让我们来参观本地食客:3000/食谱:
您还可以尝试删除食谱项目,并观看它们相应地更新。
添加新的食谱
正如我们已经讨论过的,我们希望能够从应用程序的前端添加新的食谱,所以打开页面 / 食谱 / 添加 / 文件,并用以下短片更新它:
  1[label client/pages/recipes/add.vue]
  2<template>
  3  <main class="container my-5">
  4    <div class="row">
  5      <div class="col-12 text-center my-3">
  6        <h2 class="mb-3 display-4 text-uppercase">{{ recipe.name }}</h2>
  7      </div>
  8      <div class="col-md-6 mb-4">
  9        <img
 10          v-if="https://cdn.jsdelivr.net/gh/andsky/tutorials-images/preview"
 11          class="img-fluid"
 12          style="width: 400px; border-radius: 10px; box-shadow: 0 1rem 1rem rgba(0,0,0,.7);"
 13          :src="https://cdn.jsdelivr.net/gh/andsky/tutorials-images/preview"
 14          alt
 15        >
 16        <img
 17          v-else
 18          class="img-fluid"
 19          style="width: 400px; border-radius: 10px; box-shadow: 0 1rem 1rem rgba(0,0,0,.7);"
 20          src="https://cdn.jsdelivr.net/gh/andsky/tutorials-images/@/static/images/placeholder.png"
 21        >
 22      </div>
 23      <div class="col-md-4">
 24        <form @submit.prevent="submitRecipe">
 25          <div class="form-group">
 26            <label for>Recipe Name</label>
 27            <input type="text" class="form-control" v-model="recipe.name">
 28          </div>
 29          <div class="form-group">
 30            <label for>Ingredients</label>
 31            <input v-model="recipe.ingredients" type="text" class="form-control">
 32          </div>
 33          <div class="form-group">
 34            <label for>Food picture</label>
 35            <input type="file" name="file" @change="onFileChange">
 36          </div>
 37          <div class="row">
 38            <div class="col-md-6">
 39              <div class="form-group">
 40                <label for>Difficulty</label>
 41                <select v-model="recipe.difficulty" class="form-control">
 42                  <option value="Easy">Easy</option>
 43                  <option value="Medium">Medium</option>
 44                  <option value="Hard">Hard</option>
 45                </select>
 46              </div>
 47            </div>
 48            <div class="col-md-6">
 49              <div class="form-group">
 50                <label for>
 51                  Prep time
 52                  <small>(minutes)</small>
 53                </label>
 54                <input v-model="recipe.prep_time" type="number" class="form-control">
 55              </div>
 56            </div>
 57          </div>
 58          <div class="form-group mb-3">
 59            <label for>Preparation guide</label>
 60            <textarea v-model="recipe.prep_guide" class="form-control" rows="8"></textarea>
 61          </div>
 62          <button type="submit" class="btn btn-primary">Submit</button>
 63        </form>
 64      </div>
 65    </div>
 66  </main>
 67</template>
 68
 69<script>
 70export default {
 71  head() {
 72    return {
 73      title: "Add Recipe"
 74    };
 75  },
 76  data() {
 77    return {
 78      recipe: {
 79        name: "",
 80        picture: "",
 81        ingredients: "",
 82        difficulty: "",
 83        prep_time: null,
 84        prep_guide: ""
 85      },
 86      preview: ""
 87    };
 88  },
 89  methods: {
 90    onFileChange(e) {
 91      let files = e.target.files || e.dataTransfer.files;
 92      if (!files.length) {
 93        return;
 94      }
 95      this.recipe.picture = files[0];
 96      this.createImage(files[0]);
 97    },
 98    createImage(file) {
 99      // let image = new Image();
100      let reader = new FileReader();
101      let vm = this;
102      reader.onload = e => {
103        vm.preview = e.target.result;
104      };
105      reader.readAsDataURL(file);
106    },
107    async submitRecipe() {
108      const config = {
109        headers: { "content-type": "multipart/form-data" }
110      };
111      let formData = new FormData();
112      for (let data in this.recipe) {
113        formData.append(data, this.recipe[data]);
114      }
115      try {
116        let response = await this.$axios.$post("/recipes/", formData, config);
117        this.$router.push("/recipes/");
118      } catch (e) {
119        console.log(e);
120      }
121    }
122  }
123};
124</script>
125
126<style scoped>
127</style>
在submitRecipe()中,一旦表单数据发布并成功创建配方,应用程序将使用this.$router重定向到/recipes/。
创建单一食谱查看页面
让我们创建一个允许用户查看单个食谱项目的视图,打开 /pages/recipes/_id/index.vue 文件,并粘贴下面的片段:
 1[label client/pages/recipes/_id/index.vue]
 2<template>
 3  <main class="container my-5">
 4    <div class="row">
 5      <div class="col-12 text-center my-3">
 6        <h2 class="mb-3 display-4 text-uppercase">{{ recipe.name }}</h2>
 7      </div>
 8      <div class="col-md-6 mb-4">
 9        <img
10          class="img-fluid"
11          style="width: 400px; border-radius: 10px; box-shadow: 0 1rem 1rem rgba(0,0,0,.7);"
12          :src="https://cdn.jsdelivr.net/gh/andsky/tutorials-images/recipe.picture"
13          alt
14        >
15      </div>
16      <div class="col-md-6">
17        <div class="recipe-details">
18          <h4>Ingredients</h4>
19          <p>{{ recipe.ingredients }}</p>
20          <h4>Preparation time ⏱</h4>
21          <p>{{ recipe.prep_time }} mins</p>
22          <h4>Difficulty</h4>
23          <p>{{ recipe.difficulty }}</p>
24          <h4>Preparation guide</h4>
25          <textarea class="form-control" rows="10" v-html="recipe.prep_guide" disabled />
26        </div>
27      </div>
28    </div>
29  </main>
30</template>
31
32<script>
33export default {
34  head() {
35    return {
36      title: "View Recipe"
37    };
38  },
39  async asyncData({ $axios, params }) {
40    try {
41      let recipe = await $axios.$get(`/recipes/${params.id}`);
42      return { recipe };
43    } catch (e) {
44      return { recipe: [] };
45    }
46  },
47  data() {
48    return {
49      recipe: {
50        name: "",
51        picture: "",
52        ingredients: "",
53        difficulty: "",
54        prep_time: null,
55        prep_guide: ""
56      }
57    };
58  }
59};
60</script>
61
62<style scoped>
63</style>
我们输入了在asyncData()方法中看到的params键,在这种情况下,我们正在使用params来获取我们想要查看的食谱的ID。
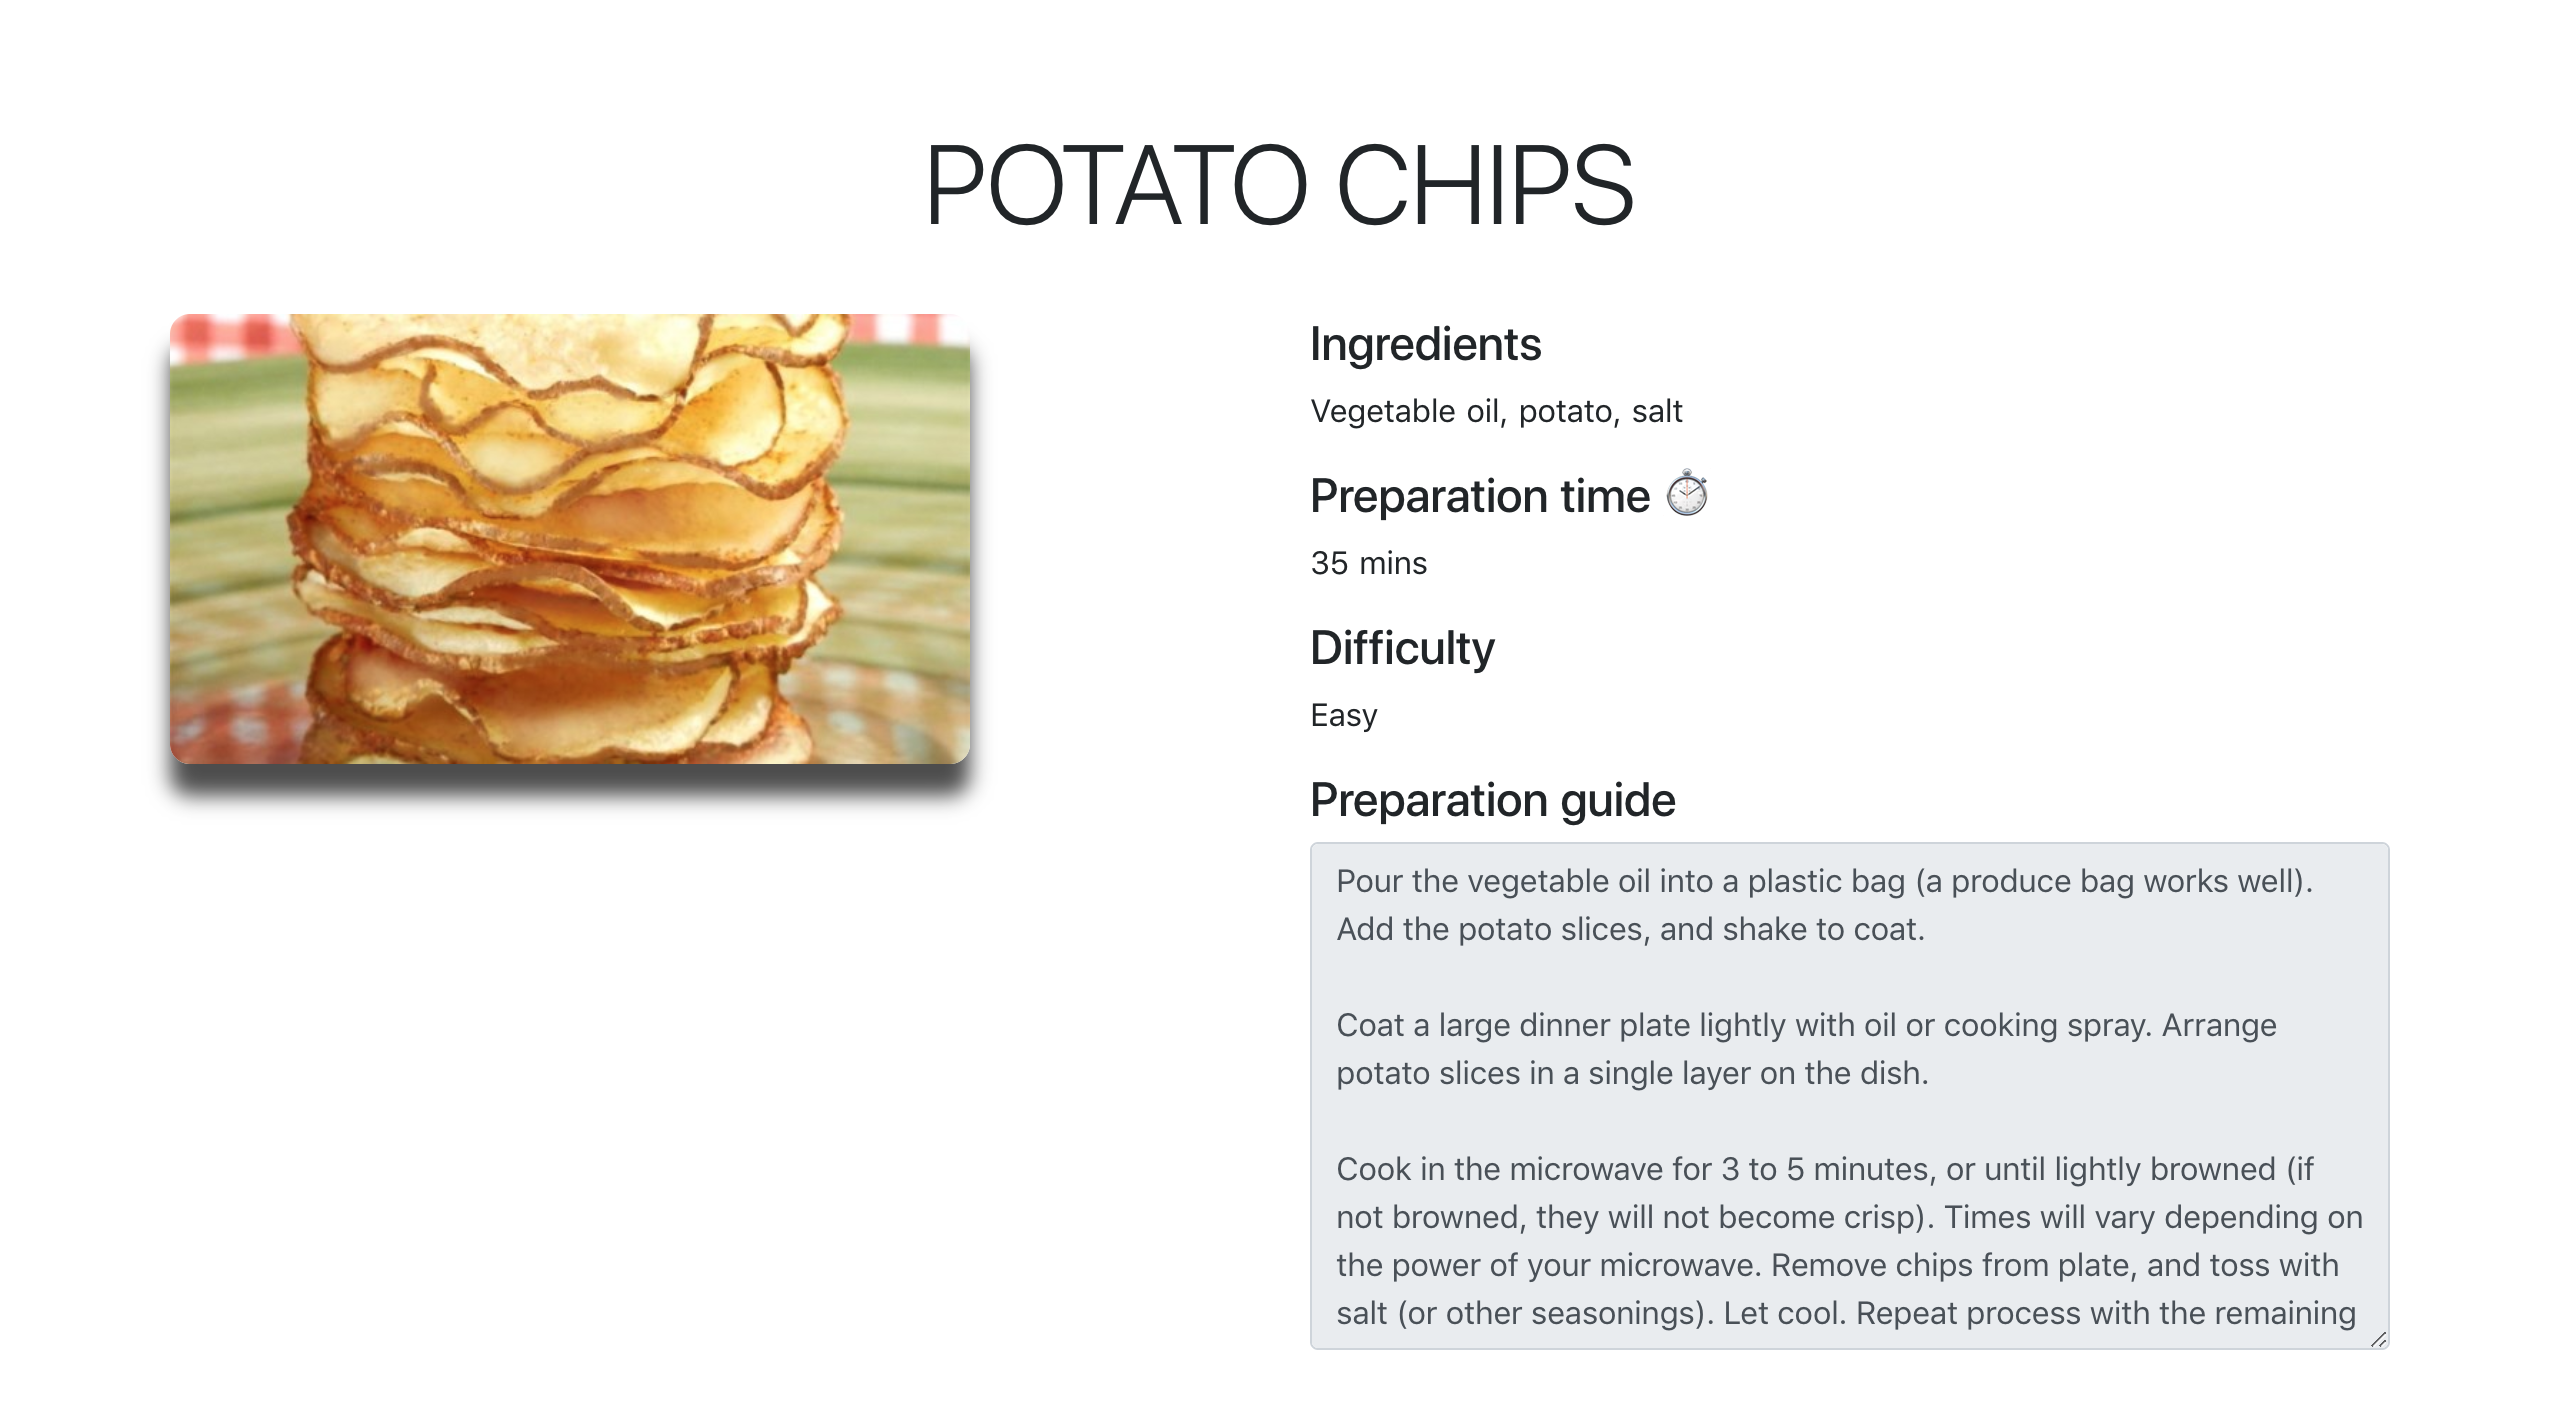
我们可以在网页浏览器上观察到一个单一的食谱项目。
创建单一食谱编辑页面
我们需要创建允许用户编辑和更新单个食谱项目的视图,所以打开 /pages/recipes/_id/edit.vue 文件并粘贴下面的片段:
  1[label client/pages/recipes/_id/edit.vue]
  2<template>
  3  <main class="container my-5">
  4    <div class="row">
  5      <div class="col-12 text-center my-3">
  6        <h2 class="mb-3 display-4 text-uppercase">{{ recipe.name }}</h2>
  7      </div>
  8      <div class="col-md-6 mb-4">
  9        <img v-if="!preview" class="img-fluid" style="width: 400px; border-radius: 10px; box-shadow: 0 1rem 1rem rgba(0,0,0,.7);"  :src="https://cdn.jsdelivr.net/gh/andsky/tutorials-images/recipe.picture">
 10        <img v-else class="img-fluid" style="width: 400px; border-radius: 10px; box-shadow: 0 1rem 1rem rgba(0,0,0,.7);"  :src="https://cdn.jsdelivr.net/gh/andsky/tutorials-images/preview">
 11      </div>
 12      <div class="col-md-4">
 13        <form @submit.prevent="submitRecipe">
 14          <div class="form-group">
 15            <label for>Recipe Name</label>
 16            <input type="text" class="form-control" v-model="recipe.name" >
 17          </div>
 18          <div class="form-group">
 19            <label for>Ingredients</label>
 20            <input type="text" v-model="recipe.ingredients" class="form-control" name="Ingredients" >
 21          </div>
 22          <div class="form-group">
 23            <label for>Food picture</label>
 24            <input type="file" @change="onFileChange">
 25          </div>
 26          <div class="row">
 27            <div class="col-md-6">
 28              <div class="form-group">
 29                <label for>Difficulty</label>
 30                <select v-model="recipe.difficulty" class="form-control" >
 31                  <option value="Easy">Easy</option>
 32                  <option value="Medium">Medium</option>
 33                  <option value="Hard">Hard</option>
 34                </select>
 35              </div>
 36            </div>
 37            <div class="col-md-6">
 38              <div class="form-group">
 39                <label for>
 40                  Prep time
 41                  <small>(minutes)</small>
 42                </label>
 43                <input type="text" v-model="recipe.prep_time" class="form-control" name="Ingredients" >
 44              </div>
 45            </div>
 46          </div>
 47          <div class="form-group mb-3">
 48            <label for>Preparation guide</label>
 49            <textarea v-model="recipe.prep_guide" class="form-control" rows="8"></textarea>
 50          </div>
 51          <button type="submit" class="btn btn-success">Save</button>
 52        </form>
 53      </div>
 54    </div>
 55  </main>
 56</template>
 57
 58<script>
 59export default {
 60  head(){
 61      return {
 62        title: "Edit Recipe"
 63      }
 64    },
 65  async asyncData({ $axios, params }) {
 66    try {
 67      let recipe = await $axios.$get(`/recipes/${params.id}`);
 68      return { recipe };
 69    } catch (e) {
 70      return { recipe: [] };
 71    }
 72  },
 73  data() {
 74    return {
 75      recipe: {
 76        name: "",
 77        picture: "",
 78        ingredients: "",
 79        difficulty: "",
 80        prep_time: null,
 81        prep_guide: ""
 82      },
 83      preview: ""
 84    };
 85  },
 86  methods: {
 87    onFileChange(e) {
 88      let files = e.target.files || e.dataTransfer.files;
 89      if (!files.length) {
 90        return;
 91      }
 92      this.recipe.picture = files[0]
 93      this.createImage(files[0]);
 94    },
 95    createImage(file) {
 96      let reader = new FileReader();
 97      let vm = this;
 98      reader.onload = e => {
 99        vm.preview = e.target.result;
100      };
101      reader.readAsDataURL(file);
102    },
103    async submitRecipe() {
104      let editedRecipe = this.recipe
105      if (editedRecipe.picture.name.indexOf("http://") != -1){
106        delete editedRecipe["picture"]
107      }
108      const config = {
109        headers: { "content-type": "multipart/form-data" }
110      };
111      let formData = new FormData();
112      for (let data in editedRecipe) {
113        formData.append(data, editedRecipe[data]);
114      }
115      try {
116        let response = await this.$axios.$patch(`/recipes/${editedRecipe.id}/`, formData, config);
117        this.$router.push("/recipes/");
118      } catch (e) {
119        console.log(e);
120      }
121    }
122  }
123};
124</script>
125
126<style scoped>
127</style>
在上面的代码中,submitRecipe()方法有一个有条件的声明,其目的是从要提交的数据中删除编辑的Recipe项目的图像,如果图像没有更改。
一旦更新了食谱项,应用程序将被重定向到食谱列表页 - /recipes/。
设置过渡
该应用程序是完全功能的,然而,我们可以通过添加过渡来让它看起来更顺畅,这使我们能够在给定的时间内顺利地改变CSS属性值(从一个值到另一个值)。
默认情况下, 过渡名称设置为 页面,这意味着我们定义的过渡将在所有页面上活跃。
让我们包括过渡的样式。在资产目录中创建一个名为css的目录,并在里面添加一个transitions.css文件。
1[label client/assets/css/transitions.css]
2.page-enter-active,
3.page-leave-active {
4  transition: opacity .3s ease;
5}
6.page-enter,
7.page-leave-to {
8  opacity: 0;
9}
打开nuxt.config.js文件,并相应地更新它来加载我们刚刚创建的CSS文件:
1[label nuxt.config.js]
2/*
3** Global CSS
4*/
5css: [
6  '~/assets/css/transitions.css', // update this
7],
保存您的更改,并在您的浏览器中打开应用程序:
现在,我们的应用程序将以滑稽的方式改变每个导航的框架。
结论
在本文中,我们开始学习客户端和服务器端渲染应用程序之间的区别,然后我们学习了什么是通用应用程序,最后,我们看到了如何使用Nuxt.js和Django构建通用应用程序。
此教程的源代码在GitHub上可用(https://github.com/do-community/recipes_app)。