作者选择了 Mozilla 基金会作为 写给捐款计划的一部分,以获得捐款。
介绍
Reactive Programming是一个与 asynchronous data streams 相关的范式,其中编程模型认为一切都是随着时间的推移而传播的数据流,这包括键键,HTTP请求,要打印的文件,甚至可以认为在非常小的间隔内计时的数组元素。
RxJS是一个流行的图书馆的反应式编程在 JavaScript. ReactiveX,伞,其中RxJS躺在,有它的扩展在许多其他语言,如 Java, Python, C++, Swift,和 Dart. RxJS也被广泛使用的图书馆,如Angular和React。
RxJS 的实施基于连锁函数,这些函数能够在一定时间范围内处理数据,这意味着可以实现RxJS的几乎每一个方面,只有函数可以接收一个参数和回复列表,然后在发出信号时执行它们。
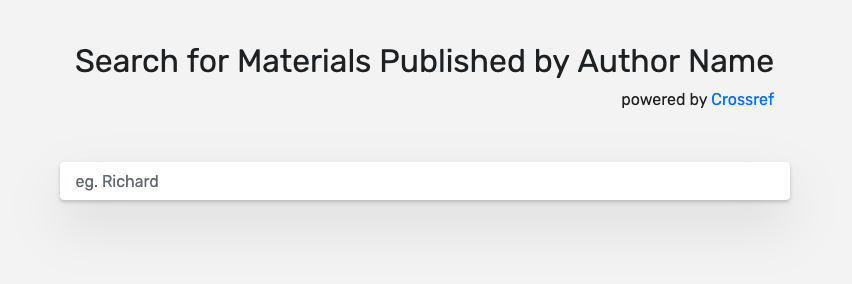
在本教程中,您将使用RxJS构建一个富有功能的搜索栏,向用户返回实时结果。您还将使用HTML和CSS来格式化搜索栏。
像搜索栏一样常见和看似简单的东西需要有各种检查,本教程将向您展示RxJS如何将相当复杂的要求组合转化为易于管理和易于理解的代码。
前提条件
在您开始本教程之前,您将需要以下内容:
- 支持JavaScript语法突出化的文本编辑器,如[Atom] (http://atom.io),[Visual Studio Code] (https://code.visualstudio.com/),或[Sublime Text] (https://www.sublimetext.com/). 这些编辑器可以在Windows,macOS和Linux上找到.
- 熟悉一起使用 HTML 和 JavaScript 。 在 [如何将 JavaScript 添加到 HTML] (https://andsky.com/tech/tutorials/how-to-add-javascript-to-html] 中学习更多内容.
- 熟悉JSON数据格式,可以在[JavaScript中如何与JSON合作] (https://andsky.com/tech/tutorials/how-to-work-with-json-in-javascript)中了解更多情况. .
该教程的完整代码可在 Github找到。
步骤1 - 创建和样式化您的搜索栏
在此步骤中,您会用 HTML 和 CSS 创建和样式搜索栏 。 代码将使用从 [Bootstrap] (https://getbootstrap.com/] 中的一些常见元素来加快页面的架构和造型过程,以便您可以专注于添加自定义元素. _Bootstrap_是一个CSS框架,包含打字,形式,按钮,导航,网格等常见元素的模板,以及其他接口组件. 您的应用程序也会使用 [annimate.css] (https://daneden.github.io/animate.css/) 在搜索栏中添加动画.
您将开始创建一个名为search-bar.html的文件,使用nano或您最喜欢的文本编辑器:
1nano search-bar.html
接下来,为您的应用程序创建基本结构. 将以下HTML添加到新文件中:
 1[label search-bar.html]
 2<!DOCTYPE html>
 3<html>
 4
 5  <head>
 6    <title>RxJS Tutorial</title>
 7    <!-- Load CSS -->
 8
 9    <!-- Load Rubik font -->
10
11    <!-- Add Custom inline CSS -->
12
13  </head>
14
15  <body>
16      <!-- Content -->
17
18      <!-- Page Header and Search Bar -->
19
20      <!-- Results -->
21
22      <!-- Load External RxJS -->
23
24      <!-- Add custom inline JavaScript -->
25      <script>
26
27      </script>
28  </body>
29
30</html>
由于您需要来自整个 Bootstrap 库的 CSS,请继续下载 Bootstrap 和 Animate.css 的 CSS。
在加载CSS评论中添加以下代码:
1[label search-bar.html]
2...
3<!-- Load CSS -->
4    <link rel="stylesheet" href="https://stackpath.bootstrapcdn.com/bootstrap/4.2.1/css/bootstrap.min.css" integrity="sha384-GJzZqFGwb1QTTN6wy59ffF1BuGJpLSa9DkKMp0DgiMDm4iYMj70gZWKYbI706tWS" crossorigin="anonymous">
5    <link rel="stylesheet" href="https://cdnjs.cloudflare.com/ajax/libs/animate.css/3.7.0/animate.min.css" />
6...
本教程将使用一个自定义字体名为 Rubik从 Google 字体图书馆来设计搜索栏。 通过在评论中添加突出的代码来加载字体:
1[label search-bar.html]
2...
3<!-- Load Rubik font -->
4    <link href="https://fonts.googleapis.com/css?family=Rubik" rel="stylesheet">
5...
接下来,在添加自定义内线CSS评论下,将自定义CSS添加到页面,以确保页面上的标题、搜索栏和结果易于阅读和使用。
 1[label search-bar.html]
 2...
 3<!-- Add Custom inline CSS -->
 4    <style>
 5      body {
 6        background-color: #f5f5f5;
 7        font-family: "Rubik", sans-serif;
 8      }
 9
10      .search-container {
11        margin-top: 50px;
12      }
13      .search-container .search-heading {
14        display: block;
15        margin-bottom: 50px;
16      }
17      .search-container input,
18      .search-container input:focus {
19        padding: 16px 16px 16px;
20        border: none;
21        background: rgb(255, 255, 255);
22        box-shadow: 0 2px 4px 0 rgba(0, 0, 0, 0.2), 0 25px 50px 0 rgba(0, 0, 0, 0.1) !important;
23      }
24
25      .results-container {
26        margin-top: 50px;
27      }
28      .results-container .list-group .list-group-item {
29        background-color: transparent;
30        border-top: none !important;
31        border-bottom: 1px solid rgba(236, 229, 229, 0.64);
32      }
33
34      .float-bottom-right {
35        position: fixed;
36        bottom: 20px;
37        left: 20px;
38        font-size: 20px;
39        font-weight: 700;
40        z-index: 1000;
41      }
42      .float-bottom-right .info-container .card {
43        display: none;
44      }
45      .float-bottom-right .info-container:hover .card,
46      .float-bottom-right .info-container .card:hover {
47        display: block;
48      }
49    </style>
50...
现在你已经有所有风格,添加的HTML将定义标题和输入栏在页面标题和搜索栏的评论下:
 1[label search-bar.html]
 2...
 3<!-- Content -->
 4<!-- Page Header and Search Bar -->
 5      <div class="container search-container">
 6        <div class="row justify-content-center">
 7          <div class="col-md-auto">
 8            <div class="search-heading">
 9              <h2>Search for Materials Published by Author Name</h2>
10              <p class="text-right">powered by <a href="https://www.crossref.org/">Crossref</a></p>
11            </div>
12          </div>
13        </div>
14        <div class="row justify-content-center">
15          <div class="col-sm-8">
16            <div class="input-group input-group-md">
17              <input id="search-input" type="text" class="form-control" placeholder="eg. Richard" aria-label="eg. Richard" autofocus>
18            </div>
19          </div>
20        </div>
21      </div>
22...
这使用 Bootstrap 的网格系统来构建页面标题和搜索栏,您已将搜索输入标识符分配给搜索栏,您将在教程中稍后使用该标识符来连接到一个倾听者。
接下来,您将创建一个位置来显示搜索结果. 在结果评论下,创建一个div与响应列表标识符,以在教程中稍后添加结果:
 1[label search-bar.html]
 2...
 3<!-- Results -->
 4      <div class="container results-container">
 5        <div class="row justify-content-center">
 6          <div class="col-sm-8">
 7            <ul id="response-list" class="list-group list-group-flush"></ul>
 8          </div>
 9        </div>
10      </div>
11...
此时,search-bar.html文件将看起来如下:
  1[label search-bar.html]
  2<!DOCTYPE html>
  3<html>
  4
  5  <head>
  6    <title>RxJS Tutorial</title>
  7    <!-- Load CSS -->
  8    <link rel="stylesheet" href="https://stackpath.bootstrapcdn.com/bootstrap/4.2.1/css/bootstrap.min.css" integrity="sha384-GJzZqFGwb1QTTN6wy59ffF1BuGJpLSa9DkKMp0DgiMDm4iYMj70gZWKYbI706tWS" crossorigin="anonymous">
  9    <link rel="stylesheet" href="https://cdnjs.cloudflare.com/ajax/libs/animate.css/3.7.0/animate.min.css" />
 10
 11    <!-- Load Rubik font -->
 12    <link href="https://fonts.googleapis.com/css?family=Rubik" rel="stylesheet">
 13
 14    <!-- Add Custom inline CSS -->
 15    <style>
 16      body {
 17        background-color: #f5f5f5;
 18        font-family: "Rubik", sans-serif;
 19      }
 20
 21      .search-container {
 22        margin-top: 50px;
 23      }
 24      .search-container .search-heading {
 25        display: block;
 26        margin-bottom: 50px;
 27      }
 28      .search-container input,
 29      .search-container input:focus {
 30        padding: 16px 16px 16px;
 31        border: none;
 32        background: rgb(255, 255, 255);
 33        box-shadow: 0 2px 4px 0 rgba(0, 0, 0, 0.2), 0 25px 50px 0 rgba(0, 0, 0, 0.1) !important;
 34      }
 35
 36      .results-container {
 37        margin-top: 50px;
 38      }
 39      .results-container .list-group .list-group-item {
 40        background-color: transparent;
 41        border-top: none !important;
 42        border-bottom: 1px solid rgba(236, 229, 229, 0.64);
 43      }
 44
 45      .float-bottom-right {
 46        position: fixed;
 47        bottom: 20px;
 48        left: 20px;
 49        font-size: 20px;
 50        font-weight: 700;
 51        z-index: 1000;
 52      }
 53      .float-bottom-right .info-container .card {
 54        display: none;
 55      }
 56      .float-bottom-right .info-container:hover .card,
 57      .float-bottom-right .info-container .card:hover {
 58        display: block;
 59      }
 60    </style>
 61  </head>
 62
 63  <body>
 64      <!-- Content -->
 65      <!-- Page Header and Search Bar -->
 66      <div class="container search-container">
 67        <div class="row justify-content-center">
 68          <div class="col-md-auto">
 69            <div class="search-heading">
 70              <h2>Search for Materials Published by Author Name</h2>
 71              <p class="text-right">powered by <a href="https://www.crossref.org/">Crossref</a></p>
 72            </div>
 73          </div>
 74        </div>
 75        <div class="row justify-content-center">
 76          <div class="col-sm-8">
 77            <div class="input-group input-group-md">
 78              <input id="search-input" type="text" class="form-control" placeholder="eg. Richard" aria-label="eg. Richard" autofocus>
 79            </div>
 80          </div>
 81        </div>
 82      </div>
 83
 84      <!-- Results -->
 85      <div class="container results-container">
 86        <div class="row justify-content-center">
 87          <div class="col-sm-8">
 88            <ul id="response-list" class="list-group list-group-flush"></ul>
 89          </div>
 90        </div>
 91      </div>
 92
 93      <!-- Load RxJS -->
 94
 95      <!-- Add custom inline JavaScript -->
 96      <script>
 97
 98      </script>
 99  </body>
100
101</html>
在此步骤中,您已经列出了使用HTML和CSS的搜索栏的基本结构,在下一步,您将写一个JavaScript函数,该函数将接受搜索术语并返回结果。
步骤 2 - 编写 JavaScript
现在你已经格式化了搜索栏,你已经准备好编写JavaScript代码,它将作为你将在本教程中稍后写的RxJS代码的基础。
由于您不需要Bootstrap和JavaScript在本教程中提供的功能,您不会加载它们,但是,您将使用RxJS。
1[label search-bar.html]
2...
3<!-- Load RxJS -->
4    <script src="https://unpkg.com/@reactivex/[email protected]/dist/global/Rx.js"></script>
5...
现在,你将从HTML中存储div的引用,结果将被添加到其中。在添加自定义内线JavaScript评论下,在<script>标签中添加突出的JavaScript代码:
1[label search-bar.html]
2...
3<!-- Add custom inline JavaScript -->
4<script>
5        const output = document.getElementById("response-list");
6
7</script>
8...
接下来,添加代码将API的JSON响应转换为页面上显示的HTML元素,此代码将首先清除搜索栏的内容,然后为搜索结果动画设置延迟。
在<script>标签之间添加突出函数:
1[label search-bar.html]
2...
3<!-- Add custom inline JavaScript -->
4<script>
5 const output = document.getElementById("response-list");
6
7 function showResults(resp) {
8 var items = resp['message']['items']
9 output.innerHTML = "";
10 animationDelay = 0;
11 if (items.length == 0) {
12 output.innerHTML = "Could not find any :(";
13 } else {
14 items.forEach(item => {
15 resultItem = `
16 <div class="list-group-item animated fadeInUp" style="animation-delay: ${animationDelay}s;">
17 <div class="d-flex w-100 justify-content-between">
18 <h5 class="mb-1">${(item['title'] && item['title'][0]) || "<Title not available>"}</h5>
19 </div>
20 <p class="mb-1">${(item['container-title'] && item['container-title'][0]) || ""}</p>
21 <small class="text-muted"><a href="${item['URL']}" target="_blank">${item['URL']}</a></small>
22 <div>
23 <p class="badge badge-primary badge-pill">${item['publisher'] || ''}</p>
24 <p class="badge badge-primary badge-pill">${item['type'] || ''}</p>
25 </div>
26 </div>
27 `;
28 output.insertAdjacentHTML("beforeend", resultItem);
29 animationDelay += 0.1;
30
31 });
32 }
33 }
34
35</script>
36...
代码块从如果开始,是一个条件循环,检查搜索结果,并显示消息,如果没有找到结果. 如果结果被找到,那么forEach循环将为用户提供动画。
在此步骤中,您通过写出一个可以接受结果并返回页面的函数来为 RxJS 奠定基础,在下一步,您将使搜索栏功能。
第3步:设置一个倾听者
RxJS 涉及数据流,在本项目中是用户输入元素或搜索栏的字符串,在此步骤中,您将在输入元素上添加一个倾听器来听取更新。
首先,请注意您在教程中添加的搜索输入标识符:
1[label search-bar.html]
2...
3<input id="search-input" type="text" class="form-control" placeholder="eg. Richard" aria-label="eg. Richard" autofocus>
4...
接下来,创建一个变量,该变量将包含搜索输入元素的引用。这将成为代码将用于听取输入事件的观察元素。
从上一步的JavaScript下方添加<script>标签中的突出行:
 1[label search-bar.html]
 2...
 3      output.insertAdjacentHTML("beforeend", resultItem);
 4      animationDelay += 0.1;
 5
 6    });
 7  }
 8}
 9
10      let searchInput = document.getElementById("search-input");
11...
现在您已将变量添加到参考输入中,您将使用fromEvent操作员来收听事件。这将添加一个收听器到一个 DOM 或 D ocument** O** bject** Model,某种类型的事件的元素。
在您的searchInput变量下添加以下突出的行,以将参数传输到fromEvent。您的searchInputDOM元素是第一个参数。
1[label search-bar.html]
2...
3      let searchInput = document.getElementById("search-input");
4      Rx.Observable.fromEvent(searchInput, 'input')
5...
现在您的倾听器已设置,您的代码将在输入元素上进行任何更新时收到通知. 在下一步中,您将使用操作员对此类事件采取行动。
步骤4:添加操作员
在此步骤中,您将使用操作员执行各种任务,例如缓冲输入参数、执行 HTTP 请求和过滤结果。
首先,您将确保在用户输入查询时实时更新结果. 要做到这一点,您将使用前一步的DOM输入事件。 DOM输入事件包含各种细节,但对于本教程,您对输入目标元素的值感兴趣。
1[label search-bar.html]
2...
3      let searchInput = document.getElementById("search-input");
4      Rx.Observable.fromEvent(searchInput, 'input')
5        .pluck('target', 'value')
6...
现在事件处于所需格式,您将搜索术语的最低值设置为三个字符,在许多情况下,任何少于三个字符的内容都不会产生相关的结果,或者用户可能还在键入过程中。
您将使用过滤器操作器来设置最小值,如果满足指定的条件,则将数据进一步传递到流中,设置长度条件大于2,以要求至少3个字符。
1[label search-bar.html]
2...
3      let searchInput = document.getElementById("search-input");
4      Rx.Observable.fromEvent(searchInput, 'input')
5        .pluck('target', 'value')
6        .filter(searchTerm => searchTerm.length > 2)
7...
您还将确保请求仅在 500ms 间隔发送,以便简化 API 服务器的负载。 要做到这一点,您将使用debounceTime操作员来保持每个通过流的事件之间的最小指定间隔。
1[label search-bar.html]
2...
3      let searchInput = document.getElementById("search-input");
4      Rx.Observable.fromEvent(searchInput, 'input')
5        .pluck('target', 'value')
6        .filter(searchTerm => searchTerm.length > 2)
7        .debounceTime(500)
8...
如果自上次 API 调用以来没有发生更改,则该应用程序还应忽略搜索术语,这将通过进一步减少发送 API 调用的数量来优化应用程序。
例如,用户可以键入),然后再添加删除的字符,将这个字符返回超级汽车。
您将使用distinctUntilChanged操作员来配置此操作员,该操作员会记住之前通过流传输的数据,并仅在不同的情况下传输另一个数据。
1[label search-bar.html]
2...
3      let searchInput = document.getElementById("search-input");
4      Rx.Observable.fromEvent(searchInput, 'input')
5        .pluck('target', 'value')
6        .filter(searchTerm => searchTerm.length > 2)
7        .debounceTime(500)
8        .distinctUntilChanged()
9...
现在你已经调节了用户的输入,你将添加代码,将查询的API与搜索术语. 要做到这一点,你将使用RxJS实现的 AJAX. AJAX使API呼叫不同步的背景上加载的页面。
接下来,将代码添加到您的应用程序中使用switchMap来链接AJAX,您还将使用map来将输入映射到输出中。
 1[label search-bar.html]
 2...
 3      let searchInput = document.getElementById("search-input");
 4      Rx.Observable.fromEvent(searchInput, 'input')
 5        .pluck('target', 'value')
 6        .filter(searchTerm => searchTerm.length > 2)
 7        .debounceTime(500)
 8        .distinctUntilChanged()
 9        .switchMap(searchKey => Rx.Observable.ajax(`https://api.crossref.org/works?rows=50&query.author=${searchKey}`)
10          .map(resp => ({
11              "status" : resp["status"] == 200,
12              "details" : resp["status"] == 200 ? resp["response"] : [],
13              "result_hash": Date.now()
14            })
15          )
16        )
17...
此代码将API响应分为三个部分:
- " 地位 " : API服务器返回的HTTP状态代码. 该守则只接受 " 200 " 或成功的答复。
- `细节 ' : 收到的实际答复数据。 这将包含被询问搜索词的结果 。
- `结果': API服务器返回的回复的散列值,为本教程目的,该响应为UNIX时间戳. 结果是一团糟,结果改变时就会改变。 独特的散列值将使应用程序能够确定结果是否已经改变并应当更新。 .
系统失败,您的代码应该准备好处理错误. 要处理在 API 调用中可能发生的错误,请使用过滤器运算器只接受成功的响应:
 1[label search-bar.html]
 2...
 3      let searchInput = document.getElementById("search-input");
 4      Rx.Observable.fromEvent(searchInput, 'input')
 5        .pluck('target', 'value')
 6        .filter(searchTerm => searchTerm.length > 2)
 7        .debounceTime(500)
 8        .distinctUntilChanged()
 9        .switchMap(searchKey => Rx.Observable.ajax(`https://api.crossref.org/works?rows=50&query.author=${searchKey}`)
10          .map(resp => ({
11              "status" : resp["status"] == 200,
12              "details" : resp["status"] == 200 ? resp["response"] : [],
13              "result_hash": Date.now()
14            })
15          )
16        )
17        .filter(resp => resp.status !== false)
18...
接下来,您将添加代码以仅在响应中检测到更改时更新 DOM. DOM 更新可能是一个资源繁重的操作,因此减少更新次数将对应用程序产生积极的影响.由于result_hash只会在响应更改时改变,您将使用它来实现此功能。
要做到这一点,请像以前那样使用 distinctUntilChanged 运算符,代码只会用它来接受用户输入,当密钥发生更改时。
 1[label search-bar.html]
 2...
 3      let searchInput = document.getElementById("search-input");
 4      Rx.Observable.fromEvent(searchInput, 'input')
 5        .pluck('target', 'value')
 6        .filter(searchTerm => searchTerm.length > 2)
 7        .debounceTime(500)
 8        .distinctUntilChanged()
 9        .switchMap(searchKey => Rx.Observable.ajax(`https://api.crossref.org/works?rows=50&query.author=${searchKey}`)
10          .map(resp => ({
11              "status" : resp["status"] == 200,
12              "details" : resp["status"] == 200 ? resp["response"] : [],
13              "result_hash": Date.now()
14            })
15          )
16        )
17        .filter(resp => resp.status !== false)
18        .distinctUntilChanged((a, b) => a.result_hash === b.result_hash)
19...
您以前使用了DistinctUntilChanged运算符来查看数据是否全部发生了变化,但在这种情况下,您会检查响应中的更新密钥。
该函数接受两个对象,之前所看到的值和新值. 我们检查了这两个对象的哈希,并在这两个值匹配时返回True,在这种情况下,数据被过滤,而不是在管道中进一步传递。
在这个步骤中,您创建了一条管道,接收用户输入的搜索词,然后对它进行各种检查. 检查完成后,它会发出API呼叫,并以向用户显示结果的格式返回回复. 您通过在必要时限制 API 呼叫来优化客户端和服务器方的资源使用 。 在下一步中,您将配置应用程序开始监听输入元素,并将结果传递到会使其在页面上的函数.
步骤5 – 通过订阅激活一切
订阅是链接的最终操作员,允许观察者看到由观察者发出的数据事件。
onNext:指明在收到事件时要做什么。 *onError:负责处理错误。 呼叫到onNext和onCompleted将不会在呼叫此方法后进行。
这个订阅者的签名是允许实现 lazy execution 的,即能够定义一个可观察的管道,并在您订阅时只将其放入运动中。
接下来,订阅可观察并将数据路由到负责在用户界面中渲染的方法。
 1[label search-bar.html]
 2...
 3      let searchInput = document.getElementById("search-input");
 4      Rx.Observable.fromEvent(searchInput, 'input')
 5        .pluck('target', 'value')
 6        .filter(searchTerm => searchTerm.length > 2)
 7        .debounceTime(500)
 8        .distinctUntilChanged()
 9        .switchMap(searchKey => Rx.Observable.ajax(`https://api.crossref.org/works?rows=50&query.author=${searchKey}`)
10          .map(resp => ({
11              "status" : resp["status"] == 200,
12              "details" : resp["status"] == 200 ? resp["response"] : [],
13              "result_hash": Date.now()
14            })
15          )
16        )
17        .filter(resp => resp.status !== false)
18        .distinctUntilChanged((a, b) => a.result_hash === b.result_hash)
19        .subscribe(resp => showResults(resp.details));
20...
保存并关闭这些更改后的文件。
现在你已经完成编写代码,你已经准备好查看和测试你的搜索栏. 双击search-bar.html文件,在你的Web浏览器中打开它. 如果代码被输入正确,你会看到你的搜索栏。
在搜索栏中输入内容来测试它。
在此步骤中,您订阅了可观察以激活您的代码. 您现在有一个有风格和功能的搜索栏应用程序。
结论
在本教程中,您创建了一个富有功能的搜索栏,使用RxJS,CSS和HTML,为用户提供实时结果。搜索栏需要至少3个字符,自动更新,并针对客户端和API服务器都优化。
可以认为是一组复杂的要求是用18行RxJS代码创建的,代码不仅易于阅读,而且比独立的JavaScript实现更清洁。
有关使用 RxJS 的更多信息,请参阅 官方 API 文档。