介绍
REST API 由于它提供的各种优点而在前端开发方面获得了普及,但是,设置您自己的 GraphQL 服务器既容易出现错误,也复杂。由于此,像 Prisma 这样的管理服务已经建立,以管理您的 GraphQL 服务器,允许您专注于您的应用程序的发展。
在本教程中,我们将使用 React 和 Prisma 来管理 GraphQL 构建一个完全功能的食谱应用程序。
前提条件
- JavaScript 和 React 的中间知识 * GraphQL 基本知识 * Docker 基本知识
步骤1 - 安装依赖性
通过运行以下命令在全球范围内安装 Prisma CLI 客户端:
1npm install -g prisma
我们将使用create-react-app来启动我们的React应用程序,所以运行以下命令以在全球范围内安装它:
1npm install -g create-react-app
要在本地使用 Prisma,您需要在您的计算机上安装 Docker 如果您还没有 Docker,您可以下载 Docker Community Edition。
第2步:设置 Prisma
您可以创建一个帐户(在 Prisma 网站)(https://app.prisma.io/),然后通过运行以下命令登录 Prisma CLI:
1prisma login
现在我们有所有所需的依赖性,为项目创建一个文件夹,并通过运行以下命令导航到文件夹中:
1mkdir recipe-app-prisma-react
2cd recipe-app-prisma-react
然后在文件夹中初始化您的 Prisma 服务器:
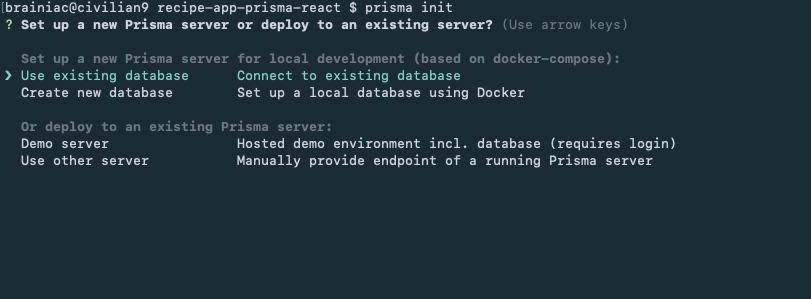
1prisma init
我们将与本地服务器合作,现在,然后在稍后部署它。选择)。
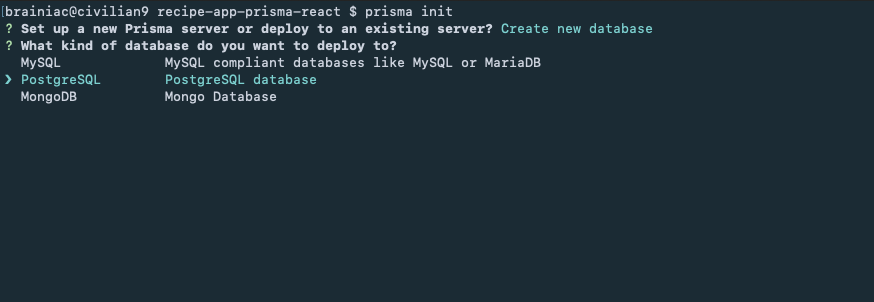
接下来,你会得到一个提示选择一个数据库. 对于这个教程,我们将使用Postgres,所以选择PostgreSQL:
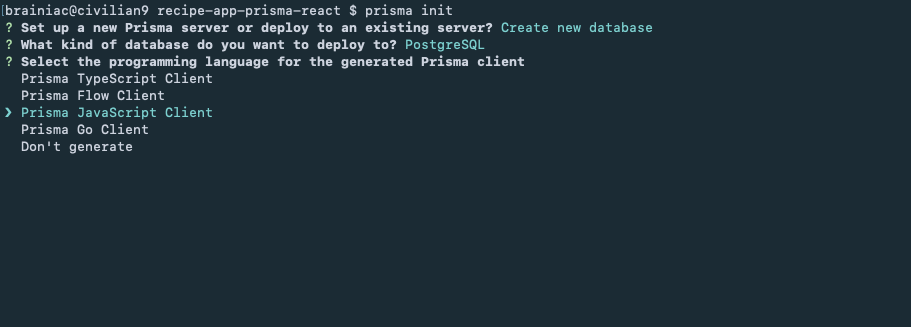
接下来,我们必须为我们生成的 Prisma 客户端选择一个编程语言。
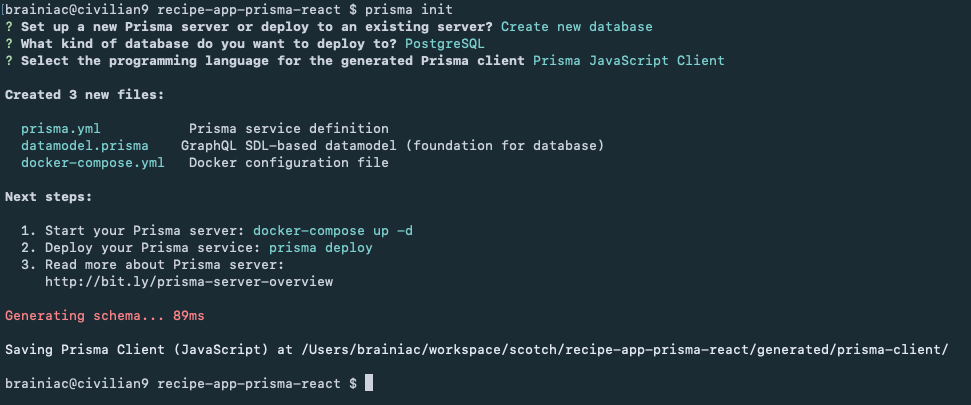
您将根据所选择的选项获得由 Prisma 生成的下列文件:
第3步:部署Prisma
现在我们已经设置了我们的 Prisma 服务器,请确保 docker 运行,然后运行以下命令来启动服务器:
1docker-compose up -d
Docker compose被用来运行多个容器作为一个服务。 之前的命令将启动我们的 Prisma 服务器和 Postgres 数据库。 在您的浏览器中,转到 127.0.0.1:4466 查看 Prisma 游乐场。
如果您想停止您的服务器,请运行docker-compose stop。
接下来,打开您的datamodel.prisma文件,并用以下内容替换演示内容:
1type Recipe {
2  id: ID! @unique
3  createdAt: DateTime!
4  updatedAt: DateTime!
5  title: String! @unique
6  ingredients: String!
7  directions: String!
8  published: Boolean! @default(value: "false")
9}
然后运行以下命令来部署到演示服务器:
1prisma deploy
您将收到一个回复,显示创建的模型和您的 Prisma 终端如下:
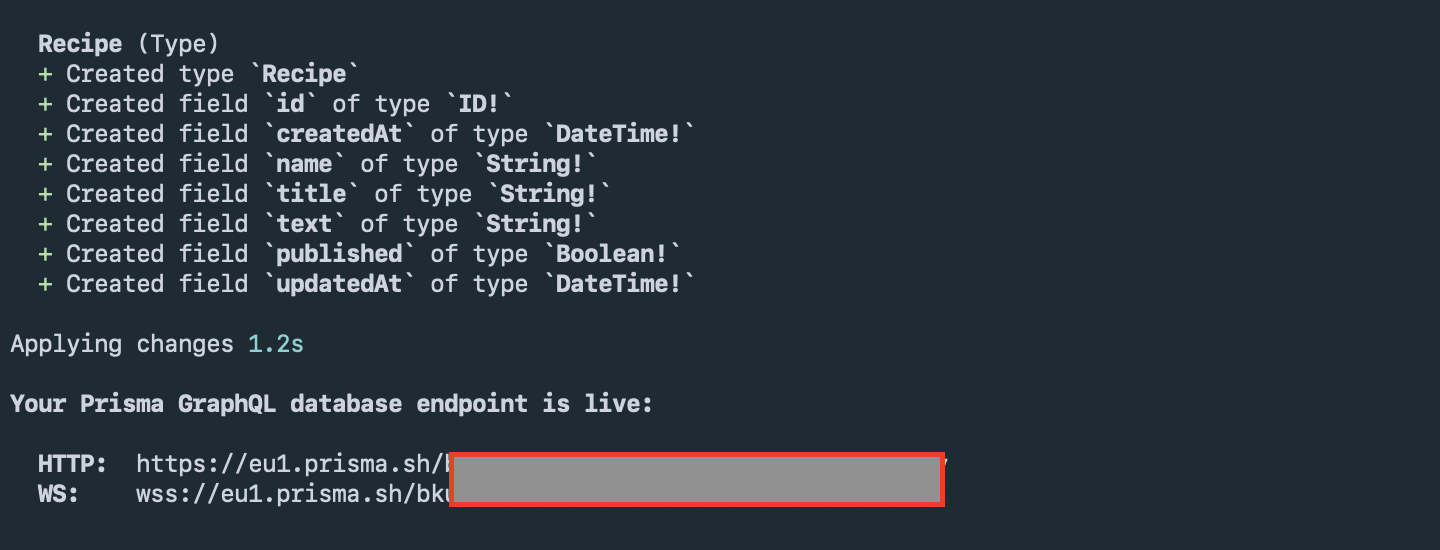
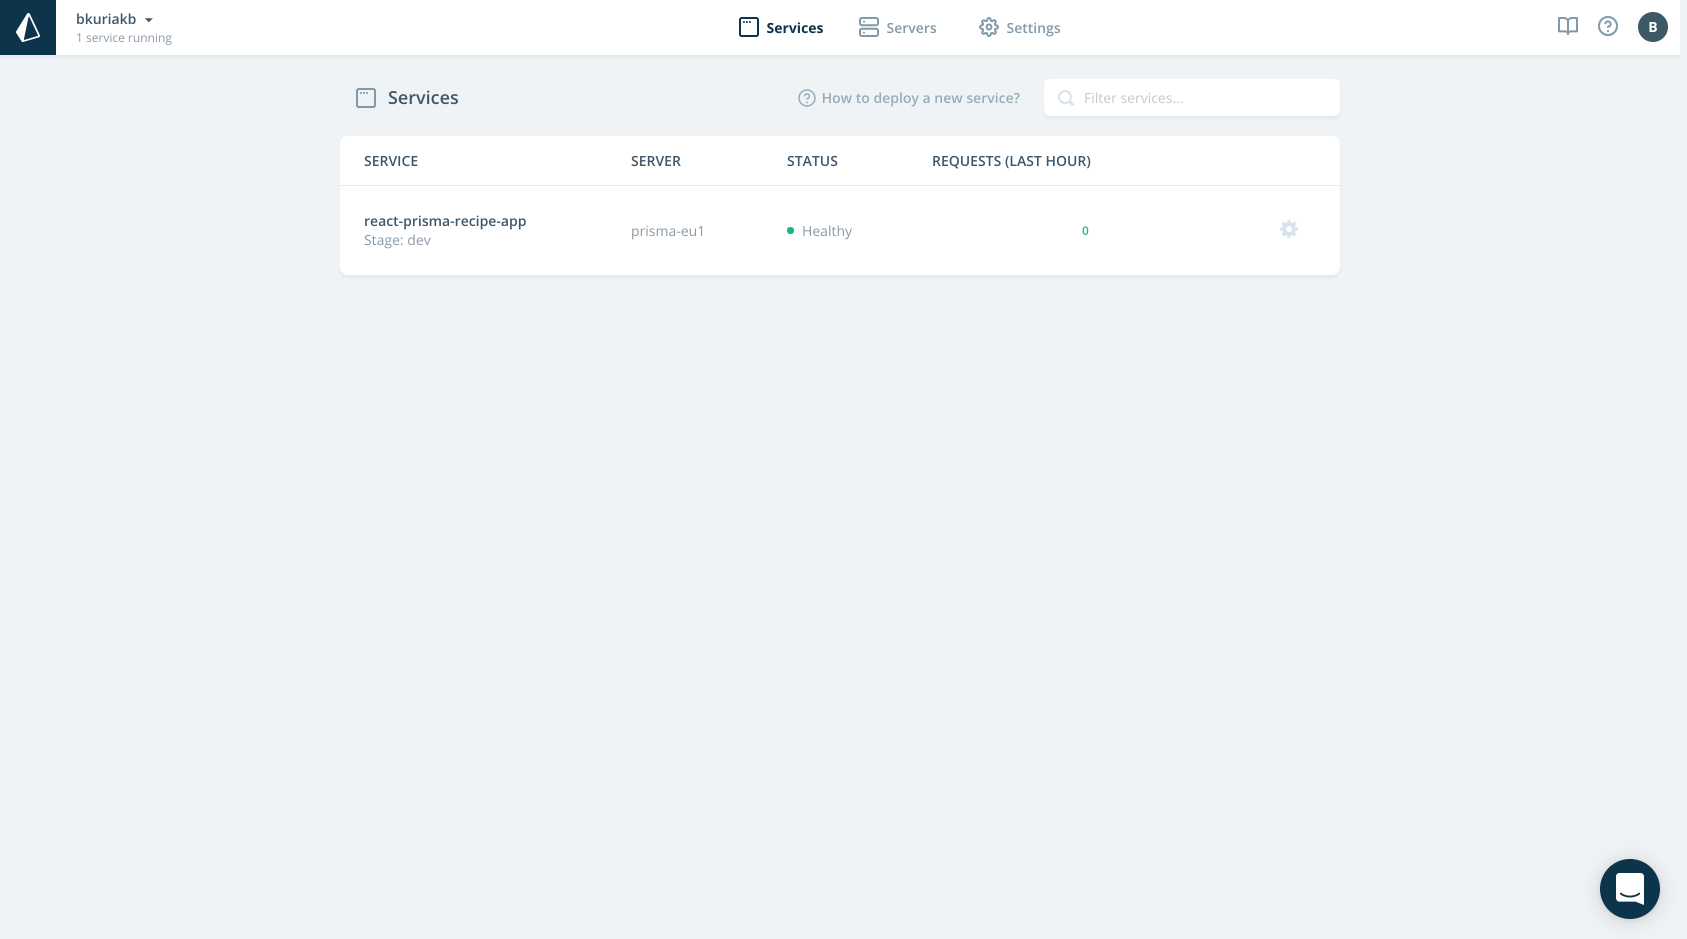
要查看部署的服务器,请打开 Prisma 仪表板在 https://app.prisma.io/ 并导航到服务. 您将在仪表板中看到以下内容:
要部署到本地服务器,请打开prisma.yml文件并将终端转换为http://localhost:4466,然后运行prisma 部署。
步骤4 – 设置 React 应用程序
现在我们的Prisma服务器已经准备好了,我们可以设置我们的React应用程序来消耗Prisma GraphQL终端。
在项目文件夹中,运行以下命令以使用create-react-app启动我们的客户端应用程序:
1create-react-app client
要使用 GraphQL,我们需要几个依赖性。导航到客户端文件夹并运行以下命令来安装它们:
1cd client
2npm install apollo-boost react-apollo graphql-tag graphql --save
对于用户界面,我们将使用 Ant Design:
1npm install antd --save
文件夹结构:
我们的 app 文件夹结构将如下:
 1src
 2├── components
 3│   ├── App.js
 4│   ├── App.test.js
 5│   ├── RecipeCard
 6│   │   ├── RecipeCard.js
 7│   │   └── index.js
 8│   └── modals
 9│       ├── AddRecipeModal.js
10│       └── ViewRecipeModal.js
11├── containers
12│   └── AllRecipesContainer
13│       ├── AllRecipesContainer.js
14│       └── index.js
15├── graphql
16│   ├── mutations
17│   │   ├── AddNewRecipe.js
18│   │   └── UpdateRecipe.js
19│   └── queries
20│       ├── GetAllPublishedRecipes.js
21│       └── GetSingleRecipe.js
22├── index.js
23├── serviceWorker.js
24└── styles
25    └── index.css
第5步:编写代码
标签: index.js
这里我们将做 apollo config. 这将是我们应用程序的主要输入文件:
 1import React from 'react';
 2import ReactDOM from 'react-dom';
 3import ApolloClient from 'apollo-boost';
 4import { ApolloProvider } from 'react-apollo';
 5
 6import App from './components/App';
 7
 8// Pass your prisma endpoint to uri
 9const client = new ApolloClient({
10  uri: 'https://eu1.prisma.sh/XXXXXX'
11});
12
13ReactDOM.render(
14  <ApolloProvider client={client}>
15    <App />
16  </ApolloProvider>,
17  document.getElementById('root')
18);
收集 发布Recipes.js
请点击查看所有食谱:
 1import { gql } from 'apollo-boost';
 2
 3export default gql`query GetAllPublishedRecipes {
 4    recipes(where: { published: true }) {
 5      id
 6      createdAt
 7      title
 8      ingredients
 9      directions
10      published
11    }
12  }`;
点击GetSingleRecipe.js
请通过食谱ID获取食谱:
 1import { gql } from 'apollo-boost';
 2
 3export default gql`query GetSingleRecipe($recipeId: ID!) {
 4    recipe(where: { id: $recipeId }) {
 5      id
 6      createdAt
 7      title
 8      directions
 9      ingredients
10      published
11    }
12  }`;
AddNewRecipe。js
创建新食谱的突变:
 1import { gql } from 'apollo-boost';
 2
 3export default gql`mutation AddRecipe(
 4    $directions: String!
 5    $title: String!
 6    $ingredients: String!
 7    $published: Boolean
 8  ) {
 9    createRecipe(
10      data: {
11        directions: $directions
12        title: $title
13        ingredients: $ingredients
14        published: $published
15      }
16    ) {
17      id
18    }
19  }`;
更新Recipe.js
更新食谱的突变:
 1import { gql } from 'apollo-boost';
 2
 3export default gql`mutation UpdateRecipe(
 4    $id: ID!
 5    $directions: String!
 6    $title: String!
 7    $ingredients: String!
 8    $published: Boolean
 9  ) {
10    updateRecipe(
11      where: { id: $id }
12      data: {
13        directions: $directions
14        title: $title
15        ingredients: $ingredients
16        published: $published
17      }
18    ) {
19      id
20    }
21  }`;
AllRecipesContainer.js 的所有内容
这就是我们对‘CRUD’操作的逻辑的依据。 该文件相当大,所以我们只包括了关键部分。 您可以查看代码的其余部分 在GitHub。
为了使用我们的查询和突变,我们需要导入它们,然后使用),这使我们能够创建一个更高级别的组件,可以执行查询并根据我们在我们的应用程序中拥有的数据进行反应更新。
以下是我们如何收集和显示所有发布的食谱的例子:
 1import React, { Component } from 'react';
 2import { graphql } from 'react-apollo';
 3
 4import { Card, Col, Row, Empty, Spin } from 'antd';
 5
 6// queries
 7import GetAllPublishedRecipes from '../../graphql/queries/GetAllPublishedRecipes';
 8
 9class AllRecipesContainer extends Component {
10  render() {
11    const { loading, recipes } = this.props.data;
12
13    return (
14      <div>
15        {loading ? (
16          <div className="spin-container">
17            <Spin />
18          </div>
19        ) : recipes.length > 0 ? (
20          <Row gutter={16}>
21            {recipes.map(recipe => (
22              <Col span={6} key={recipe.id}>
23                <RecipeCard
24                  title={recipe.title}
25                  content={
26                    <Fragment>
27                      <Card
28                        type="inner"
29                        title="Ingredients"
30                        style={{ marginBottom: '15px' }}
31                      >
32                        {`${recipe.ingredients.substring(0, 50)}.....`}
33                      </Card>
34                      <Card type="inner" title="Directions">
35                        {`${recipe.directions.substring(0, 50)}.....`}
36                      </Card>
37                    </Fragment>
38                  }
39                  handleOnClick={this._handleOnClick}
40                  handleOnEdit={this._handleOnEdit}
41                  handleOnDelete={this._handleOnDelete}
42                  {...recipe}
43                />
44              </Col>
45            ))}
46          </Row>
47        ) : (
48          <Empty />
49        )}
50      </div>
51    );
52  }
53}
54
55graphql(GetAllPublishedRecipes)(AllRecipesContainer);
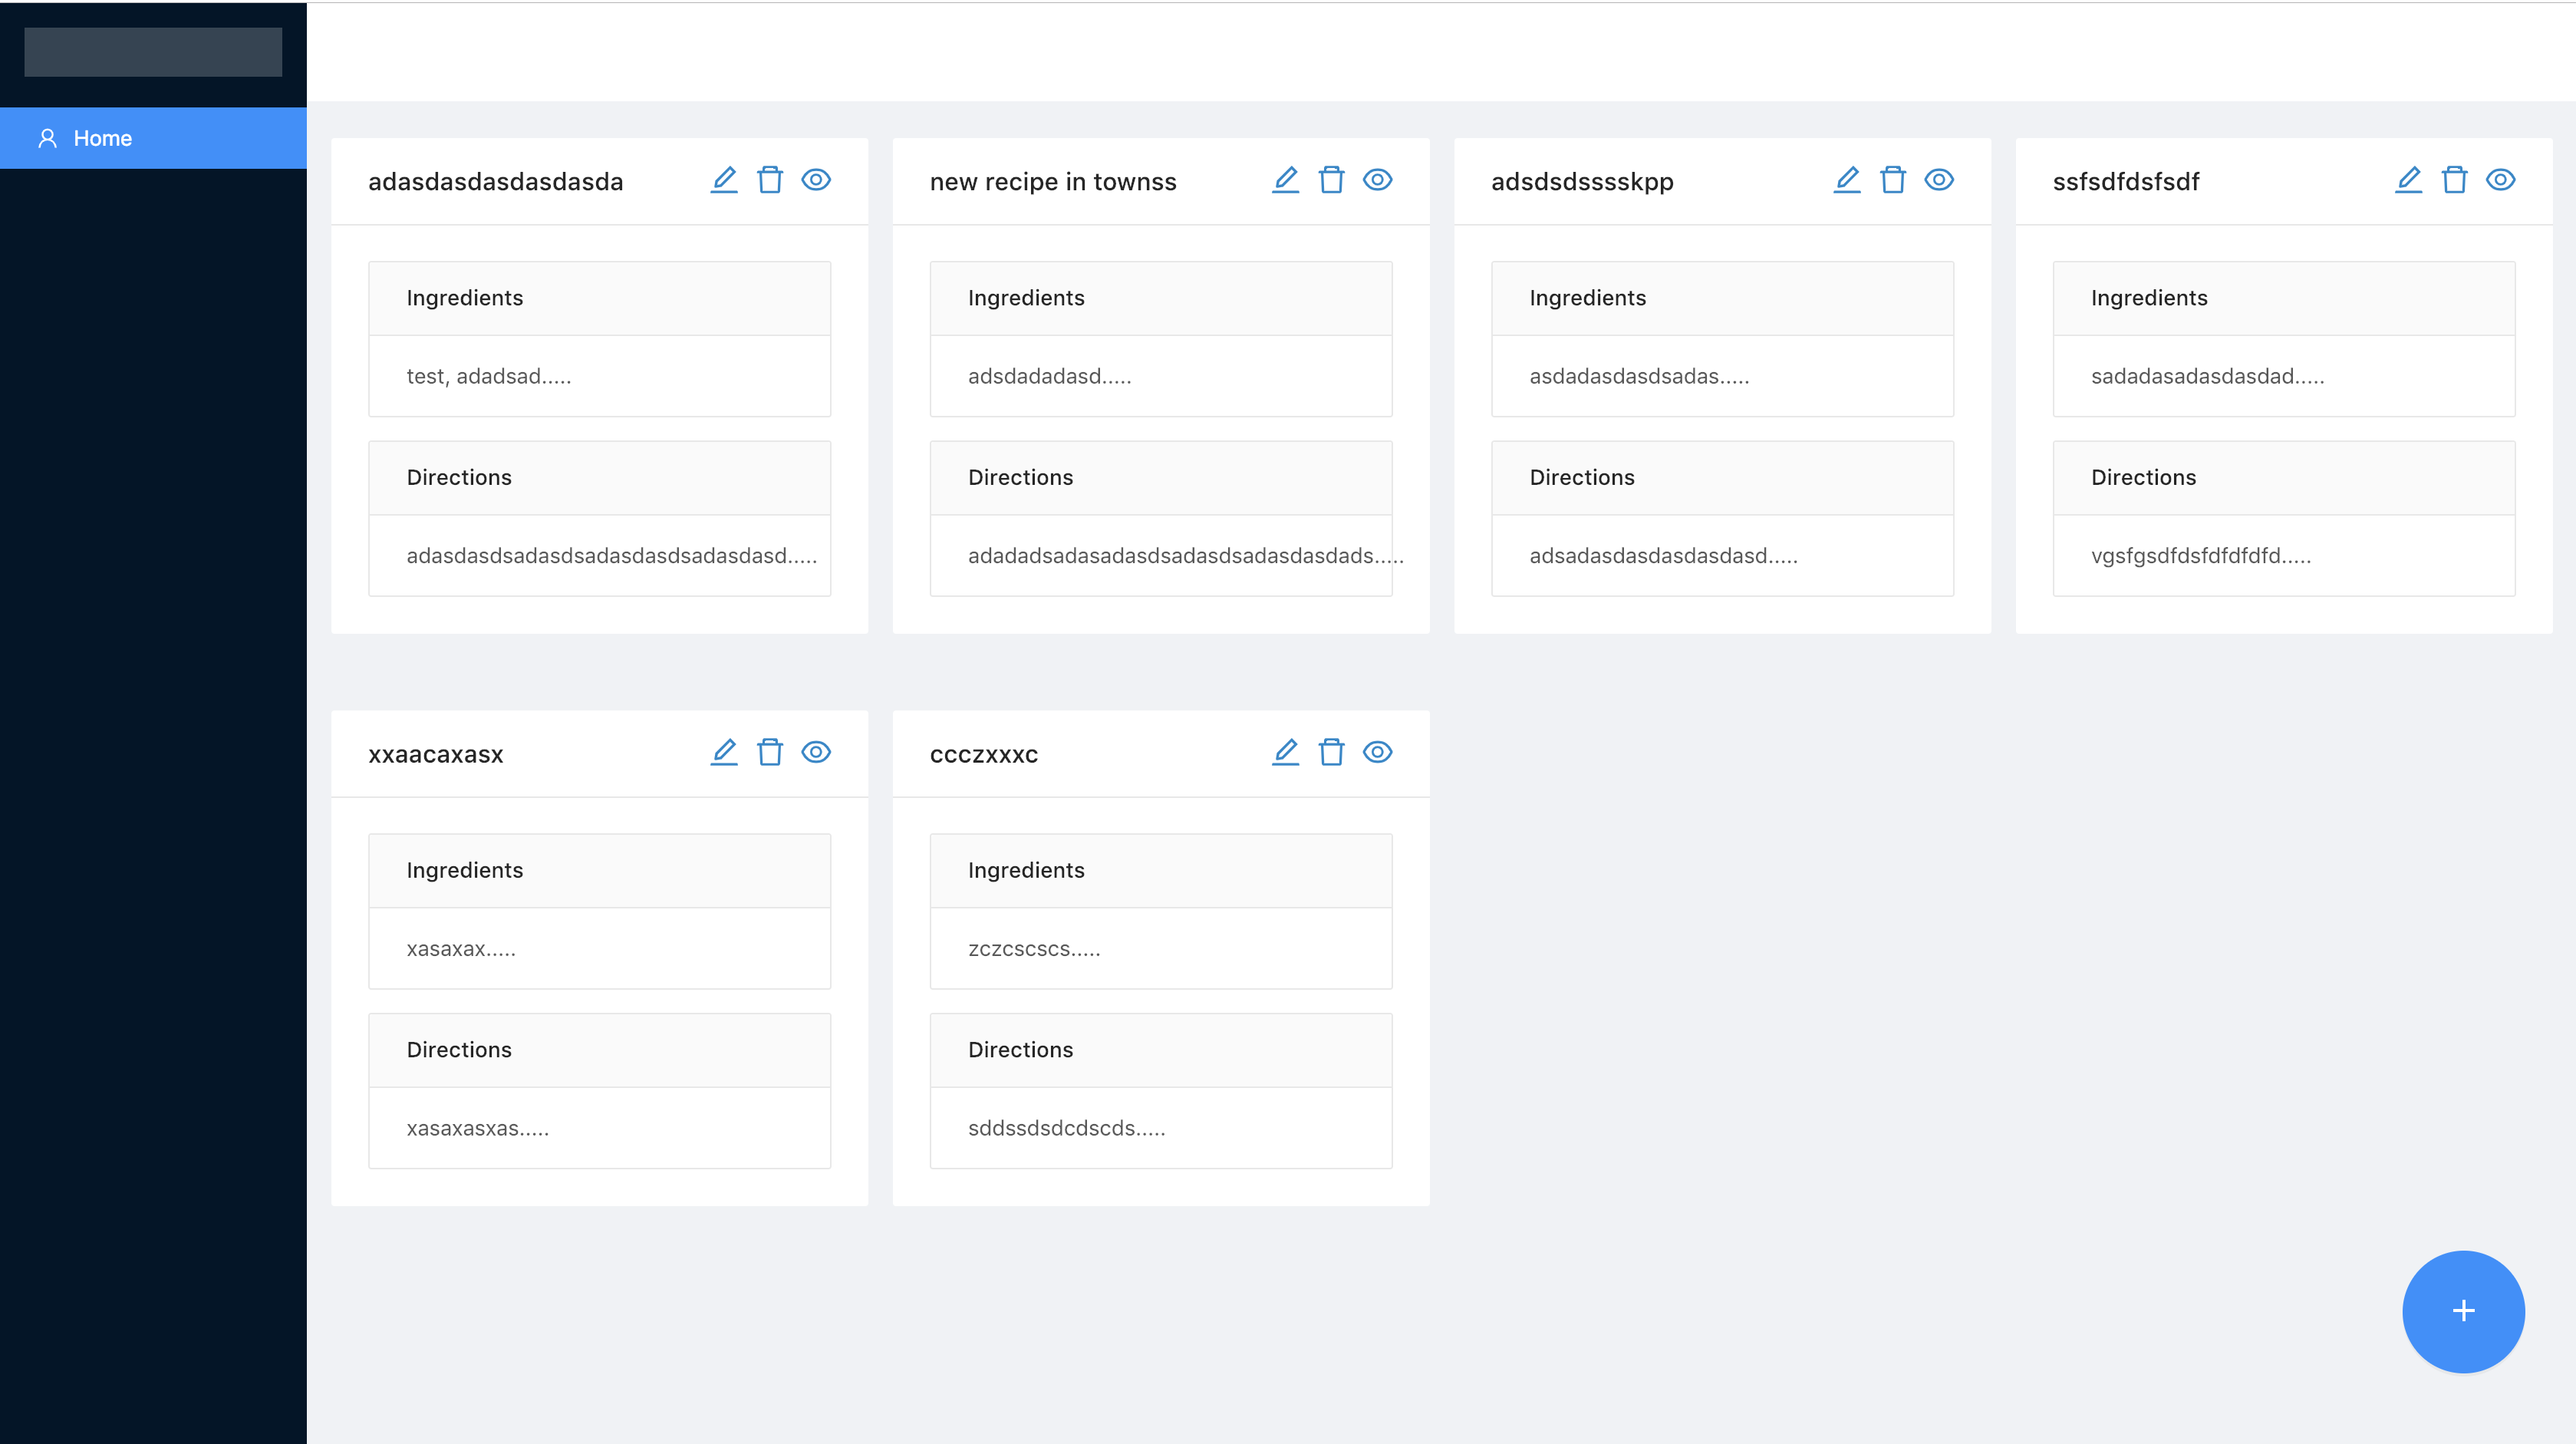
结果的观点将如下:
<$>[注] 注: 因文件大小而不会包含组件的样式。 代码可在 GitHub 复制中找到。
由于我们需要一个以上的增强器在我们的组件中,我们将使用 compose 将所有所需的增强器用于组件:
 1import React, { Component } from 'react';
 2import { graphql, compose, withApollo } from 'react-apollo';
 3
 4// queries
 5import GetAllPublishedRecipes from '../../graphql/queries/GetAllPublishedRecipes';
 6import GetSingleRecipe from '../../graphql/queries/GetSingleRecipe';
 7
 8// mutations
 9import UpdateRecipe from '../../graphql/mutations/UpdateRecipe';
10import AddNewRecipe from '../../graphql/mutations/AddNewRecipe';
11
12// other imports
13
14class GetAllPublishedRecipes extends Component {
15    // class logic
16}
17
18export default compose(
19  graphql(UpdateRecipe, { name: 'updateRecipeMutation' }),
20  graphql(AddNewRecipe, { name: 'addNewRecipeMutation' }),
21  graphql(GetAllPublishedRecipes)
22)(withApollo(AllRecipesContainer));
我们还需要withApollo增强器,它可以直接访问你的ApolloClient实例,因为我们需要执行一次性查询来获取信息。
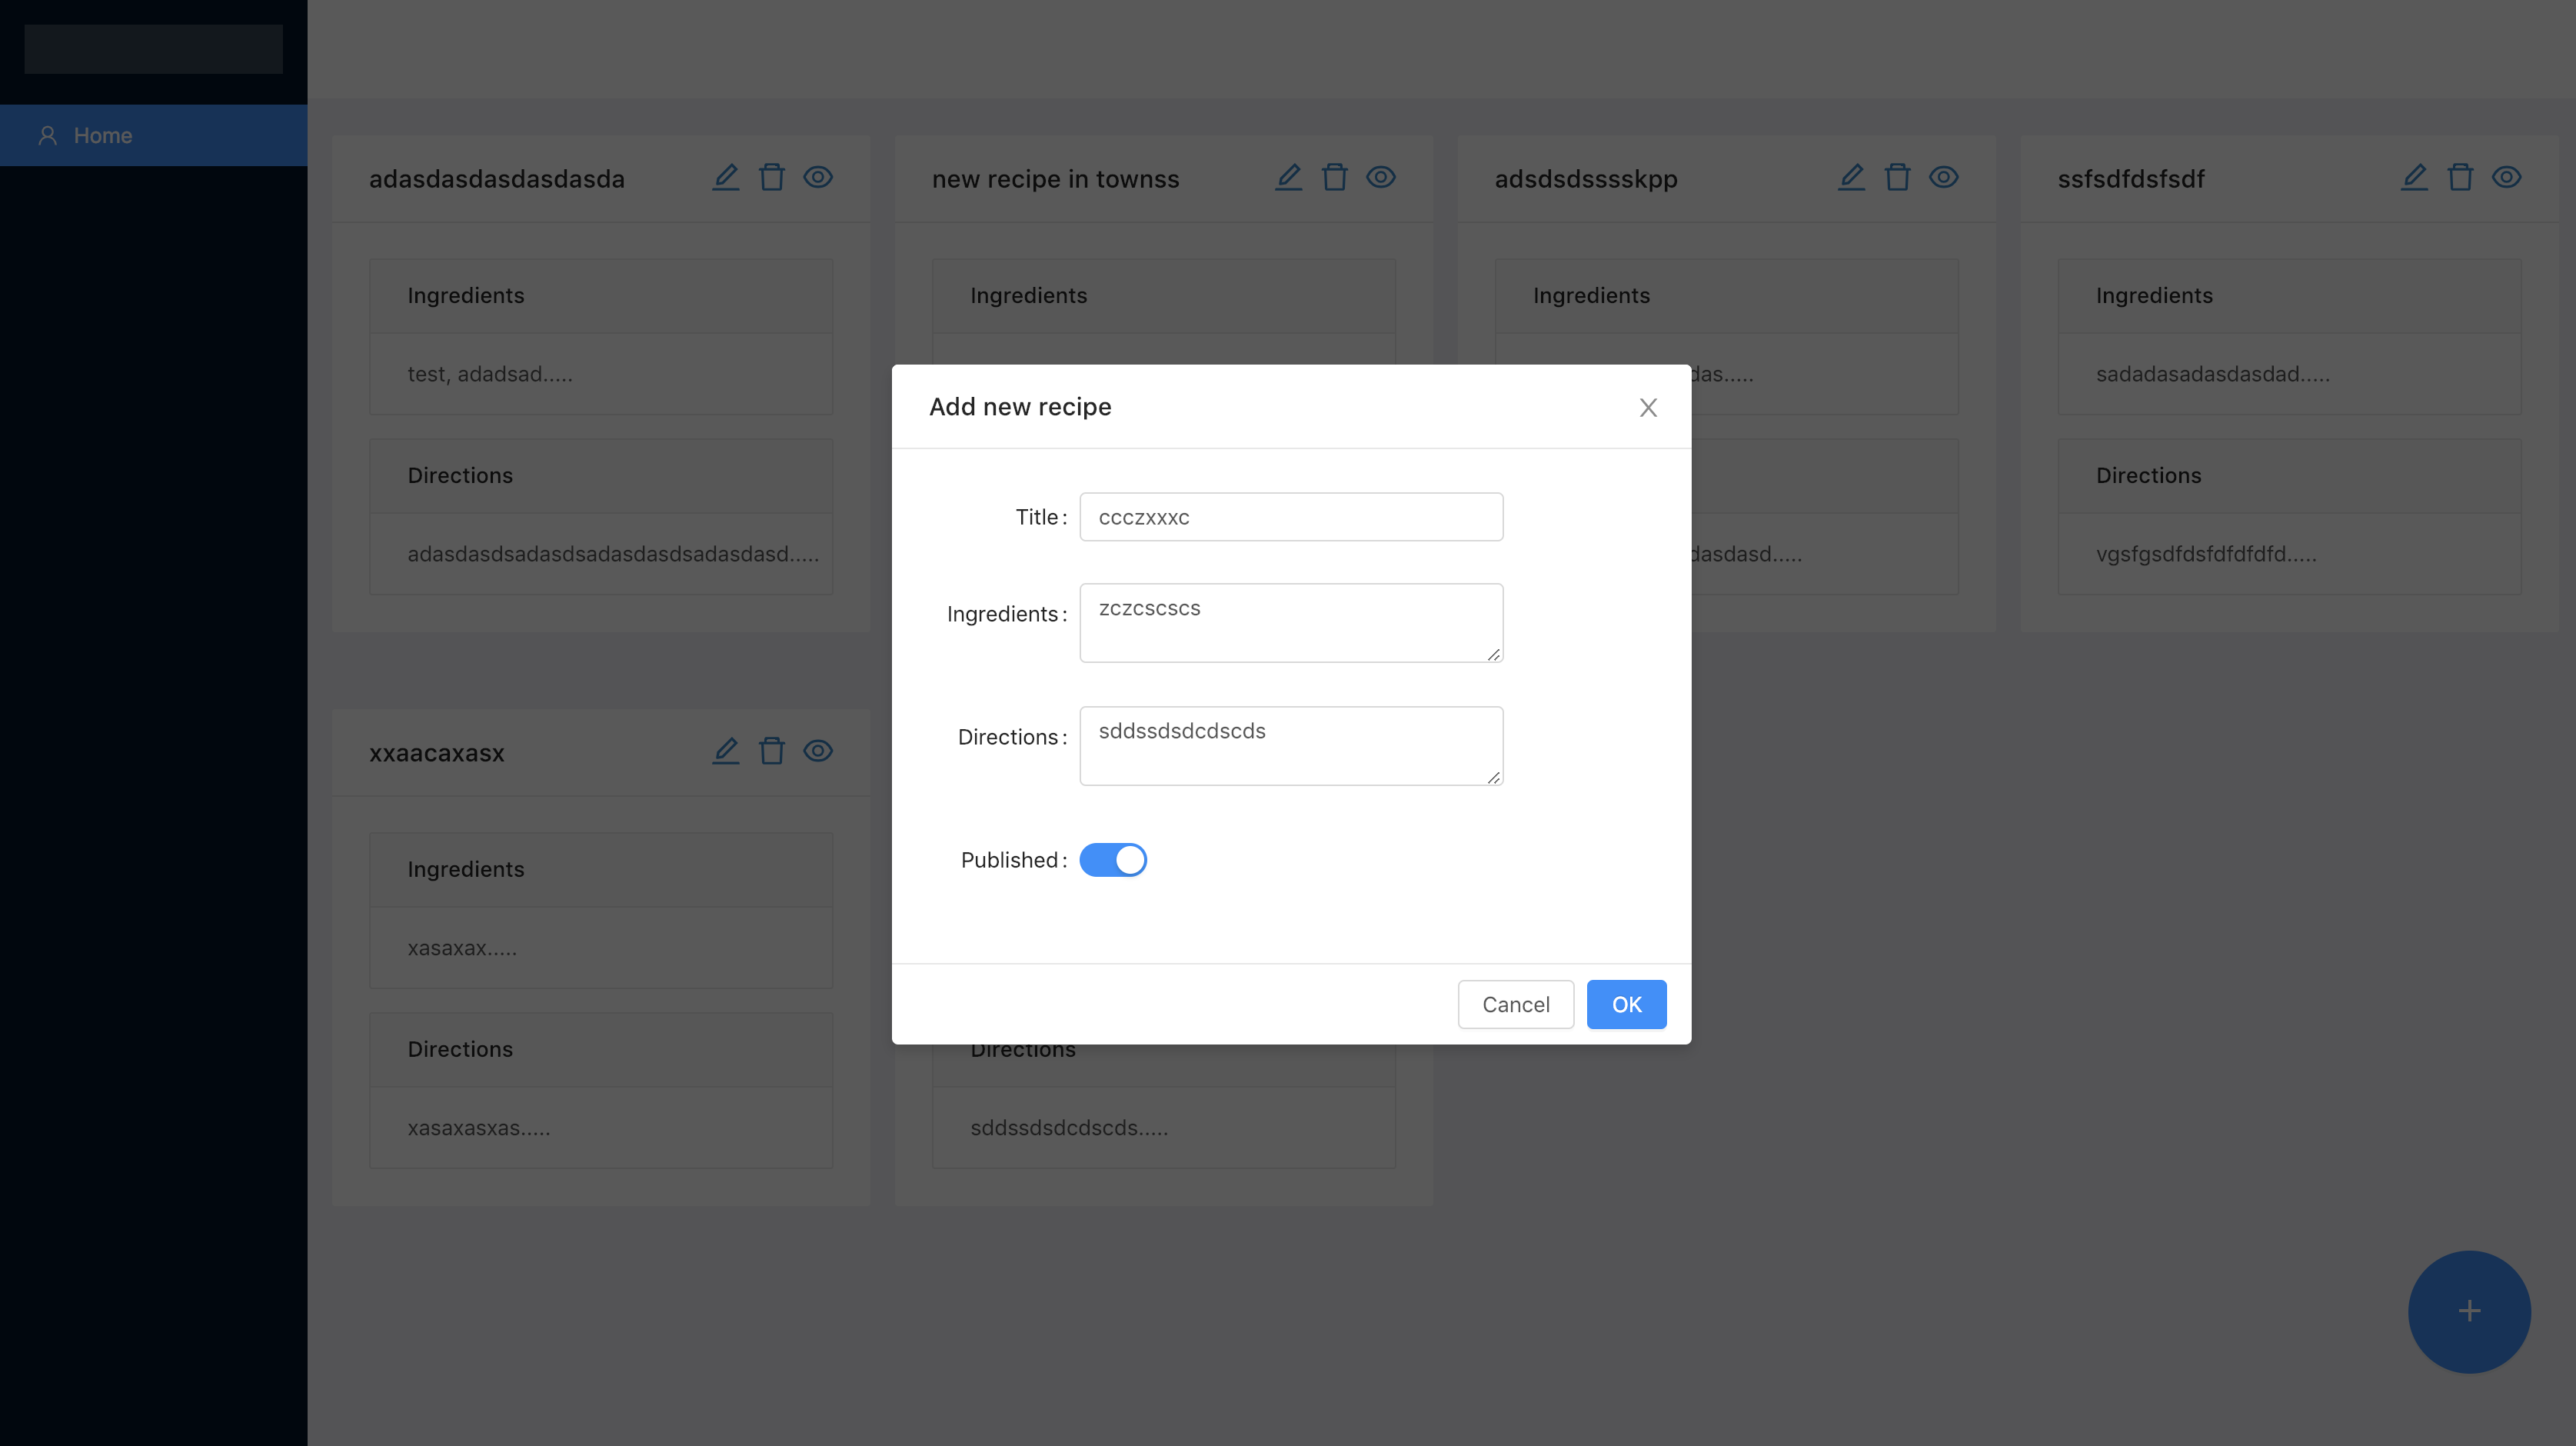
创建一个食谱
在从以下形式获取数据后:
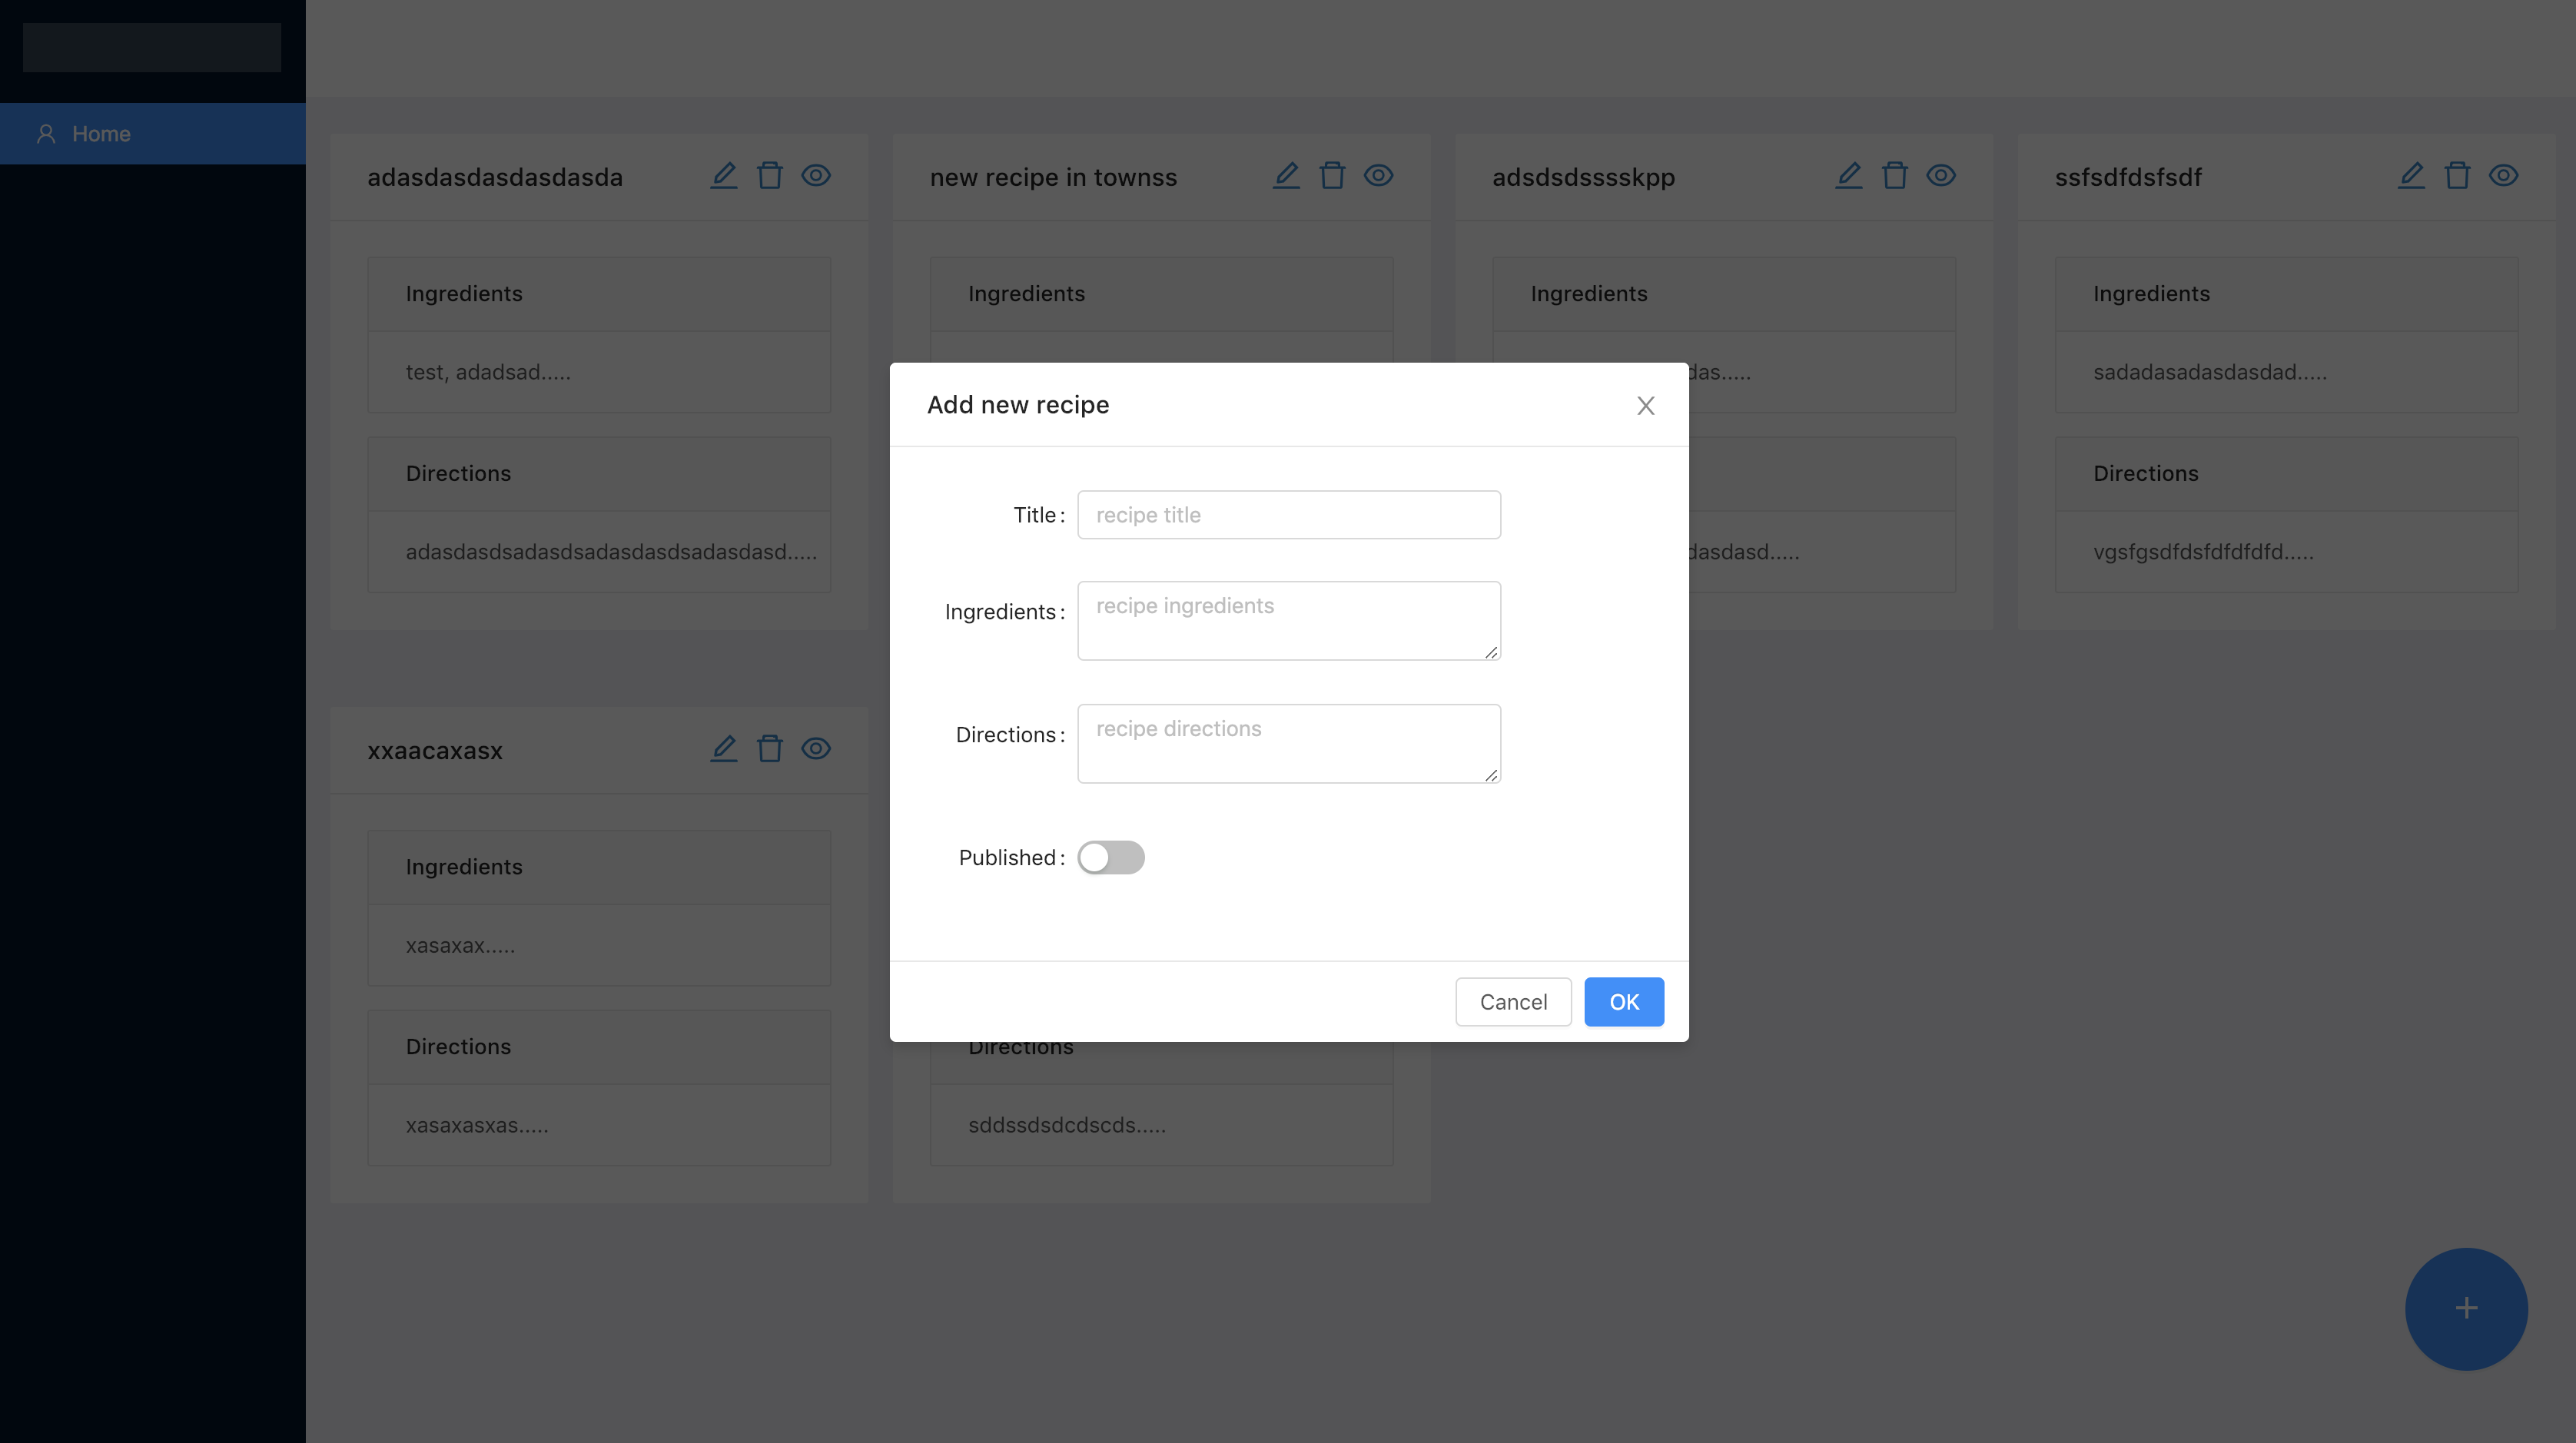
然后,我们执行以下handleSubmit调用,该调用运行了addNewRecipeMutation突变:
 1class GetAllPublishedRecipes extends Component {
 2  //other logic
 3   _handleSubmit = event => {
 4    this.props
 5      .addNewRecipeMutation({
 6        variables: {
 7          directions,
 8          title,
 9          ingredients,
10          published
11        },
12        refetchQueries: [
13          {
14            query: GetAllPublishedRecipes
15          }
16        ]
17      })
18      .then(res => {
19        if (res.data.createRecipe.id) {
20          this.setState(
21            (prevState, nextProps) => ({
22              addModalOpen: false
23            }),
24            () =>
25              this.setState(
26                (prevState, nextProps) => ({
27                  notification: {
28                    notificationOpen: true,
29                    type: 'success',
30                    message: `recipe ${title} added successfully`,
31                    title: 'Success'
32                  }
33                }),
34                () => this._handleResetState()
35              )
36          );
37        }
38      })
39      .catch(e => {
40        this.setState((prevState, nextProps) => ({
41          notification: {
42            ...prevState.notification,
43            notificationOpen: true,
44            type: 'error',
45            message: e.message,
46            title: 'Error Occured'
47          }
48        }));
49      });
50  };
51};
编辑一份食谱
为了编辑配方,我们重复使用用于创建新配方的表单,然后传输配方数据。
然后,我们运行一个不同的处理提交处理器来执行更新突变如下:
 1class GetAllPublishedRecipes extends Component {
 2  // other logic
 3  _updateRecipe = ({
 4    id,
 5    directions,
 6    ingredients,
 7    title,
 8    published,
 9    action
10  }) => {
11    this.props
12      .updateRecipeMutation({
13        variables: {
14          id,
15          directions,
16          title,
17          ingredients,
18          published: false
19        },
20        refetchQueries: [
21          {
22            query: GetAllPublishedRecipes
23          }
24        ]
25      })
26      .then(res => {
27        if (res.data.updateRecipe.id) {
28          this.setState(
29            (prevState, nextProps) => ({
30              isEditing: false
31            }),
32            () =>
33              this.setState(
34                (prevState, nextProps) => ({
35                  notification: {
36                    notificationOpen: true,
37                    type: 'success',
38                    message: `recipe ${title} ${action} successfully`,
39                    title: 'Success'
40                  }
41                }),
42                () => this._handleResetState()
43              )
44          );
45        }
46      })
47      .catch(e => {
48        this.setState((prevState, nextProps) => ({
49          notification: {
50            ...prevState.notification,
51            notificationOpen: true,
52            type: 'error',
53            message: e.message,
54            title: 'Error Occured'
55          }
56        }));
57      });
58  };
59}
删除一个食谱
至于删除功能,我们将对删除的食谱进行软删除,这意味着我们将更改发布属性为假,因为当我们提取文章时,我们会过滤,以确保我们只收到发布的文章。
我们将使用与之前相同的函数,并将发布作为虚假,如下示例所示:
 1class GetAllPublishedRecipes extends Component {
 2   // other logic
 3   _handleOnDelete = ({ id, directions, ingredients, title }) => {
 4    // user confirmed delete prompt
 5    this._updateRecipe({
 6      id,
 7      directions,
 8      ingredients,
 9      title,
10      published: false, // soft delete the recipe
11      action: 'deleted'
12    });
13  };
14};
结论:
在本教程中,您使用 React 和 GraphQL 构建了一个食谱应用程序,使用 Prisma 来管理您的 GraphQL 服务器。
您可以访问代码在 GitHub。