尽管我们都同意markdown是多么的棒,但实时查看页面上的编辑和样式更改总是会让人更加满意。🦙TinaCMS(https://tinacms.org/),与Gatsby相结合,使我们能够直接在我们的页面上直观地操作我们的markdown文件。TinaCMS也可以与Next.js一起使用,但在这里,我们将通过Gatsby站点来探索这个强大的新工具。
安装
我们将开始使用gatsby-starter-blogStarter,因为它已经具备了发布降价帖子所需的一切。
我们只需要四件主要的东西,TinaCMS本身,styled-components(TinaCMS依赖的),Tina用于处理降价的Marking‘插件,以及Tina的git`插件,它让它能够直接改变文件系统中的文件,并在你保存帖子时提交到你的Github账户。
1$ gatsby new tina-example https://github.com/gatsbyjs/gatsby-starter-blog
2$ yarn add gatsby-plugin-tinacms styled-components gatsby-tinacms-remark gatsby-tinacms-git
设置
初始设置再简单不过了:我们将在gatsby-config.js中添加gatsby-plugin-tinacms,并使用notic和git插件。我个人更喜欢将位置‘设置为固定`,因为默认情况下,侧边栏会将我们的站点推到一边。
 1[label gatsby-config.js]
 2{
 3  resolve: 'gatsby-plugin-tinacms',
 4  options: {
 5    plugins: [
 6      "gatsby-tinacms-git",
 7      "gatsby-tinacms-remark",
 8    ],
 9    position: 'fixed'
10  }
11}
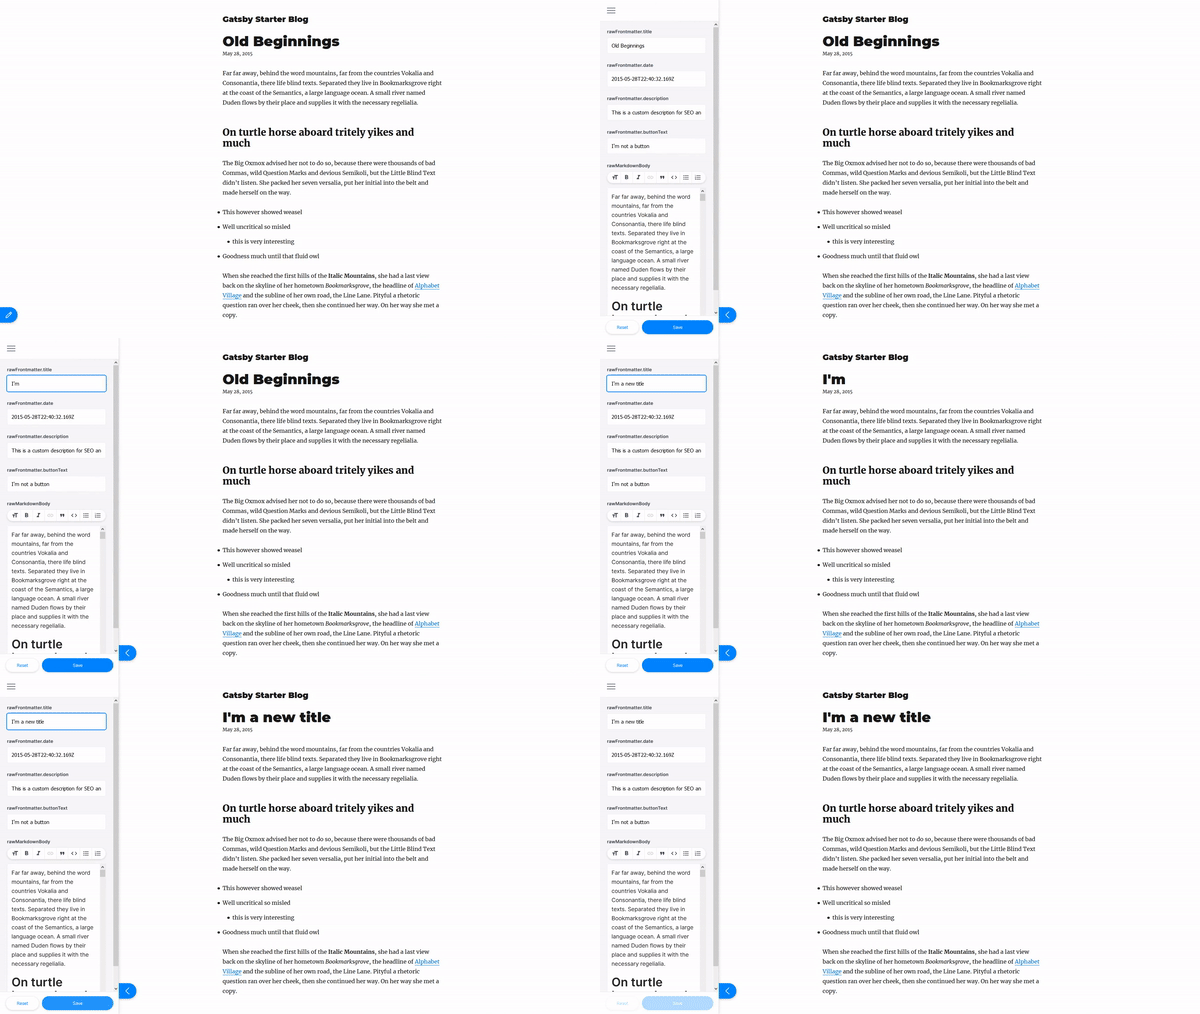
这样,你的页面底部应该有一个蓝色的小标签来打开一个新的侧边栏。
边栏
现在,在POST模板中,我们需要从查询中获得一些额外的东西:fileRelativePath、rawFrontmatter、rawMarkdown Body。它们将被TinaCMS提供给我们的高阶component](https://andsky.com/tech/tutorials/react-higher-order-components)使用,我们所要做的就是用它包装我们的导出组件,您应该可以使用它了。
 1[label blog-post.js]
 2import { remarkForm } from "gatsby-tinacms-remark";
 3
 4class BlogPostTemplate extends React.Component {
 5    // ...
 6};
 7
 8export default remarkForm(BlogPostTemplate);
 9
10export const pageQuery = graphql`
11  query BlogPostBySlug($slug: String!) {
12    # ...
13    markdownRemark(fields: { slug: { eq: $slug } }) {
14      # ...
15      fileRelativePath
16      rawFrontmatter
17      rawMarkdownBody
18    }
19  }
20`;
现在,Tina可以访问您所有的markdown帖子,并将更新和快速重新加载页面以显示任何新更改。另外,每当你点击保存按钮时,都会有一个小的提交到你的Github仓库中,所以任何连接到它的托管平台都会自动更新。

内联编辑
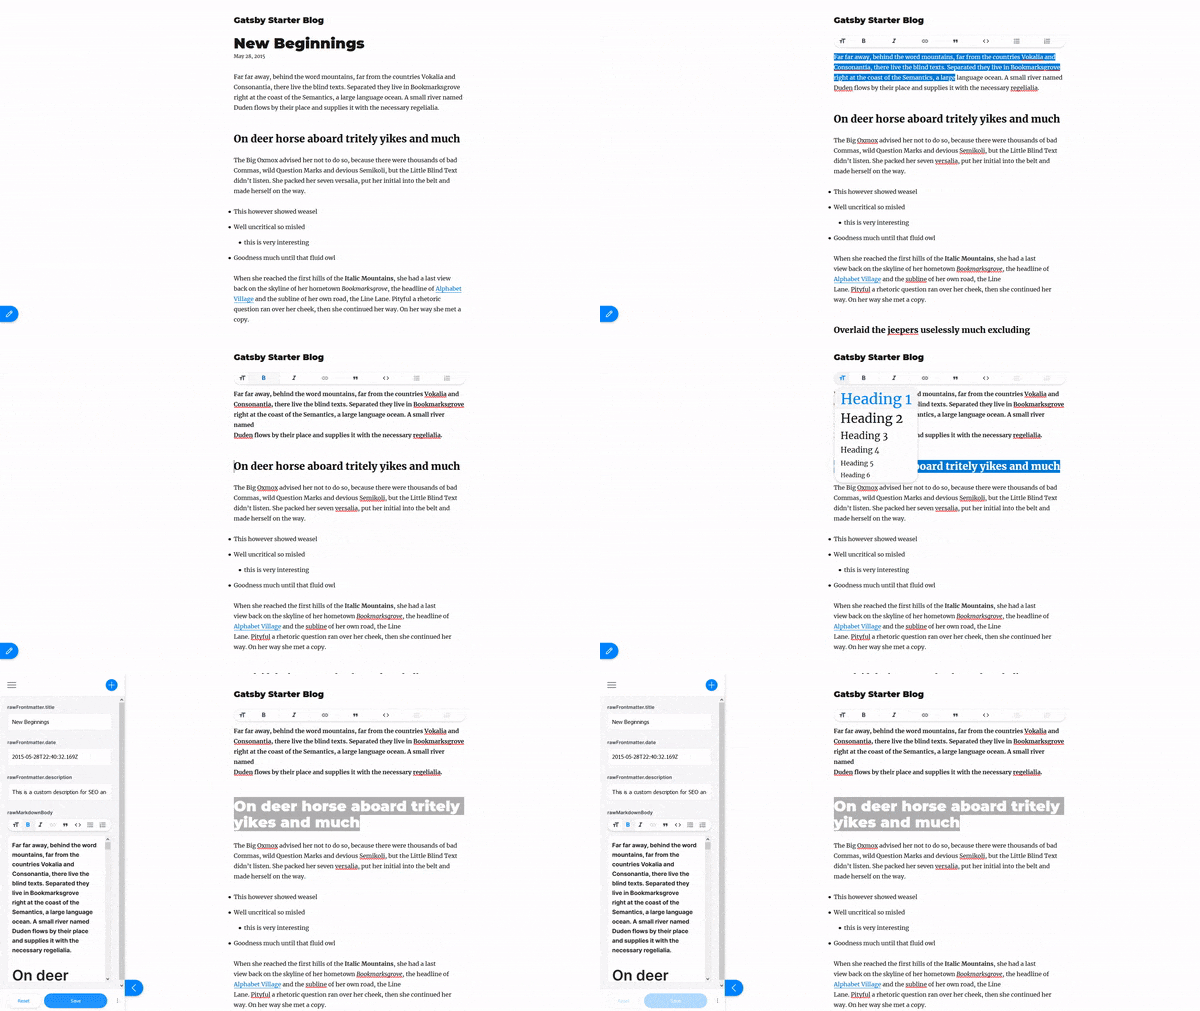
必须完全在侧边栏中处理长内容将是一种痛苦,相反,我们可以将输出的内容设置为编辑器,这样我们就可以直接与页面上的内容交互,并保留侧边栏仅用于元数据、主题、添加/删除等。
甚至不需要做太多更改,我们将页面模板包装在一个liveRemarkForm中,并用一个TinaField包装任何我们想要编辑的部分。TinaField只需要命名为rawMarkdown Body,并作为道具传入所见即所得库即可。Wysiwyg是你所见即所得的缩写,这将为我们提供大部分的实时编辑功能。
我们将激活编辑模式,每当你点击文章本身,与方便的setIsEditing方法。
 1[label layout.js]
 2import { liveRemarkForm } from 'gatsby-tinacms-remark';
 3import { Wysiwyg } from '@tinacms/fields';
 4import { TinaField } from '@tinacms/form-builder';
 5
 6const BlogPostTemplate = props => {
 7  const { previous, next } = props.pageContext;
 8
 9  return (
10    <Layout>
11        {*/ ... */}
12      <TinaField name="rawMarkdownBody" Component={Wysiwyg}>
13        <article onClick={() => props.setIsEditing(true)}>
14            {*/ ... */}
15        </article>
16      </TinaField>
17    </Layout>
18  )
19};
setIsEditing方法中的第一个属性是当前的编辑状态,因此如果您想要使用切换按钮,可以执行类似于pros.setIsEditing(editing=>!Editing)的操作。
 进行内联编辑
删除帖子
删除文件非常简单,只需导入方便的DeleteAction方法,抛入一个带标签的an对象,然后将其赋给liveRemarkForm。
1[label blog-post.js]
2import { liveRemarkForm, DeleteAction } from 'gatsby-tinacms-remark';
3
4const deleteButton = {
5  label: 'Delete',
6  actions: [DeleteAction]
7};
8
9export default liveRemarkForm(BlogPostTemplate, deleteButton);
现在,保存按钮旁边是一个带有Delete选项的小菜单。
添加帖子
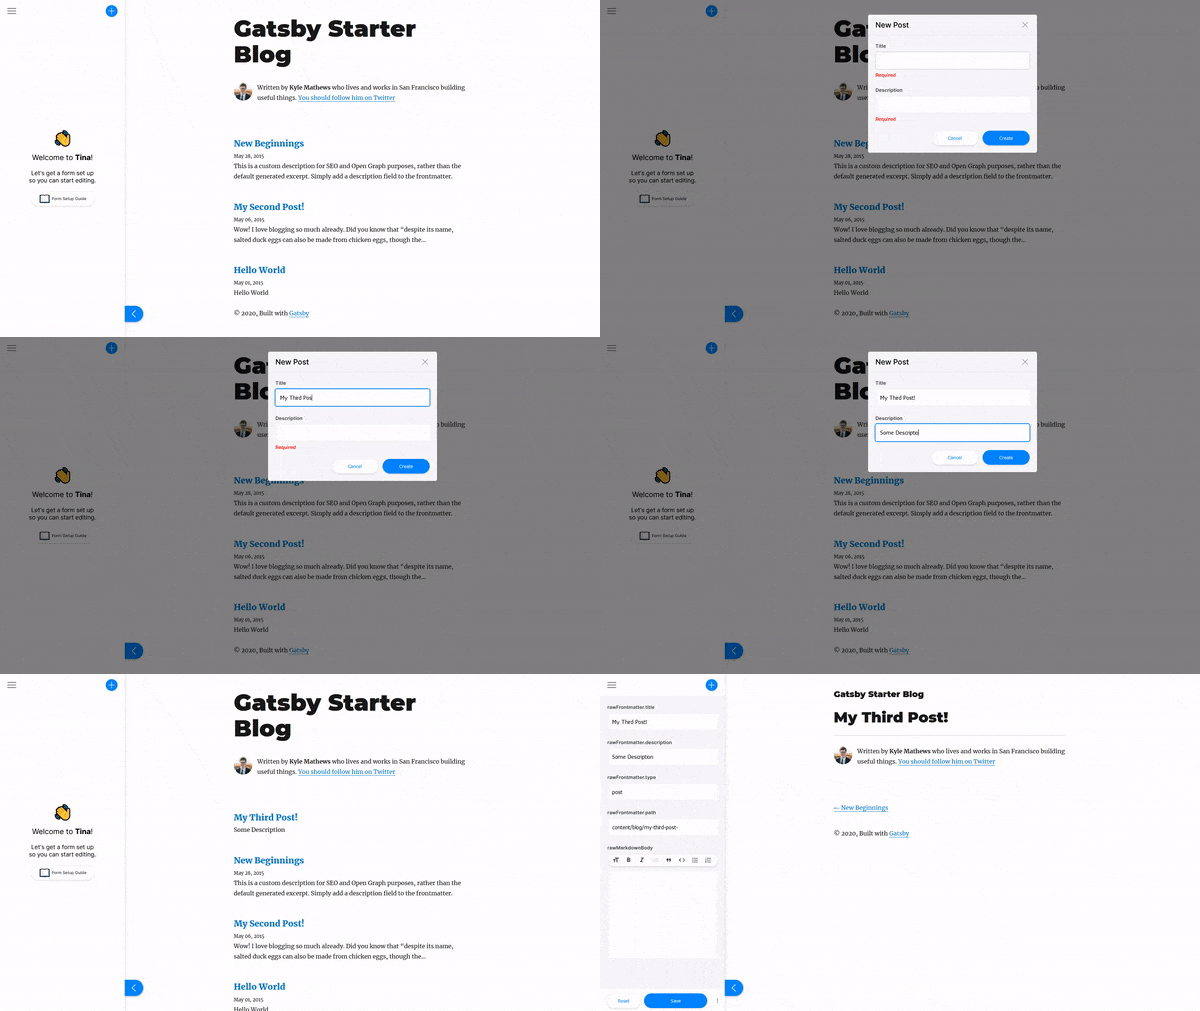
添加帖子的能力是事情变得有点沉重的样板。
我们将使用添加RemarkButton功能向侧边栏添加一个新选项。我们返回给filename的任何内容都将被添加到我们的文件系统中,我们可以使用slugify库来格式化我们文件的名称。
FrontMatter将从我们的表单处理我们帖子的元数据。‘fields’将建立表单本身。最后,我们将使用`with Plugin‘点将新按钮添加到布局中。
 1[label layout.js]
 2import { withPlugin } from 'tinacms';
 3import { createRemarkButton } from 'gatsby-tinacms-remark';
 4import slugify from 'react-slugify';
 5
 6const CreatePostButton = createRemarkButton({
 7  label: "New Post",
 8  filename(form) {
 9    let slug = slugify(form.title.toLowerCase())
10    return `content/blog/${slug}/${slug}.md`
11  },
12  frontmatter(form) {
13    let slug = slugify(form.title.toLowerCase())
14    return new Promise(resolve => {
15      resolve({
16        title: form.title,
17        description: form.description,
18        data: new Date(),
19        path: `content/blog/${slug}/${slug}`,
20      })
21    })
22  },
23  fields: [
24    { name: "title", label: "Title", component: "text", required: true },
25    { name: "description", label: "Description", component: "text", required: true },
26  ],
27});
28
29export default withPlugin(Layout, CreatePostButton);
 添加新帖子
添加新帖子
结论
TinaCMS还有很多东西需要探索,比如用JSON创建/删除页面,以及创建自定义字段、块和插件。
由于TinaCMS仍然是一项相当新的技术,仍有许多方法可以改进它。他们目前正在为不同的角色和编辑权限添加团队支持。希望在未来,他们将增加一种非技术客户访问Tina并在现场编辑所有内容的方法。🤞