在图像处理系列的第5部分中,我们将更多地讨论算术和按位运算,以及在Python语言中对图像进行掩码。
在开始您的蒙面学习之旅之前,建议先通读以前的articles》。
设置环境
下面的代码行用于下面给出的所有应用程序。我们将在这里包括这些,这样你就不必通读一大块代码。
帮助减少杂乱:)
 1# importing numpy to work with pixels
 2import numpy as np
 3
 4# importing argument parsers
 5import argparse
 6
 7# importing the OpenCV module
 8import cv2
 9
10# initializing an argument parser object
11ap = argparse.ArgumentParser()
12
13# adding the argument, providing the user an option
14# to input the path of the image
15ap.add_argument("-i", "--image", required=True, help="Path to the image")
16
17# parsing the argument
18args = vars(ap.parse_args())
19
20# reading the image location through args
21# and reading the image using cv2.imread
22image = cv2.imread(args["image"])
使用Python对图像进行算术运算
算术运算允许我们增强图像的许多方面。
我们可以处理照明、阴影、红色、蓝色和绿色的增强。
许多应用程序上的图像过滤器也使用相同的方法来改变和美化照片。
那么,让我们开始学习所有代码吧!
首先,为了了解限制是否可以超过255或0,我们可以进行一个简单的测试,它提供了255和`0‘。
1# printing out details of image min, max and the wrap around
2print("max of 255 :", str(cv2.add(np.uint8([200]), np.uint8([100]))))
3print("min of 0 :", str(cv2.subtract(np.uint8([50]), np.uint8([100]))))
4
5print("wrap around :", str(np.uint8([200]) + np.uint8([100])))
6print("wrap around :", str(np.uint8([50]) - np.uint8([100])))
在这个例子中,我们将图像中所有像素的亮度增加100。
1# adding pixels of value 255 (white) to the image
2M = np.ones(image.shape, dtype="uint8") * 100
3added = cv2.add(image, M)
4cv2.imshow("Added", added)
5cv2.waitKey(0)
这是通过使用[NumPy模块](/community/tutorials/python-numpy-tutorial)构建一个与我们的图像大小相同的矩阵,并将其添加到我们的图像中来完成的。
如果我们希望使图像变暗,我们从图像的像素值中减去,如下所示,
1# adding pixels of value 0 (black) to the image
2M = np.ones(image.shape, dtype="uint8") * 50
3subtracted = cv2.subtract(image, M)
4cv2.imshow("Subtracted", subtracted)
5cv2.waitKey(0)
这将为您提供原始图像的两种不同变体,一种较亮,另一种较暗。
按位操作
我们在尝试遮罩图像时,经常使用按位操作。
OpenCV的这一功能允许我们过滤掉图像中与我们相关的部分。
设置
要进行位操作,我们首先需要两个变量或图像,我们可以在它们上执行操作。
因此,让我们创建一个按位正方形和一个按位圆,通过它们我们可以使用按位运算。
请注意,按位操作要求图像为黑白图像。
1# creating a square of zeros using a variable
2rectangle = np.zeros((300, 300), dtype="uint8")
3cv2.rectangle(rectangle, (25, 25), (275, 275), 255, -1)
4cv2.imshow("Rectangle : ", rectangle)
5
6# creating a circle of zeros using a variable
7circle = np.zeros((300, 300), dtype="uint8")
8cv2.circle(circle, (150, 150), 150, 255, -1)
9cv2.imshow("Circle : ", circle)
您收到的输出图像应该是这样的,

结合AND操作
按位相加是指将两个不同的图像相加,并通过对图像的每个像素进行与运算来决定要显示哪一幅图像。
1# the bitwise_and function executes the AND operation
2# on both the images
3bitwiseAnd = cv2.bitwise_and(rectangle, circle)
4cv2.imshow("AND", bitwiseAnd)
5cv2.waitKey(0)
圆和正方形的逐位相加得到的输出应该如下所示,

通过OR操作给出选择
按位OR为我们提供了两个图像的乘积,并对图像的每个像素执行‘OR’运算。
1# the bitwise_or function executes the OR operation
2# on both the images
3bitwiseOr = cv2.bitwise_or(rectangle, circle)
4cv2.imshow("OR", bitwiseOr)
5cv2.waitKey(0)
在执行按位或操作时,您应该会收到这样的内容,

XOR操作的排他性
cv2模块提供的另一个操作是XOR操作,我们可以通过bitwise_xor函数使用它。
1# the bitwise_xor function executes the XOR operation
2# on both the images
3bitwiseXor = cv2.bitwise_xor(rectangle, circle)
4cv2.imshow("XOR", bitwiseXor)
5cv2.waitKey(0)

使用NOT操作求反
最后,我们使用bitwise_not函数执行求反操作。
NOT操作只需要一幅图像,因为我们在这里没有增加或减少任何东西。
我们仍然在这里使用它,但这也是一个选择。
1# the bitwise_not function executes the NOT operation
2# on both the images
3bitwiseNot = cv2.bitwise_not(rectangle, circle)
4cv2.imshow("NOT", bitwiseNot)
5cv2.waitKey(0)
在这种情况下,圆在正方形内,因此不可见,

使用Python OpenCV屏蔽图片
掩模在图像处理中被用来输出感兴趣的区域,或者仅仅是图像中我们感兴趣的部分。
我们倾向于使用按位操作进行掩码,因为它允许我们丢弃图像中不需要的部分。
那么,让我们开始使用蒙版吧!
屏蔽图像的过程
我们有三个步骤来掩饰。
1.创建与图片尺寸相同的黑 画布,命名为Mask。
2.更改蒙版的值,在图像中绘制任意图形,并为其提供白色 颜色。
3.对带有蒙版的图像执行按位相加操作。
按照相同的过程,让我们创建一些蒙版并在我们的图像上使用它们。
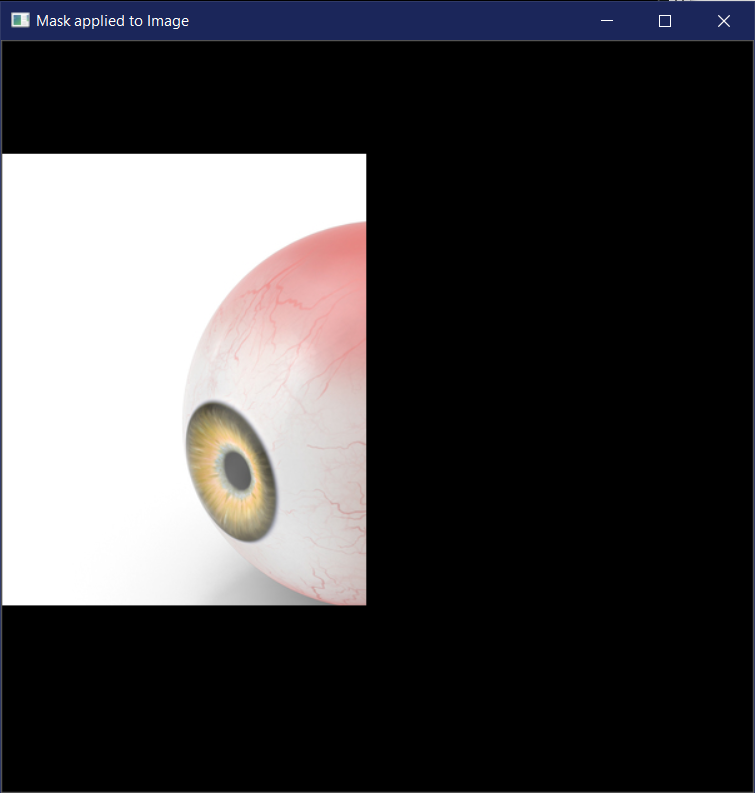
首先,让我们使用一个矩形蒙版。
 1# creating a mask of that has the same dimensions of the image
 2# where each pixel is valued at 0
 3mask = np.zeros(image.shape[:2], dtype="uint8")
 4
 5# creating a rectangle on the mask
 6# where the pixels are valued at 255
 7cv2.rectangle(mask, (0, 90), (290, 450), 255, -1)
 8cv2.imshow("Mask", mask)
 9
10# performing a bitwise_and with the image and the mask
11masked = cv2.bitwise_and(image, image, mask=mask)
12cv2.imshow("Mask applied to Image", masked)
13cv2.waitKey(0)
现在,让我们用一个圆形面具来试一试。
 1# creating a mask of that has the same dimensions of the image
 2# where each pixel is valued at 0
 3mask = np.zeros(image.shape[:2], dtype="uint8")
 4
 5# creating a rectangle on the mask
 6# where the pixels are valued at 255
 7cv2.circle(mask, (145, 200), 100, 255, -1)
 8cv2.imshow("Mask", mask)
 9
10# performing a bitwise_and with the image and the mask
11masked = cv2.bitwise_and(image, image, mask=mask)
12cv2.imshow("Mask applied to Image", masked)
13cv2.waitKey(0)
如果一切正常,我们应该会收到如下输出:
结论
我们终于开始了解图像处理的核心,理解其中的按位操作和掩码是很重要的。
它可以帮助我们屏蔽部分或只接受我们感兴趣的部分图像,所以,这是一个非常有用的概念。
我们正在以很好的速度进行,但是,如果你想跳过时间跳到最后,请便!
下面的文章让您了解OpenCV和Faces Recognition,,以及Android和CameraX OpenCV.]的Java实现