在设计具有用户界面的软件时,以一种易于扩展和维护的方式组织代码非常重要。随着时间的推移,已经有了一些方法来区分应用程序的不同组件的职责。尽管有大量关于这些设计模式的文献,但对于初学者来说,理解不同模式的局限性的特点以及它们之间的差异可能会非常令人困惑。
在本教程中,我想谈论两种主要的方法,模型-视图-控制器(MVC)模式和模型-视图-视图模型(MVVM)模式。在MVVM模式中,控制器被替换为一个视图模型。这两个组件之间的主要区别是一侧的View和另一侧的控制器或ViewModel之间的依赖方向不同。
我将发展的想法和解释模式的例子使用一个浏览器应用程序编写的打字稿和角度。TypeScrip是将类型信息添加到代码中的JavaScript的扩展。该应用程序将模仿MacOS/iOS上流行的Notes应用程序。ANGLE强制执行MVVM模式。让我们深入了解MVC和MVVM模式之间的主要区别。
使用ANGLE CLI设置应用程序
首先,您需要安装ANGLE CLI。请确保您先安装了Node和npm。如果您还没有这样做,请访问node.js.org并按照说明下载并安装节点。然后,在您的计算机上打开一个终端,运行npm命令来安装角度CLI。
1npm install -g @angular/[email protected]
根据您的系统配置,您可能需要以系统管理员身份使用sudo运行此命令。这将在您的系统上全局安装ng命令。ng用于创建、操作、测试和构建角度应用程序。您可以通过在您选择的目录中运行ng new来创建新的角度应用程序。
1ng new AngularNotes
这将启动一个向导,引导您了解有关新应用程序的几个问题,然后使用框架代码创建目录布局和一些文件。第一个问题与包含路由模块有关。路由允许您通过更改浏览器路径导航到应用程序中的不同组件。你需要对这个问题回答是 。第二个问题让您选择要使用的css技术。因为我将只包含一些非常简单的样式表,所以纯** css** 格式就足够了。回答完问题后,向导将开始下载和安装所有必要的组件。
您可以使用材质设计及其组件来使应用程序看起来更美观。可以在应用程序目录内使用npm命令进行安装。ng new命令应该已经创建了一个名为AngularNotes的目录。导航到该位置并运行以下命令。
1npm install --save @angular/[email protected] @angular/[email protected] @angular/[email protected] @angular/[email protected]
src目录包含应用程序源代码。其中,src/index.html是浏览器的主入口。在您选择的文本编辑器中打开此文件,并将以下行粘贴到<head>部分。这将加载材质图标所需的字体。
1<link href="https://fonts.googleapis.com/icon?family=Material+Icons" rel="stylesheet">
src/style.css样式表包含全局样式。打开此文件并将以下样式粘贴到其中。
 1@import "~@angular/material/prebuilt-themes/deeppurple-amber.css";
 2
 3body {
 4  margin: 0;
 5  font-family: sans-serif;
 6}
 7
 8h1, h2 {
 9  text-align: center;
10}
接下来,打开src/app/app.mode.ts。该文件包含您希望全局可用的所有模块的导入。用以下代码替换为此文件的内容。
 1import { BrowserModule } from '@angular/platform-browser';
 2import { NgModule } from '@angular/core';
 3import { FormsModule, ReactiveFormsModule } from '@angular/forms';
 4import { BrowserAnimationsModule } from '@angular/platform-browser/animations';
 5import { FlexLayoutModule } from "@angular/flex-layout";
 6
 7import { MatToolbarModule,
 8         MatMenuModule,
 9         MatIconModule,
10         MatInputModule,
11         MatFormFieldModule,
12         MatButtonModule,
13         MatListModule,
14         MatDividerModule } from '@angular/material';
15
16import { AppRoutingModule } from './app-routing.module';
17import { AppComponent } from './app.component';
18
19@NgModule({
20  declarations: [
21    AppComponent,
22  ],
23  imports: [
24    BrowserModule,
25    BrowserAnimationsModule,
26    FlexLayoutModule,
27    FormsModule,
28    ReactiveFormsModule,
29    MatToolbarModule,
30    MatMenuModule,
31    MatIconModule,
32    MatInputModule,
33    MatFormFieldModule,
34    MatButtonModule,
35    MatListModule,
36    MatDividerModule,
37    AppRoutingModule,
38  ],
39  bootstrap: [AppComponent]
40})
41export class AppModule { }
至此,我可以开始向您展示如何在src/app/app.Component.html文件中创建应用程序布局。但这已经让我深入到应用程序架构的讨论中了。相反,在下一节中,我想首先指导您完成模型的实现。在下一节中,我将讨论视图及其与视图模型的关系。
机型
模型包含应用程序的业务端。对于简单的CRUD(Create Read Update Delete)应用程序,模型通常是一个简单的数据模型。对于更复杂的应用程序,模型将自然反映复杂性的增加。在这里看到的应用程序中,模型将保存一个简单的文本注释数组。每个笔记都有一个ID、一个标题和一个文本。在Angular中,模型被编码为所谓的服务。使用ng命令可以创建一个新的服务。
1ng generate service Notes
这将创建两个新文件:src/app/notes.service.ts和src/app/notes.service.spec.ts。您可以忽略本教程中的第二个文件,就像其他.spec.ts文件一样。这些文件用于对代码进行单元测试。在您想要发布以供生产的应用程序中,您需要在那里编写测试。打开src/app/notes.service.ts,将其内容替换为以下代码。
 1import { Injectable } from '@angular/core';
 2import { BehaviorSubject, Observer } from 'rxjs';
 3
 4export class NoteInfo {
 5  id: number;
 6  title: string;
 7}
 8
 9export class Note {
10  id: number;
11  title: string;
12  text: string;
13}
14
15@Injectable({
16  providedIn: 'root'
17})
18export class NotesService {
19  private notes: Note[];
20  private nextId = 0;
21  private notesSubject = new BehaviorSubject<NoteInfo[]>([]);
22
23  constructor() {
24    this.notes = JSON.parse(localStorage.getItem('notes')) || [];
25    for (const note of this.notes) {
26      if (note.id >= this.nextId) this.nextId = note.id+1;
27    }
28    this.update();
29  }
30
31  subscribe(observer: Observer<NoteInfo[]>) {
32    this.notesSubject.subscribe(observer);
33  }
34
35  addNote(title: string, text: string): Note {
36    const note = {id: this.nextId++, title, text};
37    this.notes.push(note);
38    this.update();
39    return note;
40  }
41
42  getNote(id: number): Note {
43    const index = this.findIndex(id);
44    return this.notes[index];
45  }
46
47  updateNote(id: number, title: string, text: string) {
48    const index = this.findIndex(id);
49    this.notes[index] = {id, title, text};
50    this.update();
51  }
52
53  deleteNote(id: number) {
54    const index = this.findIndex(id);
55    this.notes.splice(index, 1);
56    this.update();
57  }
58
59  private update() {
60    localStorage.setItem('notes', JSON.stringify(this.notes));
61    this.notesSubject.next(this.notes.map(
62      note => ({id: note.id, title: note.title})
63    ));
64  }
65
66  private findIndex(id: number): number {
67    for (let i=0; i<this.notes.length; i++) {
68      if (this.notes[i].id === id) return i;
69    }
70    throw new Error(`Note with id ${id} was not found!`);
71  }
72}
在文件顶部附近可以看到两个类定义,NoteInfo和Note。Note类包含笔记的完整信息,而NoteInfo只包含id和itle。其想法是,NoteInfo要轻得多,可以在列表中使用,显示所有笔记标题。Note和NoteInfo都是简单的数据类,不包含业务逻辑。逻辑包含在NotesService中,作为应用的Model。它包含许多属性。notes属性是由Notes对象组成的数组。该数组充当模型的真理来源。函数addNote、getNote、updateNote、deleteNote定义了模型上的CRUD操作。它们都直接作用于notes数组,创建、读取、更新和删除数组中的元素。nextId属性是引用笔记的唯一ID。
您会注意到,每当修改notes数组时,都会调用私有的update方法。这个方法做两件事。首先,它将笔记保存在本地存储中。只要浏览器的本地存储没有被删除,这就会在本地保存数据。这允许用户关闭应用程序并在以后打开它,但仍然可以访问他们的笔记。在真实的应用程序中,CRUD操作将访问不同服务器上的rest API,而不是将数据保存在本地。
upate执行的第二个操作是在notesSubject属性上发出一个新值。notesSubject是来自RxJS的BehaviorSubject,包含一个浓缩的NoteInfo对象数组。‘BehaviorSubject’充当任何观察者都可以订阅的观察对象。本次订阅是通过NotesService的订阅方法实现的。任何已经订阅的观察者,只要调用update,都会得到通知。
从模型的实现中得到的主要内容是,模型是一个独立的服务,它不了解任何视图或控制器。这在MVC和MVVM架构中都很重要。模型不能对其他组件有任何依赖关系。
视图
接下来,我想把大家的注意力转向The View。在角度应用程序中,视图位于.html模板和.css样式表中。我已经在src/app/app.Component.html文件中提到了其中一个模板。打开该文件并将以下内容粘贴到其中。
1<mat-toolbar color="primary" class="expanded-toolbar">
2    <span>
3      <button mat-button routerLink="/">{{title}}</button>
4      <button mat-button routerLink="/"><mat-icon>home</mat-icon></button>
5    </span>
6    <button mat-button routerLink="/notes"><mat-icon>note</mat-icon></button>
7</mat-toolbar>
8<router-outlet></router-outlet>
为什么不再加上一点造型呢?打开src/app/app.Component.css,添加如下样式。
1.expanded-toolbar {
2  justify-content: space-between;
3  align-items: center;
4}
app.Component包含主页面布局,但不包含任何有意义的内容。您必须添加一些组件来呈现任何内容。再次使用ng生成命令,如下所示。
1ng generate component Home
2ng generate component Notes
这将生成两个组件。每个组件由一个.html、.css和一个.ts文件组成。目前,不要担心.ts文件。我将在下一节中讨论这一点。(请记住,还有一个.spec.ts文件,在本教程中我将完全忽略该文件。)
打开src/app/home/home.Component.html,将内容修改如下。
1<h1>Angular Notes</h1>
2<h2>A simple app showcasing the MVVM pattern.</h2>
接下来,打开src/app/note/notes.Component.html,将内容替换为以下代码。
 1<div fxLayout="row" fxLayout.xs="column" fxLayoutAlign="center" class="notes">
 2  <mat-list fxFlex="100%" fxFlex.gt-sm="20%">
 3    <mat-list-item *ngFor='let note of notes'>
 4      <a>
 5        {{note.title}}
 6      </a>
 7    </mat-list-item>
 8  </mat-list>
 9  <mat-divider fxShow="false" fxShow.gt-sm [vertical]="true"></mat-divider>
10  <mat-divider fxShow="true" fxShow.gt-sm="false" [vertical]="false"></mat-divider>
11  <div fxFlex="100%" fxFlex.gt-sm="70%" *ngIf="!editNote" class="note-container">
12    <h3>{{currentNote.title}}</h3>
13    <p>
14      {{currentNote.text}}
15    </p>
16    <div fxLayout="row" fxLayoutAlign="space-between center" >
17      <button mat-raised-button color="primary">Edit</button>
18      <button mat-raised-button color="warn">Delete</button>
19      <button mat-raised-button color="primary">New Note</button>
20    </div>
21  </div>
22  <div fxFlex="100%" fxFlex.gt-sm="70%" *ngIf="editNote" class="form-container">
23    <form [formGroup]="editNoteForm">
24      <mat-form-field class="full-width">
25        <input matInput placeholder="Title" formControlName="title">
26      </mat-form-field>
27
28      <mat-form-field class="full-width">
29        <textarea matInput placeholder="Note text" formControlName="text"></textarea>
30      </mat-form-field>
31      <button mat-raised-button color="primary">Update</button>
32    </form>
33  </div>
34</div>
附带的src/app/note/notes.Component.css应该如下所示。
 1.notes {
 2  padding: 1rem;
 3}
 4
 5.notes a {
 6  cursor: pointer;
 7}
 8
 9.form-container, .note-container {
10  padding-left: 2rem;
11  padding-right: 2rem;
12}
13
14.full-width {
15  width: 80%;
16  display: block;
17}
到目前为止,一切顺利!
看看src/app/note/notes.Component.html,它代表应用程序的主视图。您会注意到{{not.title}}这样的占位符,它们看起来像是可以填充值。在上面显示的版本中,视图似乎没有引用应用程序中的任何代码段。
如果您遵循MVC模式,则视图将定义数据可以插入的槽。它还将提供在单击按钮时注册回调的方法。在这方面,视图将保持对控制器的完全无知。控制器将主动填充值并向视图注册回调方法。只有控制器知道视图和模型,并将两者链接在一起。
正如您将在下面看到的,ANGLE采用了一种不同的方法,称为MVVM模式。在这里,控制器被替换为一个视图模型。这将是下一节的主题。
查看模型
ViewModel位于组件的.ts文件中。打开src/app/notes/notes.component.ts,填入下面的代码。
 1import { Component, OnInit } from '@angular/core';
 2import { Note, NoteInfo, NotesService } from '../notes.service';
 3import { BehaviorSubject } from 'rxjs';
 4import { FormGroup, FormBuilder, Validators } from '@angular/forms';
 5
 6@Component({
 7  selector: 'app-notes',
 8  templateUrl: './notes.component.html',
 9  styleUrls: ['./notes.component.css']
10})
11export class NotesComponent implements OnInit {
12  notes = new BehaviorSubject<NoteInfo[]>([]);
13  currentNote: Note = {id:-1, title: '', text:''};
14  createNote = false;
15  editNote = false;
16  editNoteForm: FormGroup;
17
18  constructor(private formBuilder: FormBuilder,
19              private notesModel: NotesService) { }
20
21  ngOnInit() {
22    this.notesModel.subscribe(this.notes);
23    this.editNoteForm = this.formBuilder.group({
24      title: ['', Validators.required],
25      text: ['', Validators.required]
26    });
27  }
28
29  onSelectNote(id: number) {
30    this.currentNote = this.notesModel.getNote(id);
31  }
32
33  noteSelected(): boolean {
34    return this.currentNote.id >= 0;
35  }
36
37  onNewNote() {
38    this.editNoteForm.reset();
39    this.createNote = true;
40    this.editNote = true;
41  }
42
43  onEditNote() {
44    if (this.currentNote.id < 0) return;
45    this.editNoteForm.get('title').setValue(this.currentNote.title);
46    this.editNoteForm.get('text').setValue(this.currentNote.text);
47    this.createNote = false;
48    this.editNote = true;
49  }
50
51  onDeleteNote() {
52    if (this.currentNote.id < 0) return;
53    this.notesModel.deleteNote(this.currentNote.id);
54    this.currentNote = {id:-1, title: '', text:''};
55    this.editNote = false;
56  }
57
58  updateNote() {
59    if (!this.editNoteForm.valid) return;
60    const title = this.editNoteForm.get('title').value;
61    const text = this.editNoteForm.get('text').value;
62    if (this.createNote) {
63      this.currentNote = this.notesModel.addNote(title, text);
64    } else {
65      const id = this.currentNote.id;
66      this.notesModel.updateNote(id, title, text);
67      this.currentNote = {id, title, text};
68    }
69    this.editNote = false;
70  }
71}
在类的@Component装饰器中,可以看到对View .html和.css文件的引用。另一方面,在这门课的其余部分,没有提到任何观点。相反,包含在NotesComponent类中的ViewModel公开了View可以访问的属性和方法。这意味着,与MVC架构相比,依赖性是相反的。ViewModel不知道View,但提供了一个类似Model的API,可供View使用。如果你再看一下src/app/notes/notes.component.html,你可以看到模板插值,比如{{currentNote.text}}直接访问NotesComponent的属性。
让您的应用程序工作的最后一步是告诉路由器哪些组件负责不同的路由。打开src/app/app-routing.mode.ts,编辑内容,匹配如下代码。
 1import { NgModule } from '@angular/core';
 2import { Routes, RouterModule } from '@angular/router';
 3import { HomeComponent } from './home/home.component';
 4import { NotesComponent } from './notes/notes.component';
 5
 6const routes: Routes = [
 7  { path: '', component: HomeComponent },
 8  { path: 'notes', component: NotesComponent },
 9];
10
11@NgModule({
12  imports: [RouterModule.forRoot(routes)],
13  exports: [RouterModule]
14})
15export class AppRoutingModule { }
这会将HomeComponent链接到默认路由,并将NotesComponent链接到notes路由。
对于主应用程序组件,我将定义几个方法,稍后将实现这些方法。打开src/app/app.Component.ts,更新内容如下。
 1import { Component } from '@angular/core';
 2
 3@Component({
 4  selector: 'app-root',
 5  templateUrl: './app.component.html',
 6  styleUrls: ['./app.component.css']
 7})
 8export class AppComponent {
 9  public title = 'Angular Notes';
10  public isAuthenticated: boolean;
11
12  ngOnInit() {
13    this.isAuthenticated = false;
14  }
15
16  login() {
17  }
18
19  logout() {
20  }
21}
该组件包含两个属性title和isAuthenticated。第二个是一个标志,它指示用户是否已经登录到应用程序。现在,它只是被设置为false。两个空方法作为回调来触发登录或注销。现在,我把它们空着,但你稍后会把它们填上。
完成视图
了解了依赖关系的方向后,您可以更新View,以便按钮和表单在ViewModel上执行操作。再次打开src/app/note/notes.Component.html,代码修改如下。
 1<div fxLayout="row" fxLayout.xs="column" fxLayoutAlign="center" class="notes">
 2  <mat-list fxFlex="100%" fxFlex.gt-sm="20%">
 3    <mat-list-item *ngFor='let note of notes | async'>
 4      <a (click)="onSelectNote(note.id)">
 5        {{note.title}}
 6      </a>
 7    </mat-list-item>
 8  </mat-list>
 9  <mat-divider fxShow="false" fxShow.gt-sm [vertical]="true"></mat-divider>
10  <mat-divider fxShow="true" fxShow.gt-sm="false" [vertical]="false"></mat-divider>
11  <div fxFlex="100%" fxFlex.gt-sm="70%" *ngIf="!editNote" class="note-container">
12    <h3>{{currentNote.title}}</h3>
13    <p>
14      {{currentNote.text}}
15    </p>
16    <div fxLayout="row" fxLayoutAlign="space-between center" >
17      <button mat-raised-button color="primary" (click)="onEditNote()" *ngIf="noteSelected()">Edit</button>
18      <button mat-raised-button color="warn" (click)="onDeleteNote()" *ngIf="noteSelected()">Delete</button>
19      <button mat-raised-button color="primary" (click)="onNewNote()">New Note</button>
20    </div>
21  </div>
22  <div fxFlex="100%" fxFlex.gt-sm="70%" *ngIf="editNote" class="form-container">
23    <form [formGroup]="editNoteForm" (ngSubmit)="updateNote()">
24      <mat-form-field class="full-width">
25        <input matInput placeholder="Title" formControlName="title">
26      </mat-form-field>
27
28      <mat-form-field class="full-width">
29        <textarea matInput placeholder="Note text" formControlName="text"></textarea>
30      </mat-form-field>
31      <button mat-raised-button color="primary">Update</button>
32    </form>
33  </div>
34</div>
您可以在各个地方看到(点击)句柄直接引用NotesComponent类的方法。这意味着View需要了解ViewModel及其方法。颠倒依赖关系的原因是样板代码的减少。在View和ViewModel之间存在双向数据绑定。视图中的数据始终与视图模型中的数据同步。
为您的ANGLE应用添加身份验证
没有适当的用户身份验证,一个好的应用程序是不完整的。在本节中,您将学习如何将身份验证快速添加到现有的ANGLE应用程序中。Okta提供单点登录身份验证,只需几行代码就可以插入应用程序。
您将需要一个免费开发人员帐户。只需在出现的表格中填写您的详细信息,接受条款和条件,然后按Get Start提交即可。一旦您完成注册,您将被带到Okta仪表板。在这里,您可以看到向Okta服务注册的所有应用程序的概述。
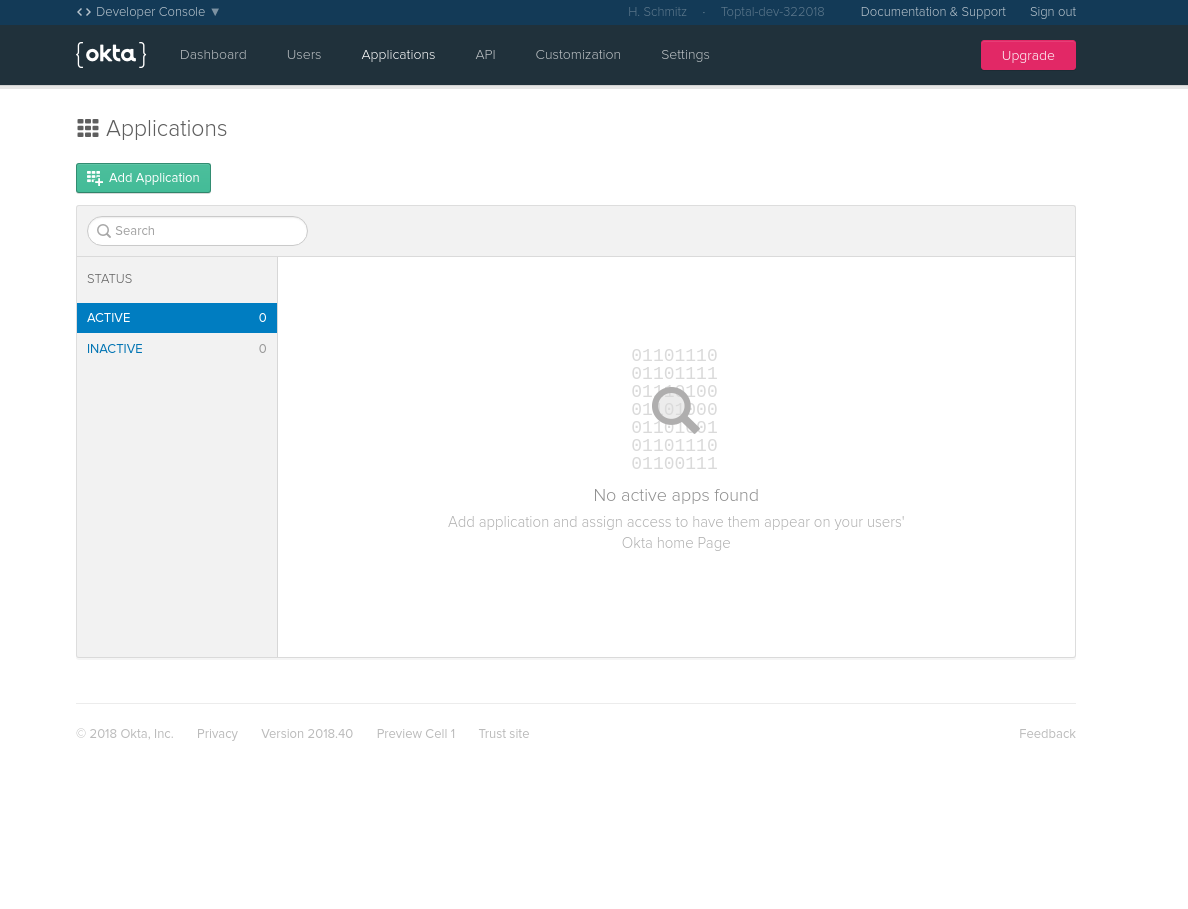
点击[添加应用程序],注册一个新的应用程序。在出现的下一个屏幕上,您将可以选择应用程序的类型。单页应用 是您的ANGLE应用的最佳选择。在接下来的页面上,您将看到应用程序设置。当您使用NG服务测试应用程序时,需要将端口号更改为4200。

就这样。现在,您应该会看到稍后需要的客户端ID。现在,您已经准备好将身份验证服务包含到您的代码中。Okta为ANGLE提供了一个方便的库。您可以通过在应用程序根目录中运行以下命令来安装它。
1npm install @okta/[email protected] --save
打开app.mode.ts,导入OktaAuthModule。
1import { OktaAuthModule } from '@okta/okta-angular';
再往下看,在同一文件中,将以下内容添加到ports列表中。
1OktaAuthModule.initAuth({
2      issuer: 'https://{yourOktaDomain}/oauth2/default',
3      redirectUri: 'http://localhost:4200/implicit/callback',
4      clientId: '{clientId}'
5    })
在这段代码中,需要将{clientID}替换为您刚刚在Okta开发者仪表板中获得的客户端ID。
为了防止特定的路由在没有密码的情况下被访问,您需要修改src/app/app-routing.mode.ts。为OktaCallback Component和OktaAuthGuard添加一个导入。
1import { OktaCallbackComponent, OktaAuthGuard } from '@okta/okta-angular';
接下来,将另一个路由添加到路由数组中。
1{ path: 'implicit/callback', component: OktaCallbackComponent }
当用户完成登录过程后,Okta会调用IMPLICIT/回调路由。OktaCallbackComponent处理结果,并将用户重定向到请求身份验证过程的页面。要保护单独的路由,现在只需在该路由上添加OktaAuthGuard即可,如下所示。
1{ path: 'notes', component: NotesComponent, canActivate: [OktaAuthGuard] }
请记住,您已经使主应用程序ViewModel处于未实现状态。再次打开src/app/app.Component.ts,在文件顶部添加如下导入内容。
1import { OktaAuthService } from '@okta/okta-angular';
接下来,实现AppComponent类的所有方法。
 1constructor(public oktaAuth: OktaAuthService) {}
 2
 3async ngOnInit() {
 4  this.isAuthenticated = await this.oktaAuth.isAuthenticated();
 5}
 6
 7login() {
 8  this.oktaAuth.loginRedirect();
 9}
10
11logout() {
12  this.oktaAuth.logout('/');
13}
现在只剩下一件事要做了。现在,您可以将登录和注销按钮添加到顶部栏。打开src/app/app.Component.html,在</span>后的<mat-bar>元素中添加这两行。
1<button mat-button *ngIf="!isAuthenticated" (click)="login()"> Login </button>
2<button mat-button *ngIf="isAuthenticated" (click)="logout()"> Logout </button>
Login和Logout按钮链接到app.Component.ts视图模型中的login()和logout()方法。这两个按钮的可见性由ViewModel中的isAuthated标志决定。
非那样做不行!现在,您拥有了一个完整的基于MVVM体系结构的应用程序,并完成了身份验证。您可以通过启动应用程序根目录中的角度测试服务器来测试它。
1ng serve
打开浏览器并导航到http://localhost:4200.你应该看到像这样的东西。

了解更多角度安全的应用程序开发
在本教程中,我向您展示了基于MVVM设计模式的角度,以及此模式与更知名的MVC模式的不同之处。在MVC模式中,控制器通过使用由其他两个组件提供的观察器和观察体,简单地将视图与模型链接起来。一旦控制器建立了连接,视图和模型就会直接通信,但不知道它们在与谁通信。具体地说,控制器没有自己的应用程序状态。它只是在视图和模型之间建立联系的促进者。在MVVM模式中,控制器被替换为ViewModel。View和ViewModel通过双向数据绑定进行链接。他们拥有相同的状态。
要了解有关MVC和MVVM设计模式的更多信息,您可能会对以下链接感兴趣。
- 使用ASP.NET构建mvc应用程序
- 将快速后端添加到您的角度app
- 了解如何向任何Web page添加身份验证
- 了解更多有关ANGLE 7的新功能
本教程的代码可在oktadeveloper/okta-angular-notes-app-example获得。
如果你喜欢这篇文章,你很有可能会喜欢我们发表的其他文章。在推特上关注@oktadev并订阅我们的Youtube channel以获取更多优秀教程。