Android Splash Screen是应用程序启动时用户看到的第一个屏幕。Splash Screen是该应用程序中最重要的屏幕之一,因为它是用户第一次使用该应用程序。闪屏用于显示一些动画(通常是应用程序徽标)和插图,同时获取下一个屏幕的一些数据。
Android闪屏
 通常情况下,
androidManifest.xml文件中设置了以下intent过滤器的活动称为Splash活动。
1<intent-filter>
2            <action android:name="android.intent.action.MAIN" />
3            <category android:name="android.intent.category.LAUNCHER" />
4        </intent-filter>
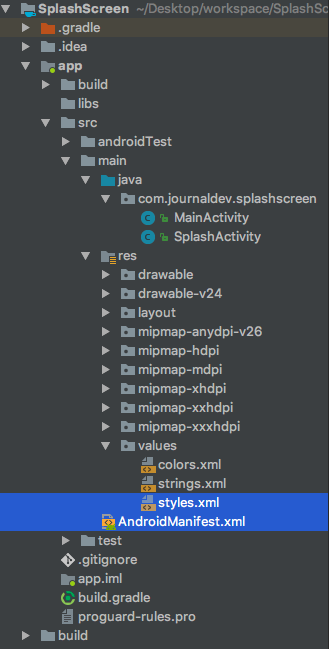
Android闪屏示例项目结构
 有几种方法可以创建应用程序的初始屏幕,即闪屏。让我们看看他们每个人。
闪屏经典方法
SplashActivity.java
 1package com.journaldev.splashscreen;
 2
 3import android.content.Intent;
 4import android.os.Handler;
 5import android.support.v7.app.AppCompatActivity;
 6import android.os.Bundle;
 7
 8public class SplashActivity extends AppCompatActivity {
 9
10    @Override
11    protected void onCreate(Bundle savedInstanceState) {
12        super.onCreate(savedInstanceState);
13        setContentView(R.layout.activity_splash);
14
15        new Handler().postDelayed(new Runnable() {
16
17            @Override
18            public void run() {
19                // This method will be executed once the timer is over
20                Intent i = new Intent(SplashActivity.this, MainActivity.class);
21                startActivity(i);
22                finish();
23            }
24        }, 5000);
25    }
26}
这是我们通常在应用程序中创建闪屏布局的方式:active_plash.xml
 1<?xml version="1.0" encoding="utf-8"?>
 2<android.support.constraint.ConstraintLayout xmlns:android="https://schemas.android.com/apk/res/android"
 3    xmlns:app="https://schemas.android.com/apk/res-auto"
 4    xmlns:tools="https://schemas.android.com/tools"
 5    android:layout_width="match_parent"
 6    android:layout_height="match_parent"
 7    android:background="@android:color/black"
 8    tools:context="com.journaldev.splashscreen.SplashActivity">
 9
10    <ImageView
11        android:id="@+id/imageView"
12        android:layout_width="72dp"
13        android:layout_height="72dp"
14        android:src="@mipmap/ic_launcher"
15        app:layout_constraintBottom_toBottomOf="parent"
16        app:layout_constraintLeft_toLeftOf="parent"
17        app:layout_constraintRight_toRightOf="parent"
18        app:layout_constraintTop_toTopOf="parent" />
19
20    <ProgressBar
21        android:layout_width="wrap_content"
22        android:layout_height="wrap_content"
23        android:indeterminate="true"
24        app:layout_constraintLeft_toLeftOf="parent"
25        app:layout_constraintRight_toRightOf="parent"
26        android:layout_marginTop="8dp"
27        app:layout_constraintTop_toBottomOf="@id/imageView" />
28
29</android.support.constraint.ConstraintLayout>
让我们暂时将MainActivity.java保持为空。SplashScreen的上述实现产生的输出如下所示。我们在androidManifest.xml文件中将SplashActivity的主题设置为Theme.AppCompat.NoActionBar 。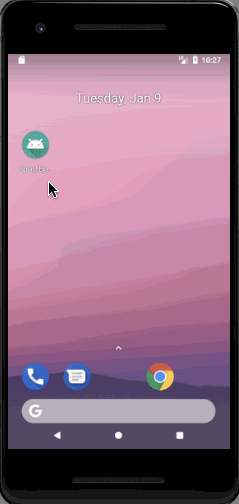 你看到闪屏之前出现的空白页面了吗?上述方法不是正确的方法。** 这会导致冷启动** 。Splash Screen的目的是在应用程序获取相关内容(从网络调用/数据库)时快速显示一个漂亮的屏幕。使用上面的方法,
SplashActivity用来创建其布局的额外开销。这将导致应用程序启动缓慢,这不利于用户体验(出现空白的黑/白屏幕)。
Android闪屏示例,方法正确
出现冷启动是因为应用程序需要时间来加载Splash活动的布局文件。因此,我们将使用应用程序主题的强大功能来创建初始布局,而不是创建布局。在创建布局之前实例化应用程序主题。我们将在android:windowBackround属性中设置一个可绘制的元素,该元素将包含活动的背景和使用Layer-List的图标,如下所示。SPASH_BACKROUN.xml
 1<?xml version="1.0" encoding="utf-8"?>
 2<layer-list xmlns:android="https://schemas.android.com/apk/res/android">
 3
 4    <item android:drawable="@android:color/black" />
 5    <item>
 6        <bitmap
 7            android:gravity="center"
 8            android:src="@mipmap/ic_launcher" />
 9    </item>
10</layer-list>
我们将把以下风格设置为活动的主题。style es.xml
1<style name="SplashTheme" parent="Theme.AppCompat.NoActionBar">
2        <item name="android:windowBackground">@drawable/splash_background</item>
3    </style>
SplashActivity.java 文件应如下所示:
 1package com.journaldev.splashscreen;
 2
 3import android.content.Intent;
 4import android.os.Handler;
 5import android.support.v7.app.AppCompatActivity;
 6import android.os.Bundle;
 7
 8public class SplashActivity extends AppCompatActivity {
 9
10    @Override
11    protected void onCreate(Bundle savedInstanceState) {
12        super.onCreate(savedInstanceState);
13
14        new Handler().postDelayed(new Runnable() {
15
16            @Override
17            public void run() {
18                // This method will be executed once the timer is over
19                Intent i = new Intent(SplashActivity.this, MainActivity.class);
20                startActivity(i);
21                finish();
22            }
23        }, 5000);
24    }
25}
注意:活动的主题被设定在其他任何事情之前。因此,上述方法将使我们的应用程序更快地启动。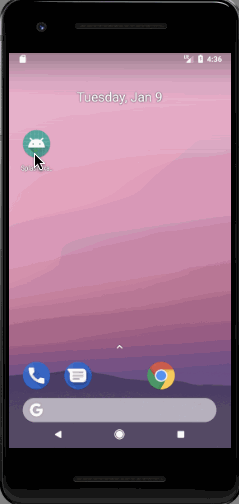 使用主题并从闪屏活动中移除布局是创建闪屏的正确方法。这就结束了Android闪屏教程。你可以从下面的链接下载最终的Android Splash Screen项目。