Android登录和注册是非常常见的场景。你会在我们想要用户信息的所有应用程序中找到注册和登录操作。在本教程中,我们将设置本地Web服务器和MySQL数据库。我们将开发Android登录和注册应用程序。我们将使用PHP脚本连接到MySQL数据库。
Android登录注册
第一步是创建后端Web服务器。我在Mac OS X上工作,XAMPP可以用来快速设置本地的ApacheWeb服务器和MySQL数据库。
设置XAMPP服务器
XAMPP(或WAMP)是一个一键安装软件,它为开发PHP,MySQL Web应用程序(我们将与Android应用程序连接)创建一个环境。从此处下载并安装XAMPP。安装后启动XAMPP应用程序,你会看到下面的屏幕. 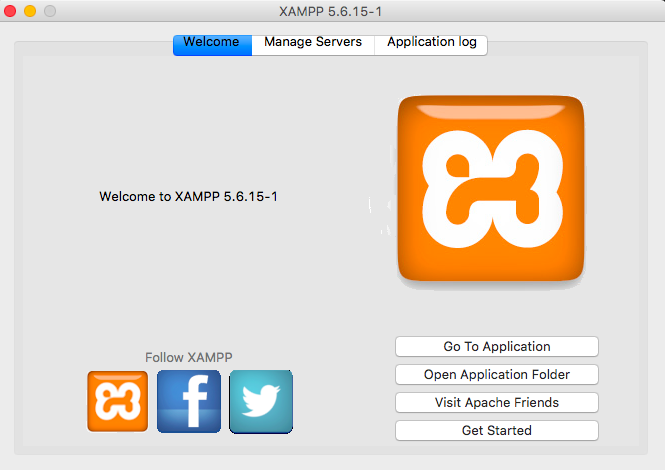 您可以通过打开
https://localhost来测试您的服务器。应出现以下屏幕。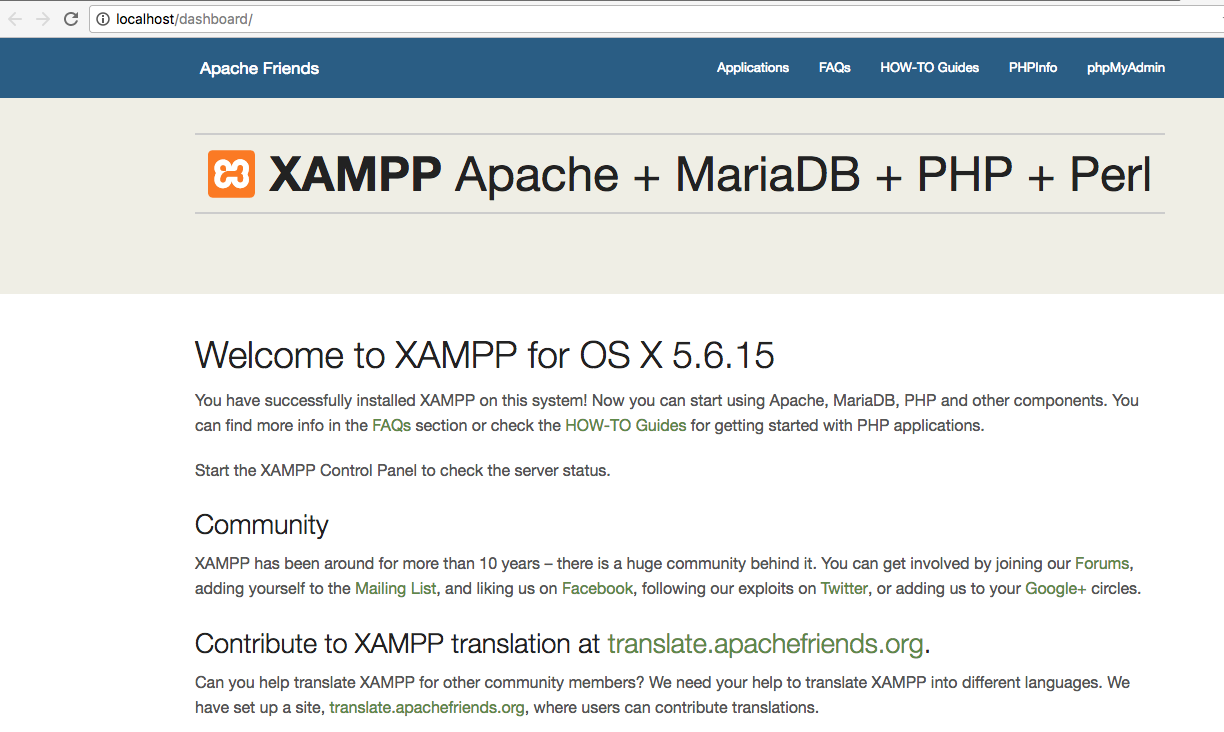 此外,您可以通过打开
https://localhost/phpmyadmin来检查phpMyAdmin。让我们看看它显示了什么 " src="https://cdn.jsdelivr.net/gh/andsky/tutorials-images/spaces/2016/08/android-phpmyadmin-error.png">哎呀!你可能会得到一个这样的屏幕。似乎MySQL服务器没有正常运行。转到XAMPP应用程序中的管理服务器选项卡,然后单击全部重新启动。服务器应该运行正常,如下图所示。
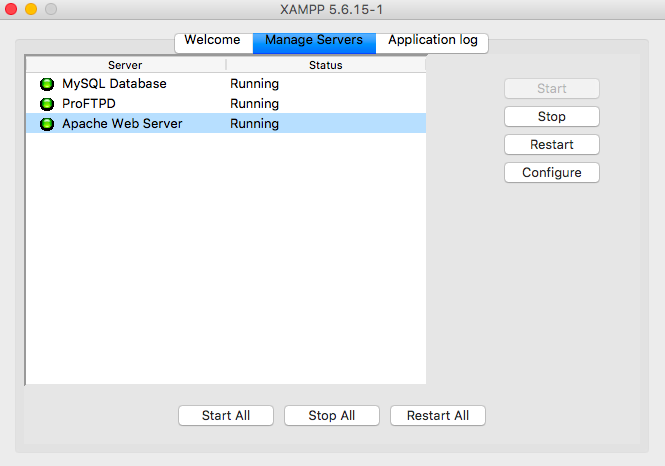 现在在localhost中测试phpMyAdmin,您最终会看到类似于此的屏幕。
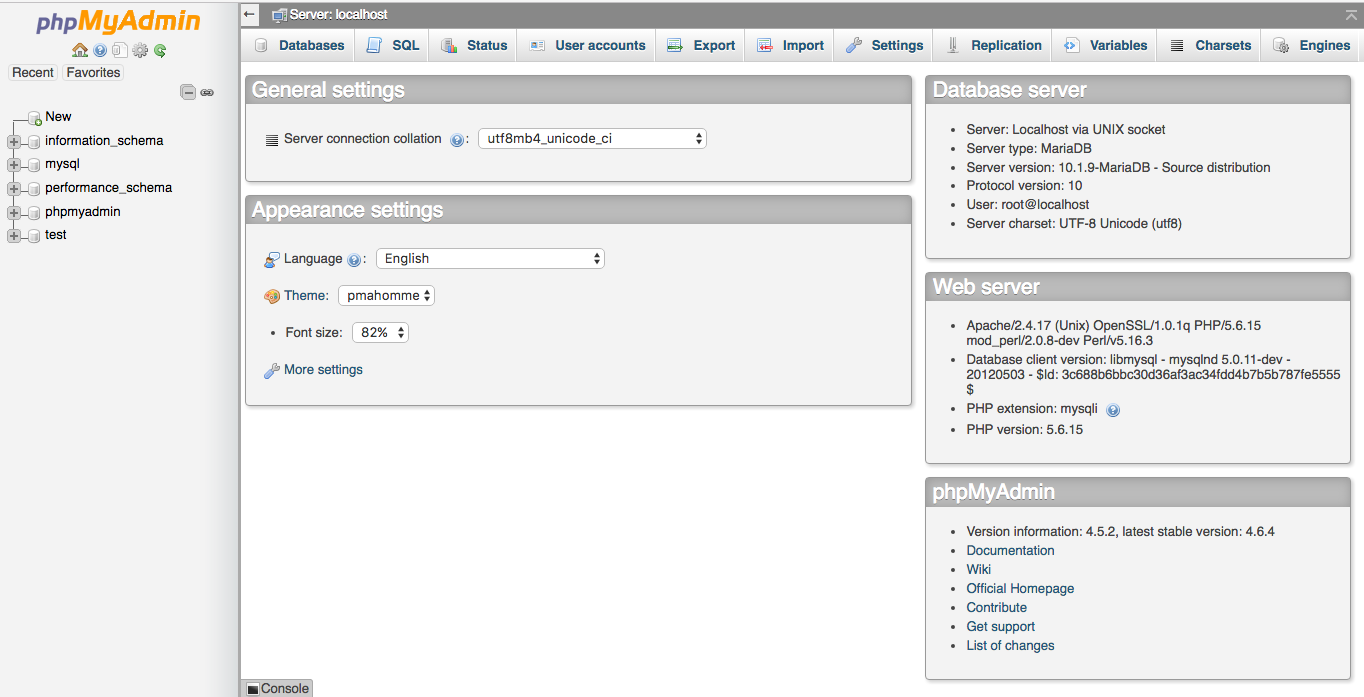 现在让我们测试一个示例php脚本。创建一个新的
test.php文件,并添加以下行。
1<?php
2echo "Hello, World";
3?>
在上面的代码中:
- ?PHP 开始任何PHP脚本的开始标记。
- ?> 在Java中表示结束标记,类似于结束括号。
注意:了解PHP不是本教程的必修课。如果你使用的是Mac,那么进入应用程序->Xampp->htdocs。在这里创建一个新文件夹,比如test_android ,然后复制粘贴之前创建的test.php。现在打开URLhttps://localhost/test_android/test.php,您将看到如下屏幕: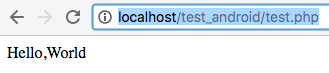
设置MySQL数据库
通过访问https://localhost/phpmyadmin.打开phpMyAdmin现在选择Headers行左上角的数据库选项卡。给出一个随机的名字,然后创建它。新创建的空数据库将在左侧边栏中可见。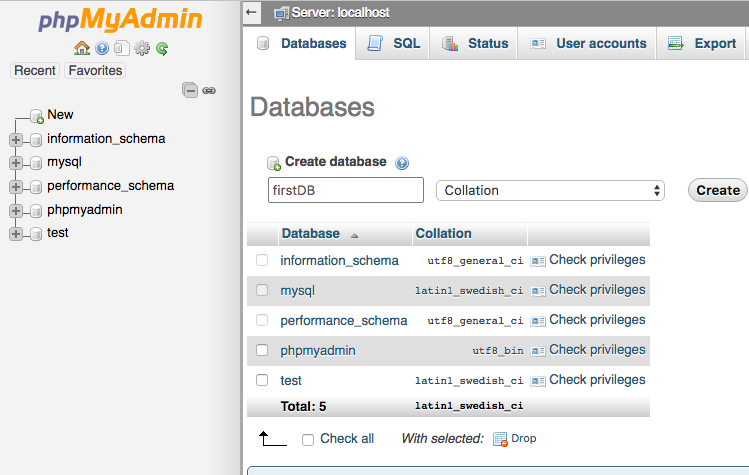 让我们在新创建的数据库中创建一个USERS表。在控制台中运行以下查询
1CREATE TABLE  `firstDB`.`users` (
2    `id` INT NOT NULL AUTO_INCREMENT PRIMARY KEY ,
3    `username` VARCHAR( 20 ) NOT NULL ,
4    `password` VARCHAR( 20 ) NOT NULL
5)
如果表创建成功,您将看到如下所示的屏幕: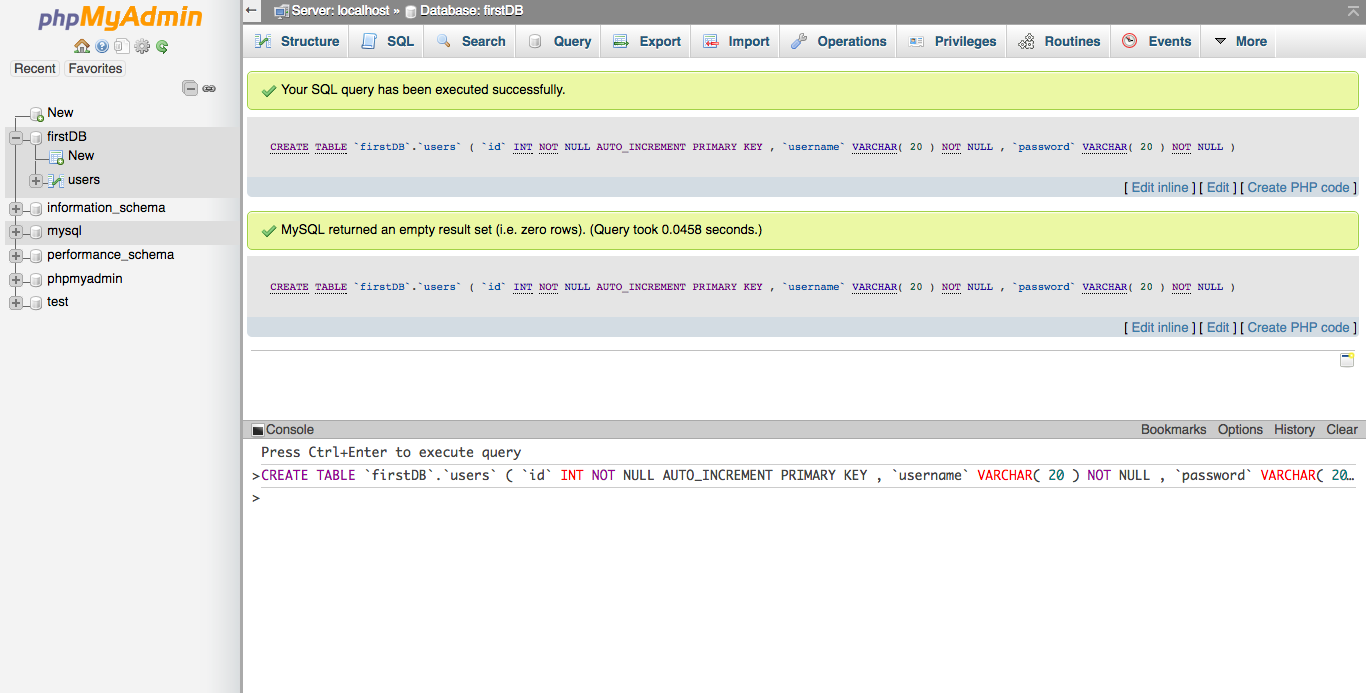
将PHP接入MySQL数据库
要将PHP脚本连接到MySQL数据库,需要三个输入值。以下是XAMPP服务器的输入和三个默认值
- 主机名:本地主机
- MySQL用户名:Root
- MySQL密码:为空。``
让我们创建一个test-Connect.php脚本并将其添加到htdocs->test-android文件夹中。
 1<?php
 2$host="localhost";
 3$user="root";
 4$password="";
 5$con=mysql_connect($host,$user,$password);
 6if($con) {
 7    echo '<h1>Connected to MySQL</h1>';
 8} else {
 9    echo '<h1>MySQL Server is not connected</h1>';
10}
11?>
MYSQL_CONNECT() 是PHP内置的连接MySQL数据库的函数,参数如下。尝试运行https://localhost/test_android/test-connect.php并查看输出。如果未连接,请尝试重新启动XAMPP服务器。
Android登录注册应用
现在我们已经讨论了PHP和MySQL的基本设置,让我们进入Android登录应用程序部分。我们将开发登录/注册应用程序。为了保持简短,我们将在注册过程中检查用户名和电子邮件是否唯一。在我们跳到应用程序逻辑之前,让我们先处理PHP脚本和MySQL数据库。首先,让我们删除Table用户,并在上述应用程序的上下文中创建一个新的用户。
1CREATE TABLE IF NOT EXISTS `firstDB`.`users` (
2`id` int(20) NOT NULL AUTO_INCREMENT PRIMARY KEY,
3`username` varchar(70) NOT NULL,
4`password` varchar(40) NOT NULL,
5`email` varchar(50) NOT NULL,
6`created_at` datetime NOT NULL,
7`updated_at` datetime DEFAULT NULL
8
9)
以下是您可以复制粘贴到htdocs->test_Android文件夹中的PHP脚本。config.php
1<?php
2    define("DB_HOST", "localhost");
3    define("DB_USER", "root");
4    define("DB_PASSWORD", "");
5    define("DB_NAME", "firstDB");
6    ?>
数据库连接的脚本如下所示。db-Connect.php
 1<?php
 2
 3    include_once 'config.php';
 4
 5    class DbConnect{
 6
 7        private $connect;
 8
 9        public function __construct(){
10
11            $this->connect = mysqli_connect(DB_HOST, DB_USER, DB_PASSWORD, DB_NAME);
12
13            if (mysqli_connect_errno($this->connect)){
14                echo "Unable to connect to MySQL Database: " . mysqli_connect_error();
15            }
16        }
17
18        public function getDb(){
19            return $this->connect;
20        }
21    }
22    ?>
以下脚本包含该应用程序的所有核心函数。user.php
  1<?php
  2
  3    include_once 'db-connect.php';
  4
  5    class User{
  6
  7        private $db;
  8
  9        private $db_table = "users";
 10
 11        public function __construct(){
 12            $this->db = new DbConnect();
 13        }
 14
 15        public function isLoginExist($username, $password){
 16
 17            $query = "select * from ".$this->db_table." where username = '$username' AND password = '$password' Limit 1";
 18
 19            $result = mysqli_query($this->db->getDb(), $query);
 20
 21            if(mysqli_num_rows($result) > 0){
 22
 23                mysqli_close($this->db->getDb());
 24
 25                return true;
 26
 27            }
 28
 29            mysqli_close($this->db->getDb());
 30
 31            return false;
 32
 33        }
 34
 35        public function isEmailUsernameExist($username, $email){
 36
 37            $query = "select * from ".$this->db_table." where username = '$username' AND email = '$email'";
 38
 39            $result = mysqli_query($this->db->getDb(), $query);
 40
 41            if(mysqli_num_rows($result) > 0){
 42
 43                mysqli_close($this->db->getDb());
 44
 45                return true;
 46
 47            }
 48
 49            return false;
 50
 51        }
 52
 53        public function isValidEmail($email){
 54            return filter_var($email, FILTER_VALIDATE_EMAIL) !== false;
 55        }
 56
 57        public function createNewRegisterUser($username, $password, $email){
 58
 59            $isExisting = $this->isEmailUsernameExist($username, $email);
 60
 61            if($isExisting){
 62
 63                $json['success'] = 0;
 64                $json['message'] = "Error in registering. Probably the username/email already exists";
 65            }
 66
 67            else{
 68
 69            $isValid = $this->isValidEmail($email);
 70
 71                if($isValid)
 72                {
 73                $query = "insert into ".$this->db_table." (username, password, email, created_at, updated_at) values ('$username', '$password', '$email', NOW(), NOW())";
 74
 75                $inserted = mysqli_query($this->db->getDb(), $query);
 76
 77                if($inserted == 1){
 78
 79                    $json['success'] = 1;
 80                    $json['message'] = "Successfully registered the user";
 81
 82                }else{
 83
 84                    $json['success'] = 0;
 85                    $json['message'] = "Error in registering. Probably the username/email already exists";
 86
 87                }
 88
 89                mysqli_close($this->db->getDb());
 90                }
 91                else{
 92                    $json['success'] = 0;
 93                    $json['message'] = "Error in registering. Email Address is not valid";
 94                }
 95
 96            }
 97
 98            return $json;
 99
100        }
101
102        public function loginUsers($username, $password){
103
104            $json = array();
105
106            $canUserLogin = $this->isLoginExist($username, $password);
107
108            if($canUserLogin){
109
110                $json['success'] = 1;
111                $json['message'] = "Successfully logged in";
112
113            }else{
114                $json['success'] = 0;
115                $json['message'] = "Incorrect details";
116            }
117            return $json;
118        }
119    }
120    ?>
在上面的代码中,$json包含返回的JSONObjects。下面的PHP脚本是应用程序首先调用的脚本。index.php
 1<?php
 2
 3    require_once 'user.php';
 4
 5    $username = "";
 6
 7    $password = "";
 8
 9    $email = "";
10
11    if(isset($_POST['username'])){
12
13        $username = $_POST['username'];
14
15    }
16
17    if(isset($_POST['password'])){
18
19        $password = $_POST['password'];
20
21    }
22
23    if(isset($_POST['email'])){
24
25        $email = $_POST['email'];
26
27    }
28
29    $userObject = new User();
30
31    // Registration
32
33    if(!empty($username) && !empty($password) && !empty($email)){
34
35        $hashed_password = md5($password);
36
37        $json_registration = $userObject->createNewRegisterUser($username, $hashed_password, $email);
38
39        echo json_encode($json_registration);
40
41    }
42
43    // Login
44
45    if(!empty($username) && !empty($password) && empty($email)){
46
47        $hashed_password = md5($password);
48
49        $json_array = $userObject->loginUsers($username, $hashed_password);
50
51        echo json_encode($json_array);
52    }
53    ?>
在上面的代码中,我们检查电子邮件字段是否为空。如果是,我们将在PHP脚本中调用登录函数,否则我们将转到注册函数。JSON响应返回两个参数:成功 (0或1)和** 消息** 。
md5()函数使用RSA Data Security,Inc.MD5消息摘要算法创建密码的哈希串。- 为了检查邮箱地址是否合法,我们实现了一个
isValidEmail()方法。 FILTER_VALIDATE_EMAIL** 适用于PHP 5.2.0+版
Android登录注册项目结构
 在这个项目中,我们使用了三个库来实现应用程序中的Http调用。JSONParser类用于执行对本地主机的POST和GET HTTP调用,并以JSONObject的形式返回响应。
Android登录注册码
active_main.xml布局定义如下。
 1<?xml version="1.0" encoding="utf-8"?>
 2<ScrollView xmlns:android="https://schemas.android.com/apk/res/android"
 3    android:layout_width="fill_parent"
 4    android:layout_height="fill_parent"
 5    android:fillViewport="true">
 6
 7    <RelativeLayout
 8        android:layout_width="match_parent"
 9        android:layout_height="wrap_content">
10
11        <LinearLayout
12            android:orientation="vertical"
13            android:layout_width="match_parent"
14            android:layout_height="wrap_content"
15            android:layout_centerInParent="true"
16            android:paddingLeft="24dp"
17            android:paddingRight="24dp"
18            android:id="@+id/linearLayout">
19
20                <EditText android:id="@+id/editName"
21                    android:layout_width="match_parent"
22                    android:layout_height="wrap_content"
23                    android:hint="Username"
24                    android:textColor="#FF192133"
25                    android:textColorHint="#A0192133"
26                    android:fontFamily="sans-serif-light"
27                    android:focusable="true"
28                    android:focusableInTouchMode="true" />
29
30                <EditText android:id="@+id/editPassword"
31                    android:layout_width="match_parent"
32                    android:layout_height="wrap_content"
33                    android:inputType="textPassword"
34                    android:textColor="#FF192133"
35                    android:textColorHint="#A0192133"
36                    android:fontFamily="sans-serif-light"
37                    android:hint="Password"
38                    android:focusable="true"
39                    android:focusableInTouchMode="true" />
40
41                <EditText android:id="@+id/editEmail"
42                    android:layout_width="match_parent"
43                    android:layout_height="wrap_content"
44                    android:inputType="textEmailAddress"
45                    android:textColor="#FF192133"
46                    android:visibility="gone"
47                    android:textColorHint="#A0192133"
48                    android:fontFamily="sans-serif-light"
49                    android:hint="Email"
50                    android:focusable="true"
51                    android:focusableInTouchMode="true" />
52
53            <Button
54                android:layout_width="match_parent"
55                android:layout_height="wrap_content"
56                android:id="@+id/btnSignIn"
57                android:text="SIGN IN"
58                android:textStyle="bold"
59                />
60
61            <Button
62                android:layout_width="match_parent"
63                android:layout_height="wrap_content"
64                android:id="@+id/btnRegister"
65                android:text="REGISTER"
66                android:textStyle="bold"
67                />
68
69        </LinearLayout>
70
71    </RelativeLayout>
72
73</ScrollView>
下面给出了MainActivity.java。
  1package com.journaldev.loginphpmysql;
  2
  3import android.content.Intent;
  4import android.content.SharedPreferences;
  5import android.graphics.Color;
  6import android.os.AsyncTask;
  7import android.support.v7.app.AppCompatActivity;
  8import android.os.Bundle;
  9import android.util.Log;
 10import android.view.View;
 11import android.widget.Button;
 12import android.widget.EditText;
 13import android.widget.Toast;
 14
 15import org.apache.http.NameValuePair;
 16import org.apache.http.message.BasicNameValuePair;
 17import org.json.JSONException;
 18import org.json.JSONObject;
 19
 20import java.util.ArrayList;
 21
 22public class MainActivity extends AppCompatActivity {
 23
 24    EditText editEmail, editPassword, editName;
 25    Button btnSignIn, btnRegister;
 26
 27    String URL= "https://10.0.3.2/test_android/index.php";
 28
 29    JSONParser jsonParser=new JSONParser();
 30
 31    int i=0;
 32
 33    @Override
 34    protected void onCreate(Bundle savedInstanceState) {
 35        super.onCreate(savedInstanceState);
 36        setContentView(R.layout.activity_main);
 37
 38        editEmail=(EditText)findViewById(R.id.editEmail);
 39        editName=(EditText)findViewById(R.id.editName);
 40        editPassword=(EditText)findViewById(R.id.editPassword);
 41
 42        btnSignIn=(Button)findViewById(R.id.btnSignIn);
 43        btnRegister=(Button)findViewById(R.id.btnRegister);
 44
 45        btnSignIn.setOnClickListener(new View.OnClickListener() {
 46            @Override
 47            public void onClick(View view) {
 48                AttemptLogin attemptLogin= new AttemptLogin();
 49                attemptLogin.execute(editName.getText().toString(),editPassword.getText().toString(),"");
 50            }
 51        });
 52
 53        btnRegister.setOnClickListener(new View.OnClickListener() {
 54            @Override
 55            public void onClick(View view) {
 56
 57                if(i==0)
 58                {
 59                    i=1;
 60                    editEmail.setVisibility(View.VISIBLE);
 61                    btnSignIn.setVisibility(View.GONE);
 62                    btnRegister.setText("CREATE ACCOUNT");
 63                }
 64                else{
 65
 66                    btnRegister.setText("REGISTER");
 67                    editEmail.setVisibility(View.GONE);
 68                    btnSignIn.setVisibility(View.VISIBLE);
 69                    i=0;
 70
 71                    AttemptLogin attemptLogin= new AttemptLogin();
 72                    attemptLogin.execute(editName.getText().toString(),editPassword.getText().toString(),editEmail.getText().toString());
 73
 74                }
 75
 76            }
 77        });
 78
 79    }
 80
 81    private class AttemptLogin extends AsyncTask<String, String, JSONObject> {
 82
 83        @Override
 84
 85        protected void onPreExecute() {
 86
 87            super.onPreExecute();
 88
 89        }
 90
 91        @Override
 92
 93        protected JSONObject doInBackground(String... args) {
 94
 95            String email = args[2];
 96            String password = args[1];
 97            String name= args[0];
 98
 99            ArrayList params = new ArrayList();
100            params.add(new BasicNameValuePair("username", name));
101            params.add(new BasicNameValuePair("password", password));
102            if(email.length()>0)
103            params.add(new BasicNameValuePair("email",email));
104
105            JSONObject json = jsonParser.makeHttpRequest(URL, "POST", params);
106
107            return json;
108
109        }
110
111        protected void onPostExecute(JSONObject result) {
112
113            // dismiss the dialog once product deleted
114            //Toast.makeText(getApplicationContext(),result,Toast.LENGTH_LONG).show();
115
116            try {
117                if (result != null) {
118                    Toast.makeText(getApplicationContext(),result.getString("message"),Toast.LENGTH_LONG).show();
119                } else {
120                    Toast.makeText(getApplicationContext(), "Unable to retrieve any data from server", Toast.LENGTH_LONG).show();
121                }
122            } catch (JSONException e) {
123                e.printStackTrace();
124            }
125
126        }
127
128    }
129}
这是一个相当大的代码!让我们从上面的代码中得出重要的推论。
1.https://10.0.3.2为本地主机重路由地址。此地址仅在您使用GenyMotion 仿真器时有效。使用https://10.0.2.2的AVD模拟器,现在有了很大的改进。如果你在自己的设备上使用电脑的WiFi地址来运行该应用程序。示例:https://192.168.0.143. 2.当单击注册按钮时,我们以编程方式隐藏登录按钮,而显示电子邮件地址输入文本字段。 3.AttemptLogin类在后台执行对本地主机的网络HTTP请求。用户名、密码和电子邮件参数被添加到ArrayList中,该ArrayList在JSONParser类的方法MakeHttpRequest(URL,); 中传递。 4.在onPostExecute 方法中,我们将服务器返回的消息字符串显示在Toast消息中。
JSONParser.java类如下所示。
  1package com.journaldev.loginphpmysql;
  2
  3import android.util.Log;
  4
  5import org.apache.http.HttpEntity;
  6import org.apache.http.HttpResponse;
  7import org.apache.http.NameValuePair;
  8import org.apache.http.client.ClientProtocolException;
  9import org.apache.http.client.HttpClient;
 10import org.apache.http.client.entity.UrlEncodedFormEntity;
 11import org.apache.http.client.methods.HttpGet;
 12import org.apache.http.client.methods.HttpPost;
 13import org.apache.http.client.utils.URLEncodedUtils;
 14import org.apache.http.impl.client.DefaultHttpClient;
 15import org.json.JSONArray;
 16import org.json.JSONException;
 17import org.json.JSONObject;
 18
 19import java.io.BufferedReader;
 20import java.io.IOException;
 21import java.io.InputStream;
 22import java.io.InputStreamReader;
 23import java.io.UnsupportedEncodingException;
 24import java.util.ArrayList;
 25
 26/**
 27 * Created by anupamchugh on 29/08/16.
 28 */
 29public class JSONParser {
 30
 31    static InputStream is = null;
 32    static JSONObject jObj = null;
 33    static JSONArray jArr = null;
 34    static String json = "";
 35    static String error = "";
 36
 37    // constructor
 38    public JSONParser() {
 39
 40    }
 41
 42    // function get json from url
 43    // by making HTTP POST or GET mehtod
 44    public JSONObject makeHttpRequest(String url, String method,
 45                                      ArrayList params) {
 46
 47        // Making HTTP request
 48        try {
 49
 50            // check for request method
 51            if(method.equals("POST")){
 52                // request method is POST
 53                // defaultHttpClient
 54                HttpClient httpClient = new DefaultHttpClient();
 55                HttpPost httpPost = new HttpPost(url);
 56                httpPost.setEntity(new UrlEncodedFormEntity(params));
 57                try {
 58                    Log.e("API123", " " +convertStreamToString(httpPost.getEntity().getContent()));
 59                    Log.e("API123",httpPost.getURI().toString());
 60                } catch (Exception e) {
 61                    e.printStackTrace();
 62                }
 63
 64                HttpResponse httpResponse = httpClient.execute(httpPost);
 65                Log.e("API123",""+httpResponse.getStatusLine().getStatusCode());
 66                error= String.valueOf(httpResponse.getStatusLine().getStatusCode());
 67                HttpEntity httpEntity = httpResponse.getEntity();
 68                is = httpEntity.getContent();
 69
 70            }else if(method.equals("GET")){
 71                // request method is GET
 72                DefaultHttpClient httpClient = new DefaultHttpClient();
 73                String paramString = URLEncodedUtils.format(params, "utf-8");
 74                url += "?" + paramString;
 75                HttpGet httpGet = new HttpGet(url);
 76
 77                HttpResponse httpResponse = httpClient.execute(httpGet);
 78                HttpEntity httpEntity = httpResponse.getEntity();
 79                is = httpEntity.getContent();
 80            }
 81
 82        } catch (UnsupportedEncodingException e) {
 83            e.printStackTrace();
 84        } catch (ClientProtocolException e) {
 85            e.printStackTrace();
 86        } catch (IOException e) {
 87            e.printStackTrace();
 88        }
 89
 90        try {
 91            BufferedReader reader = new BufferedReader(new InputStreamReader(
 92                    is, "iso-8859-1"), 8);
 93            StringBuilder sb = new StringBuilder();
 94            String line = null;
 95            while ((line = reader.readLine()) != null) {
 96                sb.append(line + "\n");
 97            }
 98            is.close();
 99            json = sb.toString();
100            Log.d("API123",json);
101        } catch (Exception e) {
102            Log.e("Buffer Error", "Error converting result " + e.toString());
103        }
104
105        // try to parse the string to a JSON object
106        try {
107            jObj = new JSONObject(json);
108            jObj.put("error_code",error);
109        } catch (JSONException e) {
110            Log.e("JSON Parser", "Error parsing data " + e.toString());
111        }
112
113        // return JSON String
114        return jObj;
115
116    }
117
118    private String convertStreamToString(InputStream is) throws Exception {
119        BufferedReader reader = new BufferedReader(new InputStreamReader(is));
120        StringBuilder sb = new StringBuilder();
121        String line = null;
122        while ((line = reader.readLine()) != null) {
123            sb.append(line);
124        }
125        is.close();
126        return sb.toString();
127    }
128}
在上面的代码中,我们调用相应的类HTTPPost 或** HTTPGet** ,具体取决于传递给** make HttpRequest** 函数的第二个参数。
1jObj.put("error_code",error);
上面,我们将从服务器返回的响应状态代码附加到返回给MainActivity类的最终JSONObject中。注意:不要忘记在您的androidManifest.xml文件中添加以下权限。
1<uses-permission android:name="android.permission.INTERNET"/>
许多用户在本教程的底部发布了他们的评论,声称他们得到了无法检索数据Toast。请注意,从Android 6.0及更高版本开始,您需要在Manifest.xml文件的应用程序标签中添加以下属性:android:usesClearextCommunications=true``为什么?以便允许仿真器/设备的网络安全进行http调用。请查看下面来自Android Q模拟器的最新截图的输出。 ** 最新的源码和androidManifest.xml文件中的更改会在链接和我们的Github资源库中更新。*
应用程序的实际输出如下所示。
Android注册用户
在下面的屏幕截图中,我们注册了一个新用户,并将其添加到数据库中。然后,我们使用在注册过程中输入的凭据登录。

至此,Android使用PHP登录MySQL教程 结束。您可以从下面的链接下载该项目。它还包含包含PHP文件的test_android文件夹。将其复制到xampp->htdocs文件夹中!祝好运。
您也可以从下面的Github存储库访问完整的源代码: