在本教程中,我们将讨论什么是DialogFragments。我们将通过一个简单的安卓应用程序来了解它们与Dialogs的不同之处。
Androad# Dialogments
DialogFragment是扩展Fragment类的实用程序类。它是v4支持库的一部分,用于在位于其余内容顶部的活动中显示覆盖模式窗口。本质上,DialogFragment显示一个对话框,但在片段内。
Google建议我们在活动中使用DialogFragment,而不是简单的Alert Dialog生成器。
为什么会这样?
- DialogFragments有自己的生命周期方法。因此,该活动没有告诉对话框要做什么的责任。
- 不再有 IlLegalStateExceptions** 和泄漏的窗口崩溃。当活动在警报对话框仍在的情况下被销毁时,这种情况非常常见。
因为DialogFragment是一个片段,所以它集成到活动的生命周期中,并确保对话框窗口中发生的事情保持一致。在Android应用程序中使用DialogFragments创建对话框是一种很好的做法。您的类必须扩展DialogFragment,并至少实现onCreateDialog和/或onCreateView。可以通过两种方式使用DialogFragment创建对话框:
onCreateDialog-在这里可以使用AlertDialog.Builder类创建AlertDialog。onCreateView-在这里您可以使用定义的自定义视图创建一个Dialog。
为了创建显示对话框的DialogFragment,我们需要在DialogFragment实例上调用方法show(),如下所示:
1MyDialogFragment dialogFragment = new MyDialogFragment();
2FragmentTranscation ft = getSupportFragmentManager().beginTransaction();
3Fragment prev = getSupportFragmentManager().findFragmentByTag("dialog");
4if (prev != null) {
5   ft.remove(prev);
6}
7ft.addToBackStack(null);
8dialogFragment.show(ft, "dialog");
我们可以将任何标签设置为show()的第二个参数。为了创建将对话框嵌入到片段中的DialogFragment,我们只需像处理任何Fragment.一样将片段添加到Framelayout中
你知道吗您也可以在Fragments中显示自定义视图,而不仅仅是Dialog。
实例化DialogFragment类时。方法按以下顺序调用:
- onCreate
- online对话框
- onCreateView
- onViewCreated
- onDestroy
往返于DialogFragment的数据
为了将数据传递给DialogFragment类,我们只需在类的实例上使用setArguments设置数据即可。为了将来自DialogFragments的数据返回到Activity/另一个片段,我们需要创建自定义接口。在下一节中,我们将创建一个Android应用程序,该应用程序执行以下操作:
- 创建简单的DialogFragment对话框
- 活动中嵌入的对话框片段
- 有风格的DialogFragment。
- 返回数据的DialogFragment
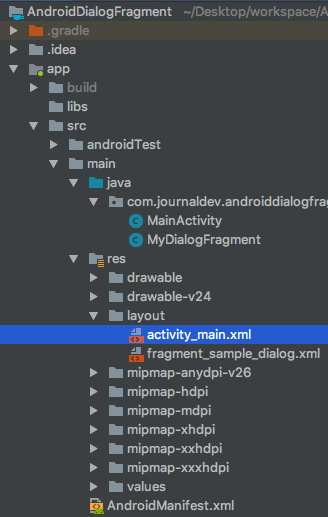
项目结构
代码
activity_main.xml类的代码如下所示:
 1<?xml version="1.0" encoding="utf-8"?>
 2<RelativeLayout xmlns:android="https://schemas.android.com/apk/res/android"
 3    xmlns:tools="https://schemas.android.com/tools"
 4    android:layout_width="match_parent"
 5    android:layout_height="match_parent"
 6    android:orientation="vertical"
 7    tools:context=".MainActivity">
 8
 9    <FrameLayout
10        android:id="@+id/frameLayout"
11        android:layout_width="match_parent"
12        android:layout_height="wrap_content"
13        android:layout_above="@+id/btnEmbedDialogFragment"
14        android:layout_alignParentTop="true" />
15
16    <Button
17        android:id="@+id/btnEmbedDialogFragment"
18        android:layout_width="wrap_content"
19        android:layout_height="wrap_content"
20        android:layout_centerHorizontal="true"
21        android:layout_above="@+id/btnDialogFragment"
22        android:text="EMBED DIALOG FRAGMENT" />
23
24    <Button
25        android:id="@+id/btnDialogFragment"
26        android:layout_width="wrap_content"
27        android:layout_height="wrap_content"
28        android:layout_centerInParent="true"
29        android:layout_marginTop="8dp"
30        android:text="SIMPLE DIALOG FRAGMENT" />
31
32    <Button
33        android:id="@+id/btnDialogFragmentFullScreen"
34        android:layout_width="wrap_content"
35        android:layout_height="wrap_content"
36        android:layout_below="@+id/btnDialogFragment"
37        android:layout_centerHorizontal="true"
38        android:layout_marginTop="8dp"
39        android:text="DIALOG FRAGMENT FULL SCREEN" />
40
41    <Button
42        android:id="@+id/btnAlertDialogFragment"
43        android:layout_width="wrap_content"
44        android:layout_height="wrap_content"
45        android:layout_below="@+id/btnDialogFragmentFullScreen"
46        android:layout_centerHorizontal="true"
47        android:layout_marginTop="8dp"
48        android:text="Alert Dialog Fragment" />
49
50    <TextView
51        android:id="@+id/textView"
52        android:layout_width="wrap_content"
53        android:layout_height="wrap_content"
54        android:layout_below="@+id/btnAlertDialogFragment"
55        android:layout_centerHorizontal="true" />
56
57</RelativeLayout>
每个按钮都会启动不同类型的DialogFragment。DialogFragment的自定义视图的XML布局在Fragment_Sample_Dialog.xml文件中定义,如下所示:
 1<?xml version="1.0" encoding="utf-8"?>
 2<LinearLayout xmlns:android="https://schemas.android.com/apk/res/android"
 3    android:layout_width="match_parent"
 4    android:layout_height="match_parent"
 5    android:orientation="vertical"
 6    android:padding="10dp">
 7
 8    <TextView
 9        android:id="@+id/title"
10        android:layout_width="wrap_content"
11        android:layout_height="wrap_content"
12        android:layout_margin="16dp"
13        android:text="Please enter your username and password" />
14
15    <EditText
16        android:id="@+id/inEmail"
17        android:layout_width="match_parent"
18        android:layout_height="wrap_content"
19        android:hint="Email Address"
20        android:inputType="textEmailAddress" />
21
22    <EditText
23        android:id="@+id/inPassword"
24        android:layout_width="match_parent"
25        android:layout_height="wrap_content"
26        android:hint="Password"
27        android:inputType="textPassword" />
28
29    <Button
30        android:id="@+id/btnDone"
31        android:layout_width="match_parent"
32        android:layout_height="wrap_content"
33        android:text="Done" />
34</LinearLayout>
因此,我们的对话框将显示一个基本的登录表单。MainActivity.java的代码如下所示:
  1package com.journaldev.androiddialogfragment;
  2
  3import android.support.v4.app.Fragment;
  4import android.support.v4.app.FragmentTransaction;
  5import android.support.v7.app.AppCompatActivity;
  6import android.os.Bundle;
  7import android.text.TextUtils;
  8import android.view.View;
  9import android.widget.Button;
 10import android.widget.TextView;
 11
 12public class MainActivity extends AppCompatActivity implements View.OnClickListener, MyDialogFragment.DialogListener {
 13
 14    Button btnEmbedDialogFragment, btnDialogFragment, btnDialogFragmentFullScreen, btnAlertDialogFragment;
 15    TextView textView;
 16
 17    @Override
 18    protected void onCreate(Bundle savedInstanceState) {
 19        super.onCreate(savedInstanceState);
 20        setContentView(R.layout.activity_main);
 21
 22        textView = findViewById(R.id.textView);
 23        btnEmbedDialogFragment = findViewById(R.id.btnEmbedDialogFragment);
 24        btnDialogFragment = findViewById(R.id.btnDialogFragment);
 25        btnDialogFragmentFullScreen = findViewById(R.id.btnDialogFragmentFullScreen);
 26        btnAlertDialogFragment = findViewById(R.id.btnAlertDialogFragment);
 27
 28        btnEmbedDialogFragment.setOnClickListener(this);
 29        btnDialogFragment.setOnClickListener(this);
 30        btnDialogFragmentFullScreen.setOnClickListener(this);
 31        btnAlertDialogFragment.setOnClickListener(this);
 32
 33    }
 34
 35    @Override
 36    public void onClick(View view) {
 37
 38        switch (view.getId()) {
 39            case R.id.btnEmbedDialogFragment:
 40                MyDialogFragment dialogFragment = new MyDialogFragment();
 41
 42                FragmentTransaction ft = getSupportFragmentManager().beginTransaction();
 43
 44                ft.replace(R.id.frameLayout, dialogFragment);
 45                ft.commit();
 46                break;
 47
 48            case R.id.btnDialogFragment:
 49                dialogFragment = new MyDialogFragment();
 50
 51                Bundle bundle = new Bundle();
 52                bundle.putBoolean("notAlertDialog", true);
 53
 54                dialogFragment.setArguments(bundle);
 55
 56                ft = getSupportFragmentManager().beginTransaction();
 57                Fragment prev = getSupportFragmentManager().findFragmentByTag("dialog");
 58                if (prev != null) {
 59                    ft.remove(prev);
 60                }
 61                ft.addToBackStack(null);
 62
 63                dialogFragment.show(ft, "dialog");
 64                break;
 65
 66            case R.id.btnDialogFragmentFullScreen:
 67                dialogFragment = new MyDialogFragment();
 68
 69                bundle = new Bundle();
 70                bundle.putString("email", "[email protected]");
 71                bundle.putBoolean("fullScreen", true);
 72                bundle.putBoolean("notAlertDialog", true);
 73
 74                dialogFragment.setArguments(bundle);
 75
 76                ft = getSupportFragmentManager().beginTransaction();
 77                prev = getSupportFragmentManager().findFragmentByTag("dialog");
 78                if (prev != null) {
 79                    ft.remove(prev);
 80                }
 81                ft.addToBackStack(null);
 82
 83                dialogFragment.show(ft, "dialog");
 84                break;
 85
 86            case R.id.btnAlertDialogFragment:
 87                dialogFragment = new MyDialogFragment();
 88
 89                ft = getSupportFragmentManager().beginTransaction();
 90                prev = getSupportFragmentManager().findFragmentByTag("dialog");
 91                if (prev != null) {
 92                    ft.remove(prev);
 93                }
 94                ft.addToBackStack(null);
 95
 96                dialogFragment.show(ft, "dialog");
 97                break;
 98        }
 99    }
100
101    @Override
102    public void onFinishEditDialog(String inputText) {
103
104        if (TextUtils.isEmpty(inputText)) {
105            textView.setText("Email was not entered");
106        } else
107            textView.setText("Email entered: " + inputText);
108    }
109}
上面的类实现了一个接口MyDialogFragment. DialogFragment,每当DialogFragment的按钮被单击时,它就会触发方法onDialogshEditDialog。它显示在活动对话框中输入的数据。下面给出了MyDialogFragment.java类的代码:
  1package com.journaldev.androiddialogfragment;
  2
  3import android.app.Dialog;
  4import android.content.DialogInterface;
  5import android.os.Bundle;
  6import android.support.annotation.NonNull;
  7import android.support.annotation.Nullable;
  8import android.support.v4.app.DialogFragment;
  9import android.support.v7.app.AlertDialog;
 10import android.text.TextUtils;
 11import android.util.Log;
 12import android.view.LayoutInflater;
 13import android.view.View;
 14import android.view.ViewGroup;
 15import android.widget.Button;
 16import android.widget.EditText;
 17
 18public class MyDialogFragment extends DialogFragment {
 19
 20    @NonNull
 21    @Override
 22    public Dialog onCreateDialog(@Nullable Bundle savedInstanceState) {
 23
 24        if (getArguments() != null) {
 25            if (getArguments().getBoolean("notAlertDialog")) {
 26                return super.onCreateDialog(savedInstanceState);
 27            }
 28        }
 29        AlertDialog.Builder builder = new AlertDialog.Builder(getActivity());
 30        builder.setTitle("Alert Dialog");
 31        builder.setMessage("Alert Dialog inside DialogFragment");
 32
 33        builder.setPositiveButton("Ok", new DialogInterface.OnClickListener() {
 34            @Override
 35            public void onClick(DialogInterface dialog, int which) {
 36                dismiss();
 37            }
 38        });
 39
 40        builder.setNegativeButton("Cancel", new DialogInterface.OnClickListener() {
 41            @Override
 42            public void onClick(DialogInterface dialog, int which) {
 43                dismiss();
 44            }
 45        });
 46
 47        return builder.create();
 48
 49    }
 50
 51    @Nullable
 52    @Override
 53    public View onCreateView(@NonNull LayoutInflater inflater, @Nullable ViewGroup container, @Nullable Bundle savedInstanceState) {
 54        return inflater.inflate(R.layout.fragment_sample_dialog, container, false);
 55
 56    }
 57
 58    @Override
 59    public void onViewCreated(@NonNull View view, @Nullable Bundle savedInstanceState) {
 60        super.onViewCreated(view, savedInstanceState);
 61
 62        final EditText editText = view.findViewById(R.id.inEmail);
 63
 64        if (getArguments() != null && !TextUtils.isEmpty(getArguments().getString("email")))
 65            editText.setText(getArguments().getString("email"));
 66
 67        Button btnDone = view.findViewById(R.id.btnDone);
 68        btnDone.setOnClickListener(new View.OnClickListener() {
 69            @Override
 70            public void onClick(View view) {
 71
 72                DialogListener dialogListener = (DialogListener) getActivity();
 73                dialogListener.onFinishEditDialog(editText.getText().toString());
 74                dismiss();
 75            }
 76        });
 77    }
 78
 79    @Override
 80    public void onResume() {
 81        super.onResume();
 82
 83    }
 84
 85    @Override
 86    public void onCreate(@Nullable Bundle savedInstanceState) {
 87        super.onCreate(savedInstanceState);
 88
 89        Log.d("API123", "onCreate");
 90
 91        boolean setFullScreen = false;
 92        if (getArguments() != null) {
 93            setFullScreen = getArguments().getBoolean("fullScreen");
 94        }
 95
 96        if (setFullScreen)
 97            setStyle(DialogFragment.STYLE_NORMAL, android.R.style.Theme_Black_NoTitleBar_Fullscreen);
 98    }
 99
100    @Override
101    public void onDestroyView() {
102        super.onDestroyView();
103    }
104
105    public interface DialogListener {
106        void onFinishEditDialog(String inputText);
107    }
108
109}
在onsightDialog中,我们创建一个普通的AlertDialog。dismiss()函数关闭对话框。下面给出了上述应用程序的输出: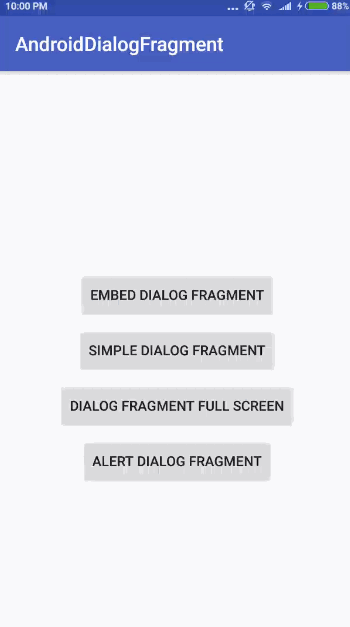 请注意,在全屏对话框中,输入字段的数据已经传递。本教程到此结束。您可以从下面的链接下载该项目: